Best Practices: Fillet Brazing

Yes, the last attempt (video) was with two sanded and cleaned tubes, without any silver.

I was probably too hot, but I had previously tried (in theory) with less heat and the 101 rod did not melt, in fact the tip bent, so I decided to try heating it even more and bringing the cone of the torch closer.

If I had too much heat with tip #0, then it is not worth putting in tip #1.

As the colleague below says, perhaps longer and thicker tubes would be better to start with.

Another thing I tried was to create a tower only with 101 bronze from the tube, and not only did it not stick to the base with the tube, but it broke between two parts, so I did not do it correctly either.

Thanks for the answer!

1 Like

Hello, tomorrow I will try to test with longer and thicker tubes, perhaps it is the opposite of what I thought about lack of heat, and what I had was excess heat. I tried with those tubes because they are the ones I had left over to use. I have set up everything new in the shop from scratch, so I do not have many leftovers to test.

The problem is you have an excess of heat in one part and a lack in the other.

2 Likes

I second what @Nick2 says about keeping the practice pieces longer. Practicing with thicker material could be helpful too.

I would also suggest you check your flame is neutral. A carburising flame can also cause this kind of reaction when bronze brazing.

3 Likes

Hi, I’m back again after atemp 4 to fillet braze with acetylene. I think a clear list of the material used will make it easier for readers.

SETUP LIST:

  • ACETYLENE: 5 PSI
  • OXYGEN: 10 PSI
  • TORCH TIP: Nº 0
  • FLAME: Neutral*
  • ROD: SIF 101 Bronze 1.6 mm
  • FLUX: LBF brass Cycle Design power mixed with tap water
  • MAIN TUBE: Columbus Spirit HSS headtube 44 mm 1.1mm
  • SECONDART TUBE: Columbus 25.5 mm 0.9 mm
  • Tubes sanded and cleaned everything with acetone, even the rods

*As you can see at the end of the vídeo, i noticed late that the flame was going from small cone to a large cone itself. I read it can be a problem with the pressures even a lick, but all was ok.

So the test went mostly as the previous, i preheated, mostly the headtube, and when flux turned a bit glassy (it doesn’t look so glassy as the vídeos i have seen) and bubbly, y tried to go closer with the cone and add the rod, but it doesnt melt, flow or get liquid.
So i tried to focus even more on one point and add the rod, but the same, just a small balls and like imposibe they stay just between the two tubes. I tried and tried on other sides of the tubes, even i got the 2mm rod to try, but no luck.

Im doing something wrong with the neutral flame (pressures or regulations in the torch), or not using it properly. But still doesn’t know what is it.

Here is cold, i braze in the small room in my shop, where i have a back door open, so there is no heater there (around 6ºC), and humidity is around 70% right now.

I go back to sunny spain this weekend for some days, so maybe i get a try again tomorrow before a i leave, but dont know what to change.

VIDEO SECOND TEST: https://www.youtube.com/watch?v=NX_8_BnoUEs

I will post some images down here with the result with flux and with cleaned flux. I tried to brake the joint, it was tight but it broke.

Thanks in advance again!

Your flux looks thin. Try mixing it to a thicker consistency and using much more on the joint. If that doesn’t solve it, try with distilled water rather than tap water. Also, try heating the rod a bit and sticking it into the powdered flux to add additional flux to the joint.

At this point, don’t worry about joints, just try to get bronze to flow on top of a piece of tube. If you can get thick plate steel or some other scrap, practice making puddles on that.


You can see where bronze briefly flowed and wet out onto the tube. I think more flux will help. Also make sure the rod is clean. I sand it and wipe with alcohol.

2 Likes

Thanks!, im going to try it with more flux and more consistency and clean better and sand the rods, if doesn’t work, will try to change the water.

1 Like

If you start to exhaust your flux again, you can take a pinch of dry powder flux and sprinkle it onto the hot joint and it will stick.

Not working with more flux, flux in the rods, sanded rods, preheat everthing…, again this “sheep pellets”.

Just the distiled water left to try for the moment, but have to go and find it. I will upload the vídeo and photos in some minutes.

The tubes separated just by cleaning the flux with hot water, so no rod got stuck to the tubes. :frowning:

I don’t think distilled water will do it. You are not trying to melt the filler rod with the flame, but trying to get the base metal hot enough that the bronze will flow.

Based on the picture I posted, we know that bronze will flow under the right conditions. Try the bigger torch tip and don’t be afraid to get the metal too hot.

Some flux is going to turn black. That’s ok. Look at the picture @manzanitacycles posted of a bb shell cluster earlier in this thread. You need to get things hotter before you introduce the filler rod. Pick a spot on a tube flux it well and get it very hot. It should be glowing faintly, then try to melt bronze onto it. Don’t worry about moving the torch around and preheating, you just need to get a feel for how hot is hot enough before you try more joints.

Taking and watching the photos now to upload, this is what i noticed. The flame must not be correct and the heat is not enough to melt the bronze and make it flow a bit.

I say this because as you will see, after cleaning all the flux, and removing all the bronze not stuck with the fingers, in the thinner tube (0.9mm) it got stuck in some parts (with balls, but i cant remove it), but in the headtube (1.1mm), nothing got stuck.

So my flame should not be correct and I’m trying to get the temperature to melt and join the metals (taking much time with the flame and burning flux), but it doesn’t get the correct temperature.

I will post them with caption:

Thanks again, i will try tomorrow with the tip torch number 1…

FLUX BEFORE START:

SHEEP PELLETS BEFORE CLEAN FLUX:

IT JUST BROKE WITH HOT WATER, NOT EVEN TOUCHED IT:

BRONZE STUCK IN THE THINNER TUBE NOT IN THE BIGGER:

VIDEO, SAME AS BEFORE JUST WITH MORE FLUX:

In the video the hottest part of the flame is much too far from the work. The small cone of a neutral flame should be touching the area you intend to braze

You’re using a technique that will work for silver. Bronze needs focused heat and the metal needs to glow.

2 Likes

Exactly as Nick says, your flame really needs to be closer and aimed directly at the area of your fillet. Further away is fine for getting some heat into the work but when you come to start the fillet you should try to get much closer.

General heat control does look better than your first video, keep going! You’ll get there.

The one thing we can’t really see for sure is the flame, I still think maybe you’re not quite at a neutral flame. You can braze with an oxidising flame (but things will get super hot, super quick) but if you try and do it with a carburising flame it’ll just contaminate the joint and your rod won’t flow.

I’ve been trying to film some things lately, apologies for the link but it’s too big a file to attach here directly.

5 Likes

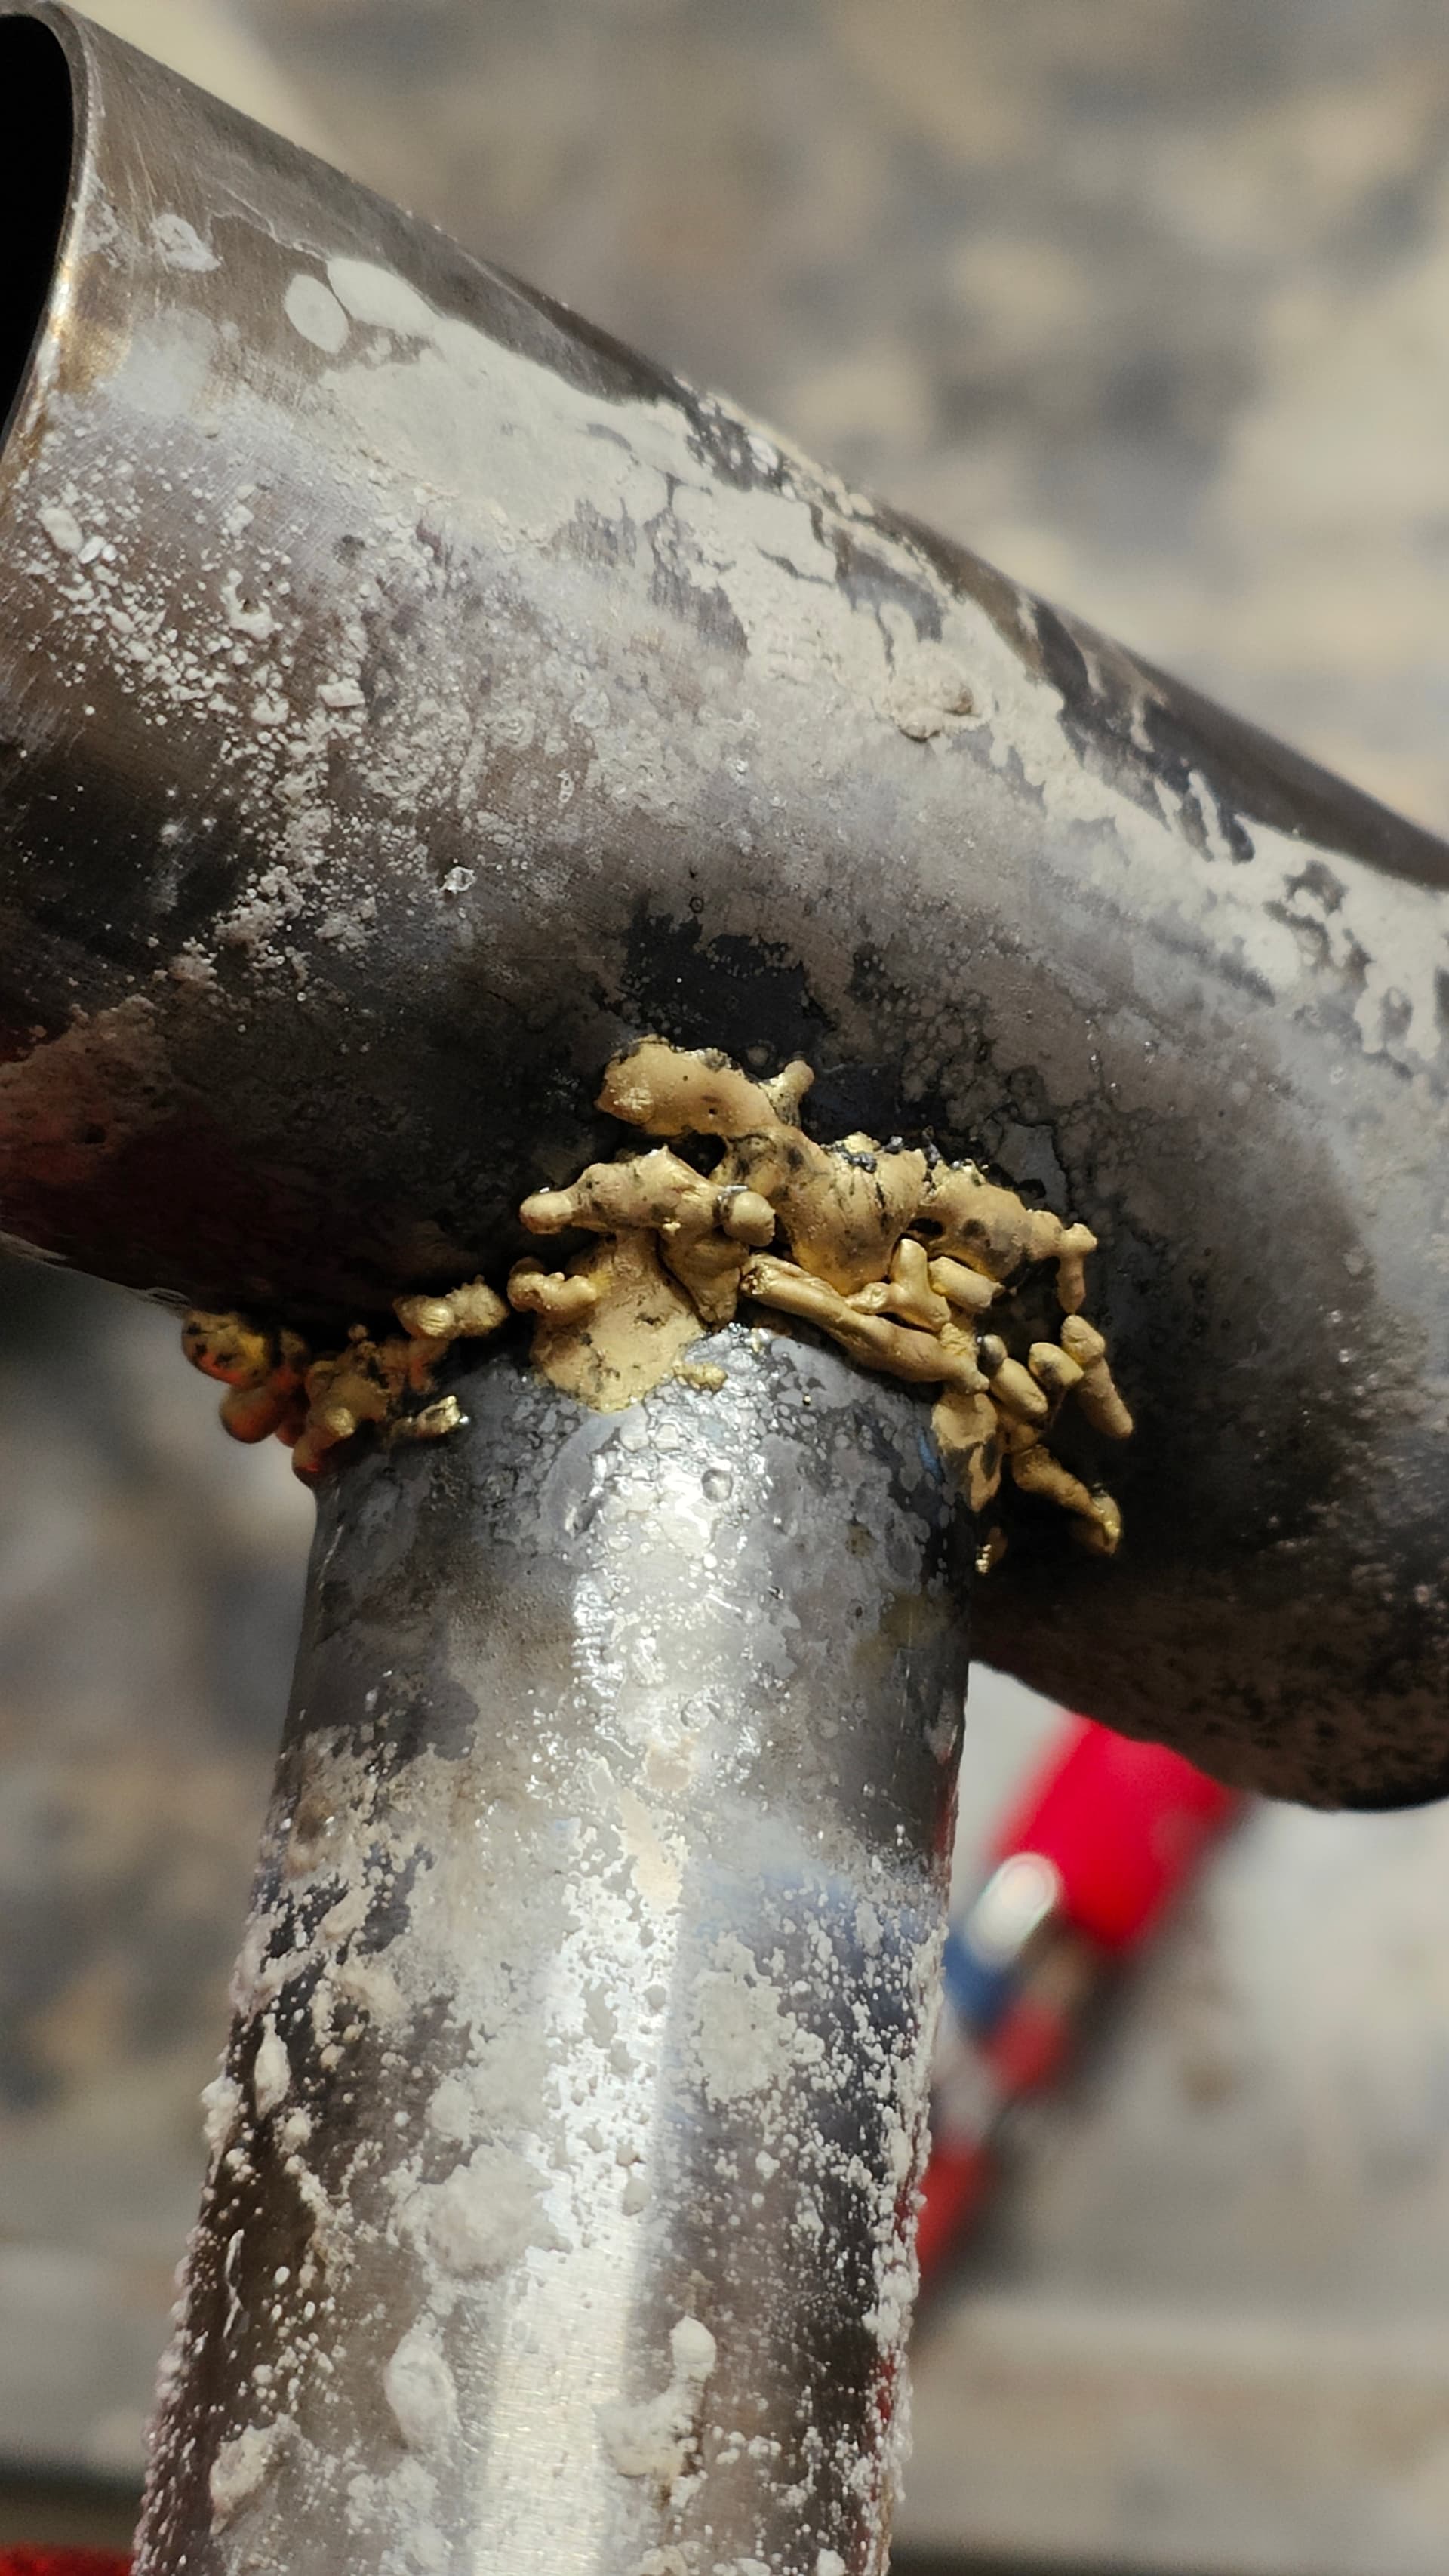
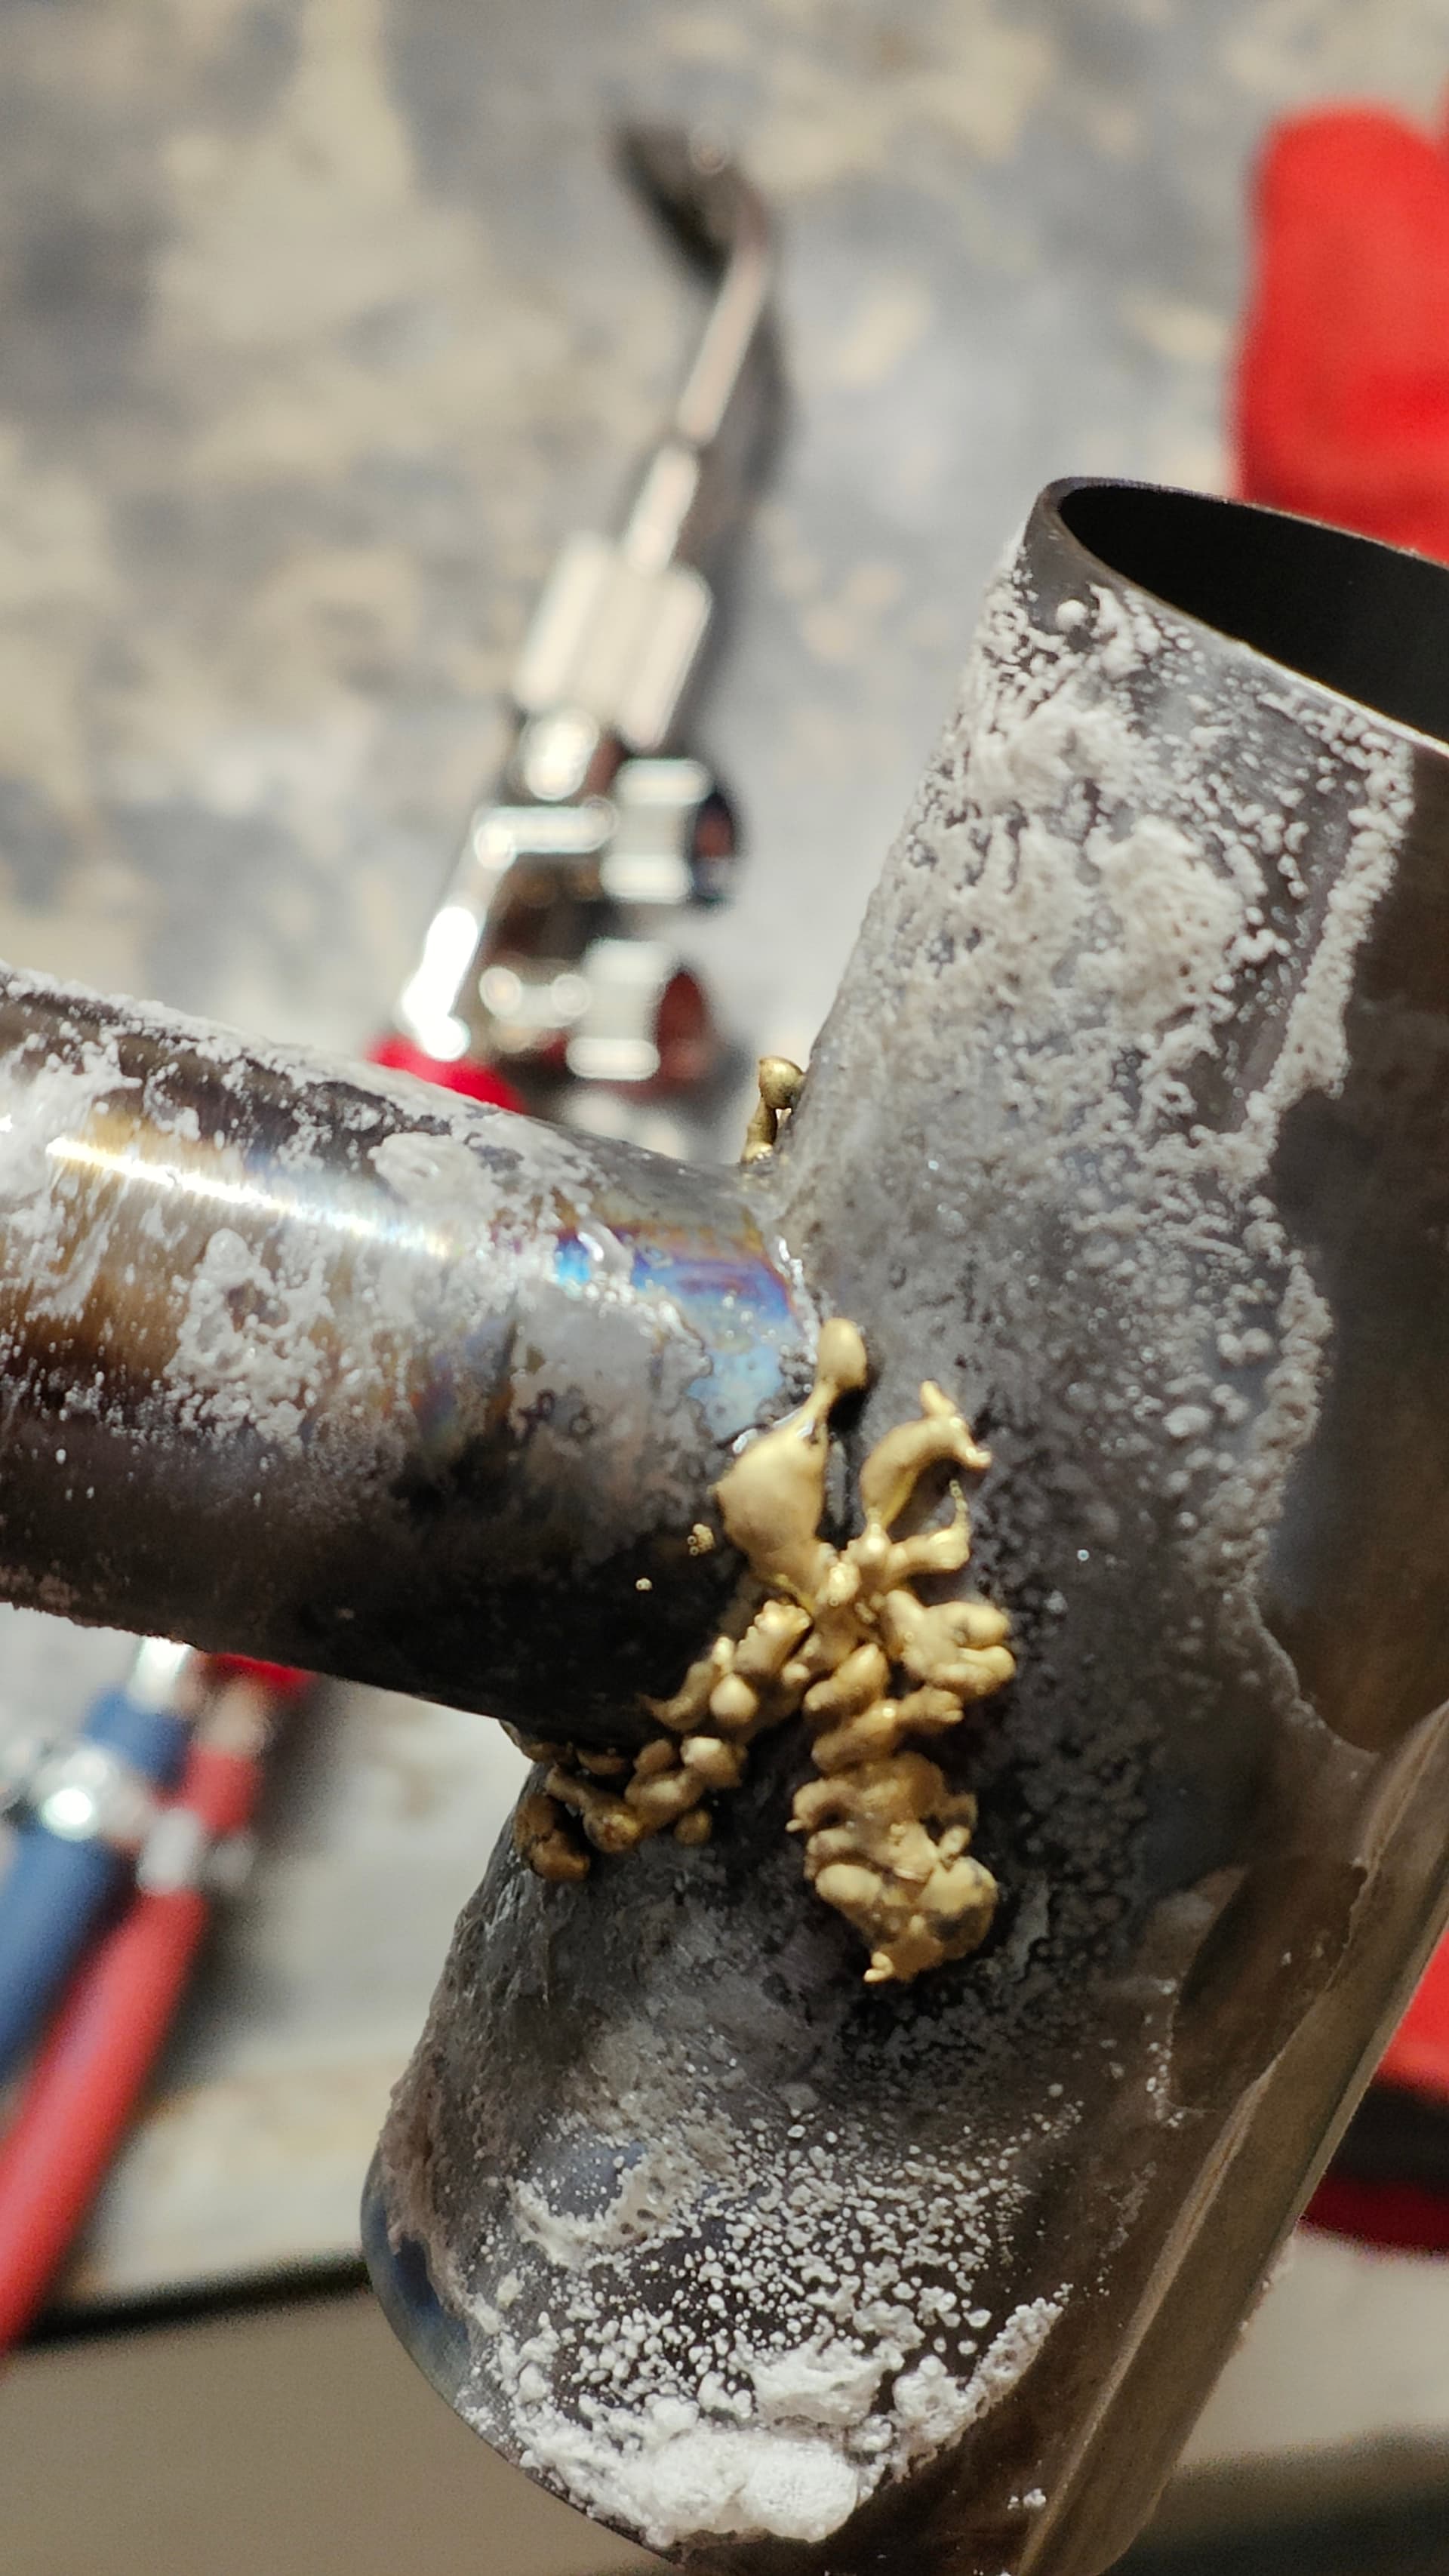
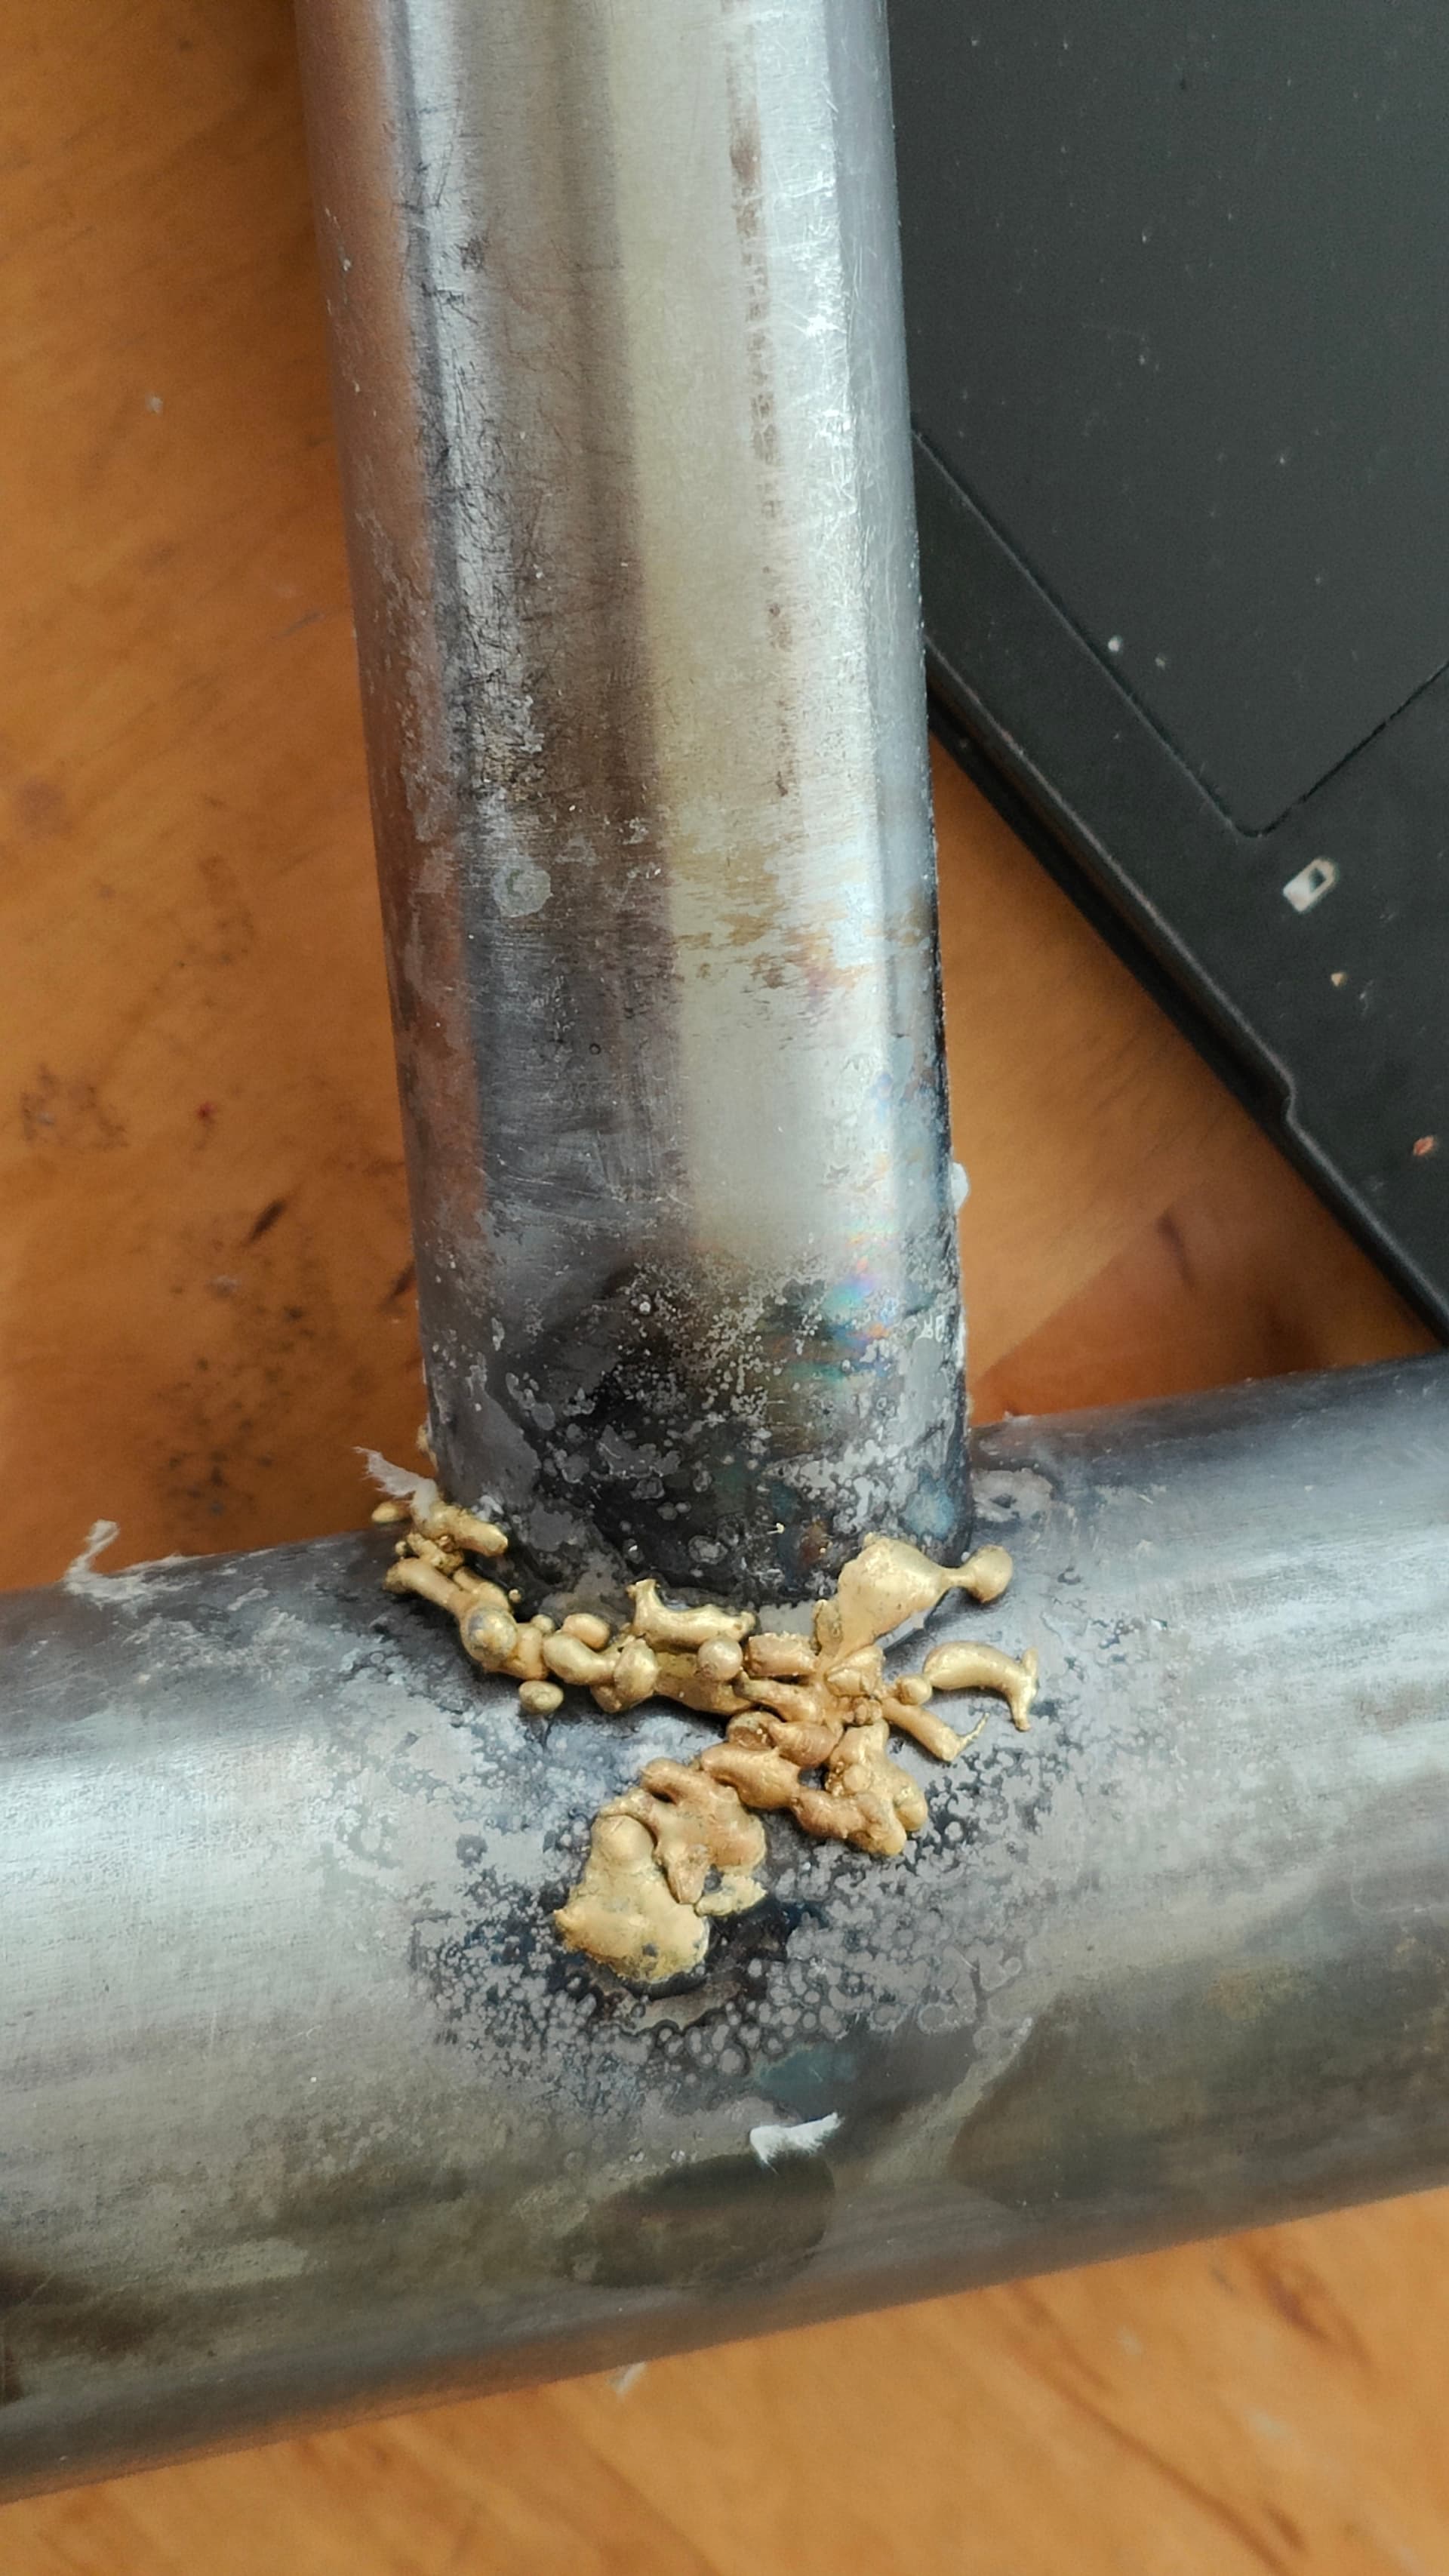
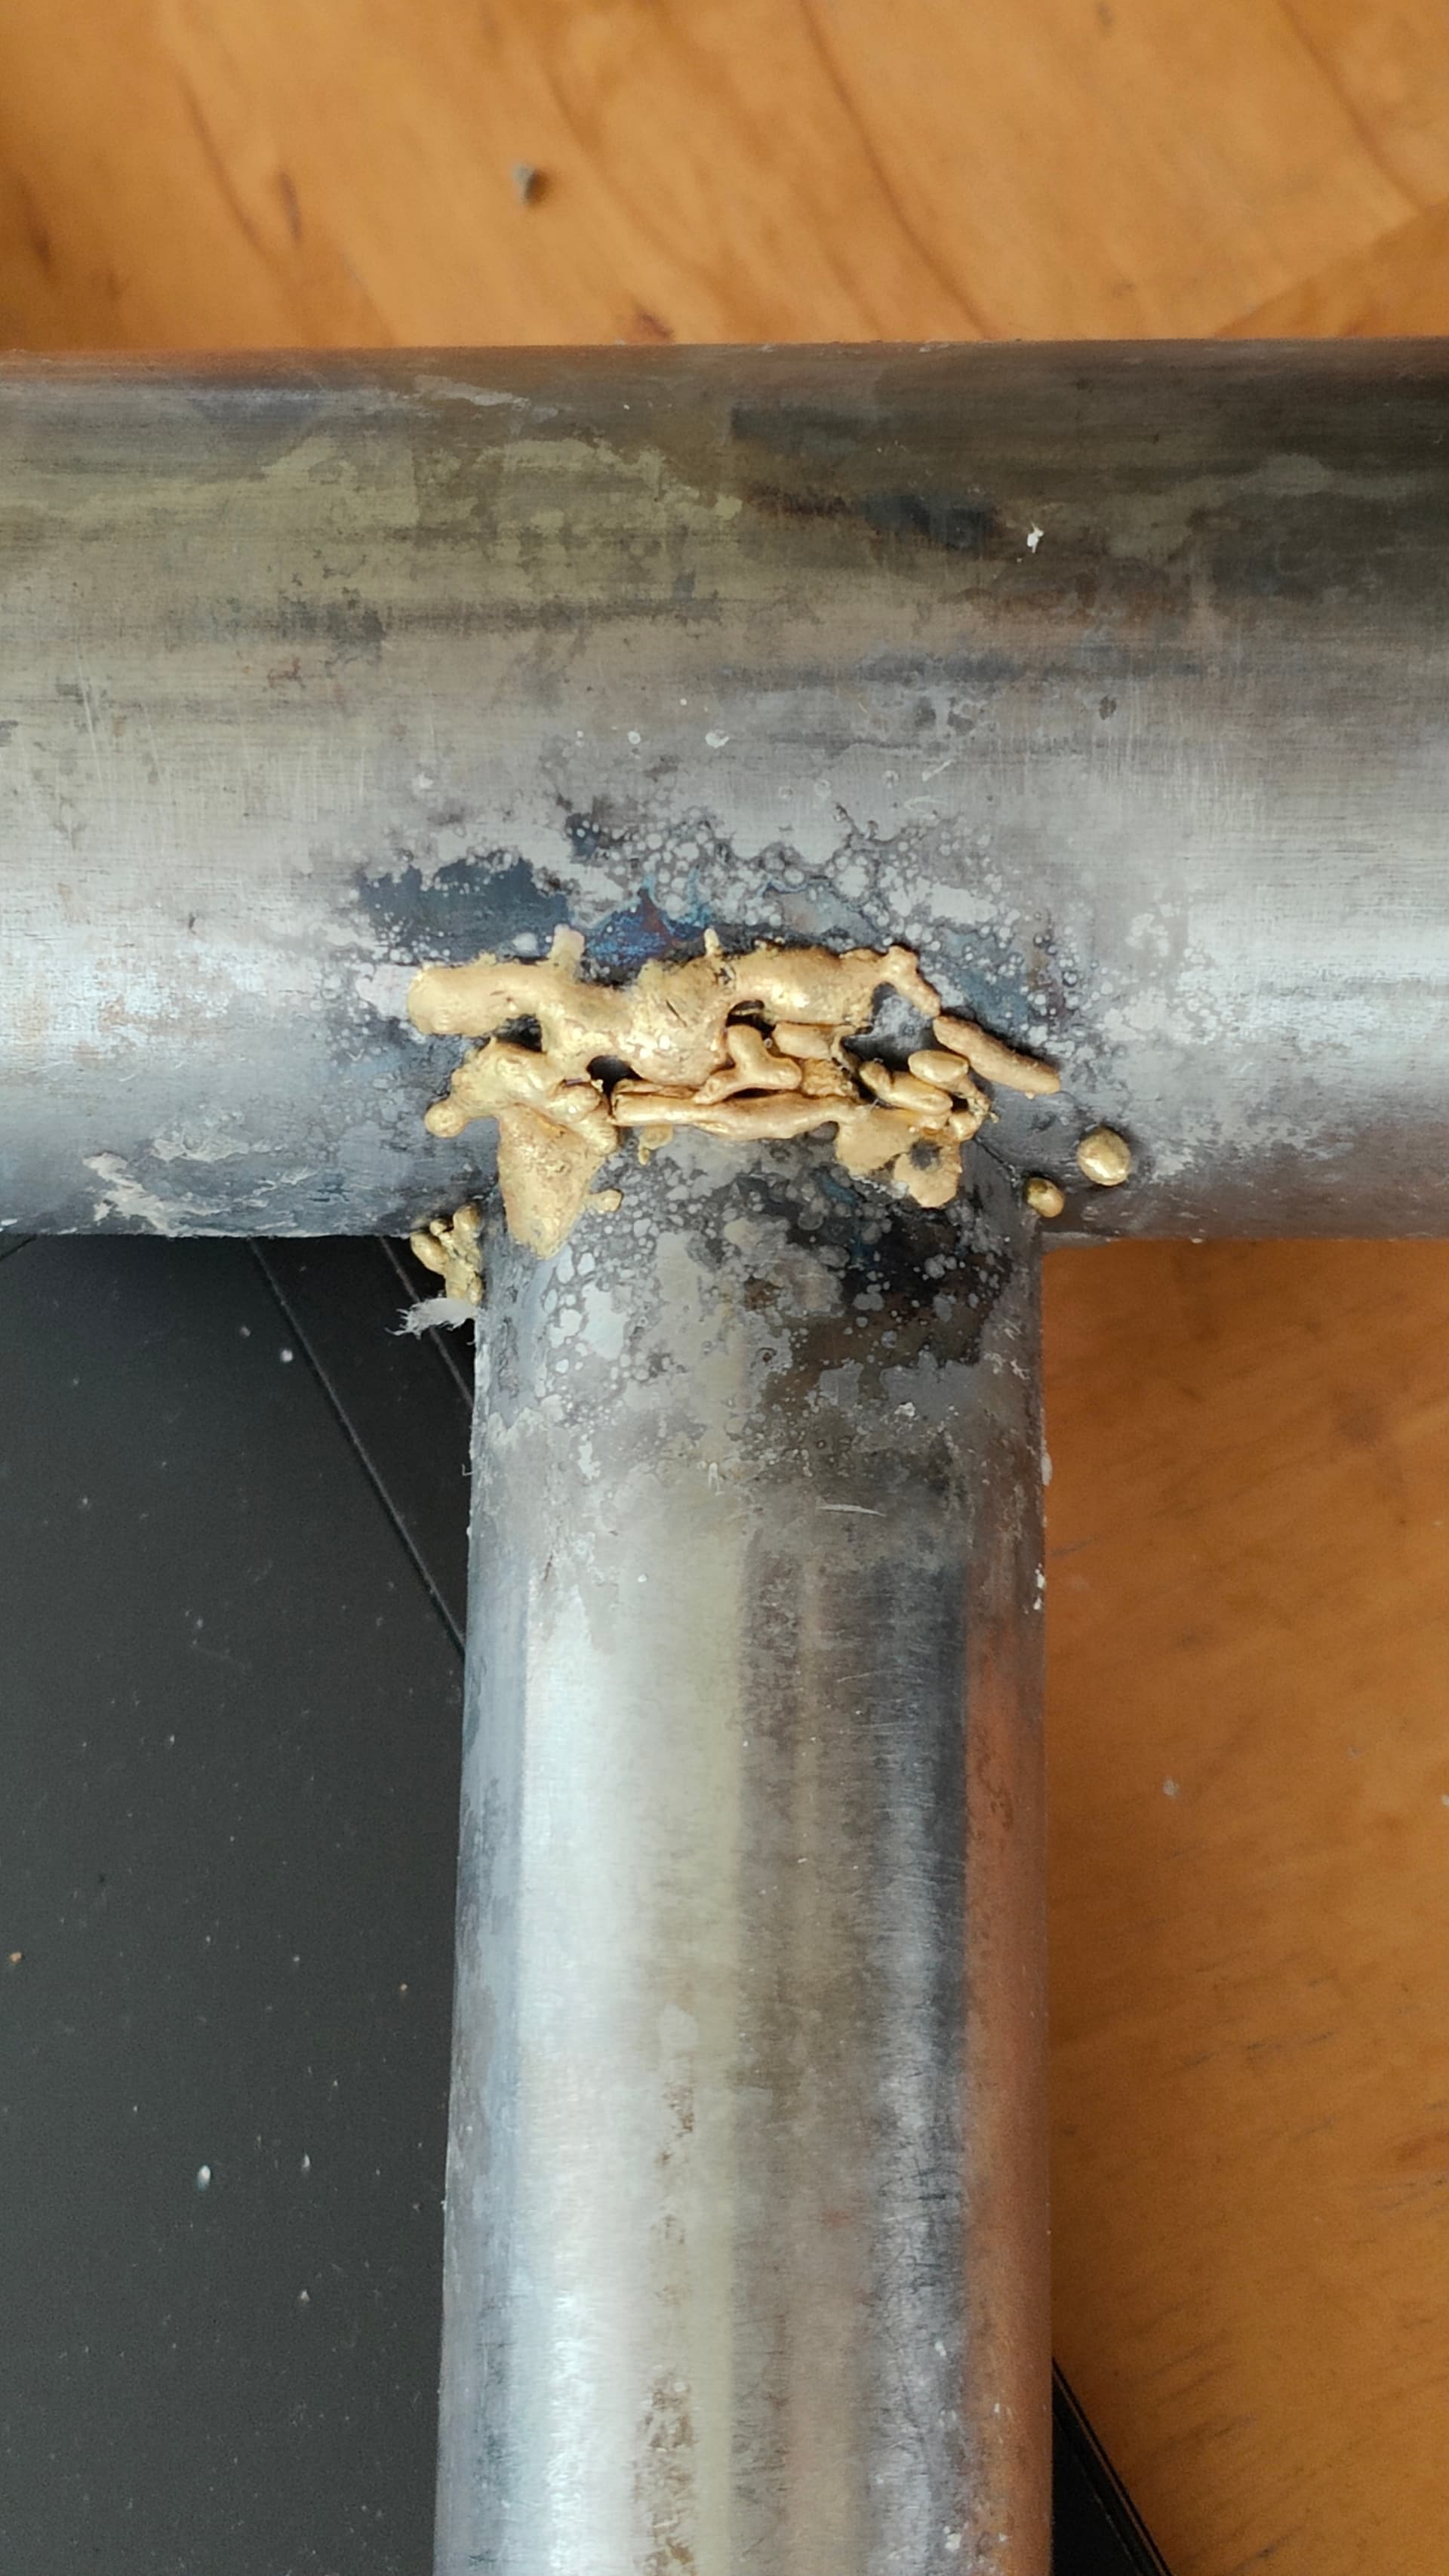
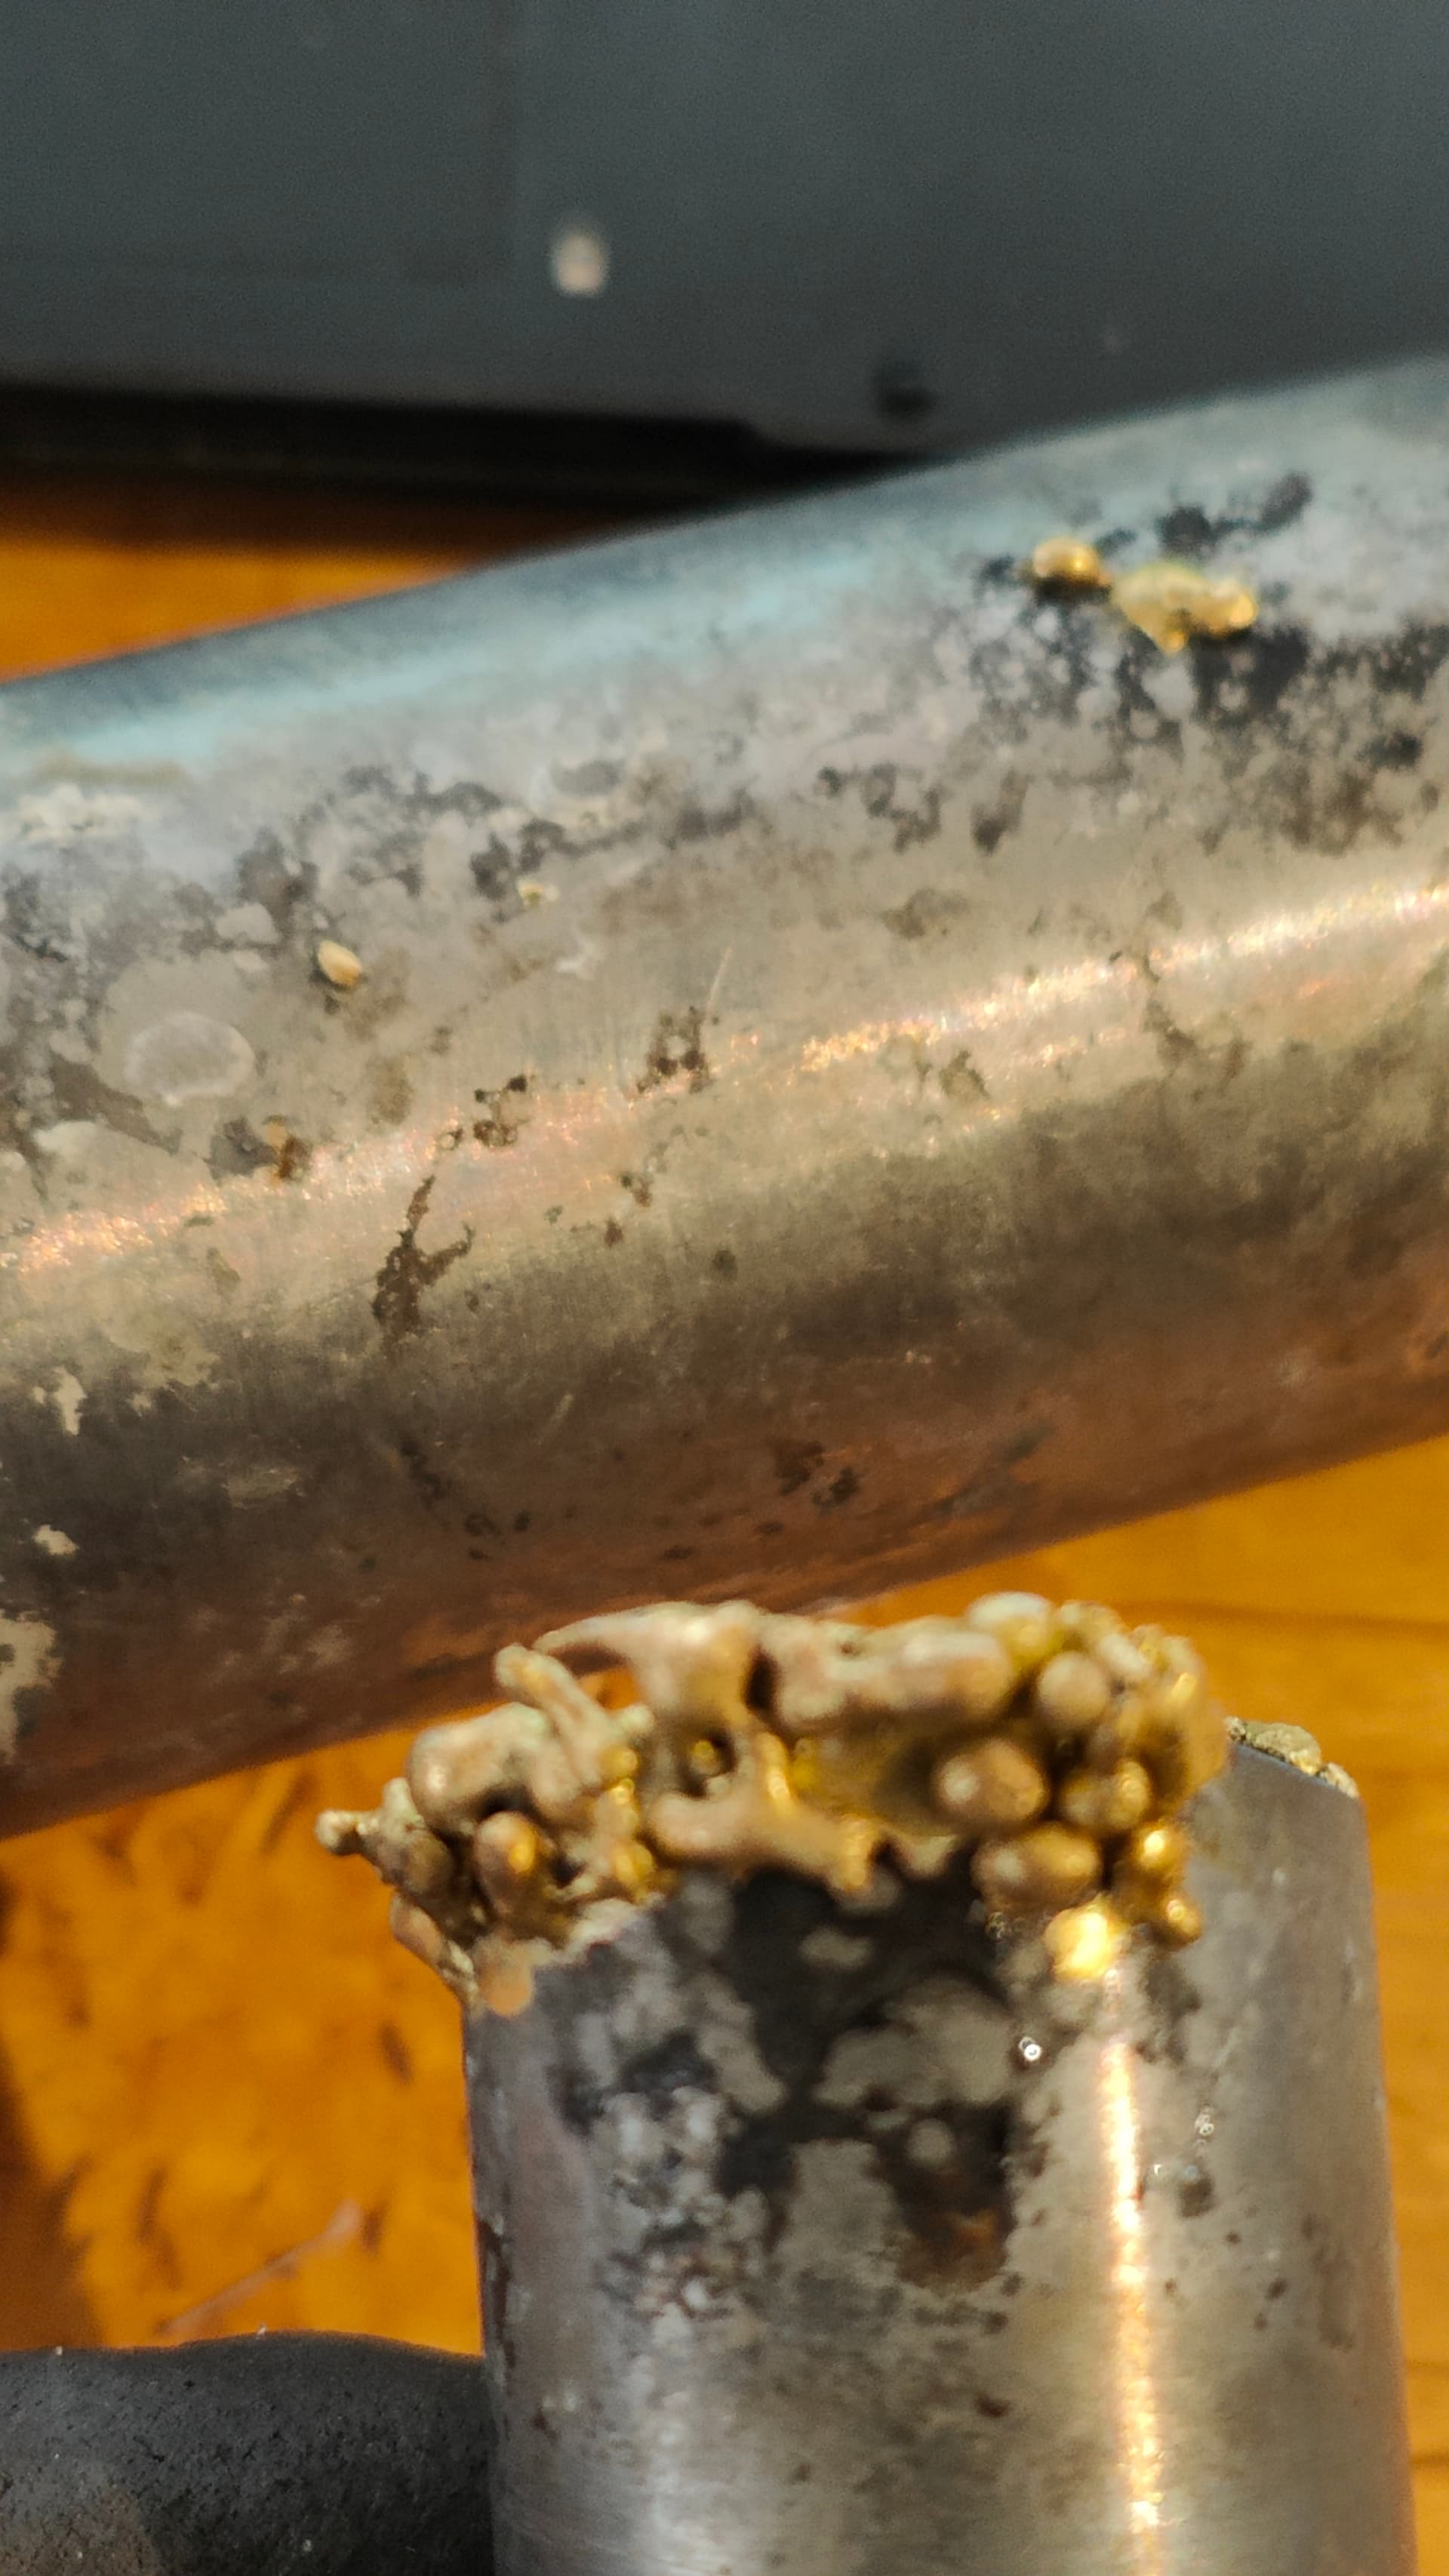
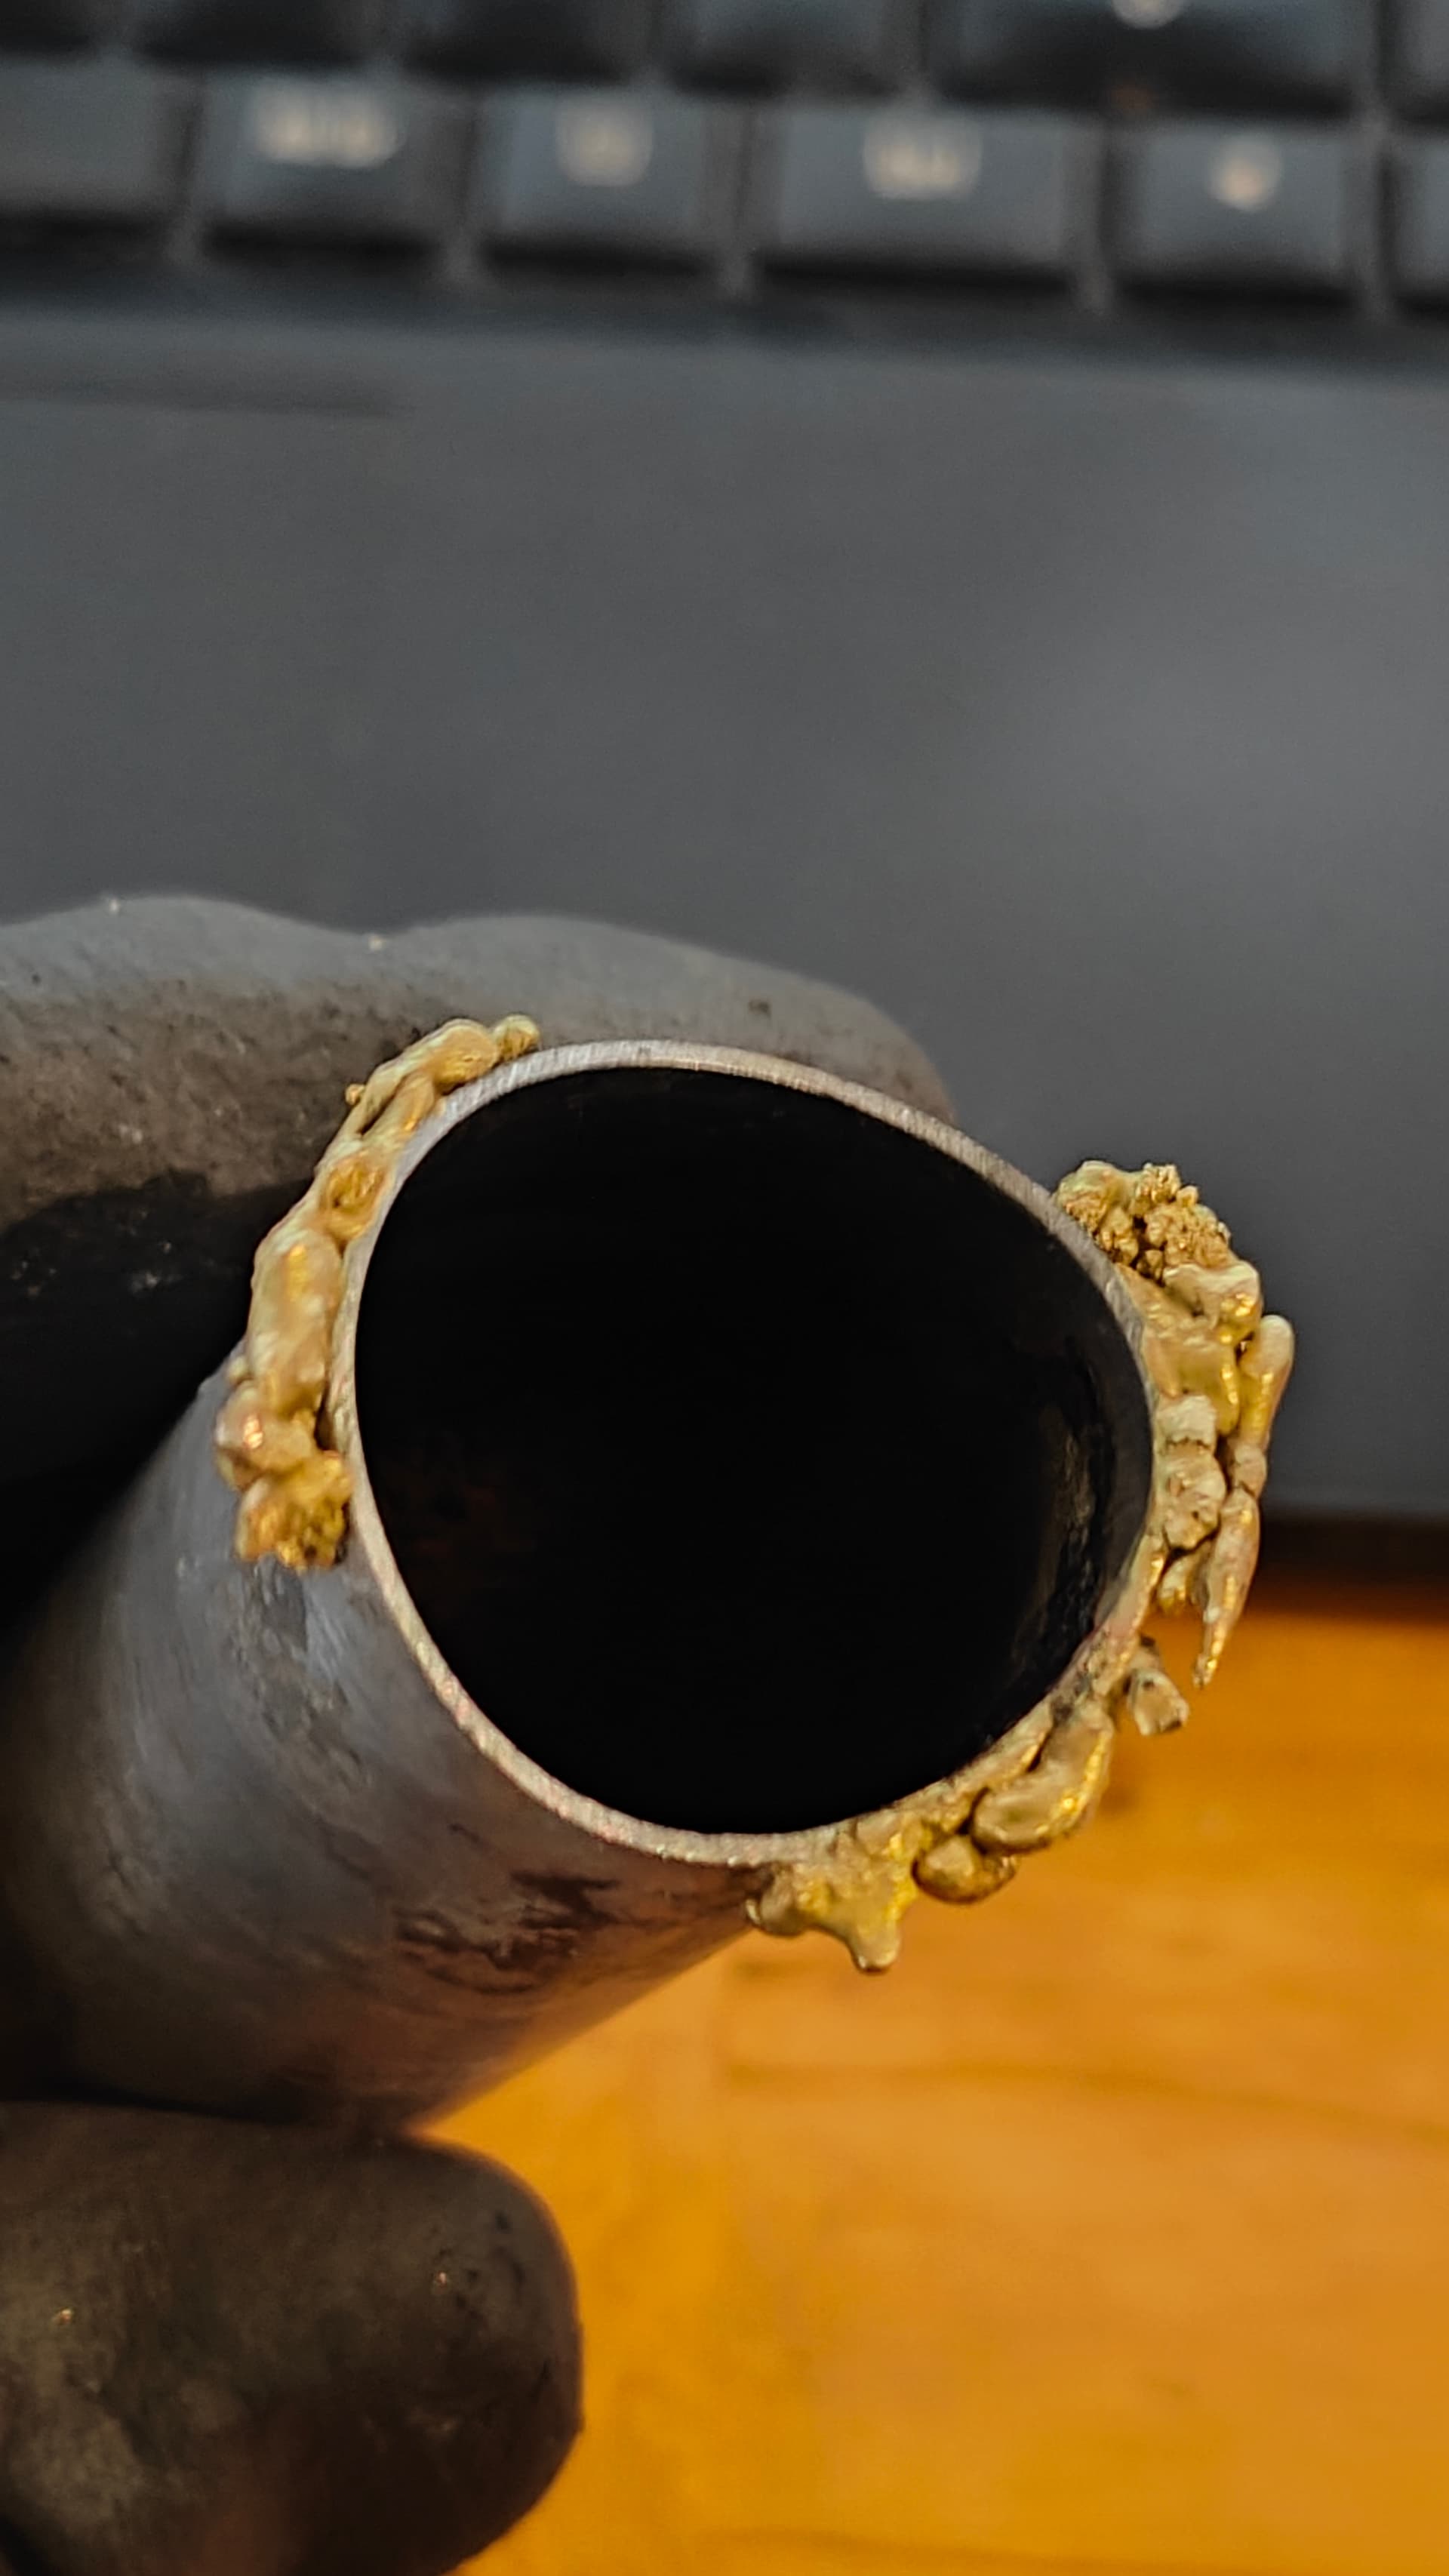
Yes, I must be doing something wrong with the torch and flame, apart from not getting close enough to the point.

I’m new with the torch, and got this “pop” sometimes trying to close a bit the acetylene to get the internal cone smaller as possible, and sometimes got it when I close the torch, ( i think because i have low oxygen flowing or pressure). I have a flashback arrestor, but anyway, it is a bit scary when it happens.

To the point that I know, i must open acetylene, fire it, remove a bit of the black smoke making the flame bigger, open slowly the oxygen, and reduce the oxygen until I get the neutral flame(same amount of oxygen (counting ambient oxygen too) than acetylene). If it is too big flame, reduce both, but as i say, it is tricky as sometimes i get this pop because i close it too much trying to get the small cone inside.

Torch is quite small, or the regulators, so with the welding gloves, it is difficult to get to the point without it making this pop because i close too much one of the regulators.

Dont know if it will be easier with the bigger tip number 1, or will be the same and i should try to get a better flame with the this number 0.

This is the one i have:

https://gasbox.lv/lv-lv/griešana-oxyfuel-un-sildīšana/rokturi/vieglais-rokturis-gloor-3901-6-ar-iebūvētu-nipeli-4101g3901--6

smaller tip: uzgalis N0 GLOOR 3910A 0,2-0,5mm (acetilēns) | gasbox.lv

bigger tip: uzgalis N1 GLOOR 3911A 0,5-1mm (acetilēns) | gasbox.lv

No manual or specifications about the preasure i should use, so i do what most people use, 5 PSI A, 10 PSI O.

Thanks!

The pop is normal and does happen, I don’t think you need to worry about it. I hear some folks purposefully kill the flame that way - by closing the acetylene before the oxy.

And it does happen to me from time to time, my dials get sticky depending on ambient temps and moisture thanks to gasflux - I accidentally lower the acetylene too far, too quickly as I’m trying to dial my flame in and pop the flame goes out.

If you setup all your hardware correctly, then don’t worry too much. But I get it, I used to shit myself about acetylene but if you stick to the rules and respect it you’ll be totally safe.

I run my regulators at ~5psi for both acetylene and oxy. Perhaps lowering the psi at your oxy reg will allow finer control at the torch handle? Obviously we should all wear appropriate PPE. I would just state that I don’t wear gloves myself and sometimes dialling a flame is tricky.

It’s super tricky to determine your exact procedure here and inherently difficult to see by video but I usually:
Crack the Acetylene, spark it up
Crack the oxygen, slowly increase until I have neutral flame.
Adjust both if necessary until I have the size I need.
Watch the flame for a few moments to check it is stable and my old regulators are doing their job.

5 Likes

Thanks, i saw it the other day (i follow you ;-)). You are an artist!

2 Likes

You’re too kind, I just picked up some brazing tools a few years ago just as you are now. I’m not creative enough to be an artist. I learn by doing and I’ve done quite a bit now. More every day, that’s the only way with welding and brazing, just practice.

But thank you :pray:

1 Like

This is what i mean with “pop”… I was closing a bit the acetylene and trying to make the inside cone smaller…

pd. sorry for the bad languaje :wink:

Just judging by how the flux is looking, I would say that it is still too cold. Not enough temp also leads to the brass staying in this spherical shape, retaining its surface tension. But hard to say from the distance, and in the video you can’t really tell either…

Maybe try the following: Just use a single piece of material (tube or sheet, doesn’t matter…). Prep and heat it up to the point where the brazing rod melts by touching the steel rather than holding it into the cone of the flame. As soon as the filler has melted, move the torch away so it can solidify. Now you have an Idea of what it should look like, and feel like, when the temperature is about right.

The result should be a flatter “blob” of brass on your test piece instead of a “ball”. Now do the same, concentrating the heat at the edge of the blob. Once you see the blob melting/getting shiny, feed the rod in, creating another blob halfway on top of the first. Continue to get something like a caterpillar :wink:

1 Like

Are you certain that the tubes are not stainless or titanium? I’ve never had brass/bronze rod ball up like that except when I had a piece of titanium I received by mistake

1 Like