Do your wallet a favor and put those bicycle tubes away. You are not ready to start fillet brazing a frame and need A LOT of practice before you attempt to braze a frame together. Fillet brazing is really hard, instruction from a pro will help cut down the learning time. If you are attempting to learn on your own, you are in for hours of experimenting and a bucket full of scrap material.
3 Likes
Thanks for your advice, but let me dream!
1 Like
I"m not trying to discourage you from dreaming, just want to save you money!
Dreams don’t braze bicycles. Working torches do, along with the experience to use them.
That’s impressive fitting and good ingenuity on display, but you’re a very long way from brazing it together and coming away with a bicycle frame.
It is needlessly complicated for a first frame and has a lot of places to go wrong. If you try to braze it together without many hours of practice you are going to get an expensive lesson and be left with a good supply of practice materials.
There is a lesson here for other people following along who want to build a bicycle frame: buy the torch first.
I was once in your shoes. I was doing it in real life. I took my first joints - which looked like your first joint - to a local builder and he laughed at me and sent me away with several pieces of advice. Fast forward a dozen trips back to get more feedback and I had made my own frame! I still ride it today (14 years later). Anyway, you’ll get there. Persistence is key and analyzing what you’re doing and not skipping steps.
First off, stop trying to do joints. There is too much going on. You have more basic problems. I have a feeling your torch or tip is too small and you’re using too low pressure. I use 8-10psi for both gasses for O/A and I use a J28 Victor with #1 tip which has a .035" (0.9mm) orifice. Sometimes I use a #2 for fillets on the BB or dropouts and for lugs/crowns/shells, I use a #5 Propane/Oxy tip. Anyway, I think you’re going to see better results with a bigger torch, bigger tanks (Acetylene has a max draw rate based on tank size so watch for that) and higher pressure. I’m not saying you can’t braze with that torch or those settings or whatever but, you wanna get it hot, lay down the filler and then get out and they look too small to me.
Smaller torches/tips/low pressure will require longer to get it up to temp and that will wear out your flux before you even get started laying down the brass.
Start by get yourself some thin (1mm or 0.040") steel sheet (our DIY store sells it for $10 or so per square foot). Lay down some flux on the plate and start heating it, watch it go through the phases from too cold, boiling off the water, glassy flux and the plate turns red and then orange. As it heats up, get your filler rod tip near the flame so it starts to get hot. Then dab the filler onto the plate to test when it gets hot enough to melt the filler. Because I think you’re too cold and the torch is small, I would say just see what happens when you really blast it with heat. Nothing to lose!! then as you add filler and move along, keep the tip of the filler right near the tip of the flame so it stays up near melting temp. I used practice the motion of moving my hands independently in meetings with pencils or whatever I had handy. It’s hard.
Starting on a flat plate eliminates trying to heat 2 tubes evenly, while holding two pieces etc. Get used to seeing the puddle melt, dab, flick the torch away and then back on, melt, dab, flick etc etc. Lay down 6-10 feet (2 metres) of beads. Lay them over the top of other beads, just get used to melting the brass and see if it’s possible with that torch/tips.
Then, once you have that dialed, start building trees stacking blobs of brass on top of each other without melting the previous blob. Then cut a tube straight and put it on the plate and fillet around it.
Don’t be afraid of heat. Look at some of the videos of old dudes, they get the tubes nearly white hot. They are using thicker walled tubing so that’s not your goal but that’s sort of the outer limit. The video you posted show the joint wasn’t nearly hot enough.
8 Likes
Some excellent advise. If I could add, try to braze somewhere dark so you can get a better idea of the color changes in the material you are trying to join. The color of the metal when it is at brazing temps should become familiar. You don’t always have to braze in the dark, just become aware of the color signals that the material gives off when it is ready to accept the filler.
2 Likes
I assume you already checked for leaks?? That’s a heck of a lot of hose clamps. Please be safe! If you don’t have any framebuilding schools nearby maybe you could pay a plumber to come check out the whole system so you can focus on building the technique.
2 Likes
Thanks, this is one of the next steps i will do when im back, also check the flame. I checked myself for leaks, and everything looks ok.
Thanks for all your tips. I have to solve about the torch/flame/heat and then practice. That’s the thing, i haven’t even started to practice. It is hard, but i know i will get it! I will post when i get results.
1 Like
Well, back at the shop in Latvia. Today I received the larger nozzles/tips, numbers 2 and 3.
I set everything up the same as before: same pressure, same flame, same flux, same rods, even the same tubes (I cut and cleaned them).
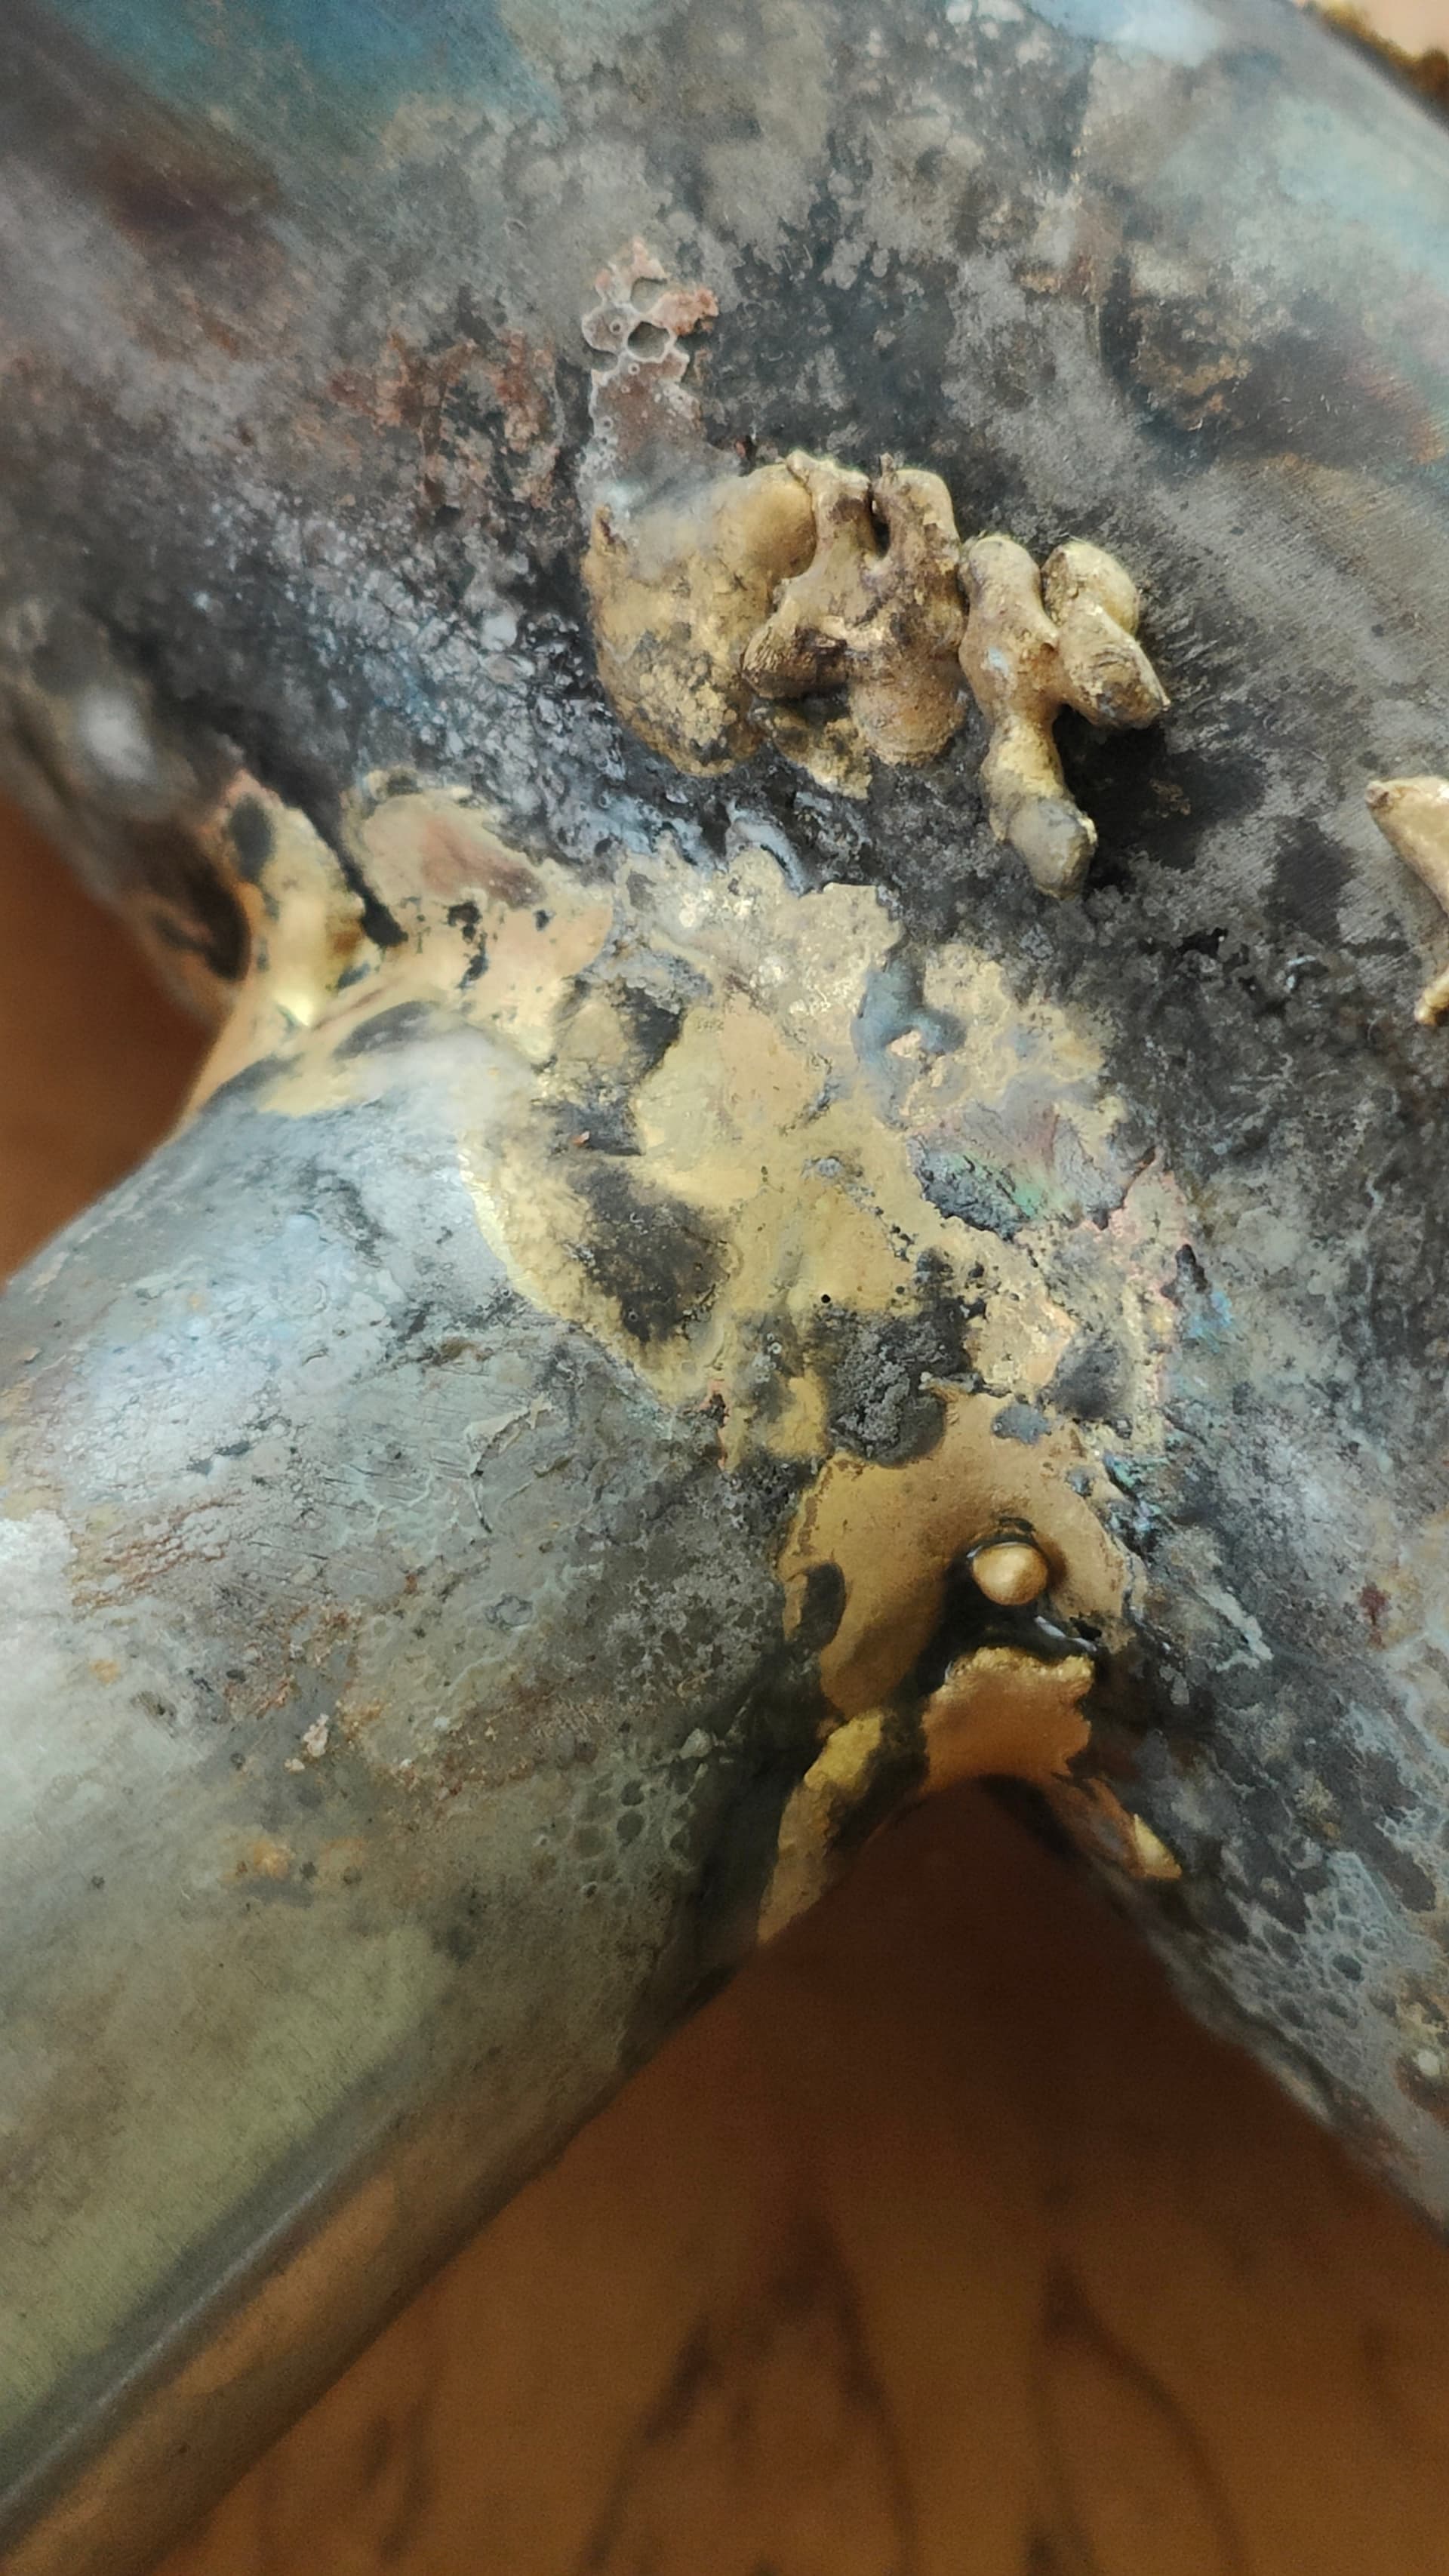
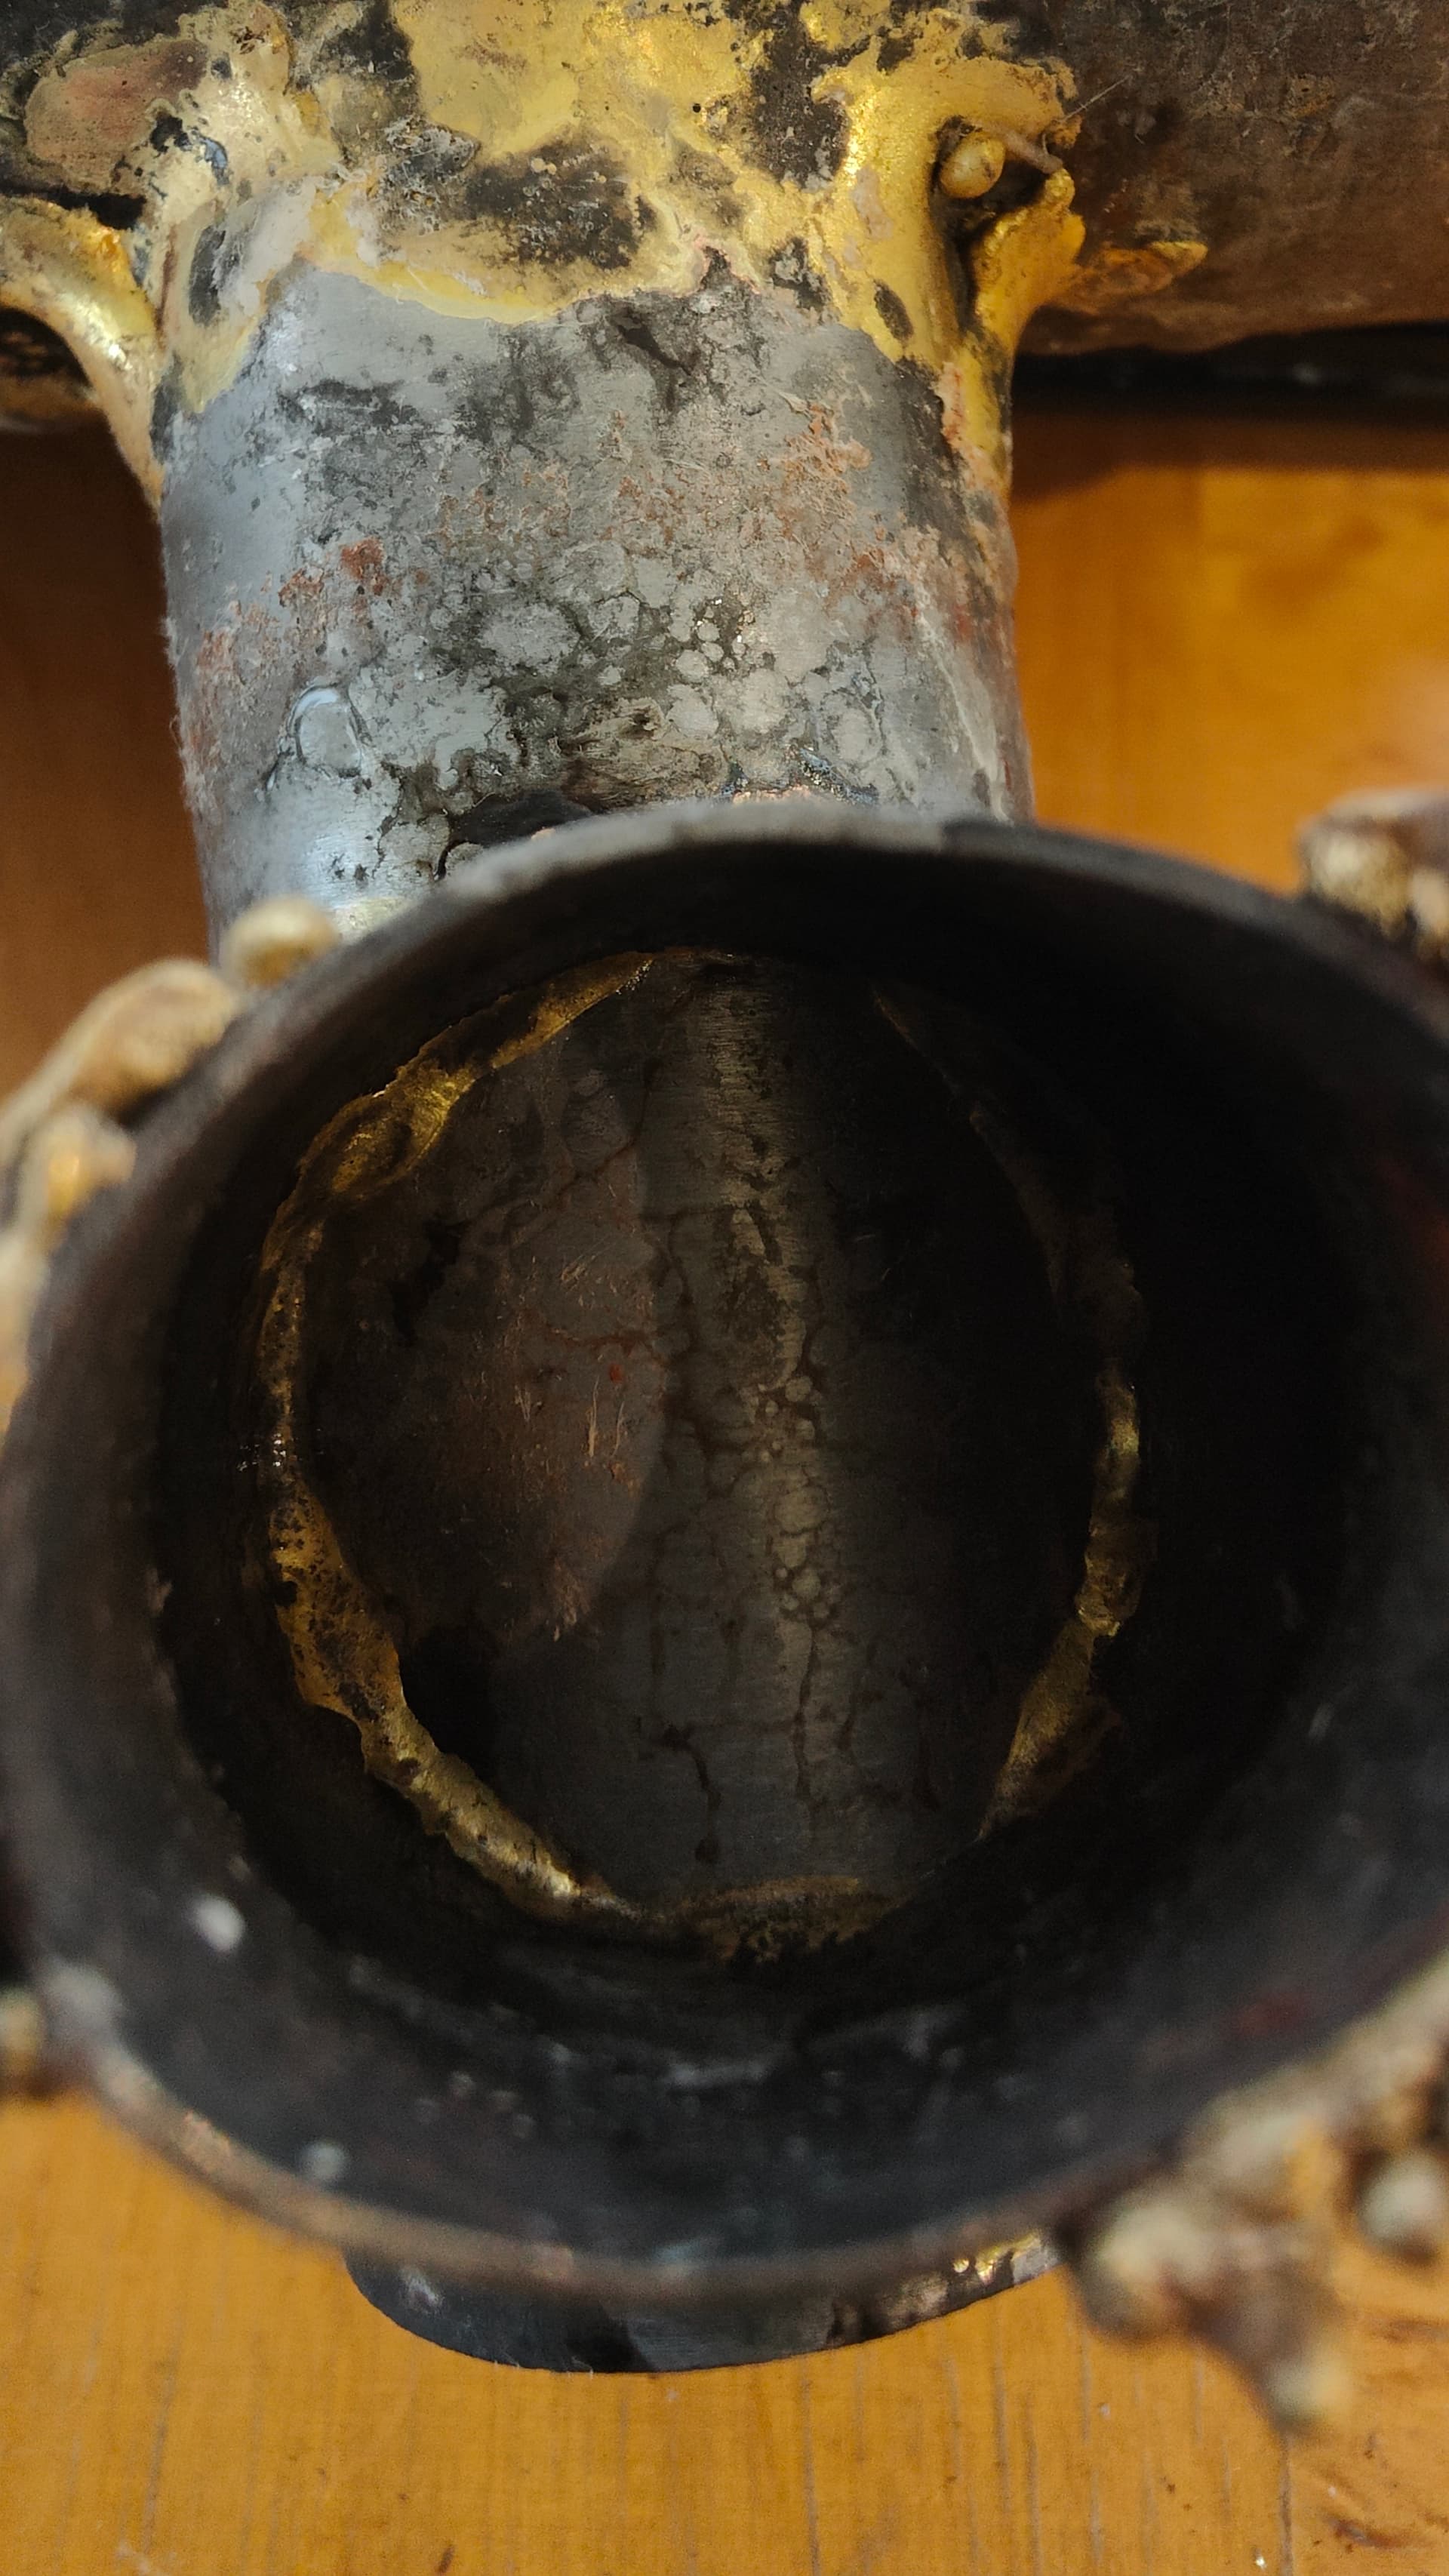
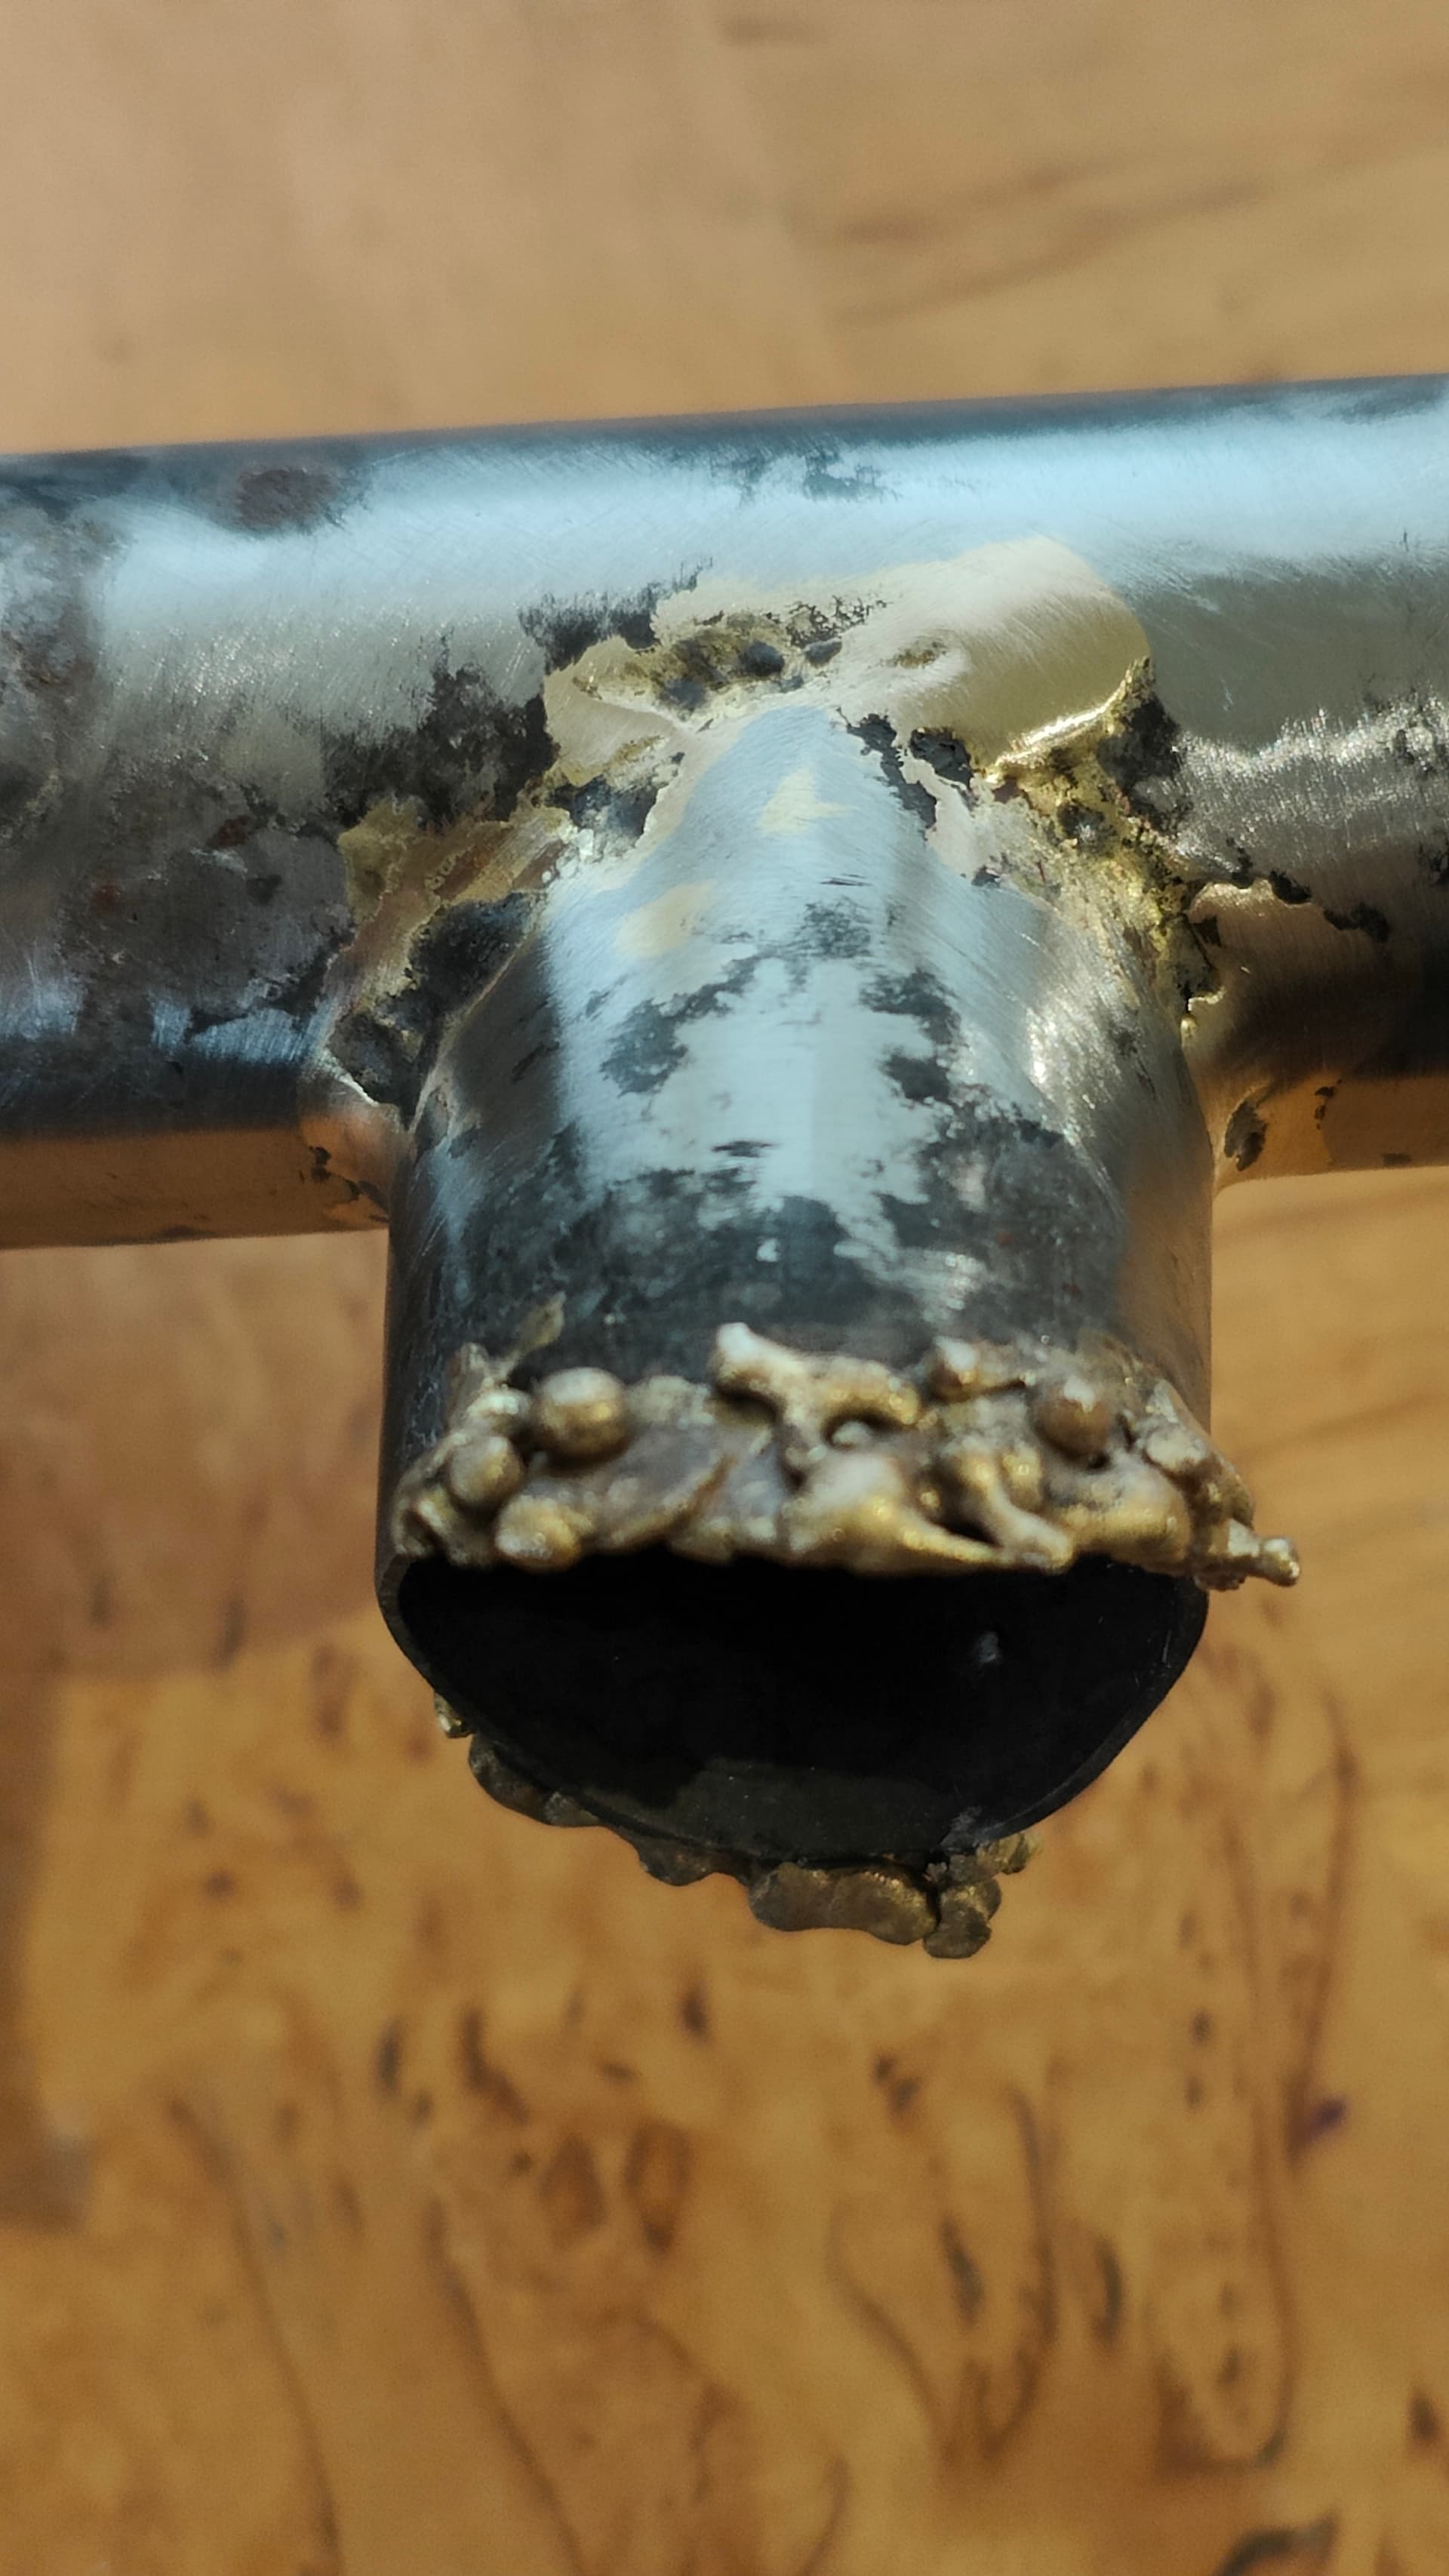
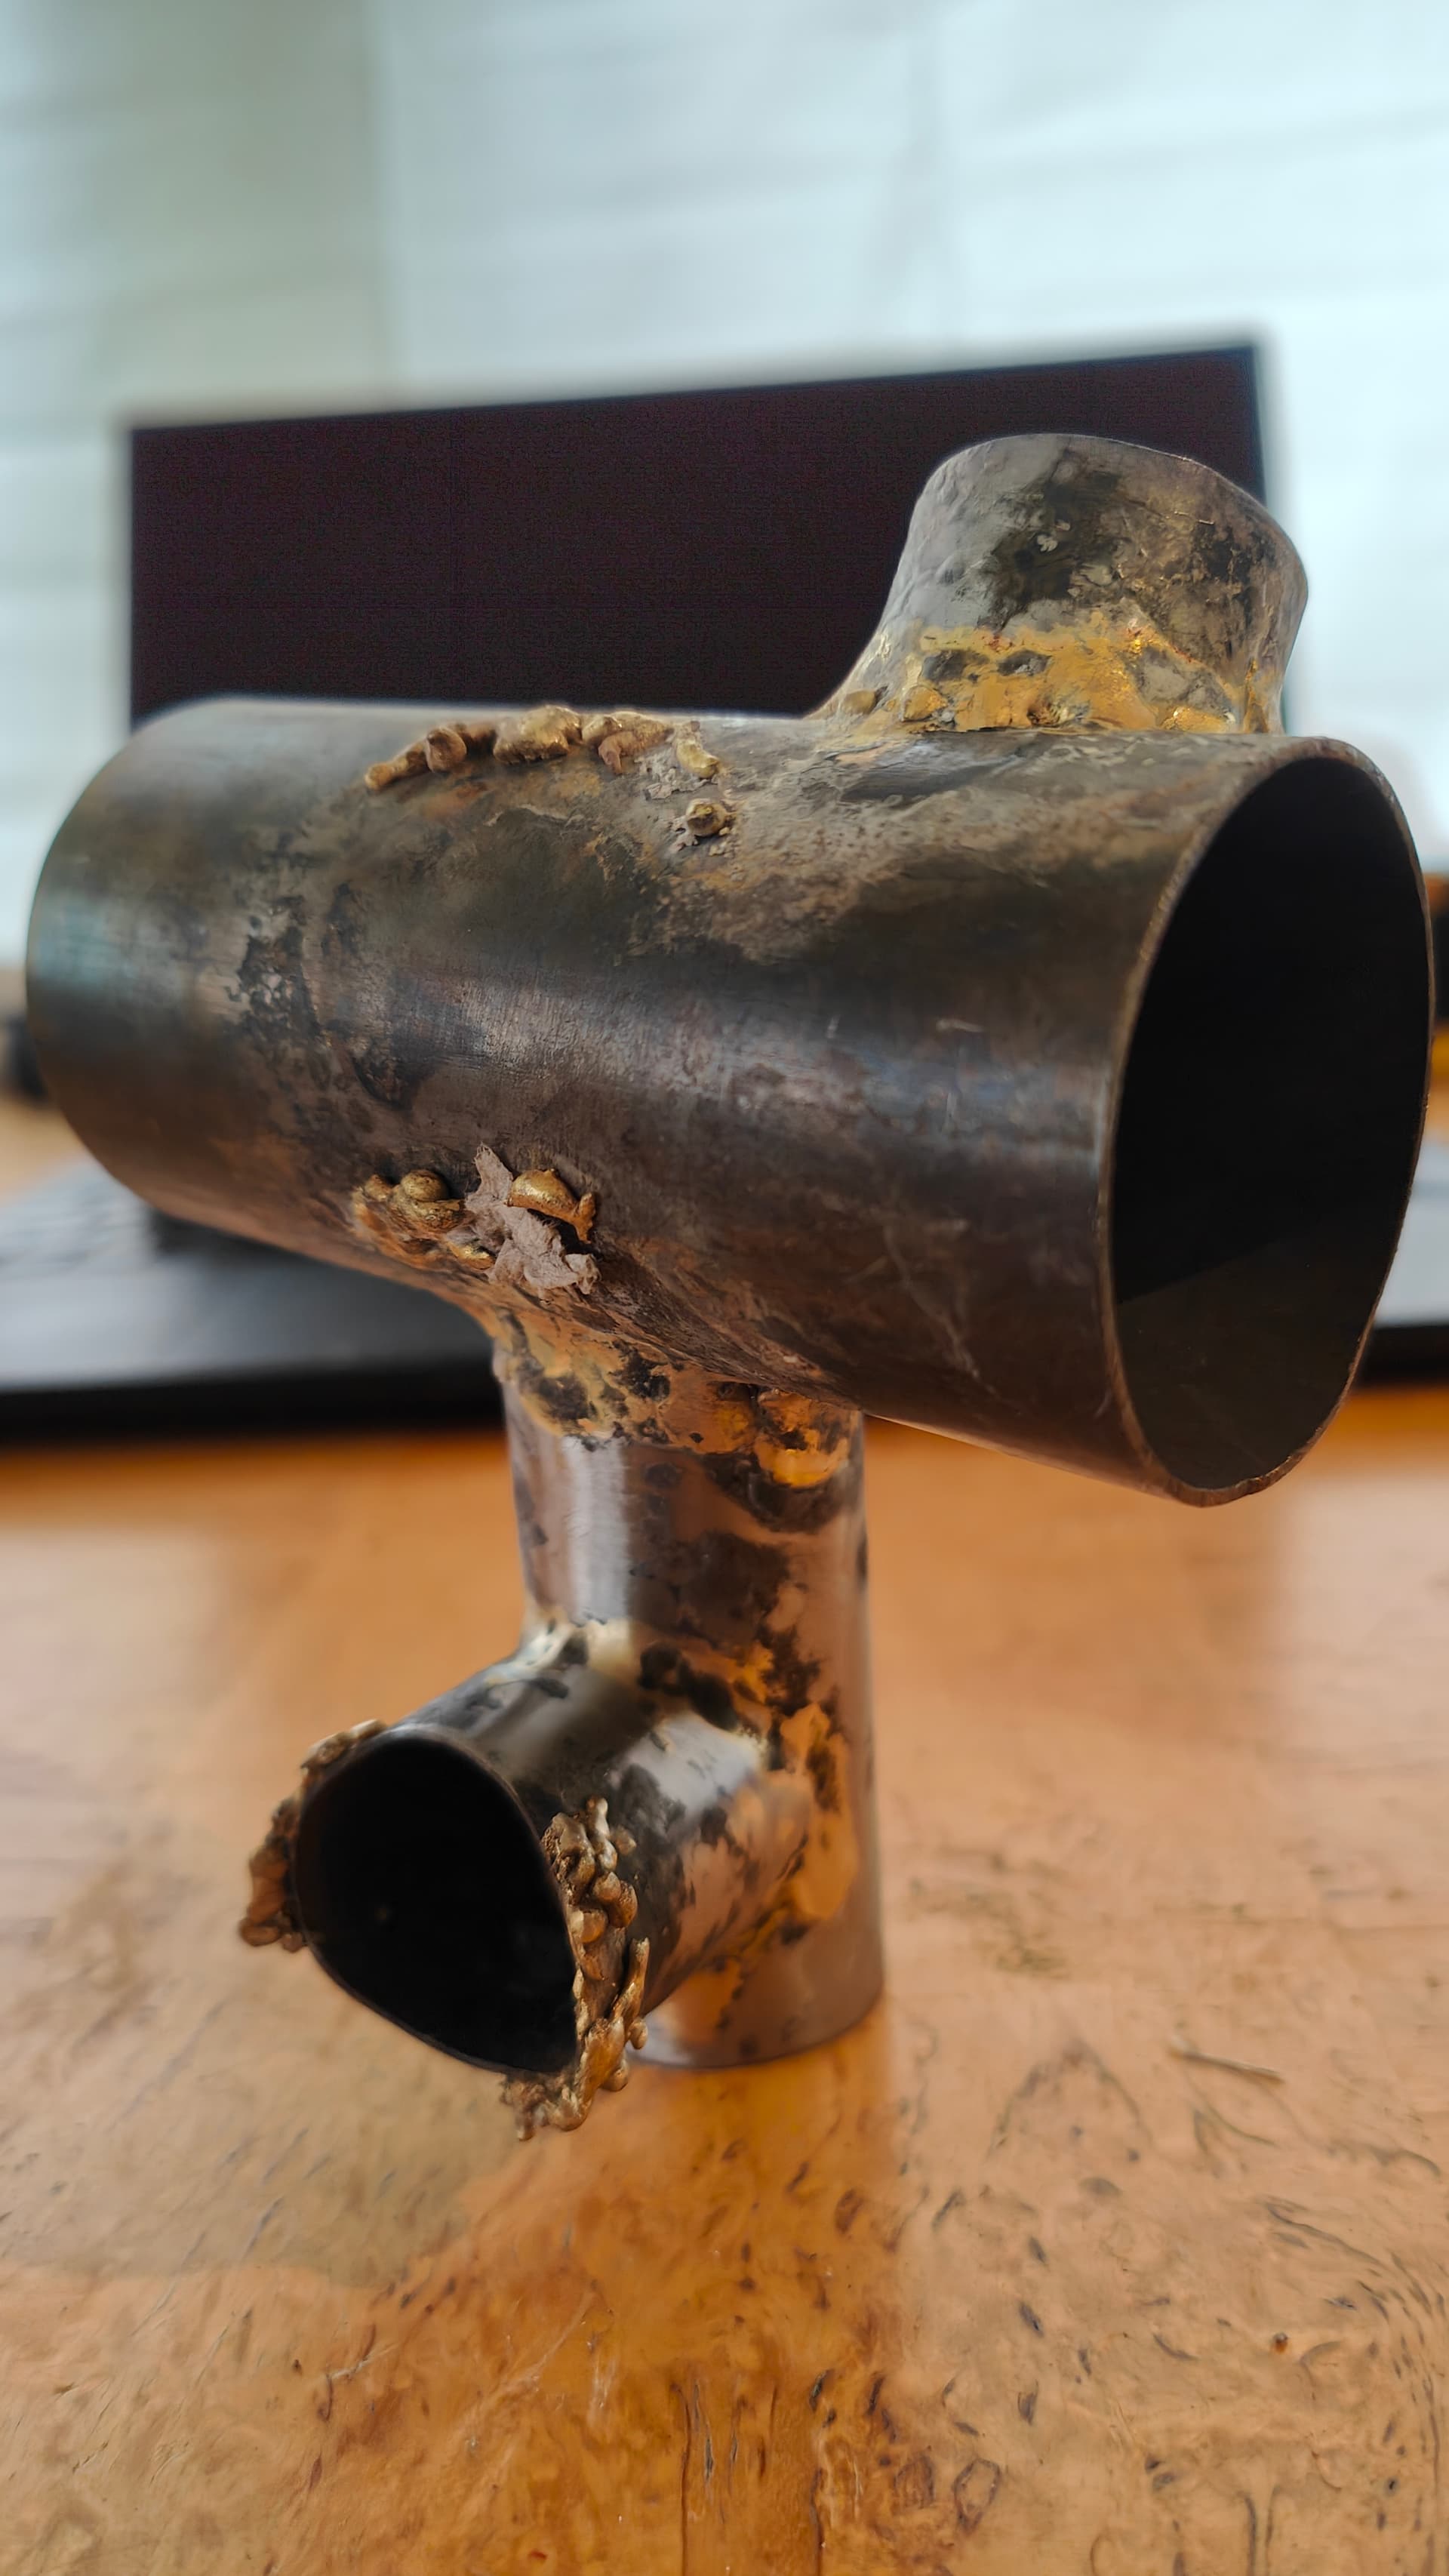
I did the tests in the photos with tip nº 2. I found the neutral flame much easier to get, and as soon as I heated the tubes a little and get the flame closer, I noticed that everything went much faster, with more heat.
I made three joints, the last one a little more slowly, trying to make it complete, although I didn’t rotate the piece to play with gravity.
As you can see, the result is completely different, and the rod at least melts and joins the steel properly. The rest is practice…
So, mystery solved, at least for now. With tips 0 and 1 for this torch, I couldn’t get the right heat/flame to melt and join the metals, even metl the bronze rods.
Thanks everyone for the help, and if I have any more questions, I’ll leave them here.
By the way, im in the search of rods around here (continental europe), where does the builders buy them?, mostly bronze:
CU = 55–60%
ZN = 35–45%
SI = 0.2–0.5%
NI = 0.1–0.3%
I bought mine in UK, but shipping and taxes makes everything a bit expensive.
See ya!
Test 1:
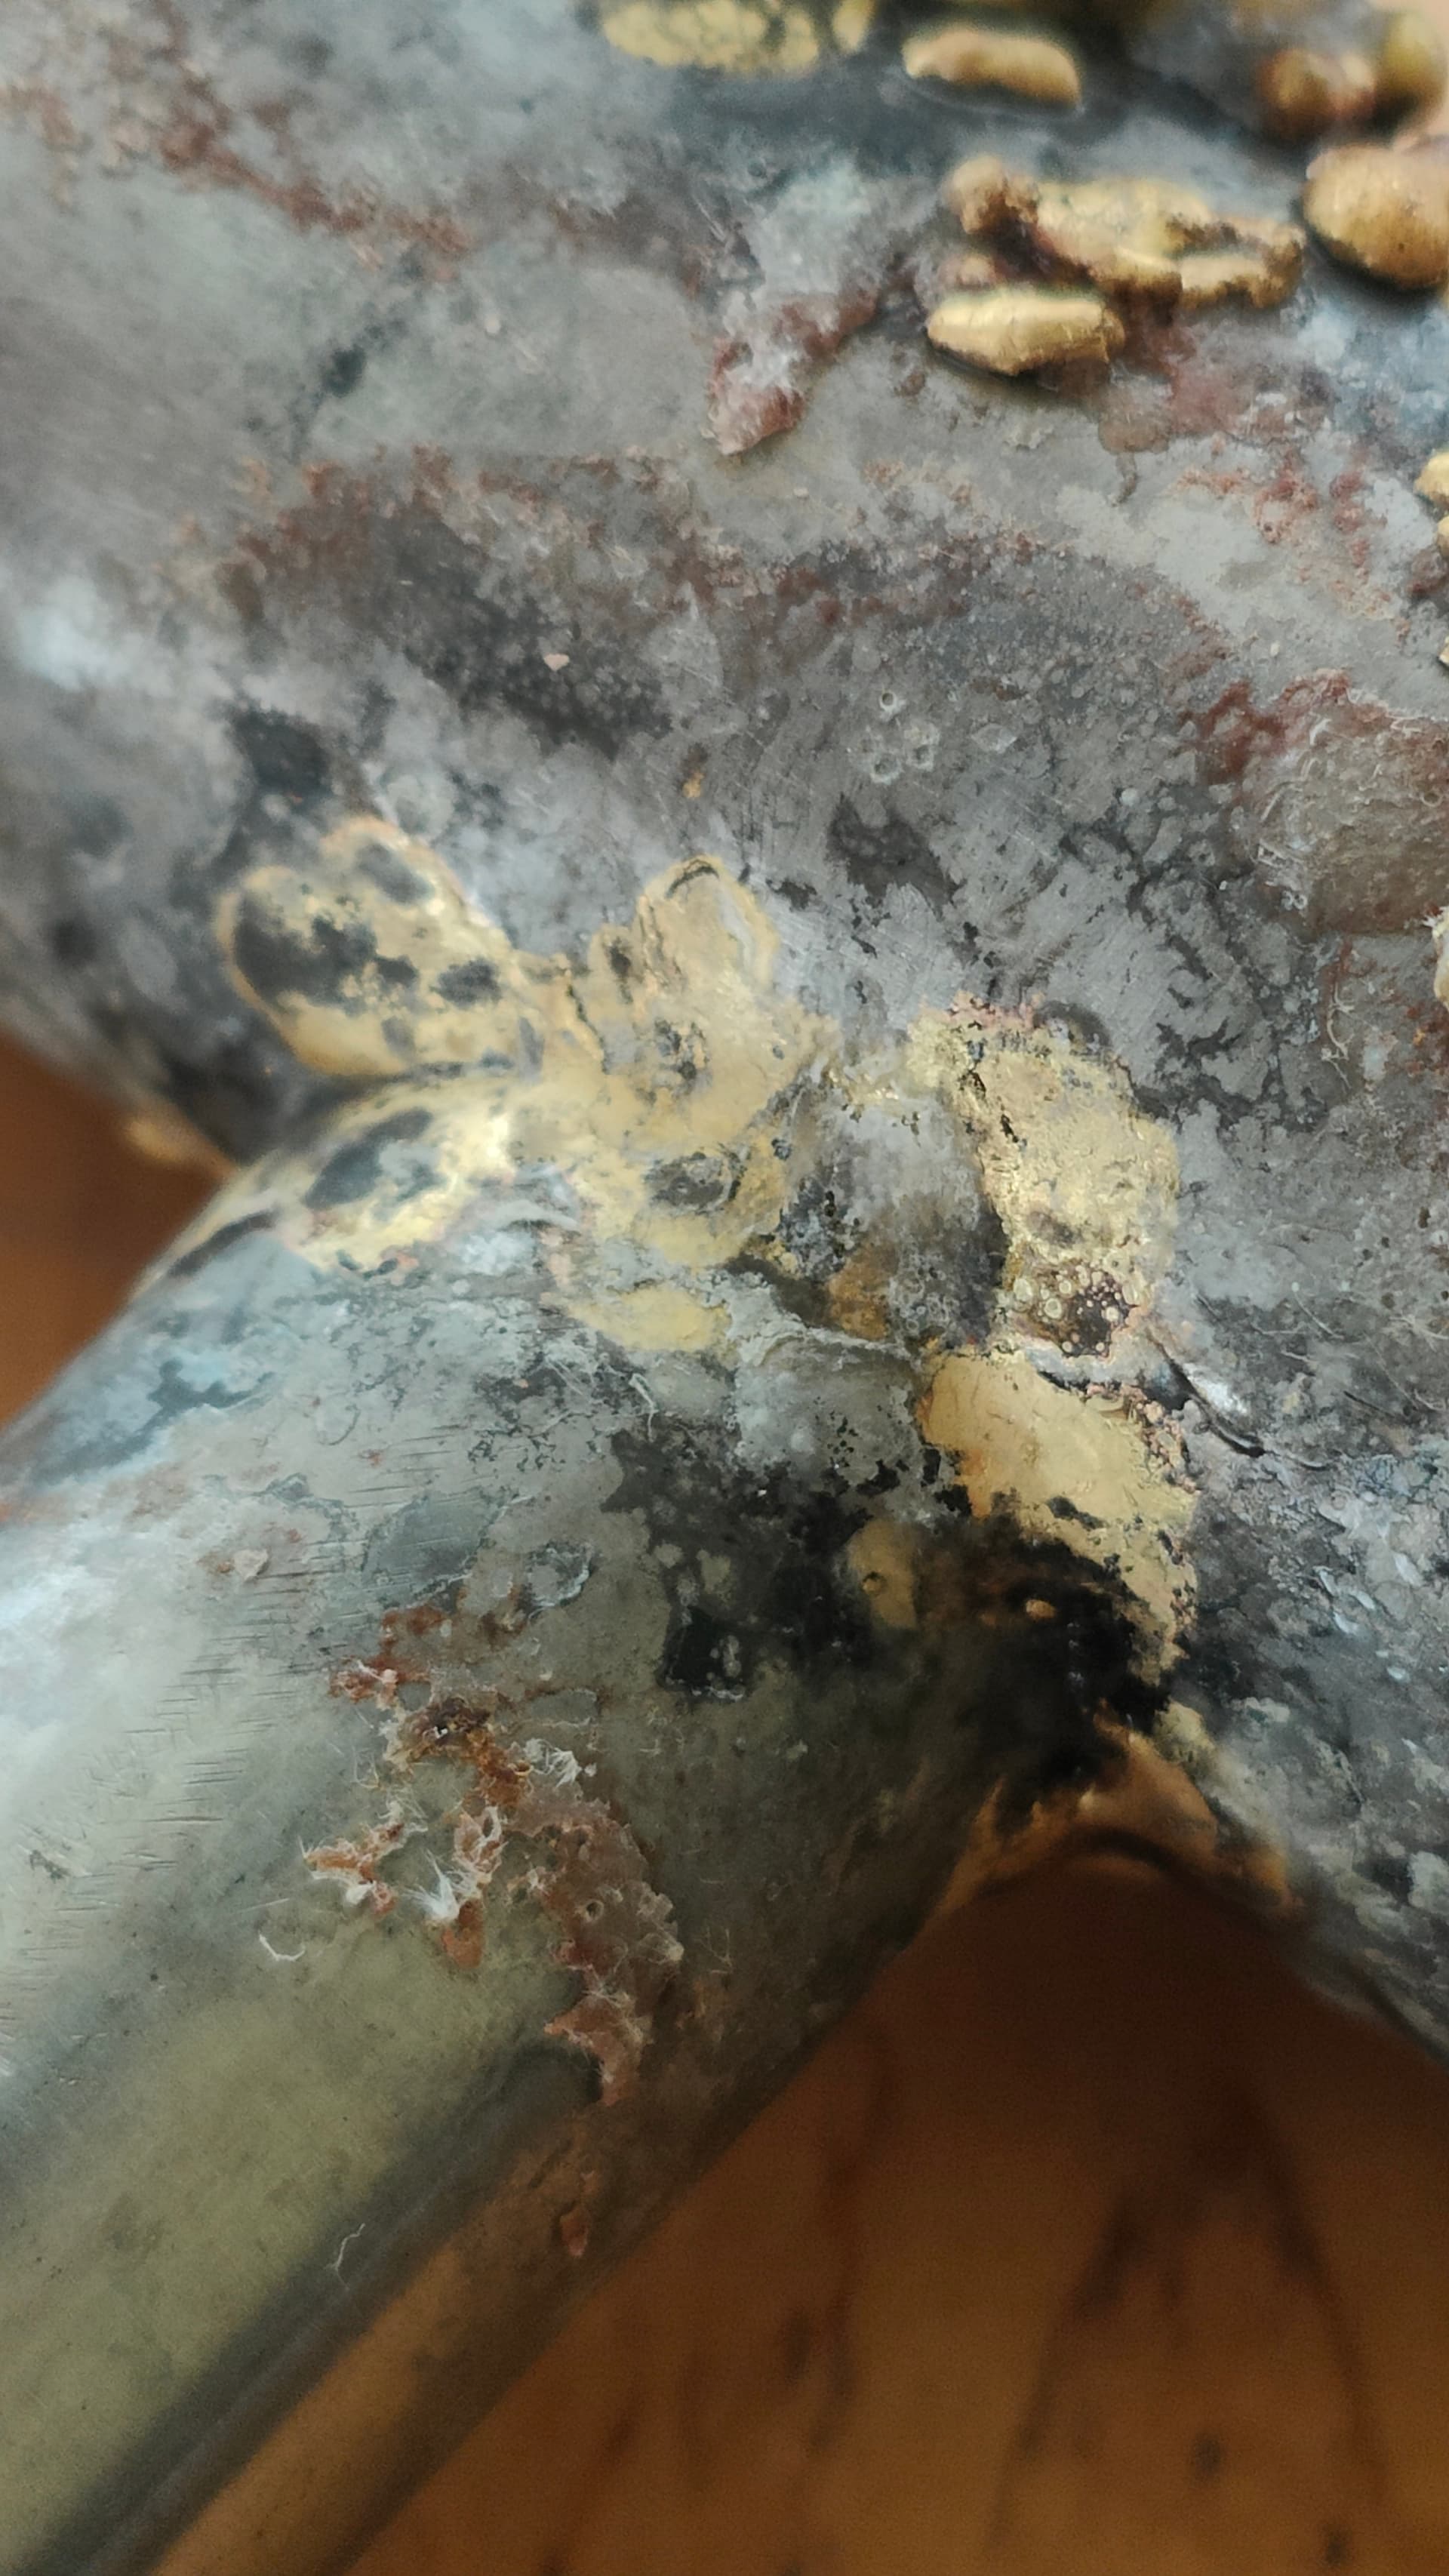
Test 2:
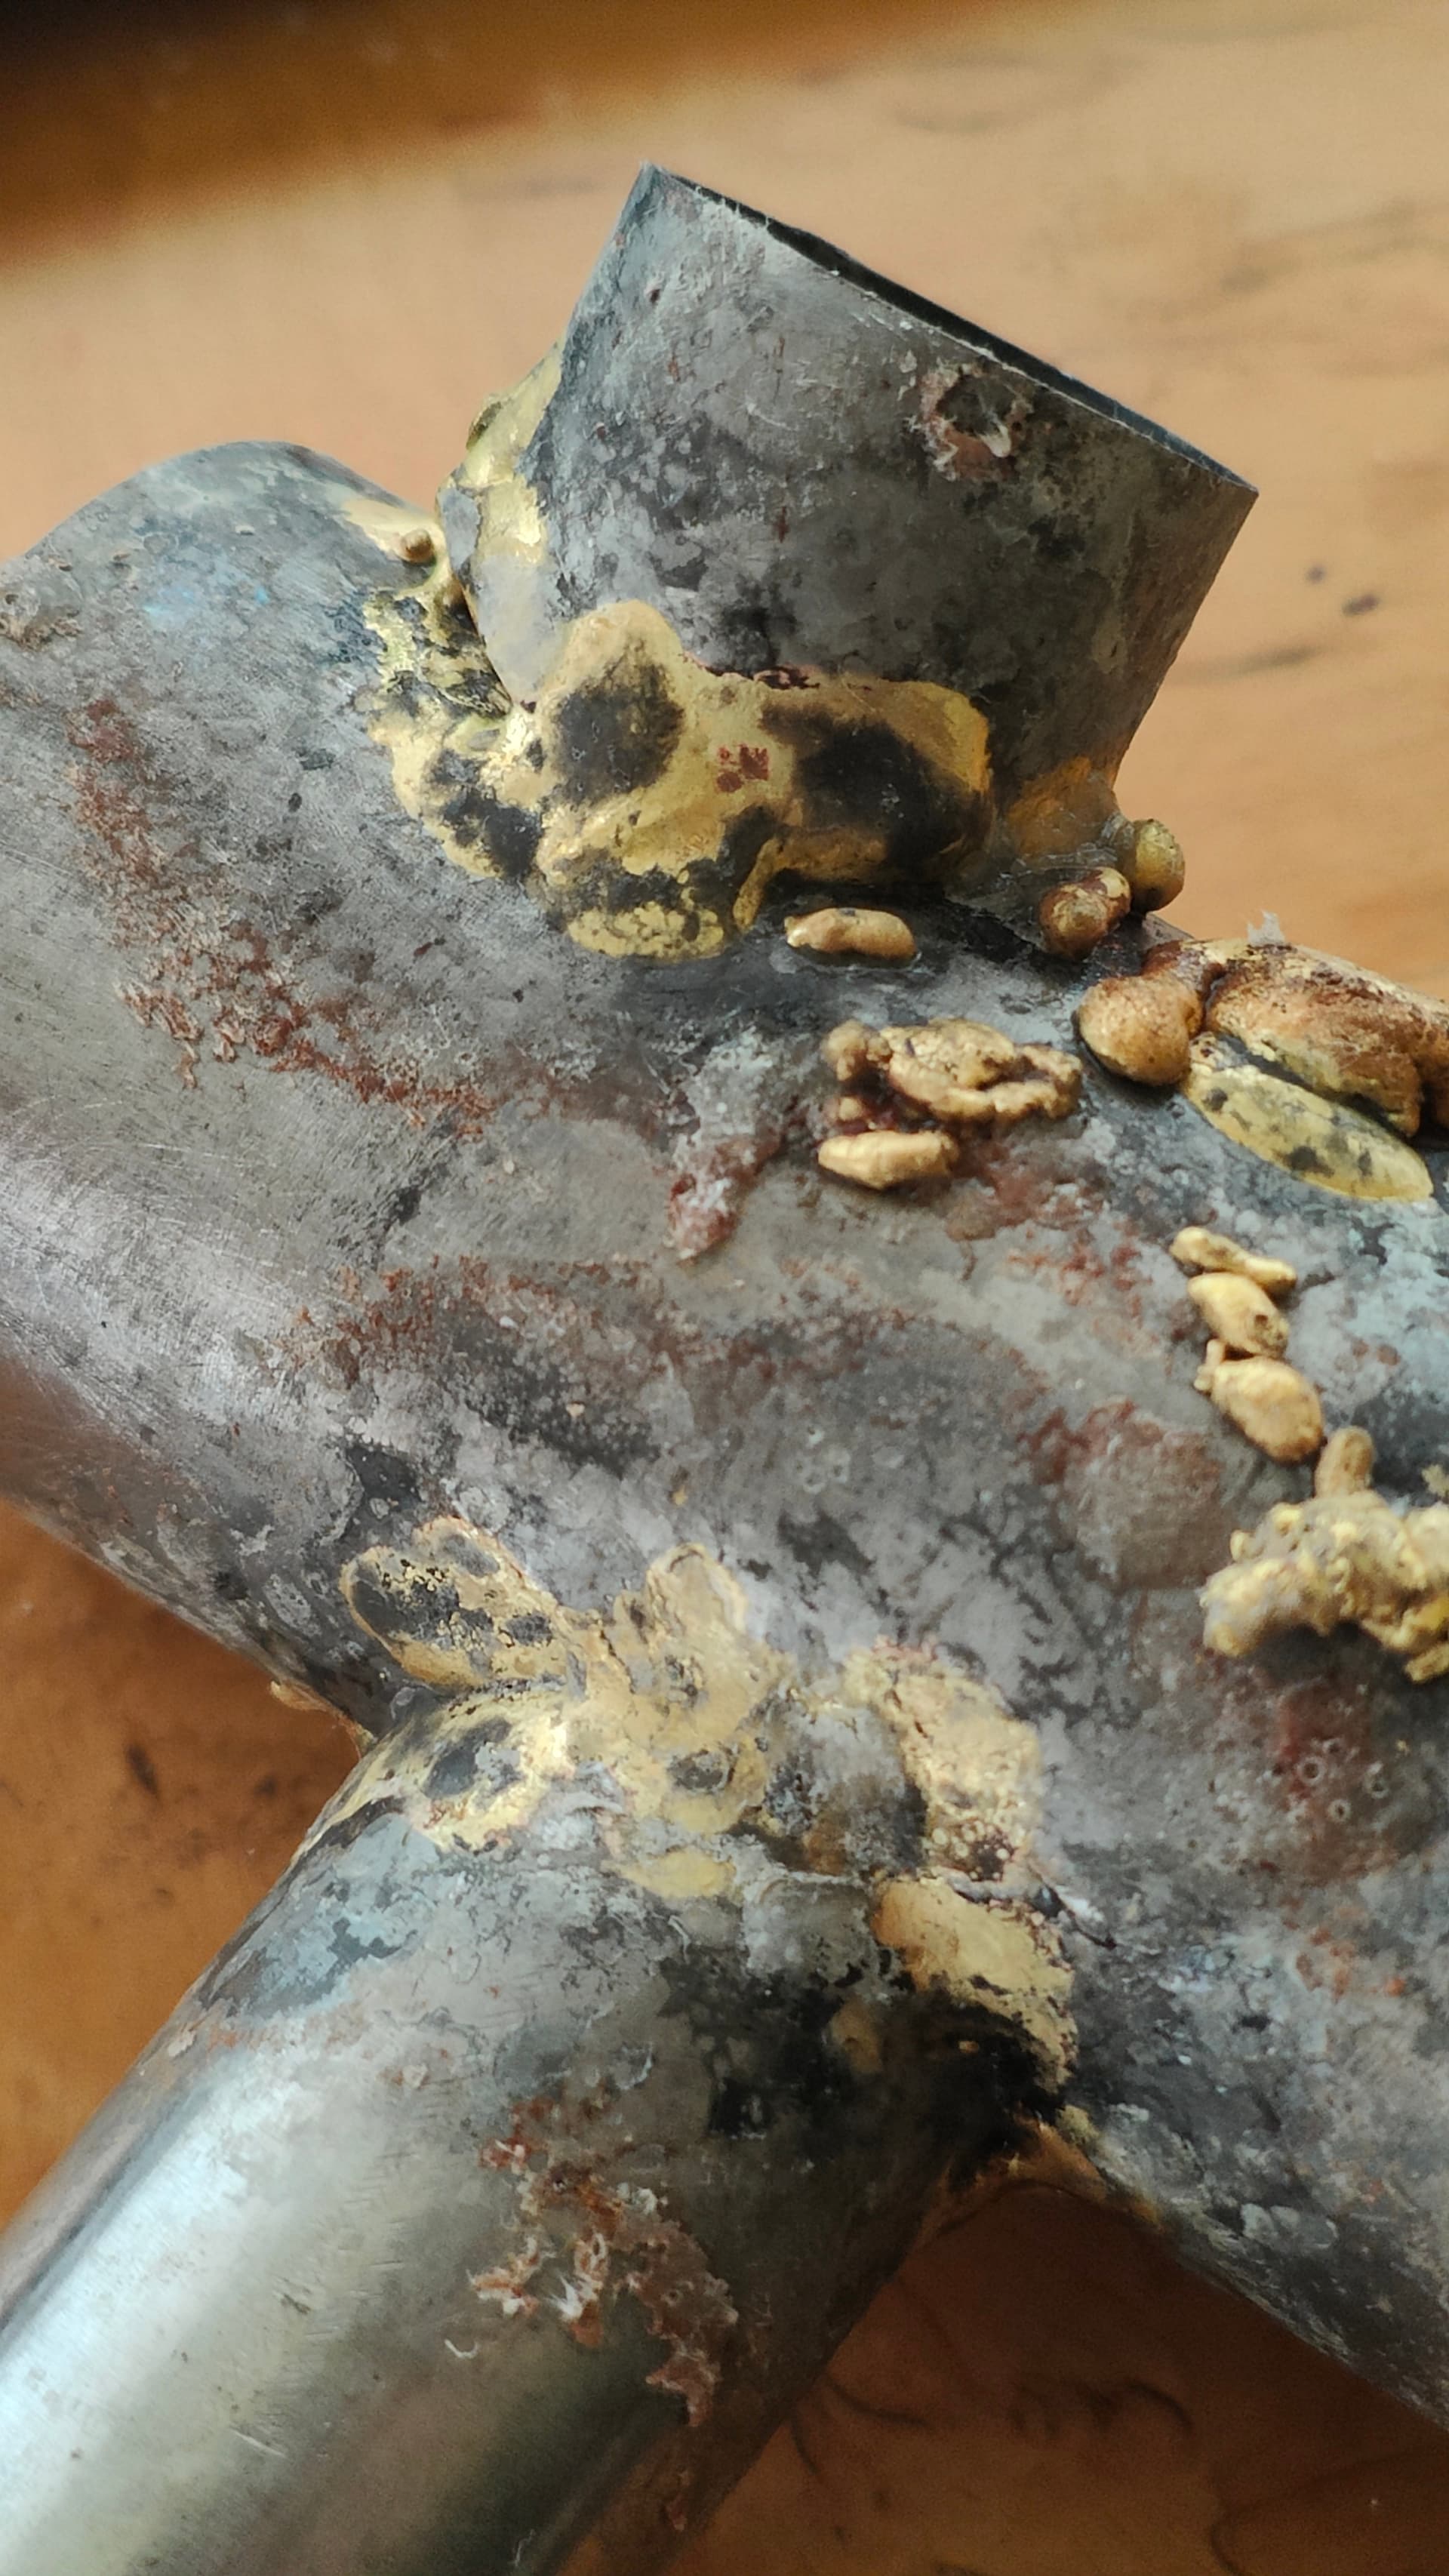
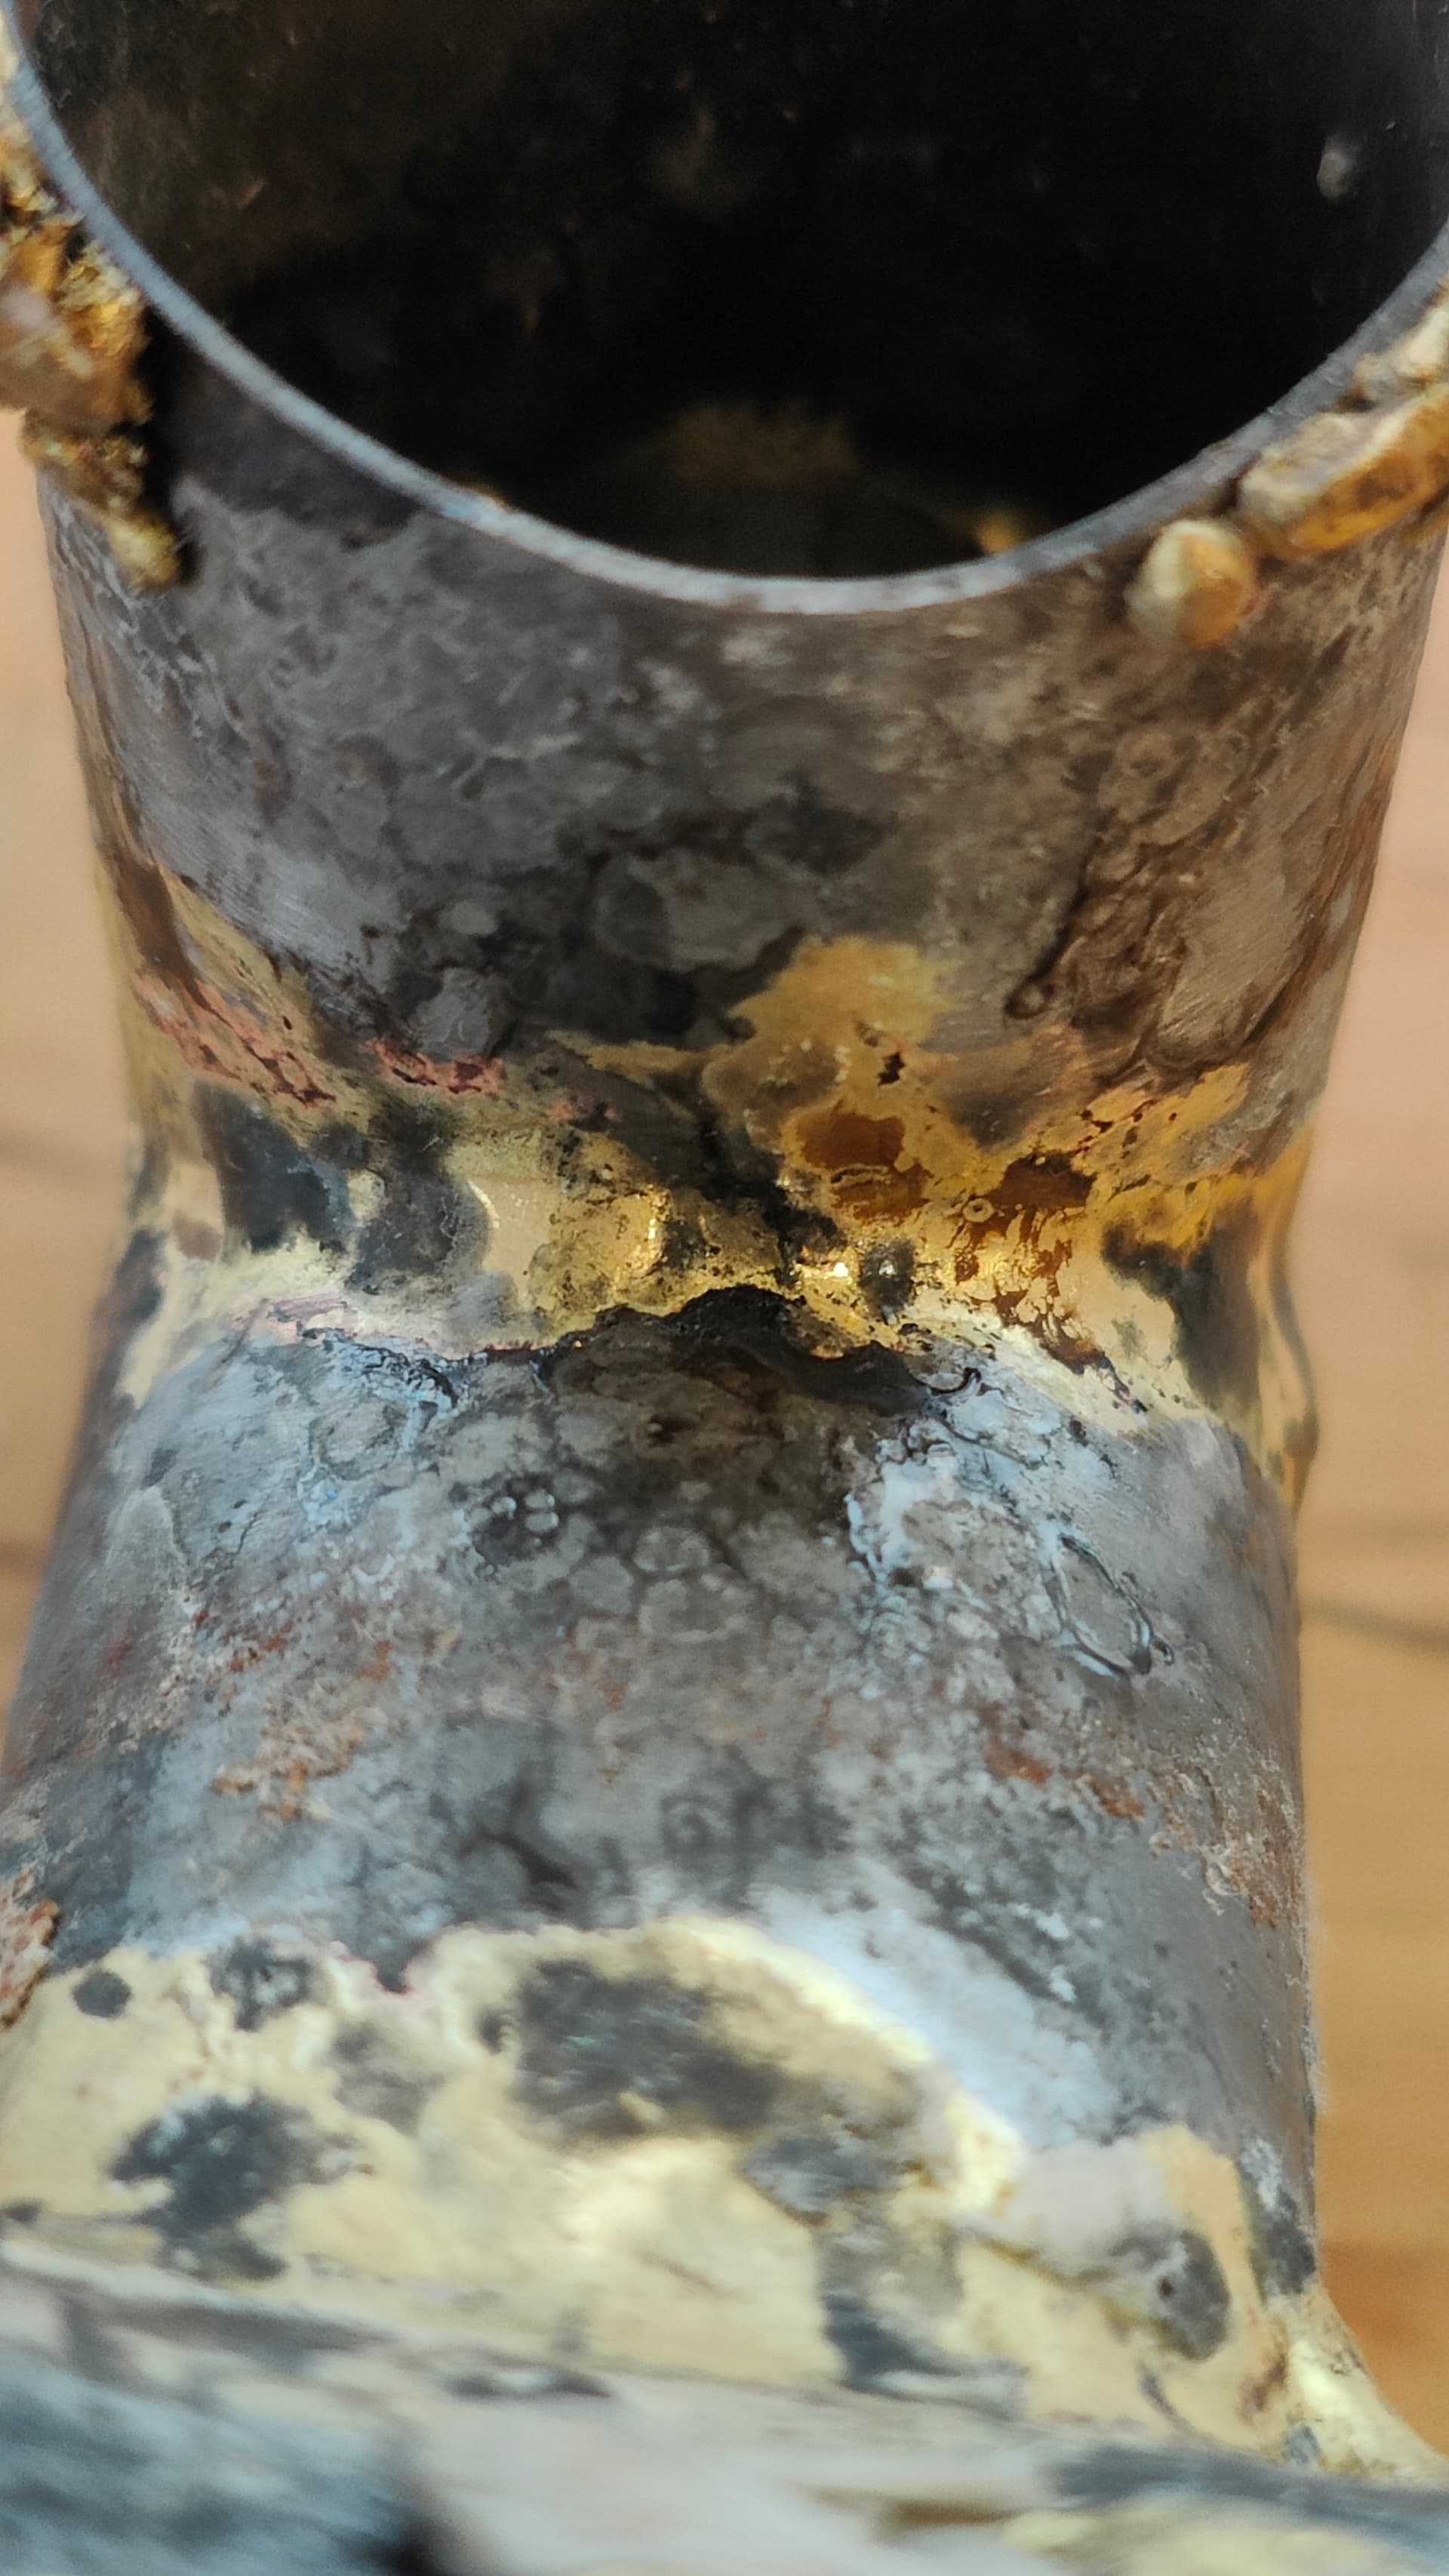
Test 3:
1 Like
Many people have said it before, including myself: Stop trying to do joints!
4 Likes
Still too cold!
3 Likes
Proof again that the Internet is not the best place to try and learn Brazing.
3 Likes
I came here because i had a problem, not to learn brazing. I have been months/years learning, this is my first time with a torch. Have a good day!
3 Likes
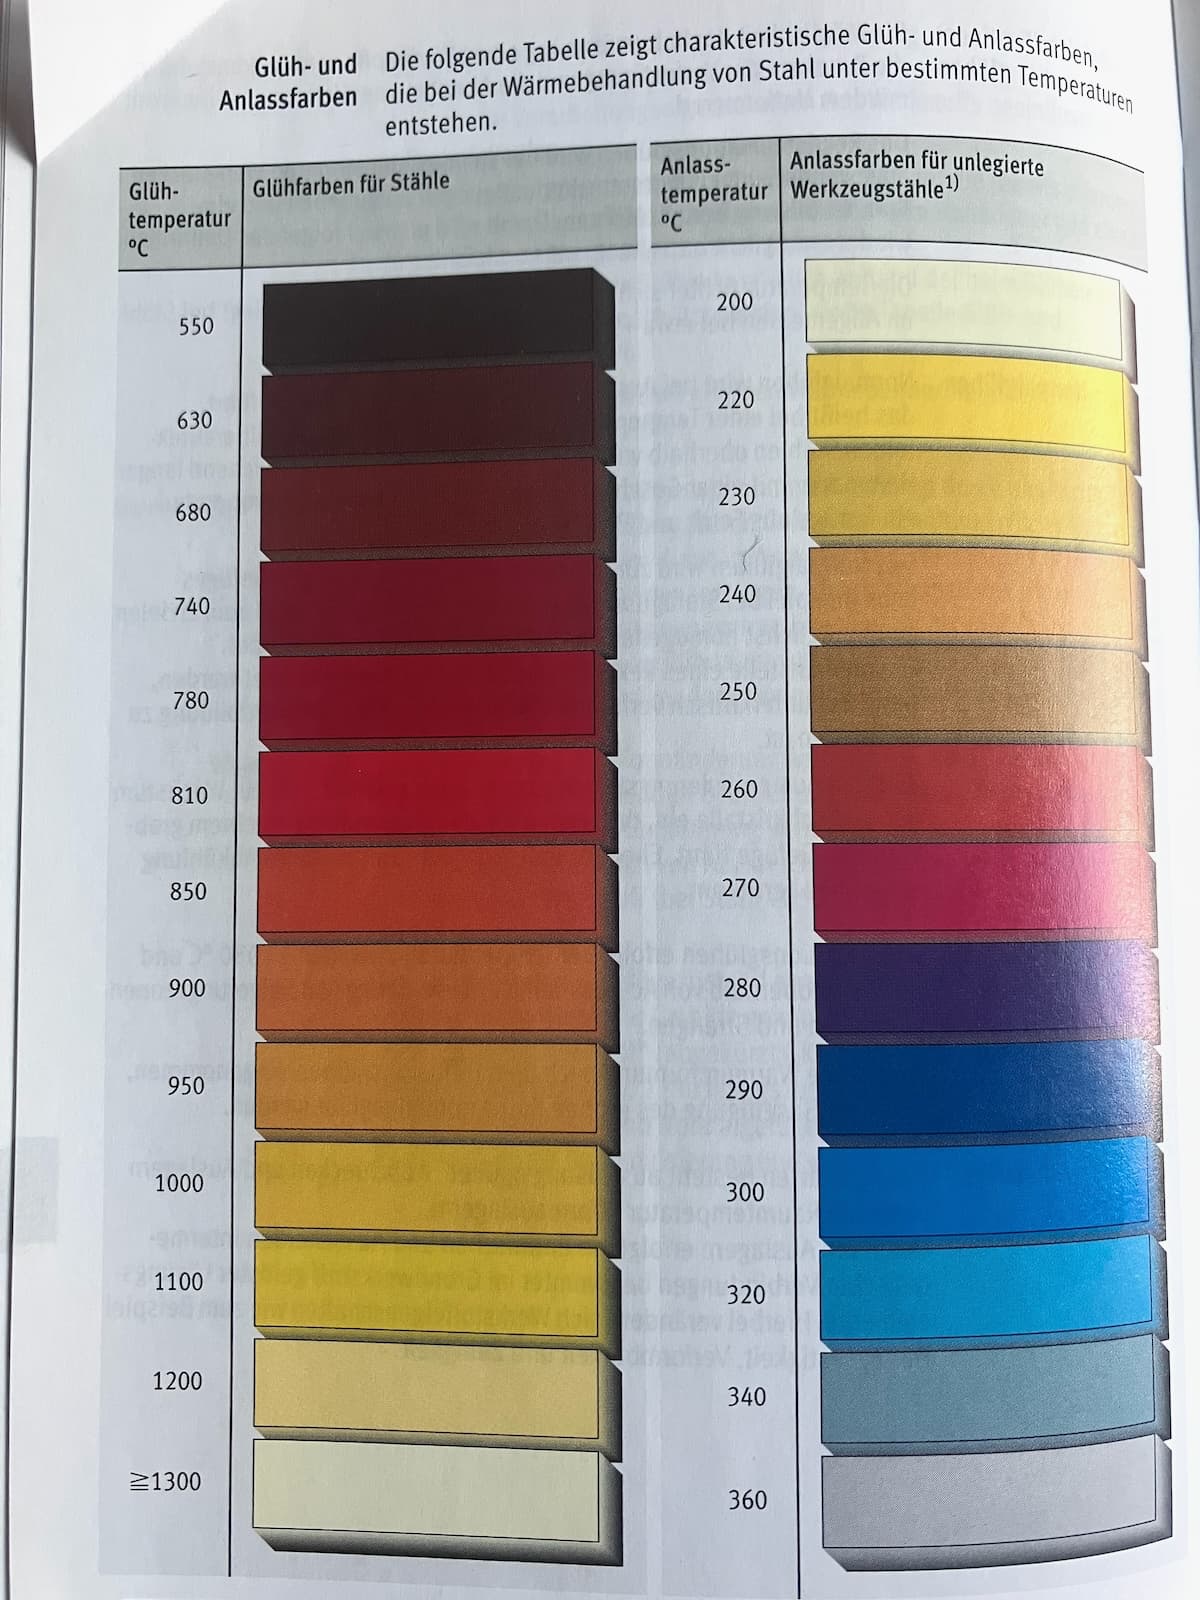
I did not read all here, but looking at your last pics, I have to repeat truth: Still too cold! But how to know the right temperature (range)? Look at the left column, it shows the colours of steel for different temps. And remember, the rod shall melt on the metal (the tube or later the melted filler), not in the flame.
Fearing that orange would be too hot? Watch framebuilder videos on youtube too see what colleagues do.
You’ll get it!
4 Likes
Also burning holes in shit can be both informative and fun. Try to gas weld!
Another thought I had just in general for folks trying brazing for the first time - be careful what you use to clean the tube. I’ve found you can’t really go wrong with an old bit of 80grit, cleans really nice but you got to be careful you don’t trap particles of it in the joint. Wire wheels are easy but I’ve had some that for some reason just seem to contaminate everything.
And wipe down with iso or acetone prior to flux. Might be repeating things, soz.
3 Likes
Good advice. A legend who’s local to me named Chris Kvale only sands his tubes along the length because he says silver/bronze flows into the joint better. Now I do it too.
3 Likes
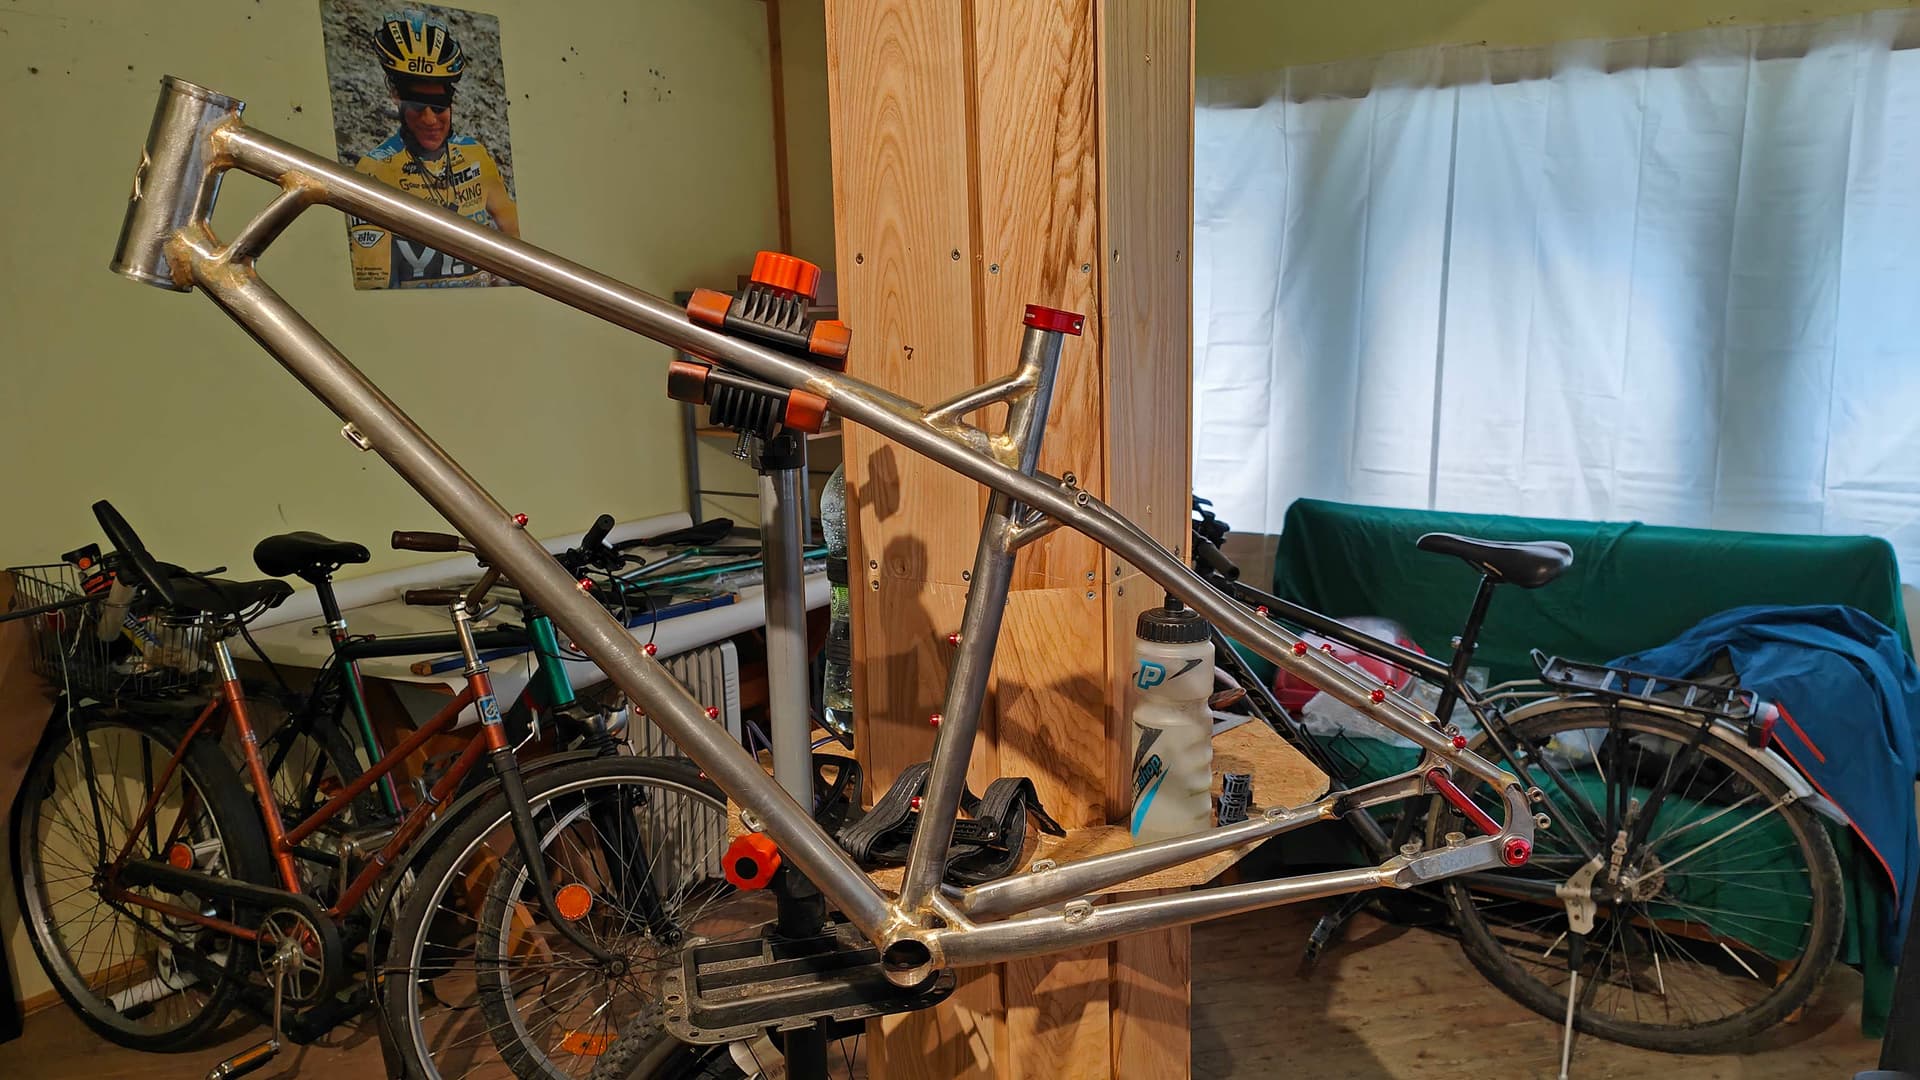
I’m just popping in here for a moment to thank everyone who helped me solve the minor problems while creating my first frame. It is not perfect, but much better than i hope for the first one.
Now it’s waiting for the stickers and paint, and I’ll soon be out enjoying it on the trails. You can see some details here (there’s still a lot of work to be done on the website, too). Cheers!
4 Likes
Chapbikes- Please do follow up with on the riding trail report. I find the added bracing tubes interesting, although I wonder of what real benefit some have:) Andy
1 Like
Thanks for your comment, I’ll definitely be happy to comment the riding experience. Not everything in life is benefit. ![]()