[quote=“Chapbikes, post:100, topic:297”]
“Not everything in life is benefit.”[/quote]
For real! I figure about 90% of my metal work is for no benefit but to me and a fair chunk of that gets redone or scrapped soon after completing. Andy
[quote=“Chapbikes, post:100, topic:297”]
“Not everything in life is benefit.”[/quote]
For real! I figure about 90% of my metal work is for no benefit but to me and a fair chunk of that gets redone or scrapped soon after completing. Andy
Well done! Looks amazing.
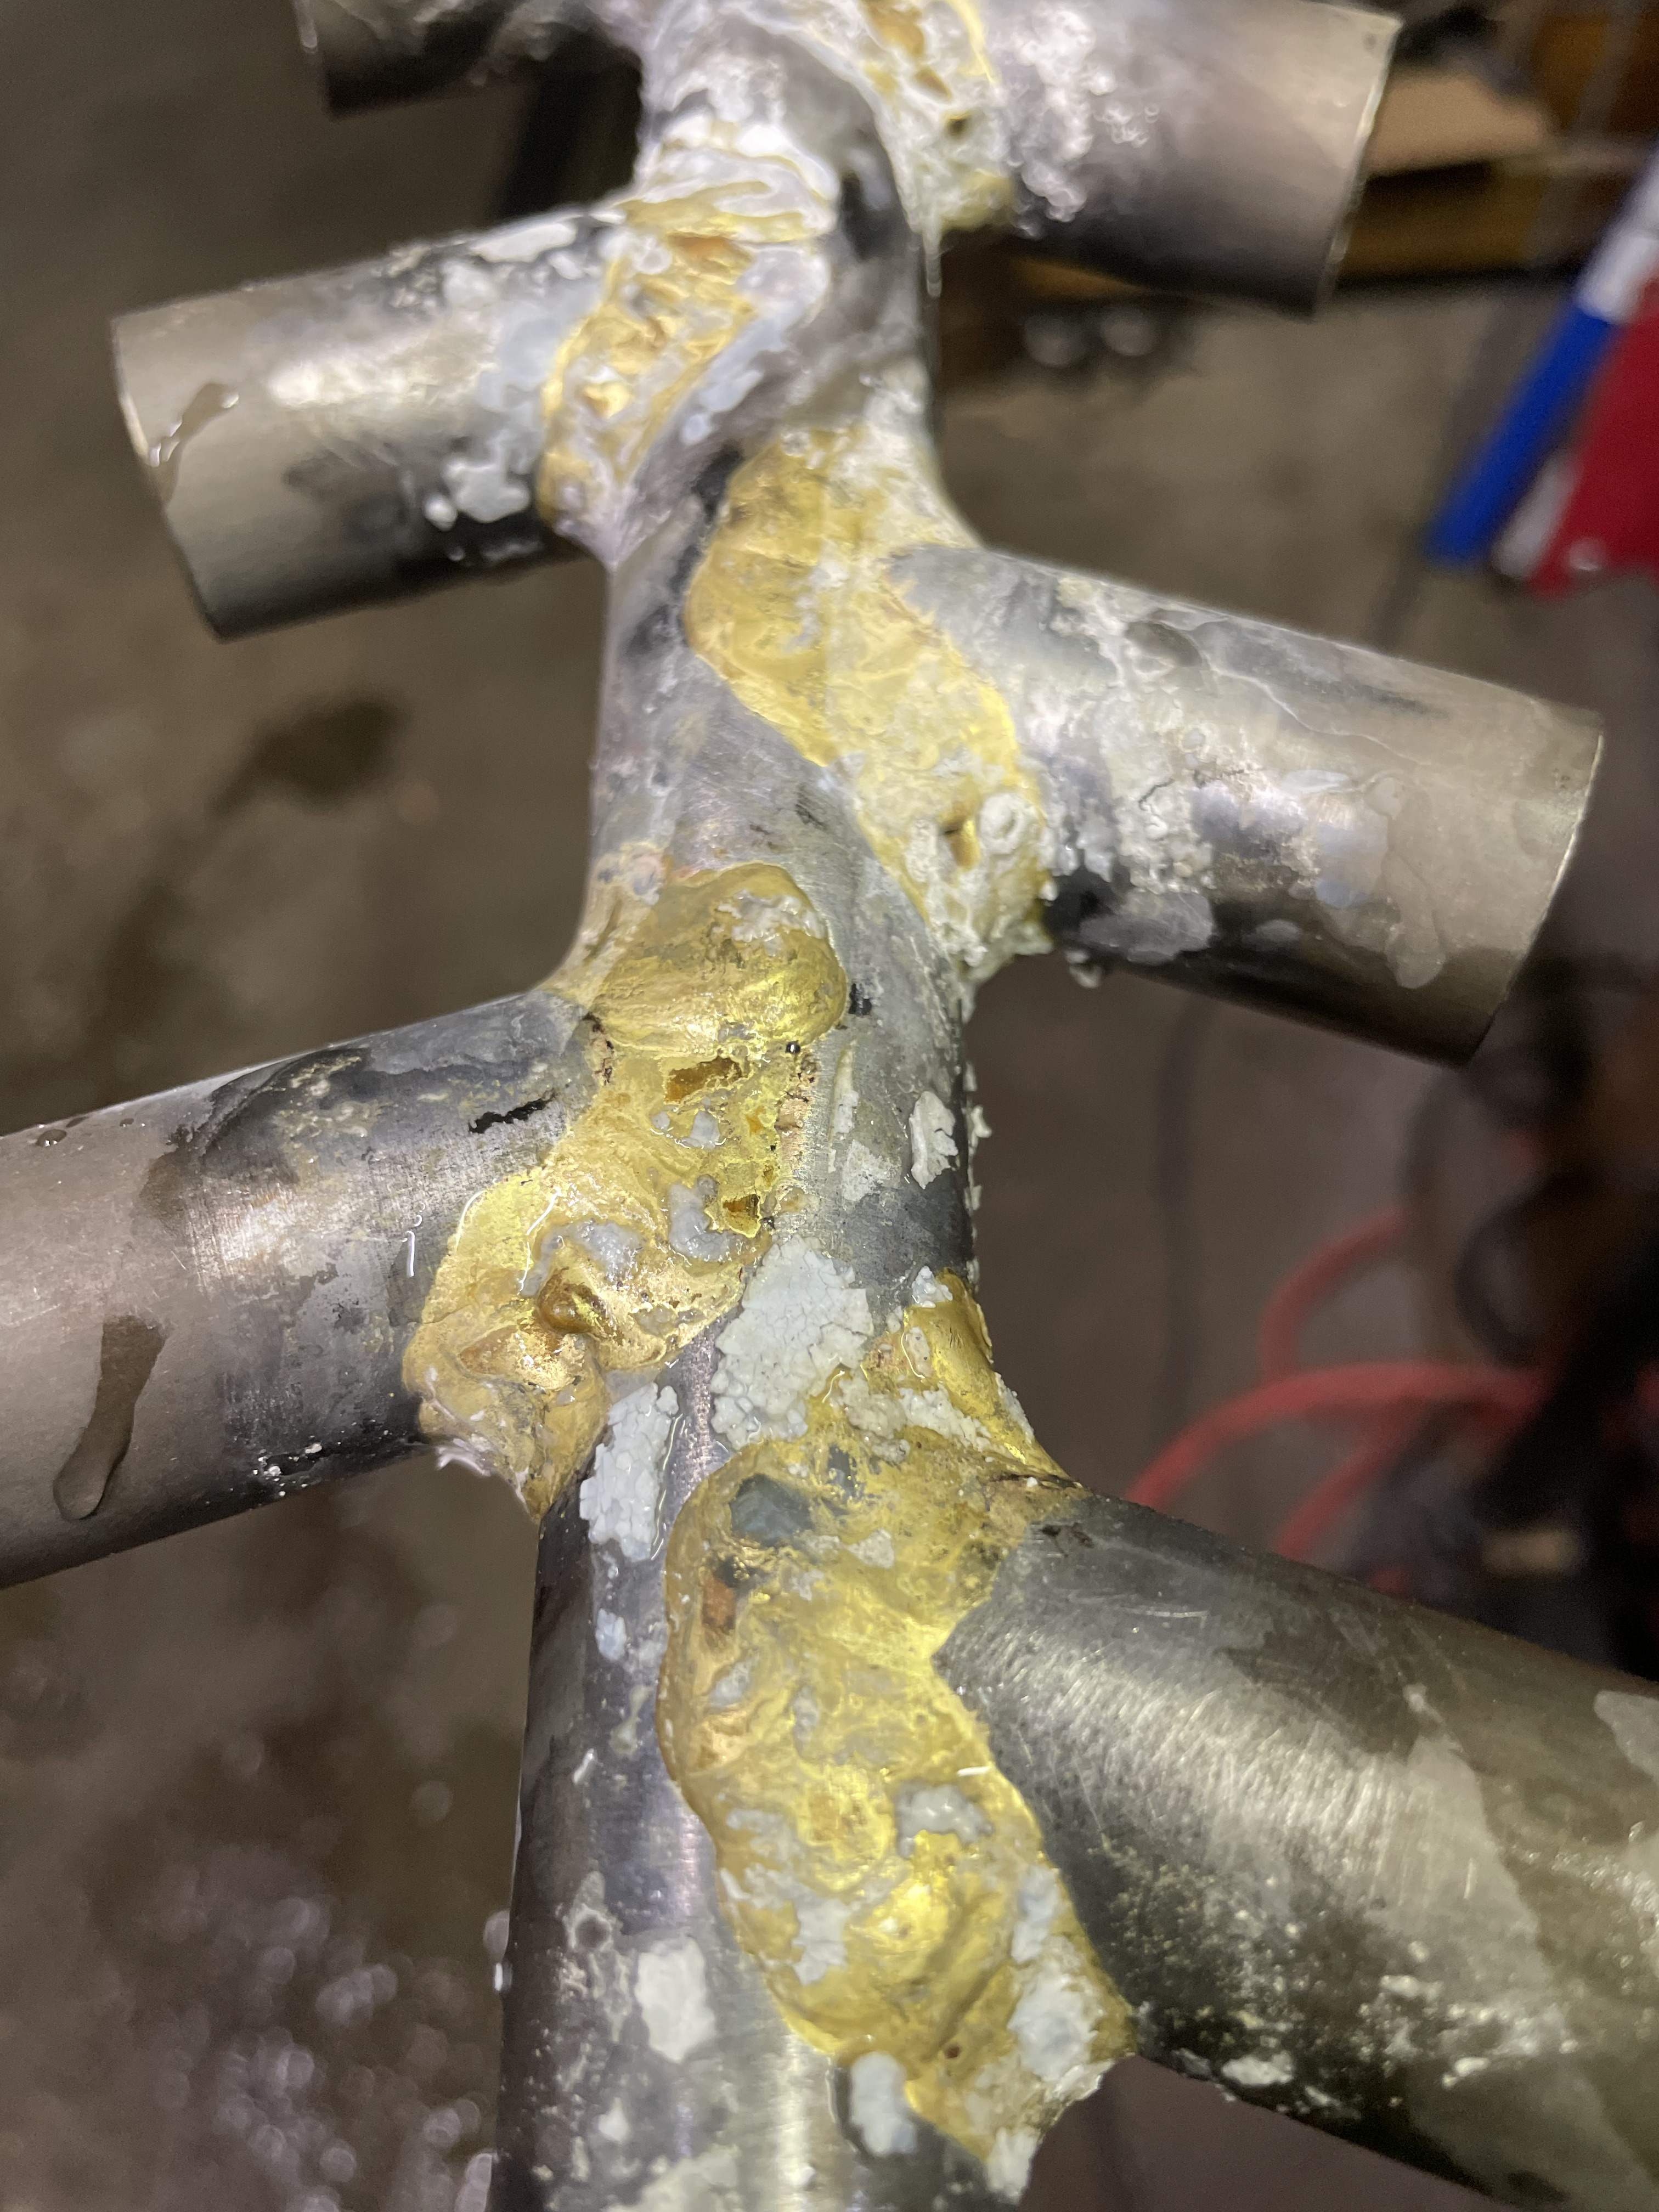
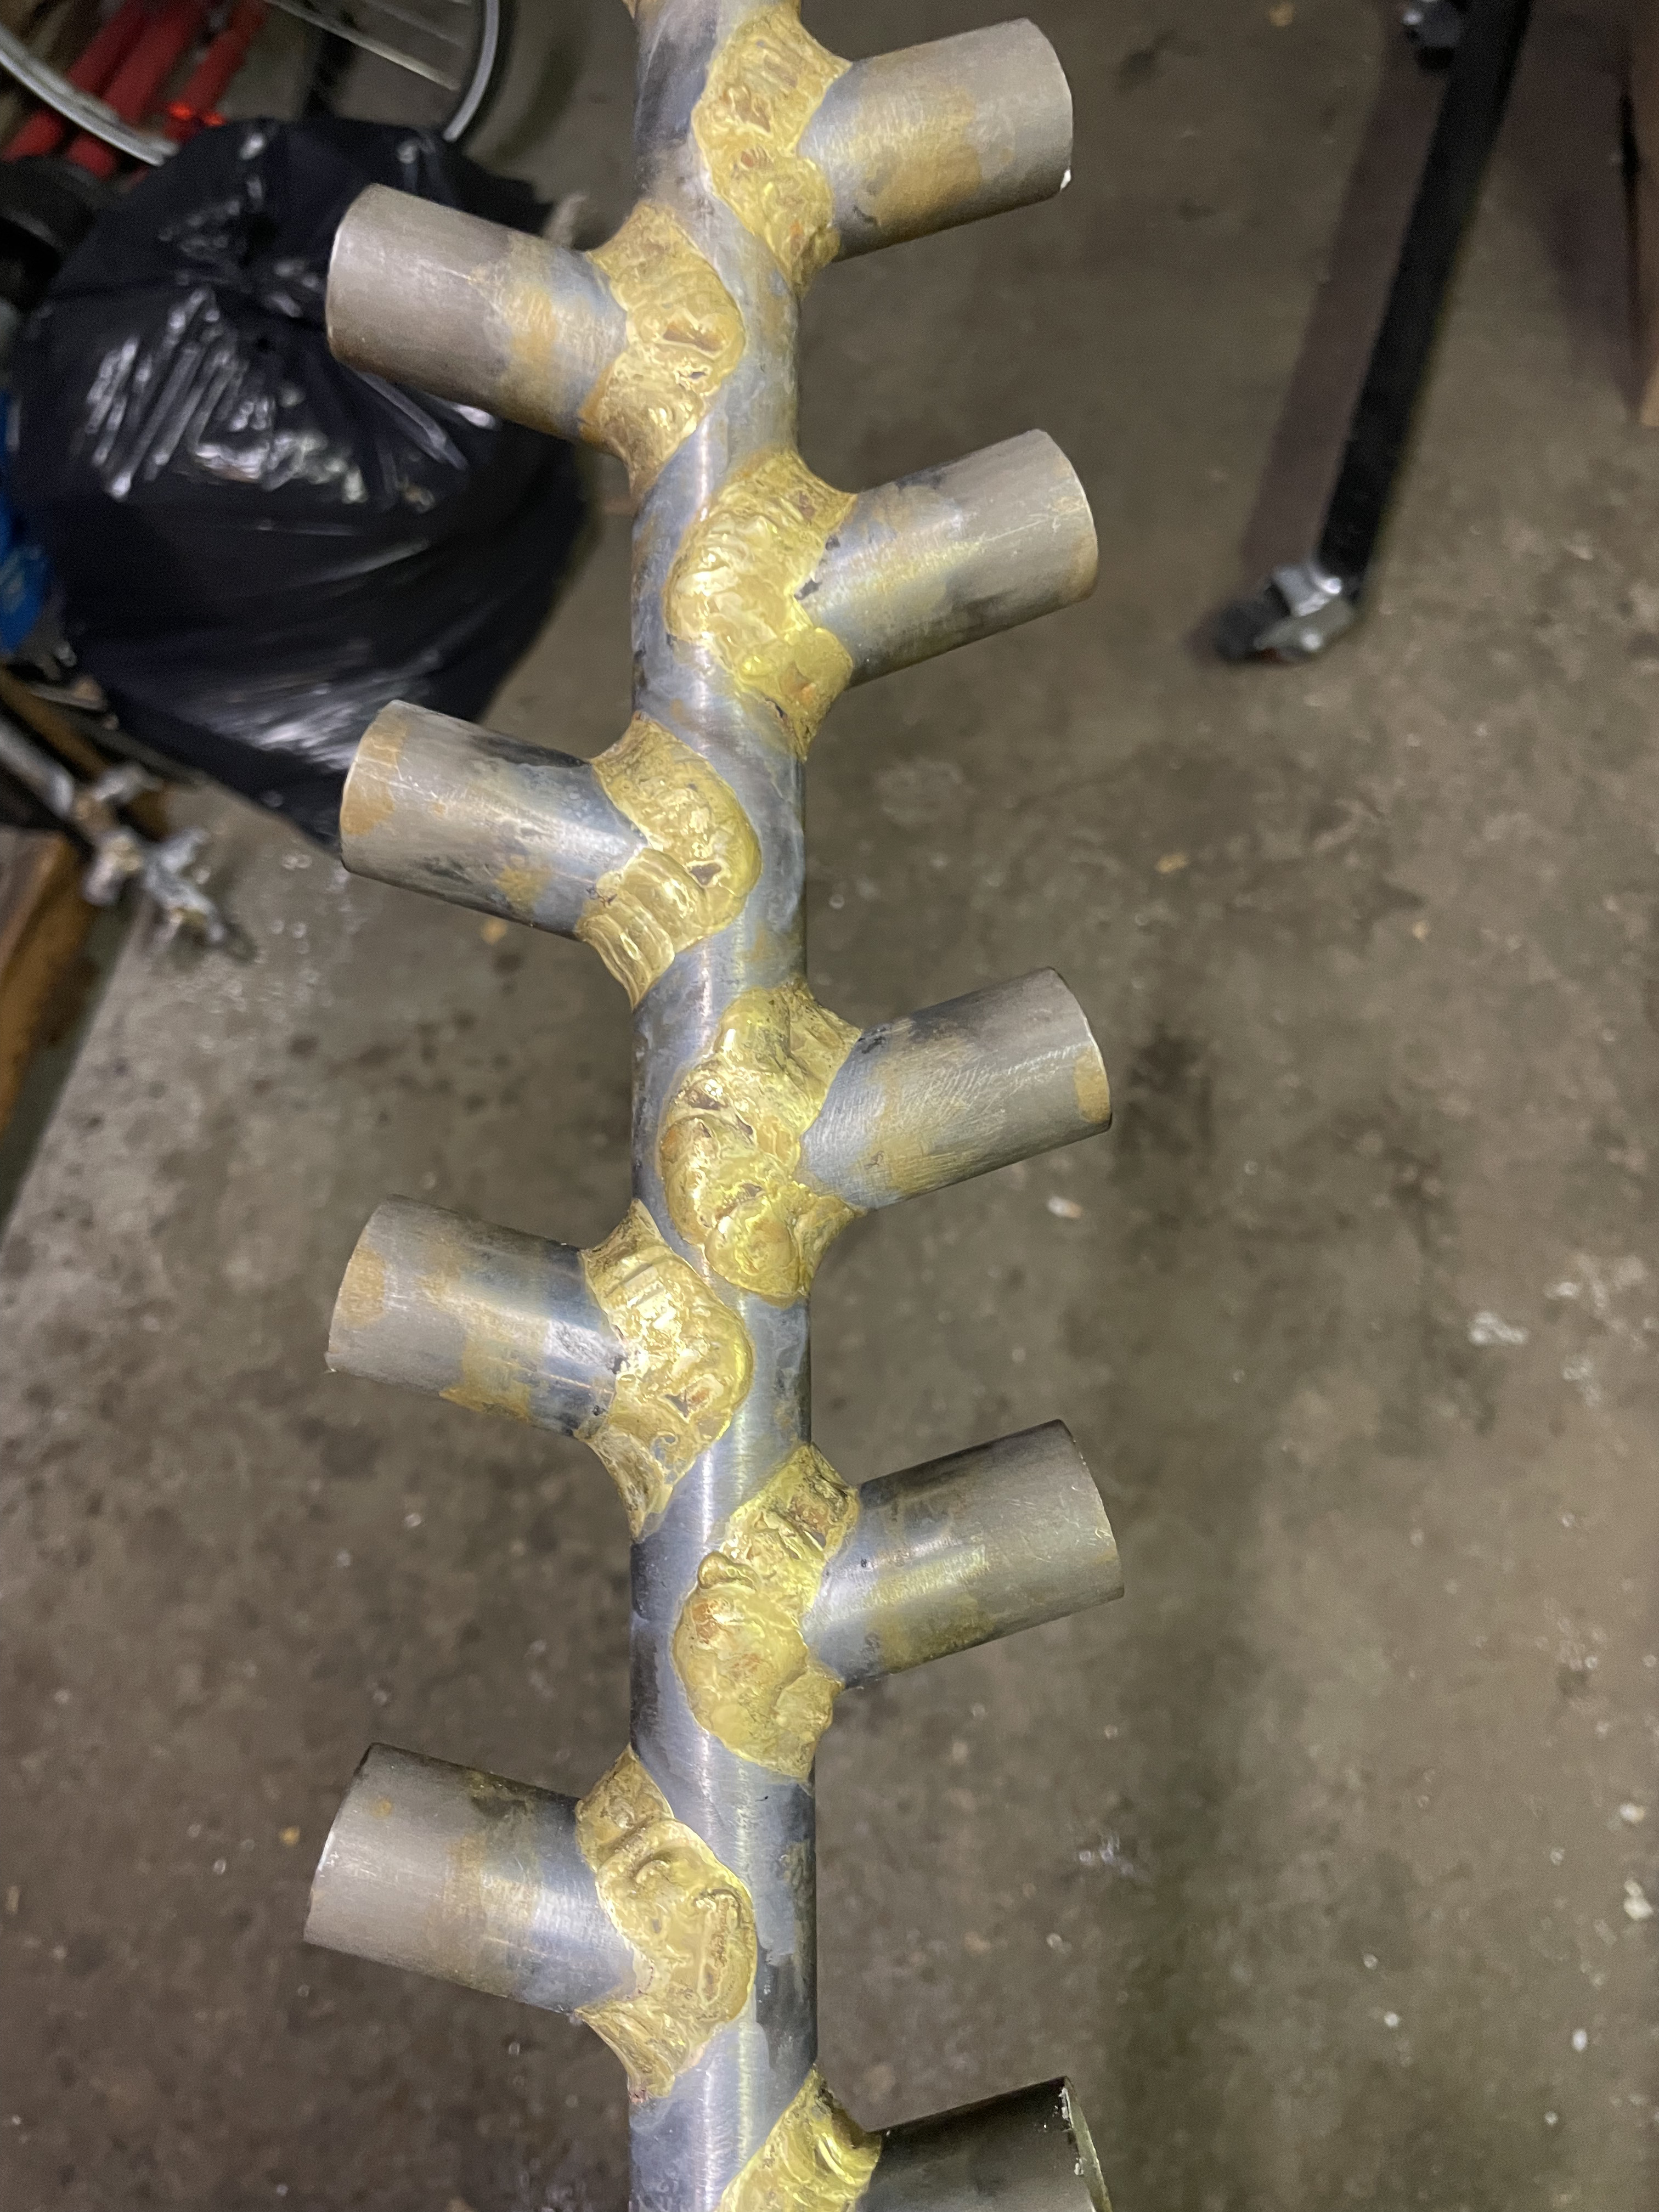
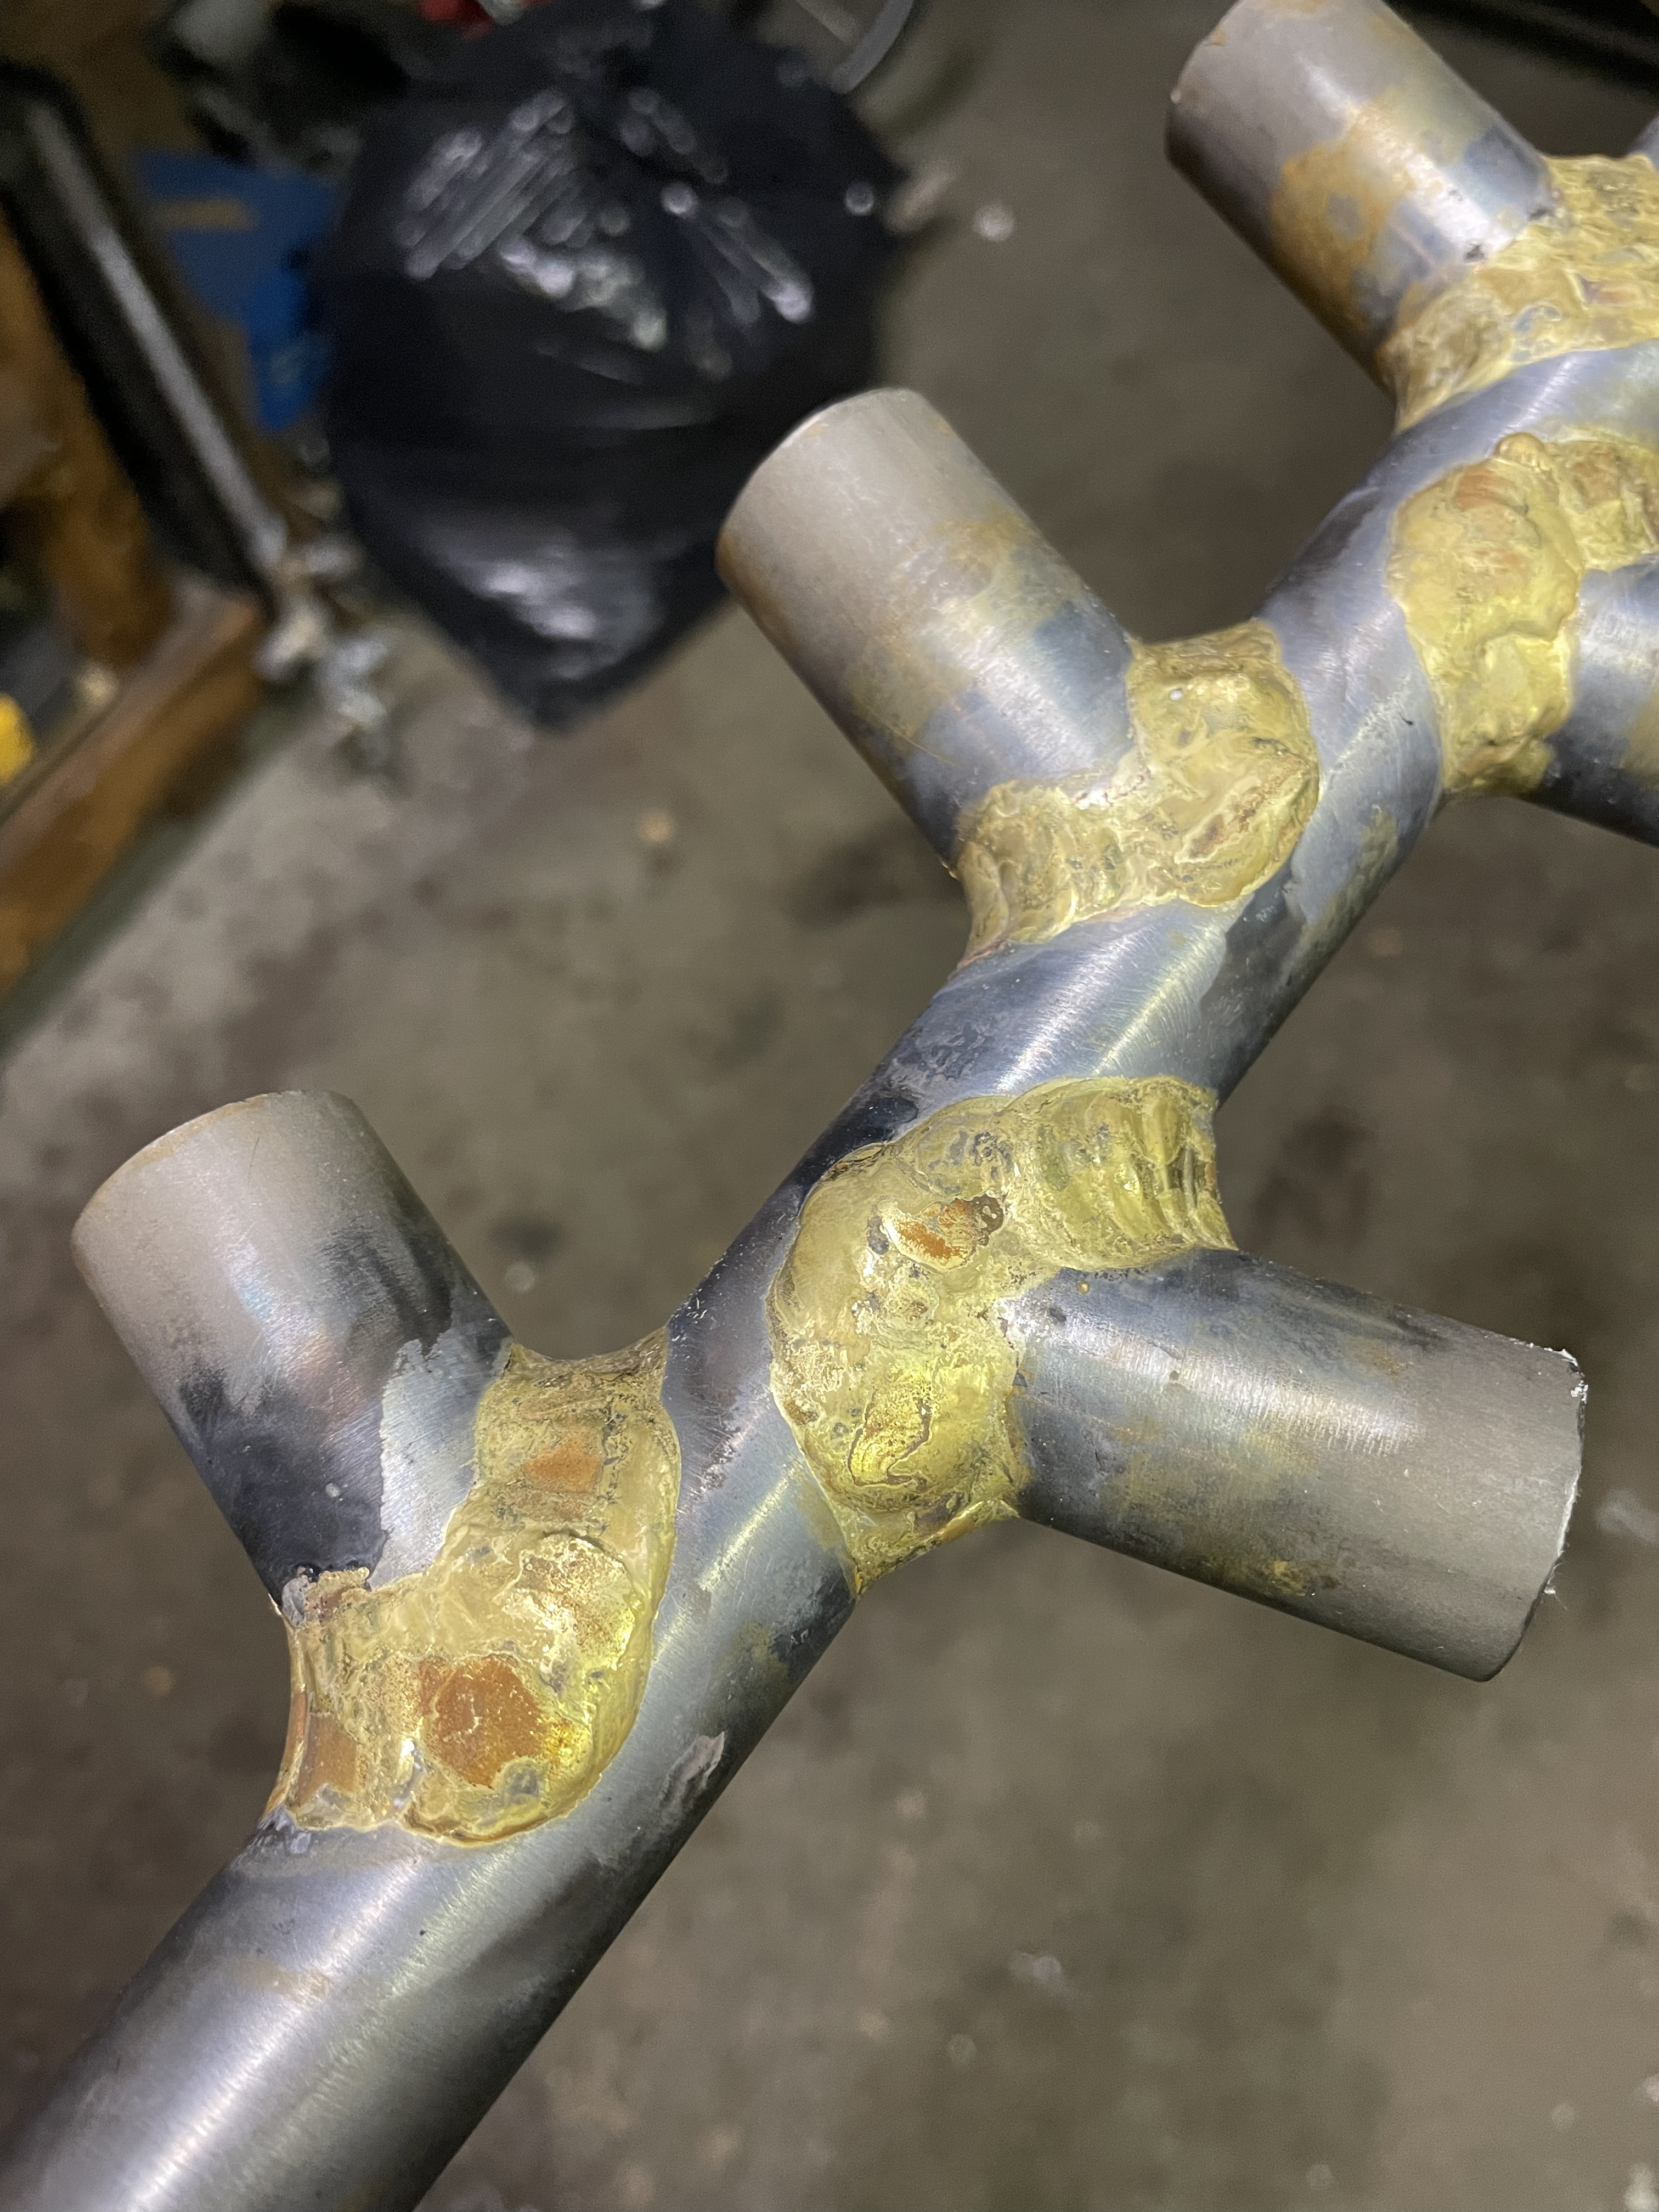
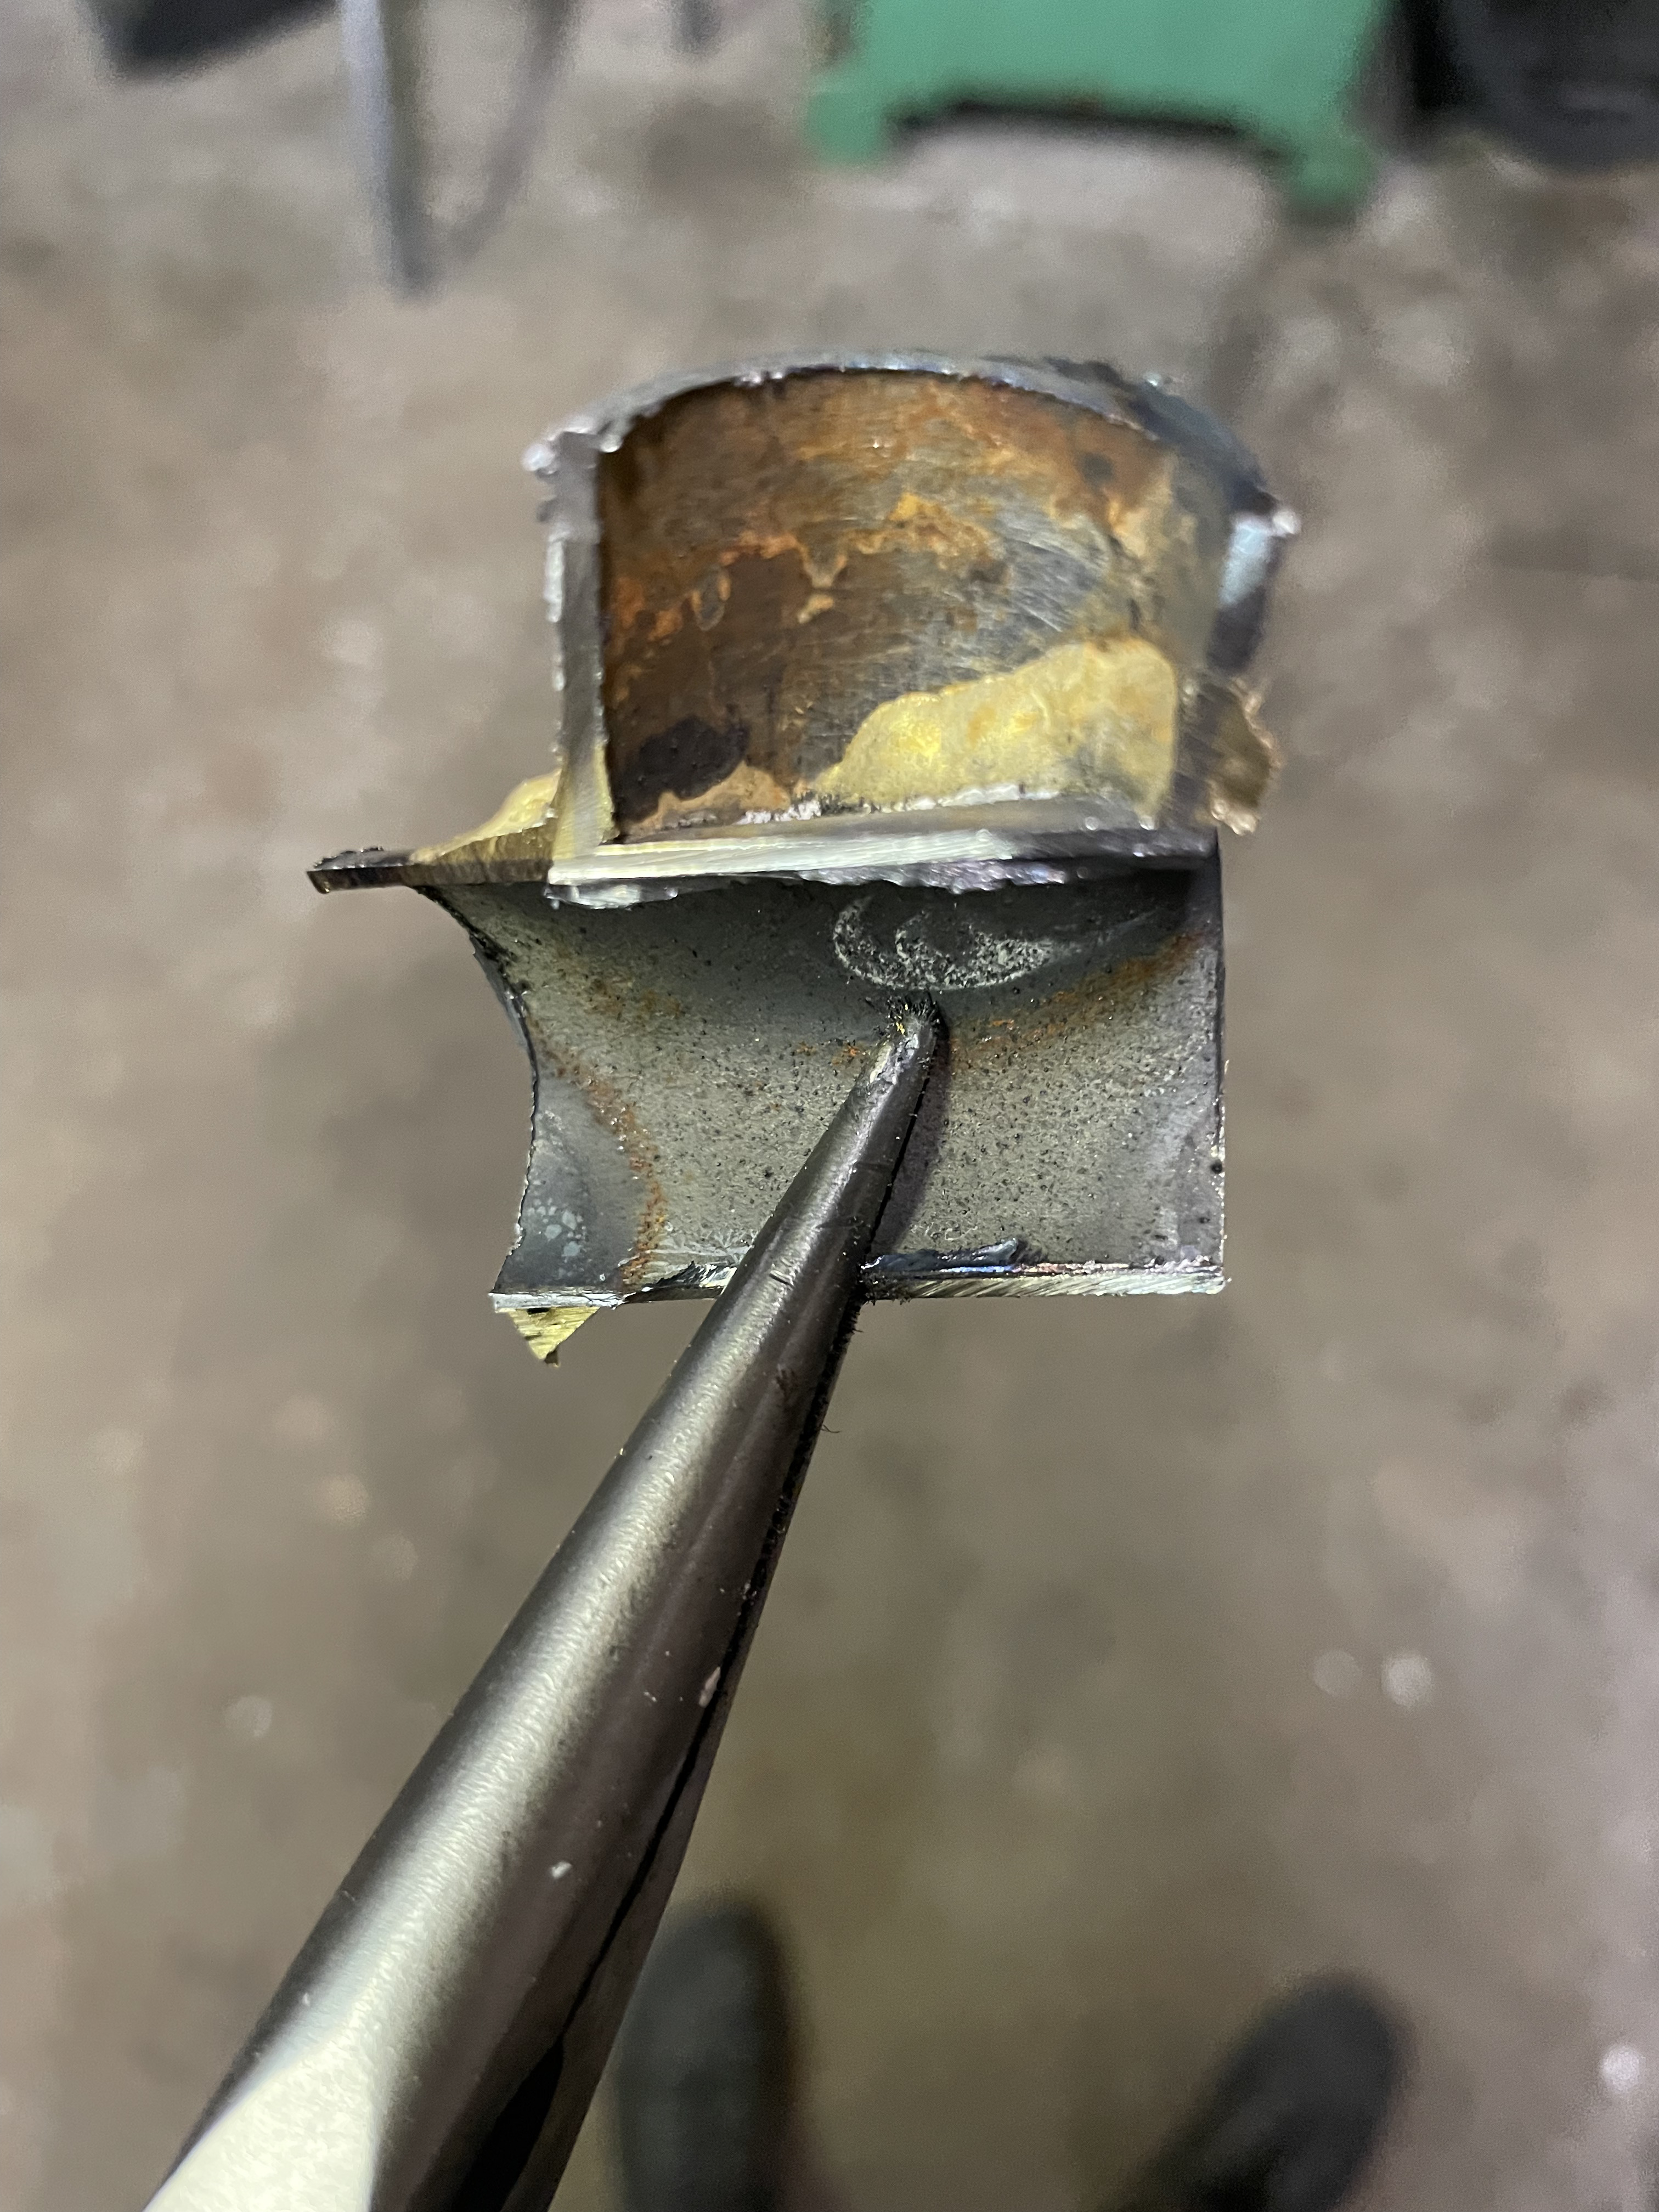
I wonder if someone could help me troubleshooting my fillets. I took a class 2 years ago but didn’t get to practice much since then, so I’m only now getting back into it. For now I’m just practicing joints with 2” stubs of tubing, mitered at an angle.
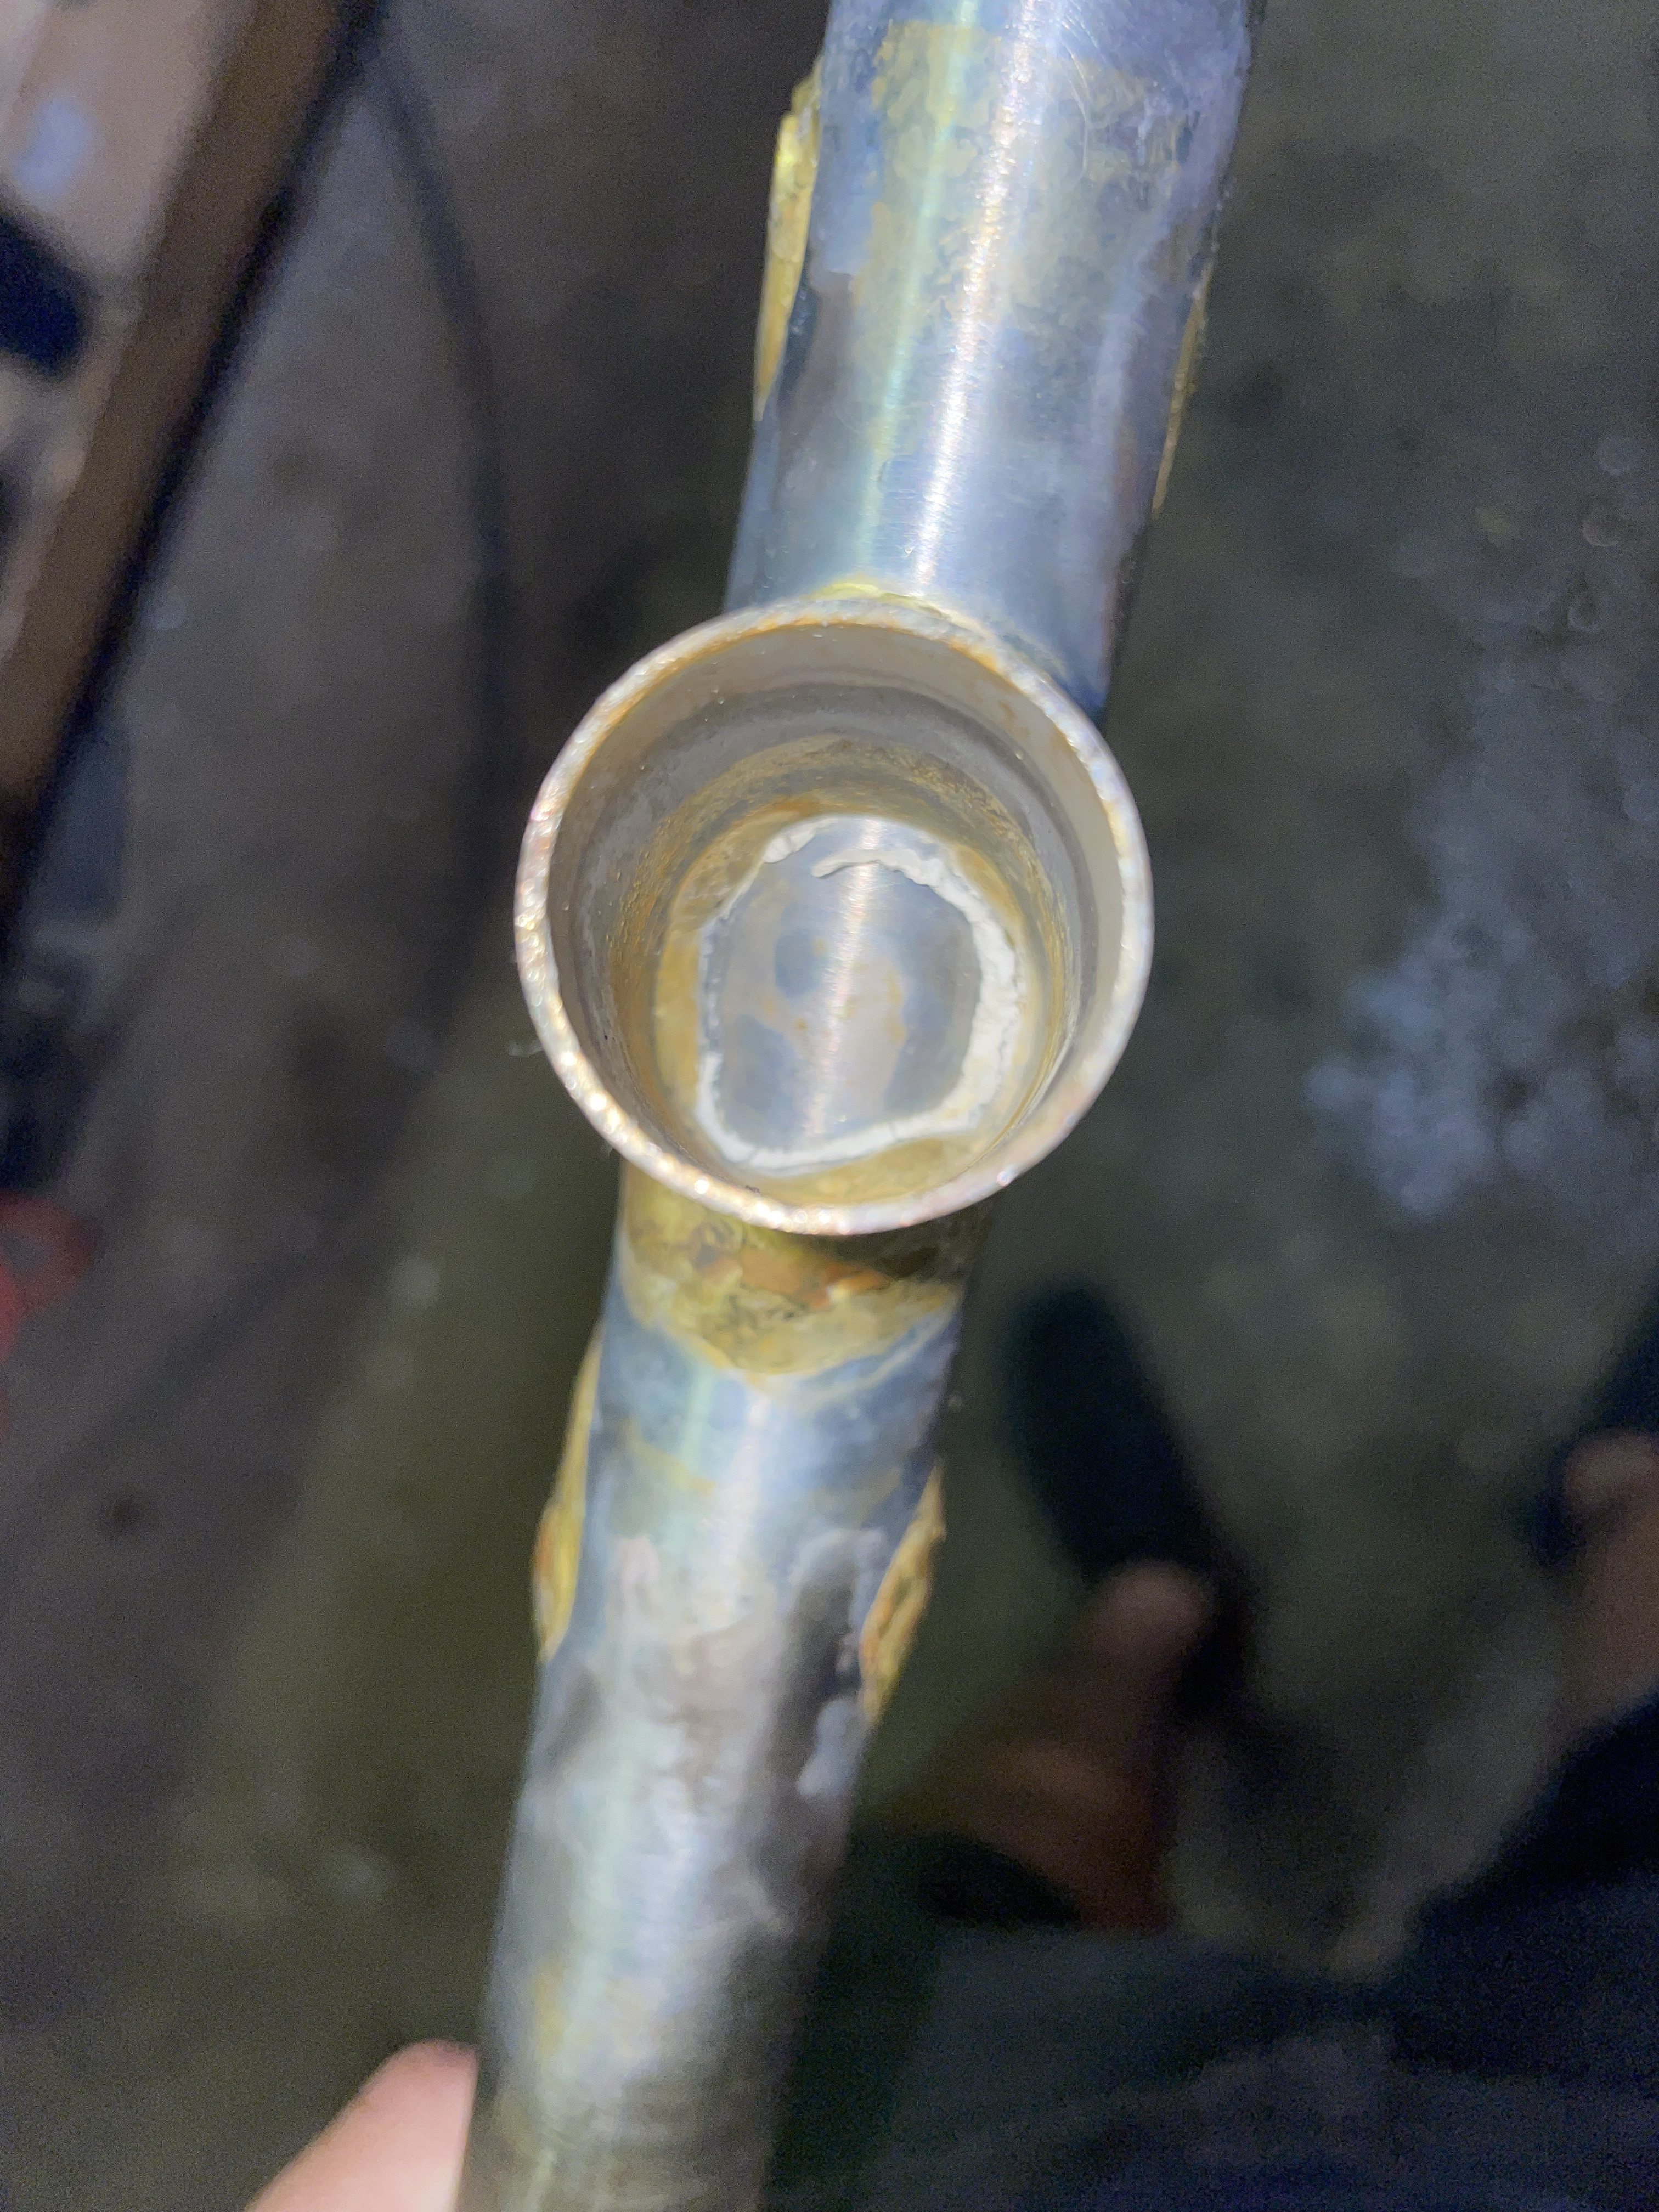
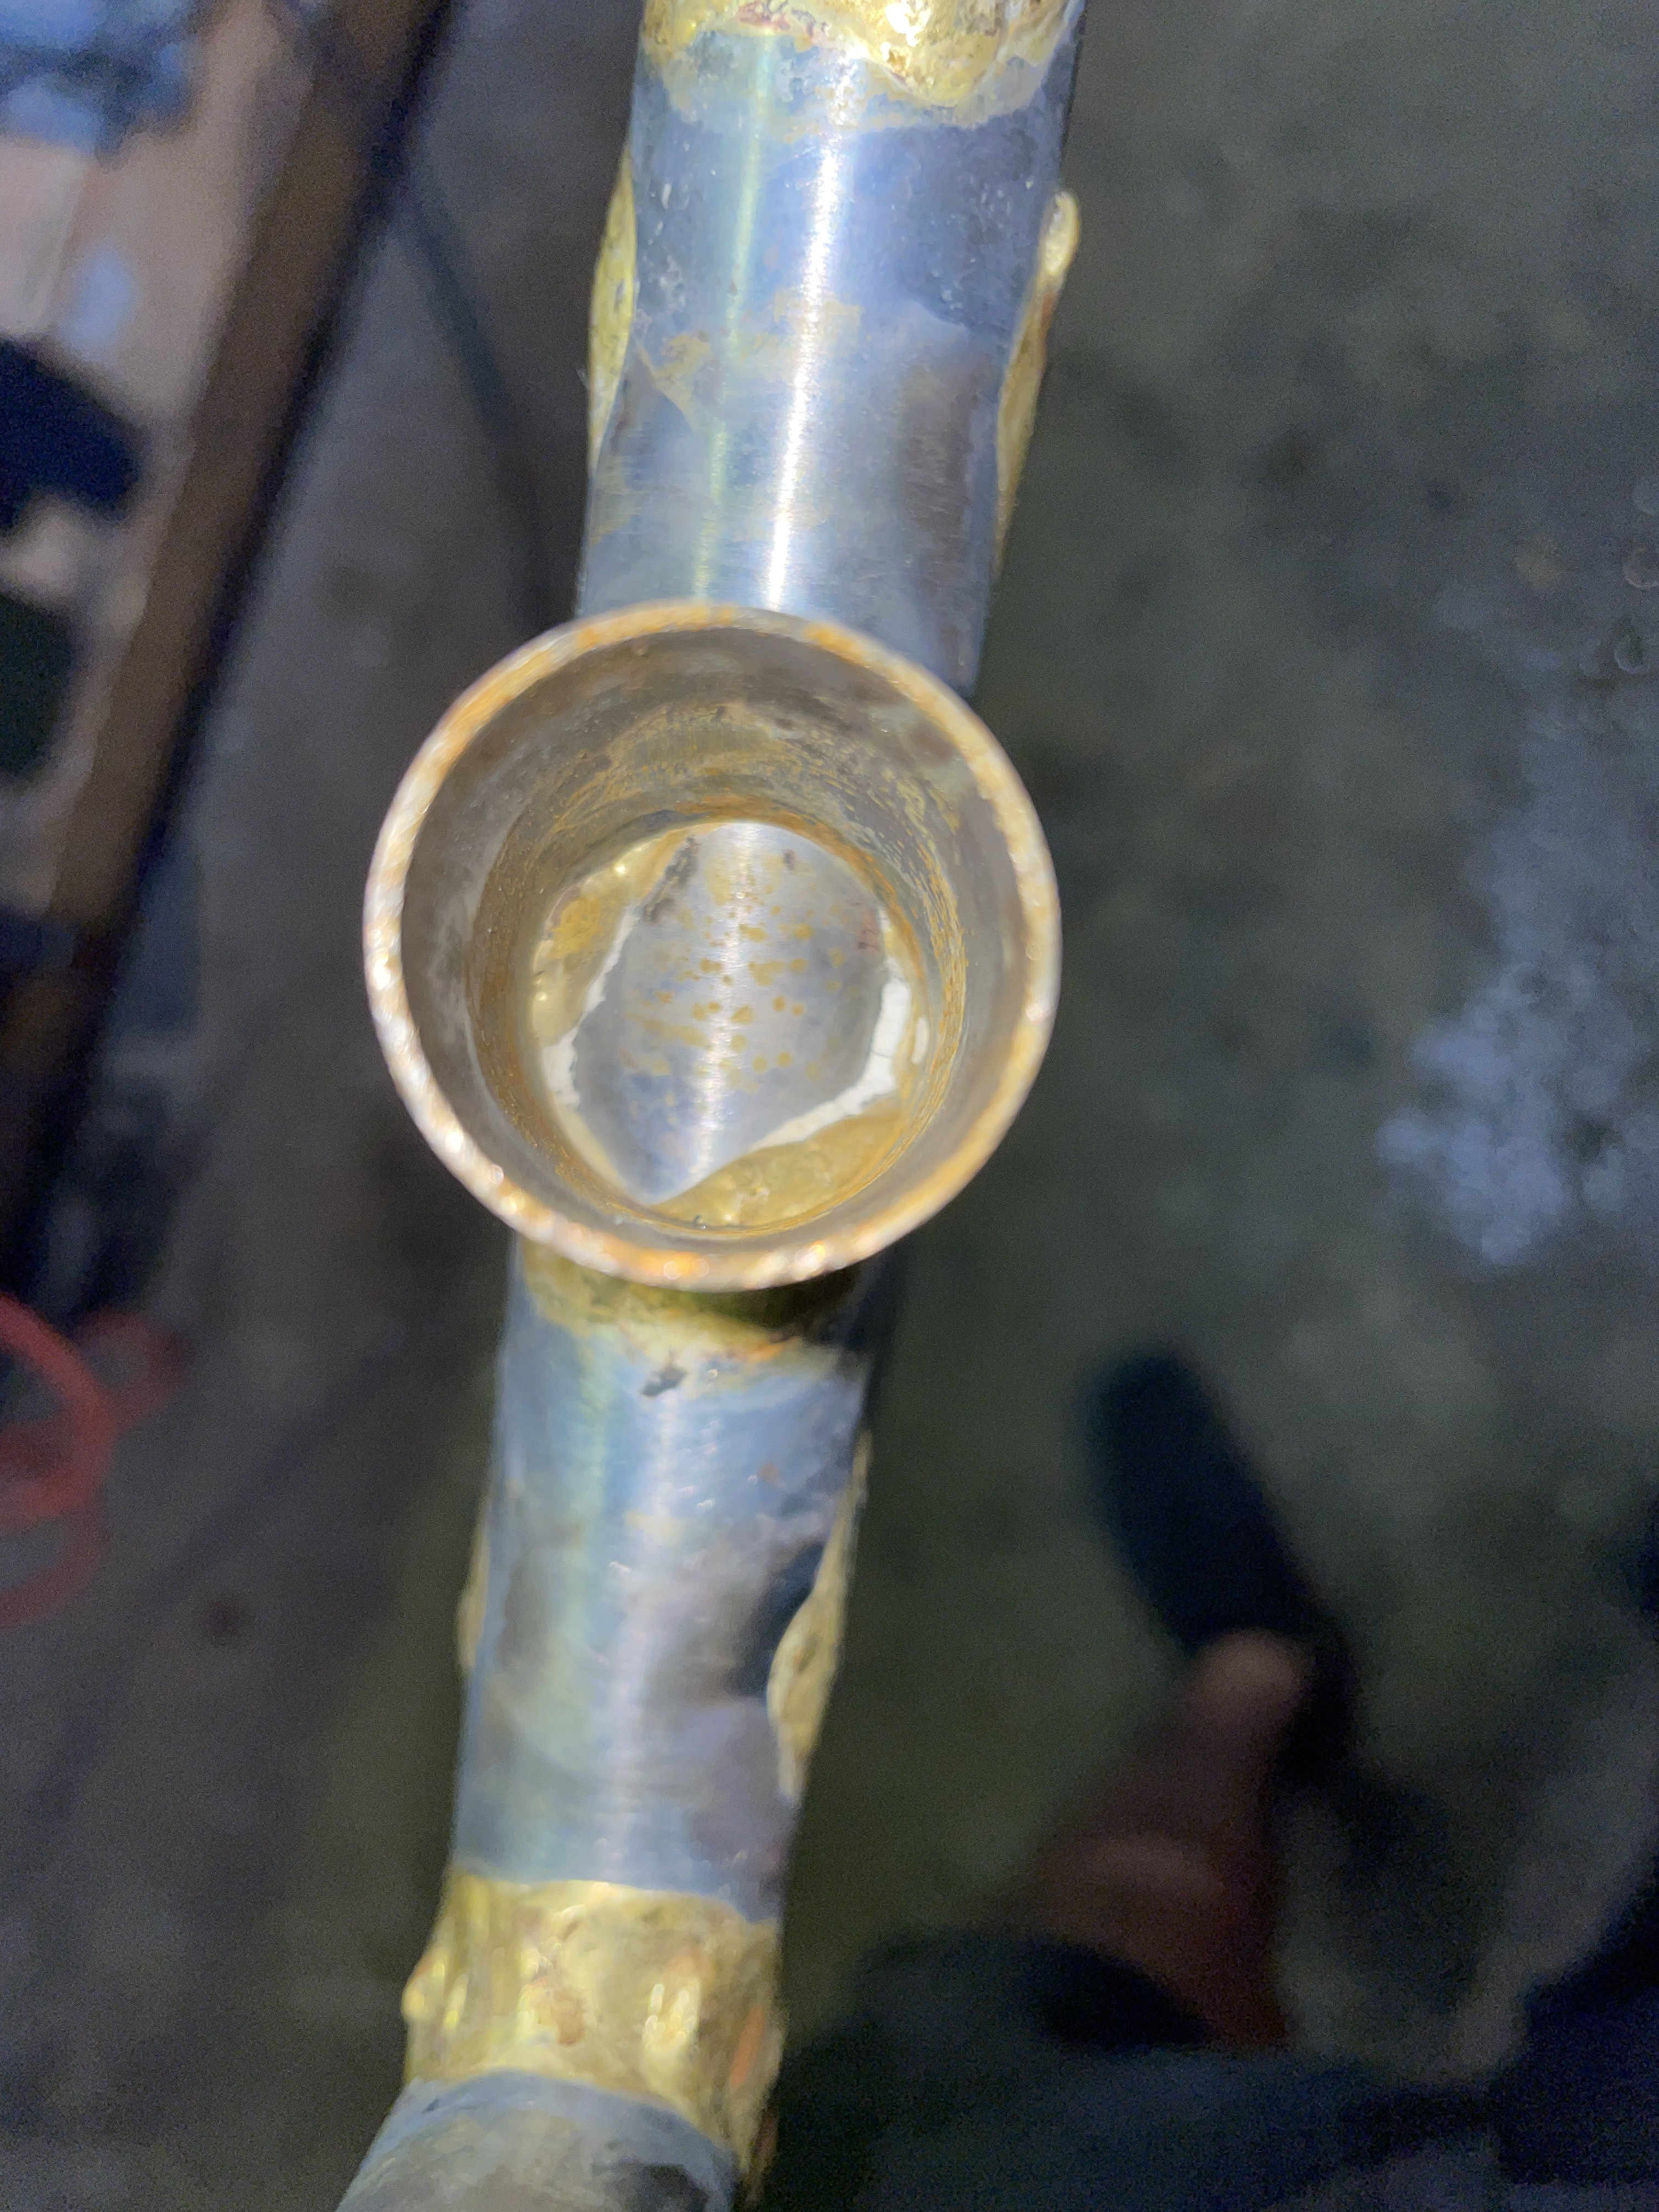
One main issue I’ve encountered is that I can’t seem to have full penetration all around the inside the tube. And weirdly enough, the lack of penetration is almost always on the same side, at the acute angle of the joint. Not only this, but I notice I’m actually getting a LOT of penetration on other sides, like big blobs of it. Is there something as too much penetration?
I’m using Gasflux 3/32” nickel bronze rods, Gasflux type B flux, torch tip is about 1mm I believe, around 5-6psi for oxygen and acetylene, tubes are 1mm thick 1” brazed to 1”, mitered on the mill and finished by hand, cleaned inside and out with 100 grit sandpaper and iso alcohol. I flux the base tube, then inside and outside the mating tube, preheat the hole joint, tack it, no tinning pass and go for the fillet.
I tried different things without seeing much of a difference: 1/16” rods, more preheating, colder flame, hotter flame, different sequence, different gas pressure, the result is pretty much the same no matter.
Here are some pictures to illustrate my issue. And any other comments and tips about my fillets, unrelated to this specific issue, is also very much welcomed and appreciated!
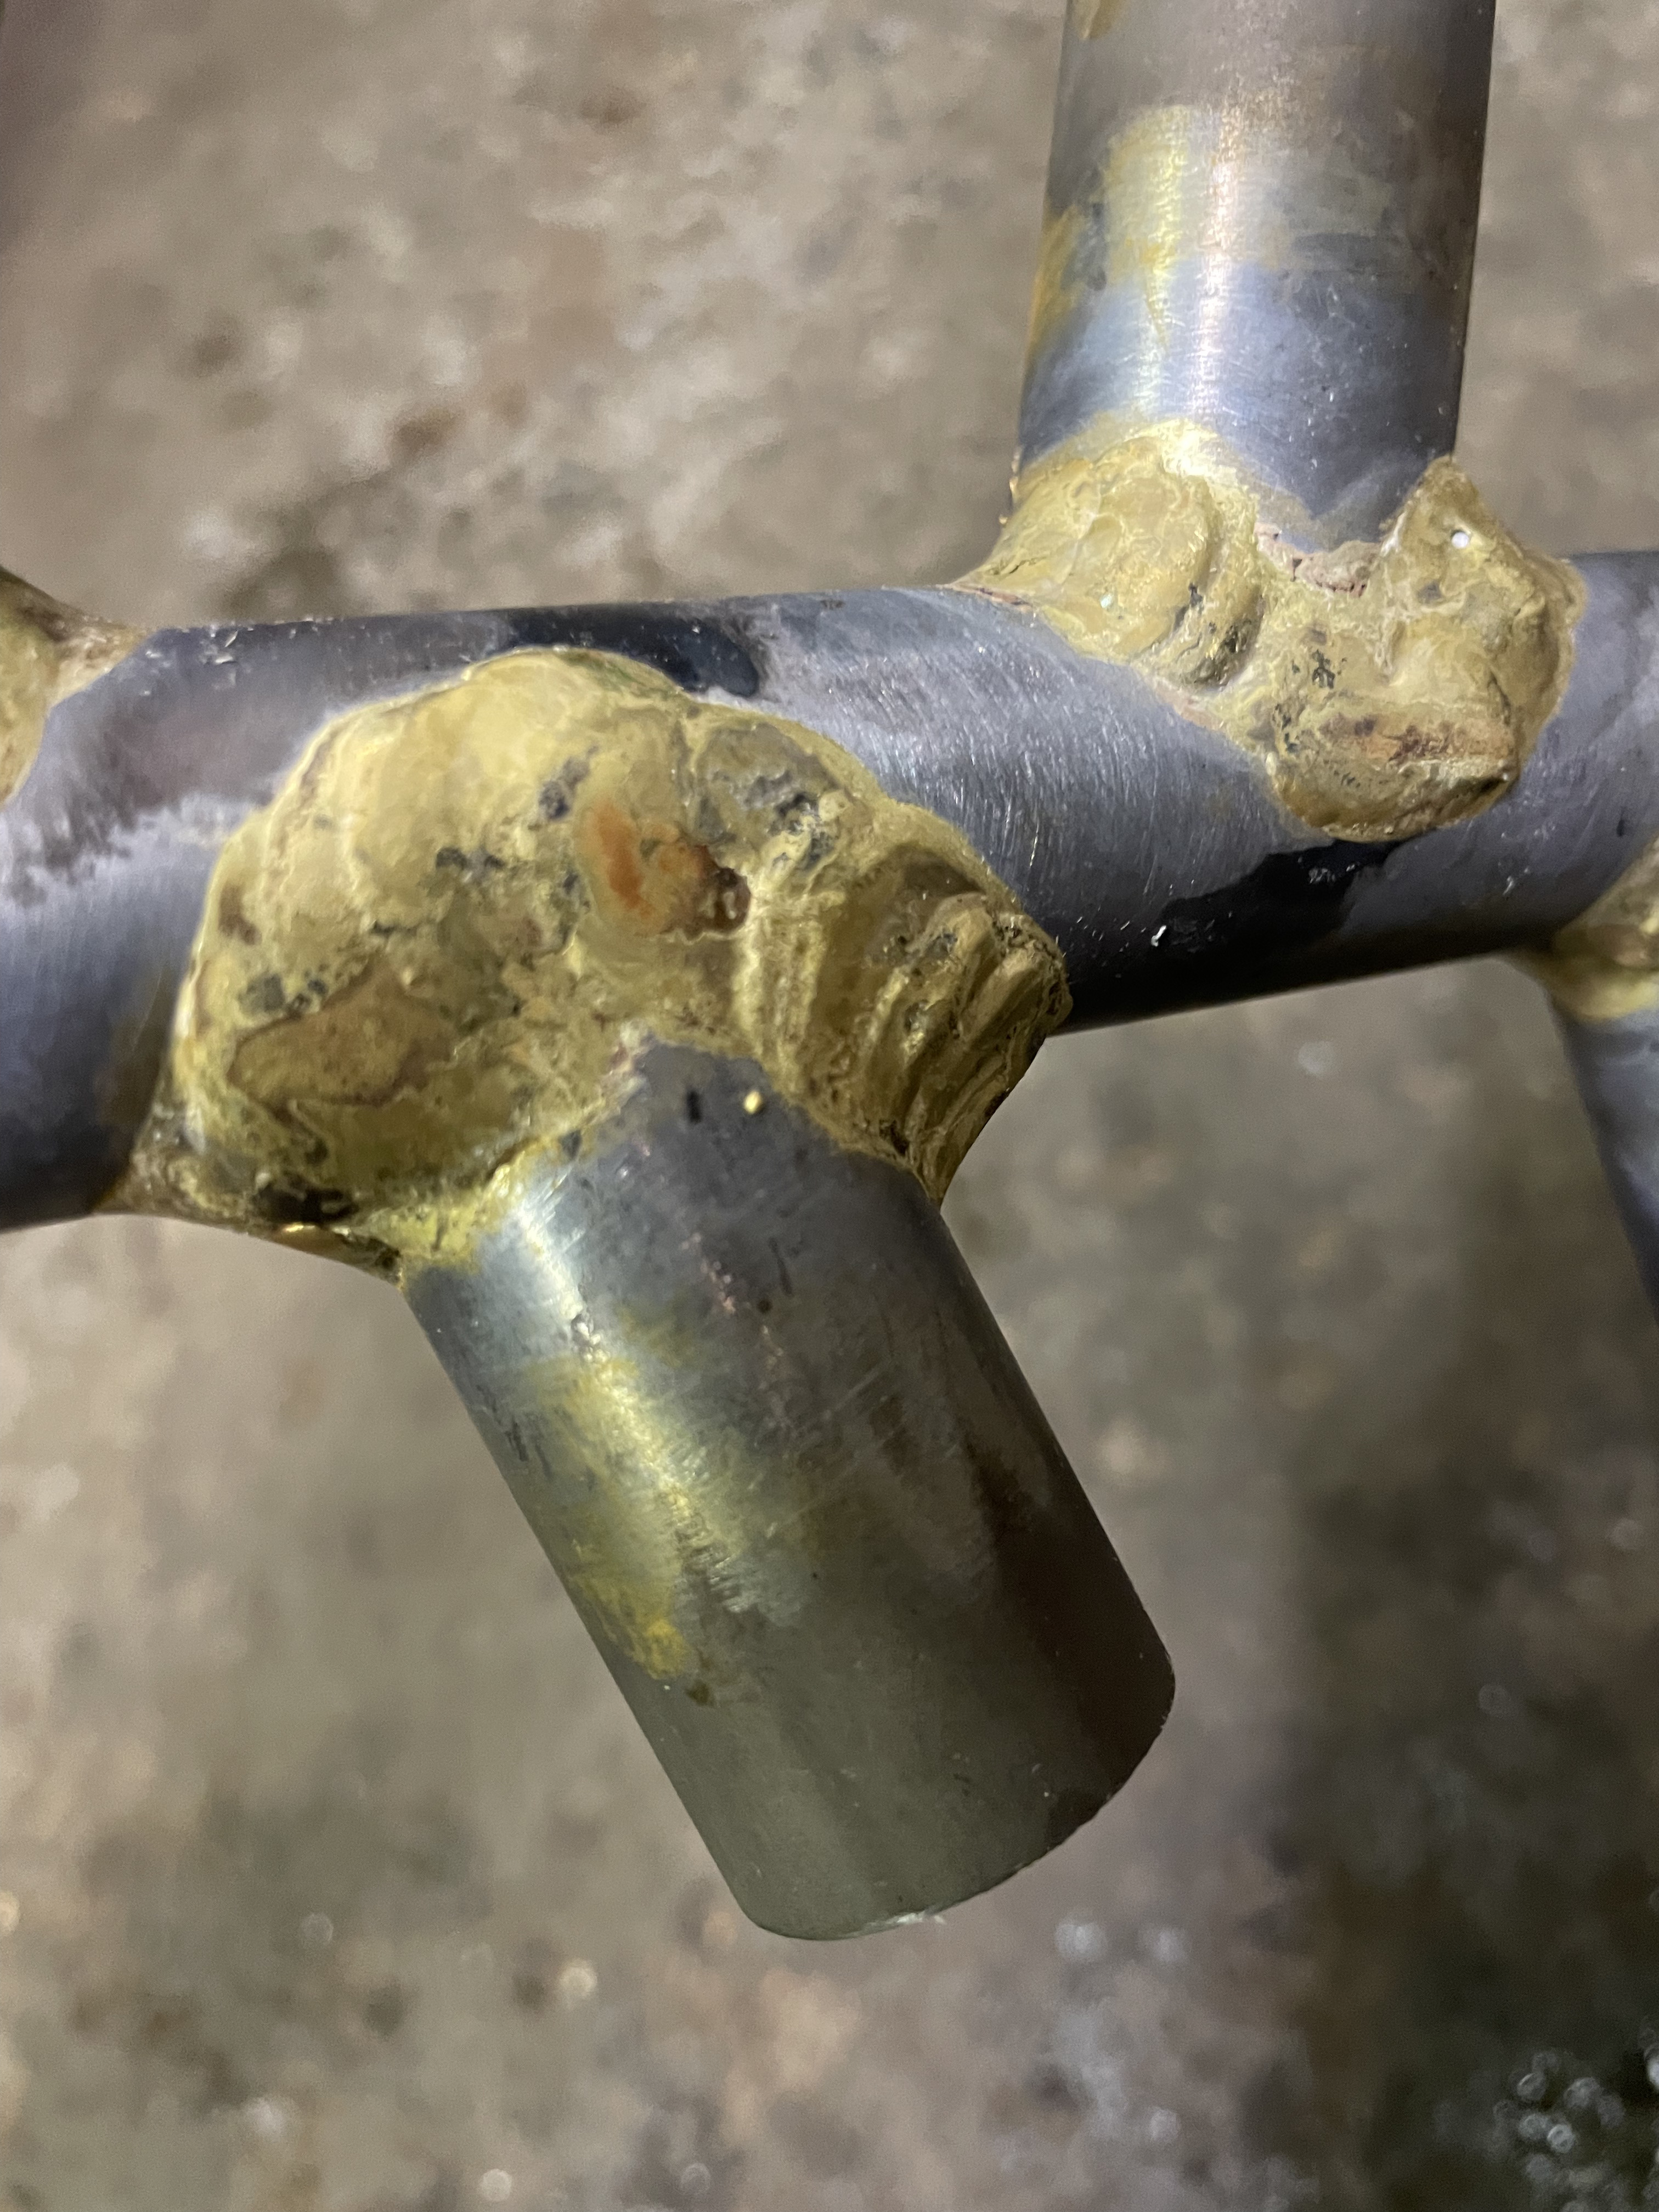
I’m no pro or teacher but that looks like a lot of bronze was laid down. Huge fillets is a style but one that can see a long time at temperature and if laid down as shown, a lot of filing. I might try doing things different purposely, like making a far smaller fillet or doing a tinning pass then a fillet one. The build up on internal fillet in one spot is likely due to where you add the filler, how hot for how long you got a spot and gravity. I do like the lack of overheating though. Andy
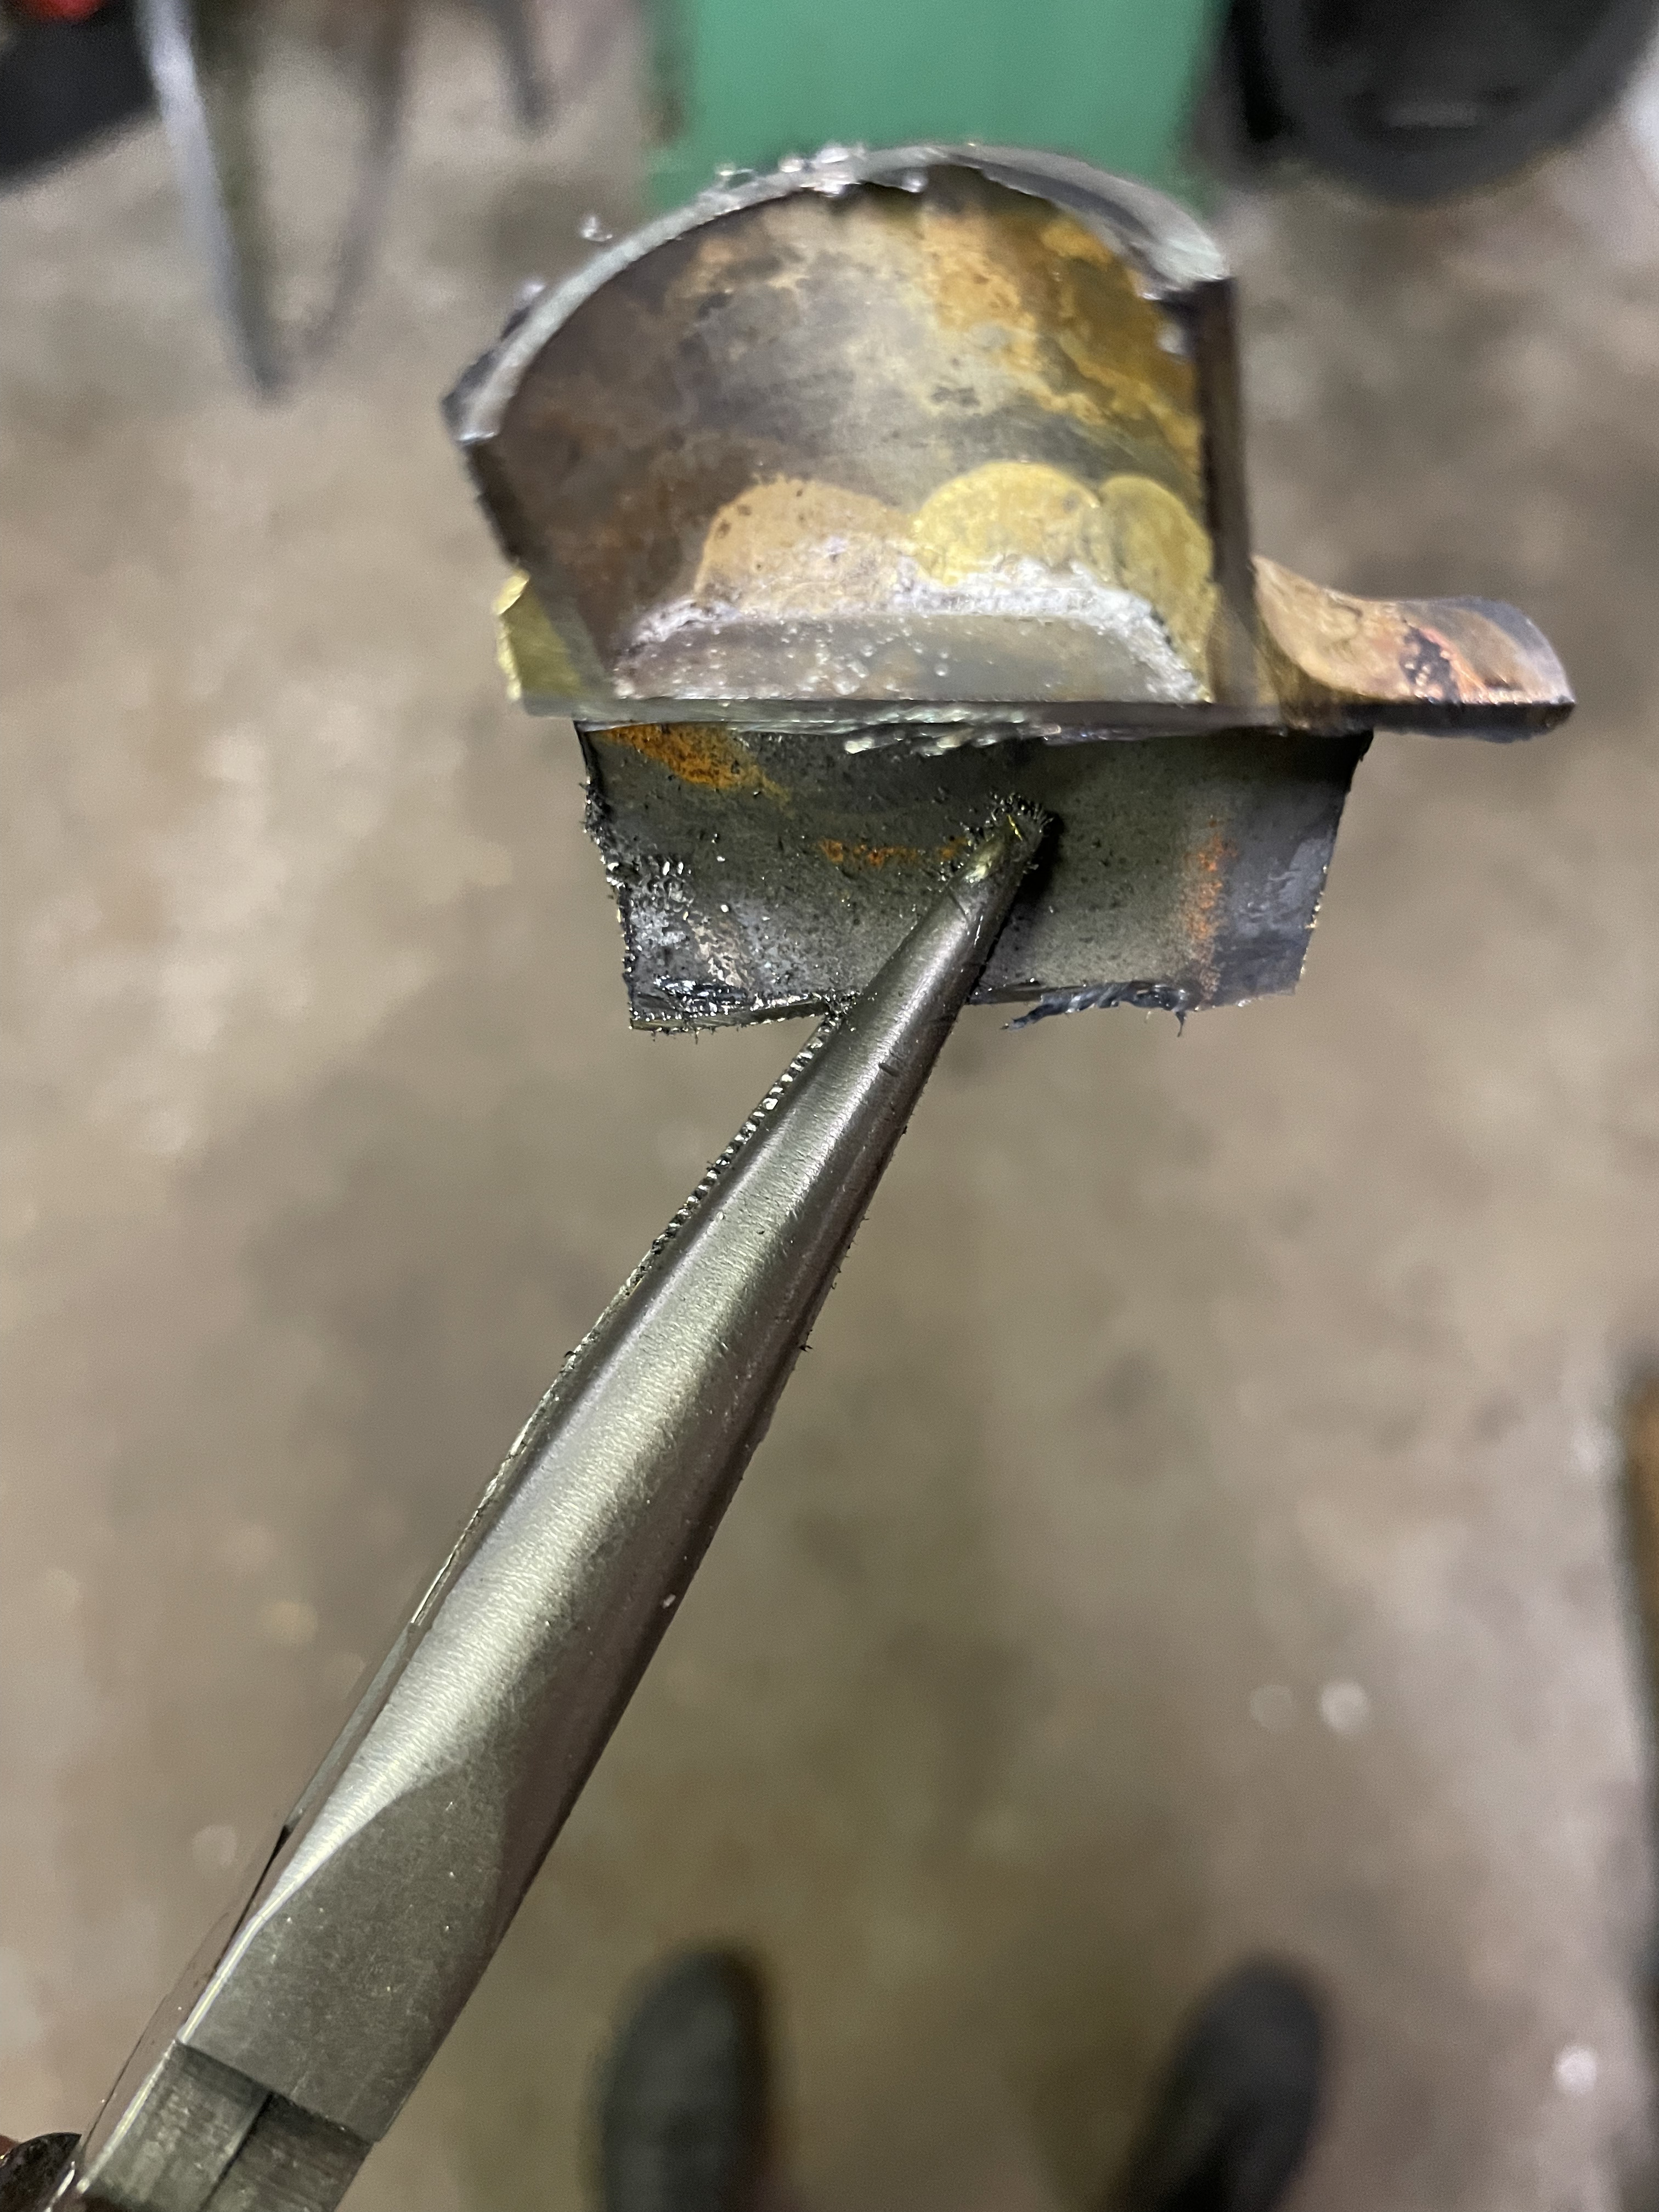
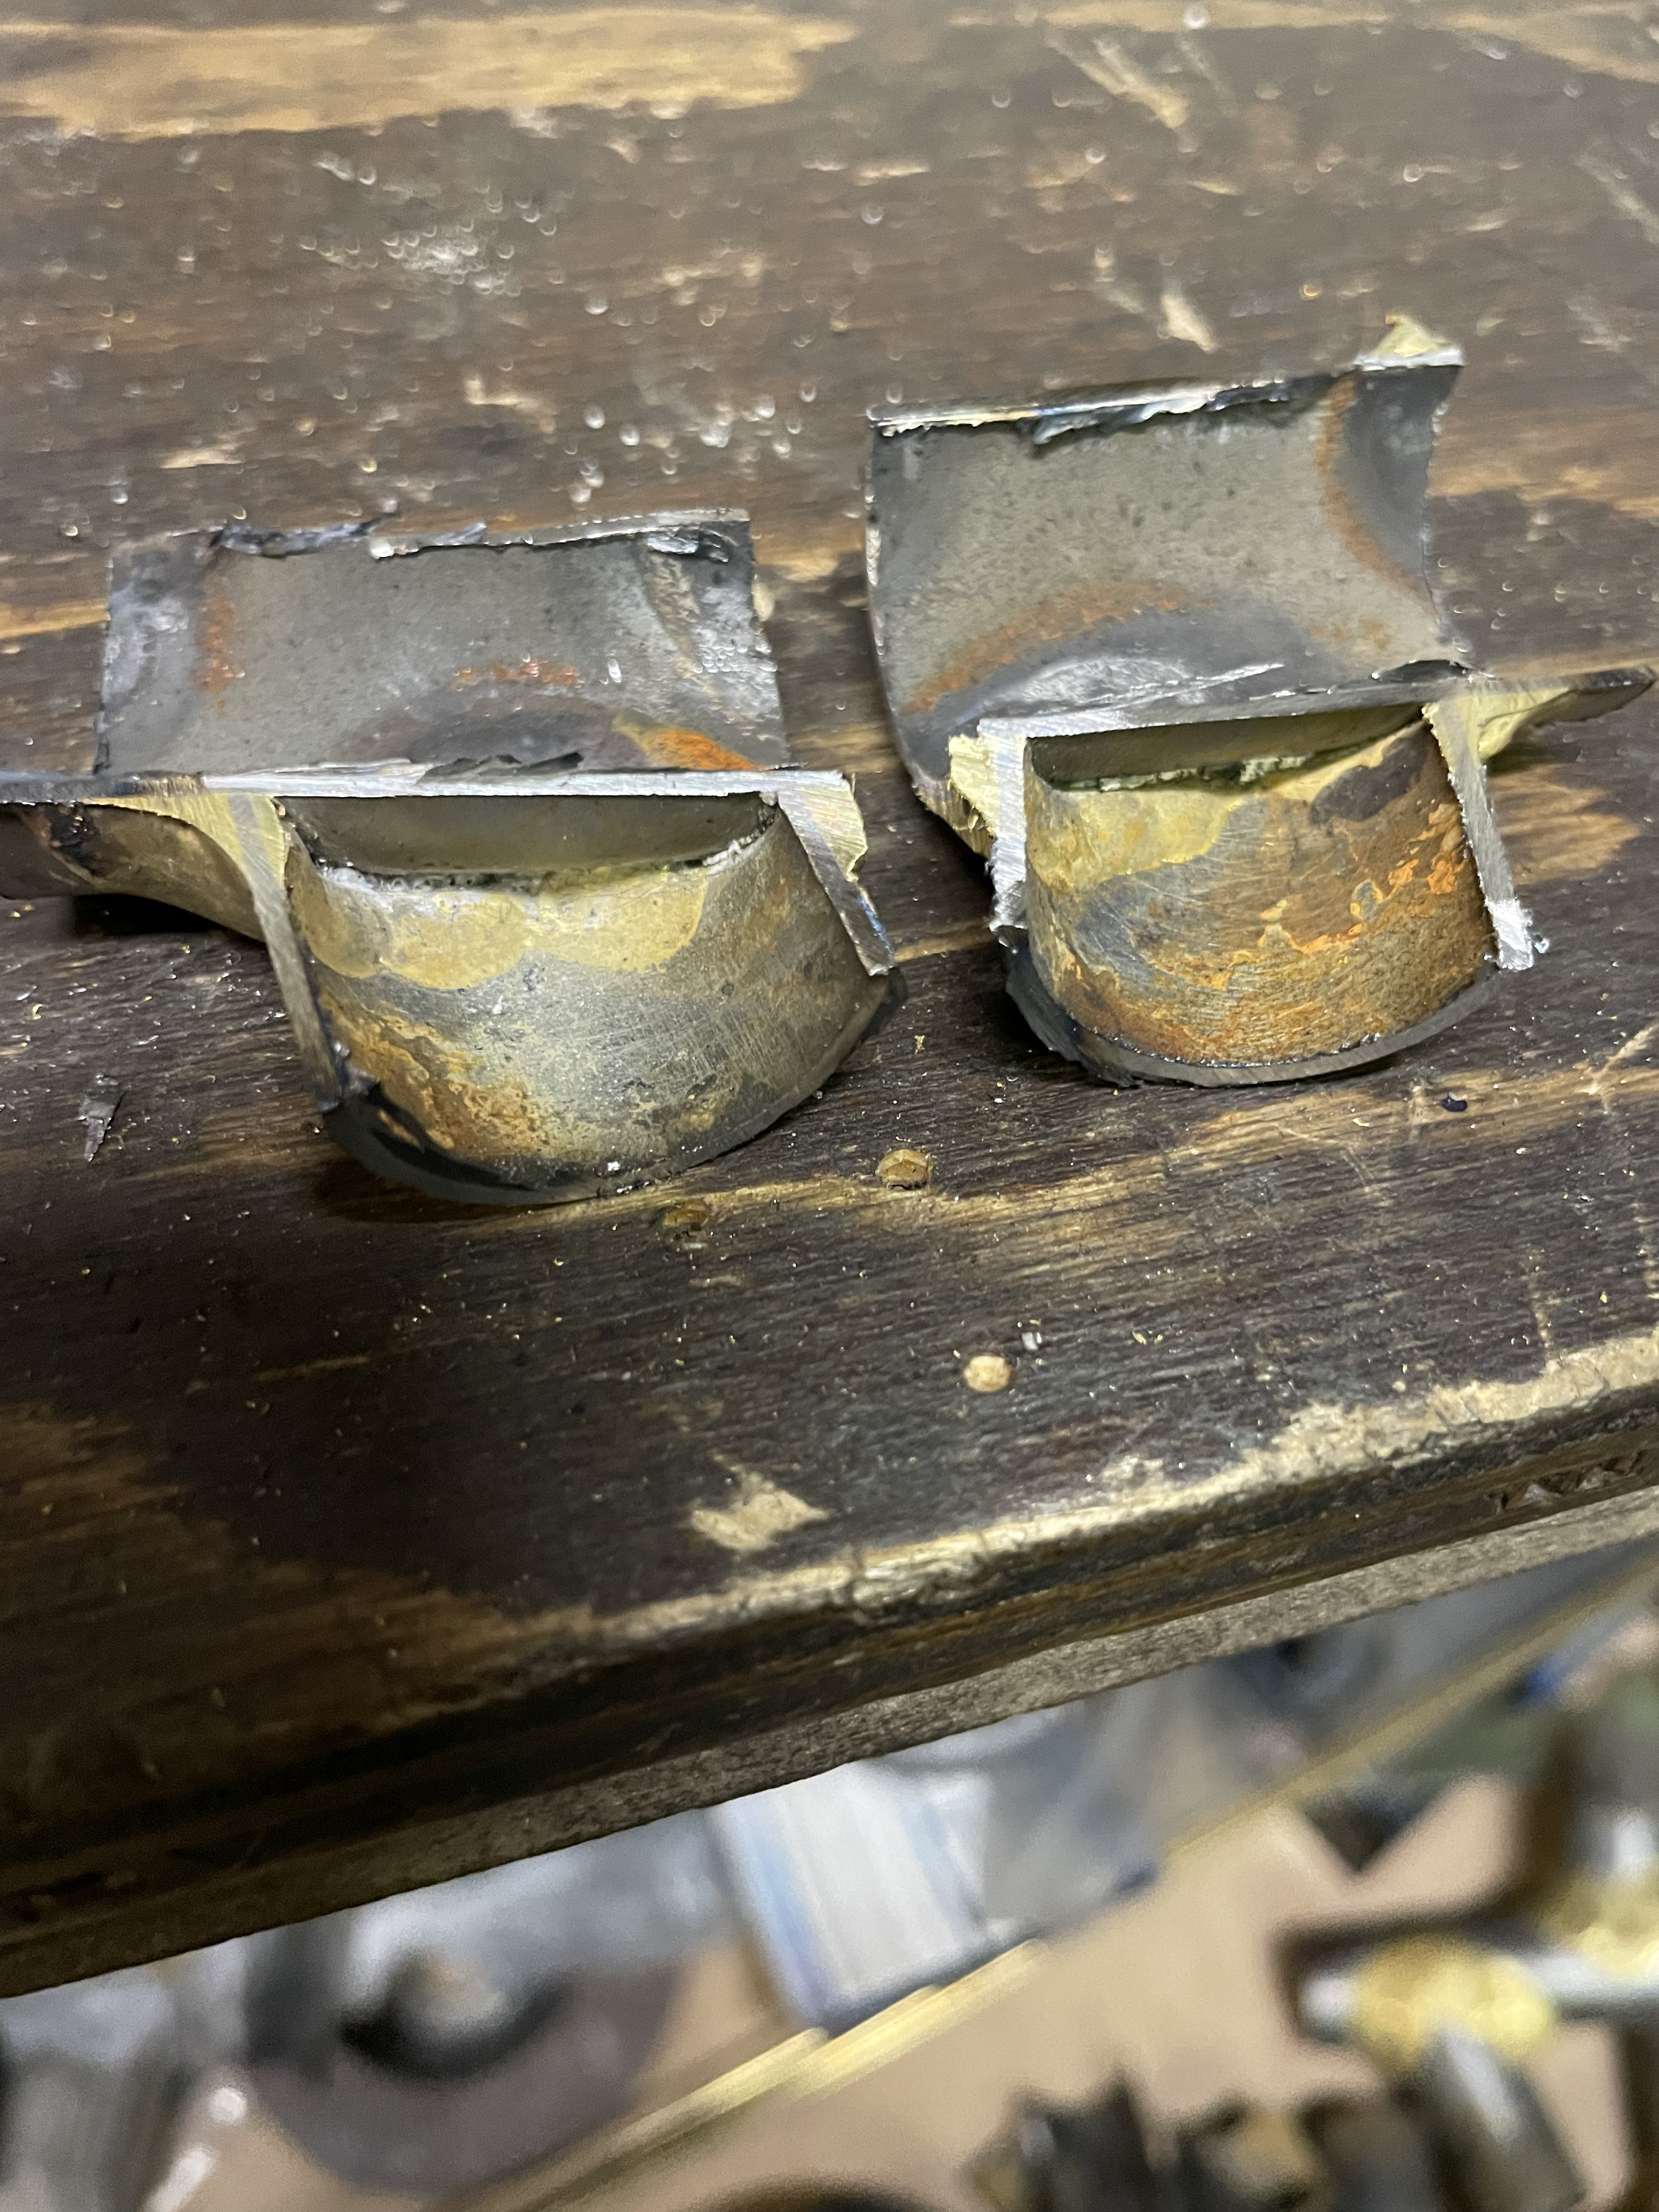
Bust out that grinder (or saw, or whatever) and cut it up. It’d be good to see a cross section.
Good penetration into the root of the joint and a nice evenly-laid external fillet with consistent heat input is all you need. Internal fillets are not necessary.
You will usually see a little more penetration on the ears of the joints because it’s much easier to heat. And it’s more difficult to get good penetration on tighter spots because it’s harder to get heat in there.
I just try to balance that with my sequence - start in the areas that are easy to heat and finish in those that take more heat. Obviously there’s only so much you can do as there’s also alignment to consider so I’ll turn down the flame for the ears, crank it up a tad for the toight bits.
Thanks everyone for the feedback!
@AndrewRStewart I tried a much smaller fillet, as well as much hotter flame, again with the same result sadly.
@Spencermon Here’s one of them, they all pretty much look like that. You can see that there’s mostly bronze all around it, and a lot of it around the ears of the miter, but there’s one spot cleary missing any bronze at all.
@TDB I thought that the internal fillet served mostly as a proof of good penetration? I havent paid much attention to the sequence so far since alignment doesn’t matter for practice joints. Would you recommend I start with the ears since they’re easier to heat? And what would be a logical sequence for such a joint?
I was taught to first tack the joint along the frame’s centerlines, two tacks. Confirm correct angles and begin brazing. I’ll start at one of the tacks and do both a flow and a fillet pass simultaneously. I’ll go around the joint just less than 1/4 of the way, then go kitty corner and do the other tack’s side opposite the first full brazing, again around 1/4 of the way around but leaving the ears alone. Back to the first side and do it’s other 1/4 around braze and flow/fillet that ear completely. back to the last 1/4 around pass with that side’s ear flowed and filleted. Note that the inside the joint fillet at the ears compensates for the lack of an external fillet. I use the ears as the escape path for too much bronze elsewhere, hence my leaving them for last to complete the brazing. By only brazing a portion of the joint at a time and moving onto the opposite side, doing another portion, the tube angle won’t drift as much.
In real life I have to modify and manipulate the process as I go along but I do try to keep the amount of heat I apply to one side of the joint fairly equal to the other side to maintain alignment. I’ll go back over the fillet with the flame to smoothen the surface although hopefully not too much as one doesn’t want to keep the tubes at brazing temp any longer than you need to. I’ve seen more distorted tubes (seat, BB shell, head) from too much heat that wasn’t evenly applied than I have seen cracked and broken fillets. I wouldn’t worry too much about a big internal fillet. Andy
I’ve been learning to tig weld the last couple of weeks and I find it most useful to practice on joints setup to mimic a real life frame. I think the same is true for fillet brazing.
What you’ve got there looks pretty good to me, I’d take it a step further by keeping your stubs longer (as long as you can with what material you have) and join thick to thin to represent a main tube to a head tube or BB for example. If you can, then use tubing diameters close to what you plan to build with. Cut the excess off after you’ve brazed the joint and go again.
Use that to practice a good sequence, see what results you get and adjust as necessary. I think perhaps you’re getting the small stubs hot quickly and so in places your filler is wicking right through.
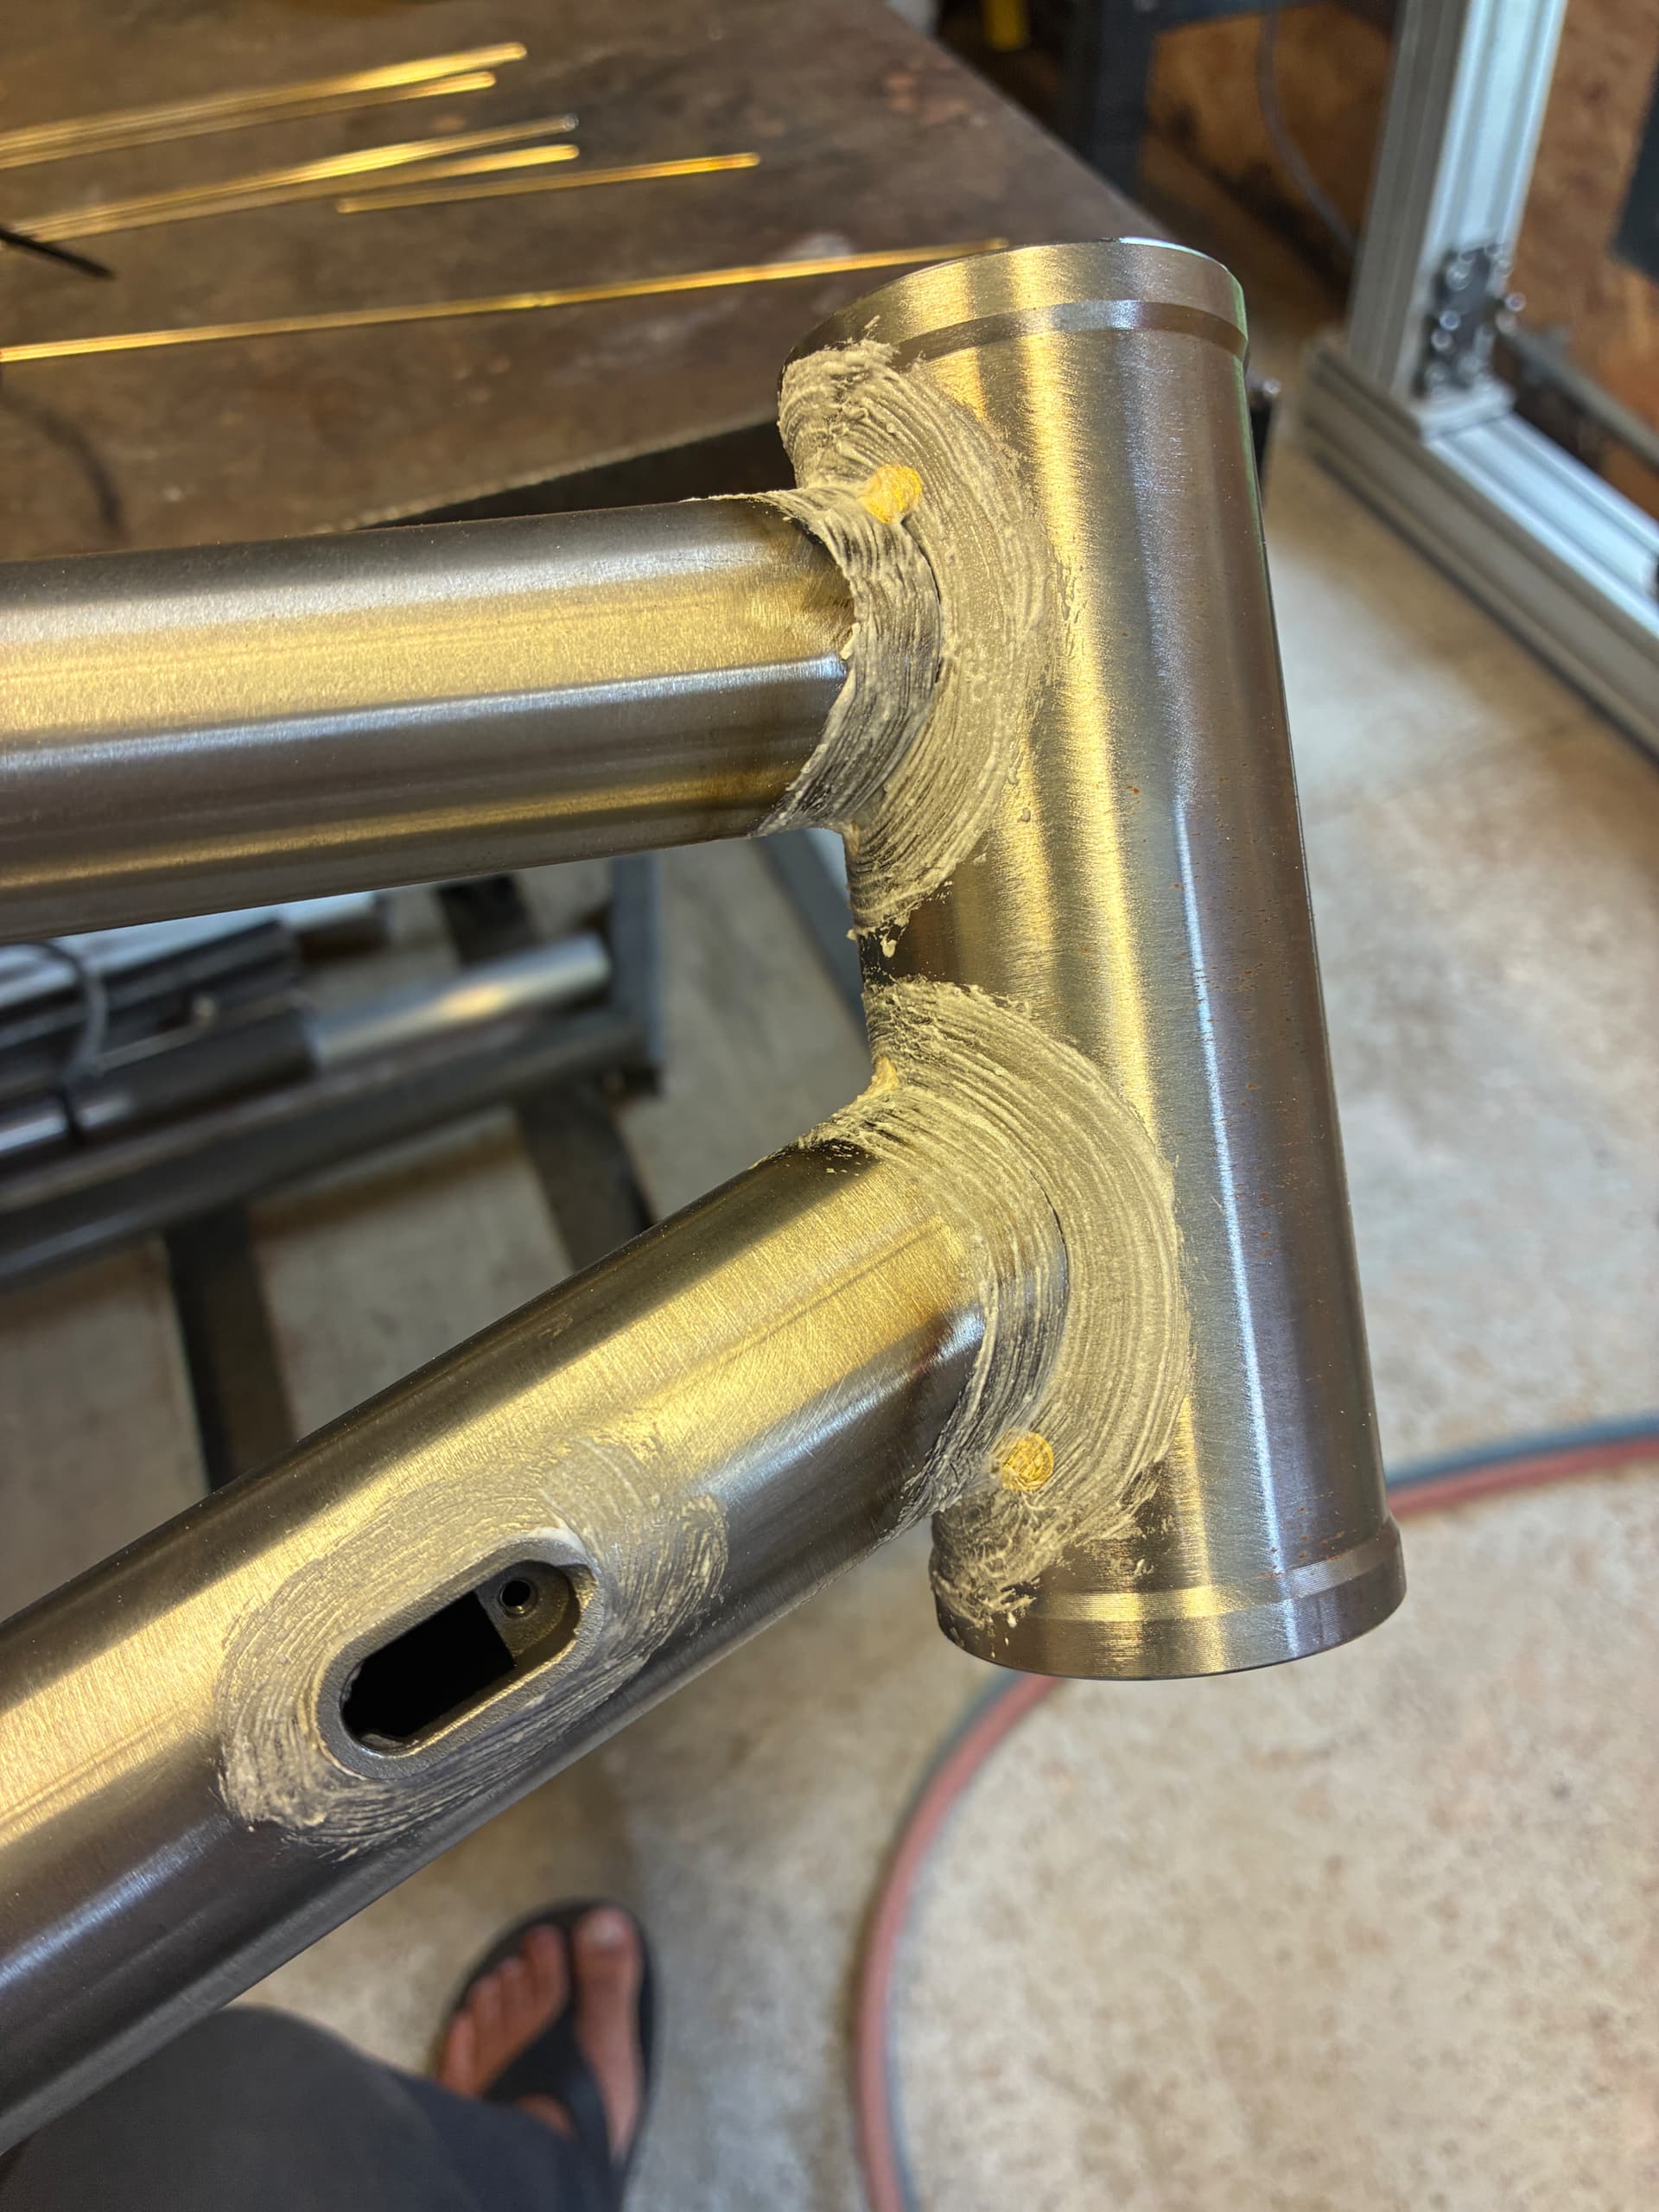
FWIW I only flux the outside of the joint but ensure paste gets into the root. If you’ve got a lot of flux floating around that could perhaps also draw filler in a little easier than you want. But more flux is usually more better. Just know that it’s not entirely necessary to paste everything. I’ll see if I can add a pic of one of my pasted joints for reference.
Seems like you’ve got a good base, try some weird stuff. Maybe try making the smallest fillet you can, try adjusting your flame, etc. See what happens and you should start to build a picture things. That’s what I’ve done with the welder and it seems to be working (I hope ![]() ).
).
Wow! That’s a real cheapskate’s approach to fluxing! Are you secretly Scottish??
some ancestry in the highlands I believe ![]()
Interesting, thank you very much for your feedback, I’ll try what you mention. Good to know I’m not too far off!
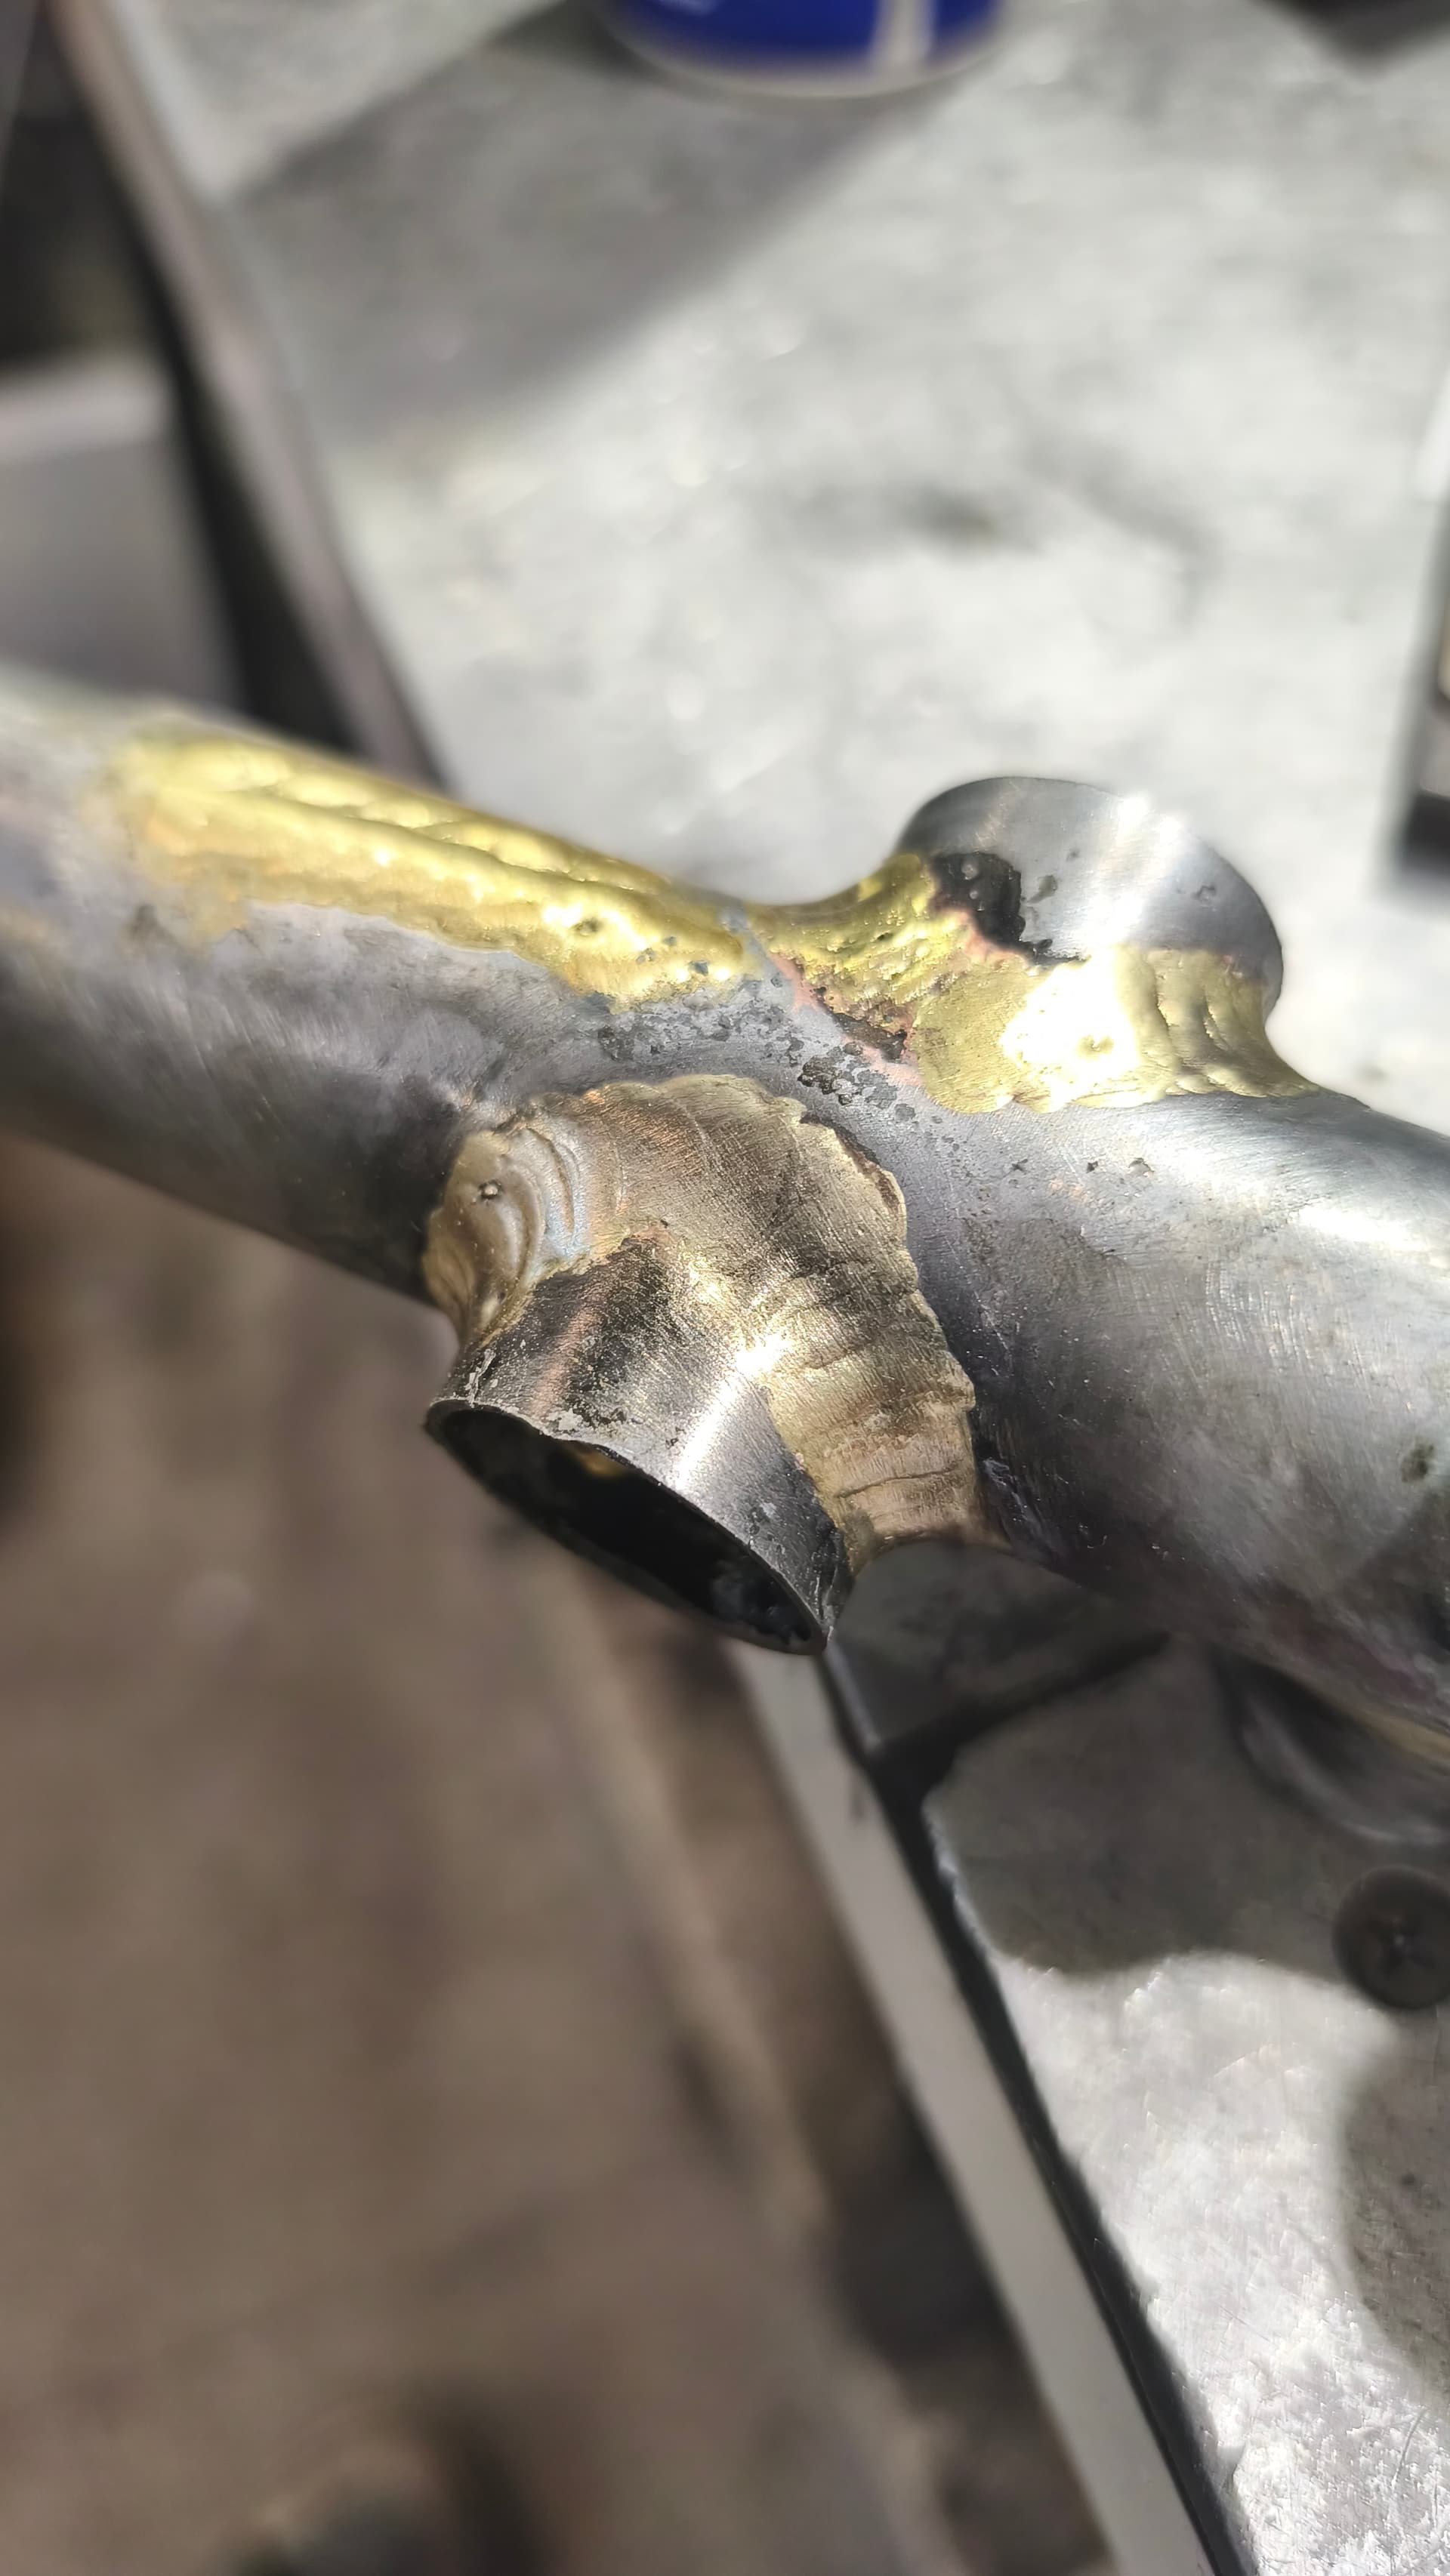
Hey there. I’m currently practicing laying dimes on fillets, and for a long time had a problem of pinholes in my brazing. (I used fh-21 flux, temp. Range 800-1100 °C) No matter what I did, they appear after brushing. I believe it’s the flux boiling on top and hiding just beneath the surface of freshly melted brass. But to get to the point, I tried simple borax (sodium tetraborate) mixed with tap water and “eureka”! All previous problems disappeared. I often cook the joint but it gave me much time to get good penetration and fillet from the other side, and quick brush showed no pinholes. So the question is- how the method of fluxing done by ours grandparents is better than proper paste flux sold for good amount of $$?
Photo of joint with borax flux
That’s quite interesting, kudos for trying something out of the ordinary and making it work!
Pinholes could be a topic all of their own, I’m not totally sure if it’s been discussed?
FWIW when I’ve seen them in my own work it’s mostly been due to laying a fillet over an existing fillet that didn’t become fully fluid which causes a void that often traps flux.
You can use a pick to QC them, if you find a dimple after soaking, give it a poke. If the pick pushes through to a proper pinhole then I’d just quickly reflow the fillet. I much preferred that to filling with silver as has often been recommended in the past, way quicker and easier imo. Just make sure to recheck alignment/ reaming and be very direct with the flame. Go around the void in a tiny circle until it begins to flow and then close in on the pinhole itself and it should seal up and flatten out (mostly) without adding any more filler.
If the pick doesn’t push through then it’s just a small dimple left when you retracted the rod and not a problem.
Thanks.
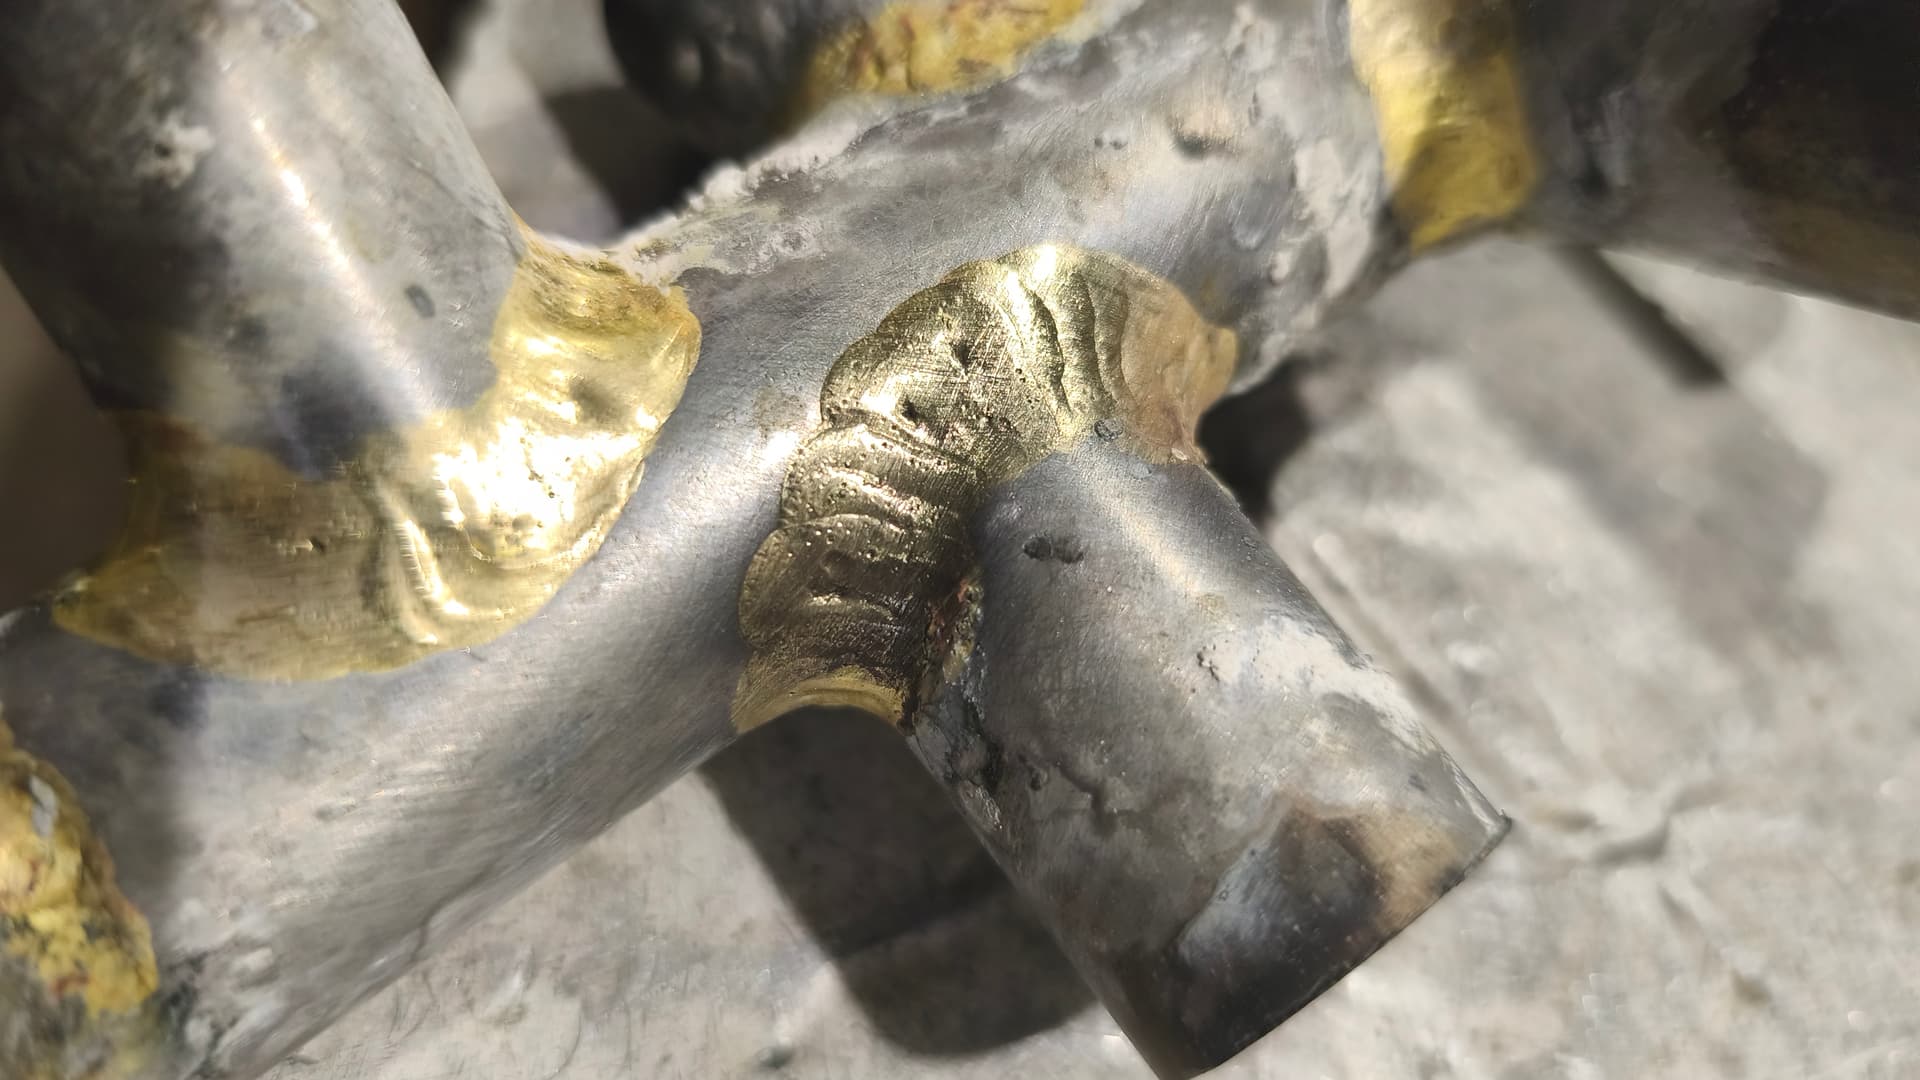
Yeah I think that would do the trick if there was one or two, but check out one of worse examples on the photo below (it was brushed with steel brush to reveal the pinholes). Flux is starting to boil on the top of the braze just after I get off the flame, and it happens again and again.
But apart from that I will be making some flux by myself using borax, boric acid and TSP. If anyone is interested in this topic I will post some updates, maybe in new topic when I will be able to make one (new user)
Hmm…this is timely! I’m building a custom rack and I was running low on Gasflux Type B in my flux jar, so just for fun I added some 20 Mule Team Borax powder and added some additional water to make a paste. I didn’t have as good results as you seemed to – at brazing temps, the flux just turned black and didn’t seem to ‘glass-up” and protect anything like Type B flux does.
Hmm again. There is some good info on using borax as brazing flux in this Home Shop Machinist thread… https://bbs.homeshopmachinist.net/forum/general/47390-borax-as-flux
I see what you mean. I haven’t seen anything quite like that before but to me those pinholes look more like some sort of contamination.
Doing some brazing practice this morning on a DIY welding cart thing. I was trying to join a small tube and when heating it up the tube distorted in the middle and away from another spot I wanted to join. This left me with a dilemma.
A. I could cut it off and start over with a new tube. This seemed time consuming and I don’t want to waste any materials
B. I could try and “bridge” the tube to the metal plate in the middle via building up some fillets. I’ve never successfully built an icicle so this also seemed daunting.
I opted for B and switched from a 1/16 to 3/32 filler rod. Little by little I was able to add puddles, watch them cool/harden. Then stack another on top. Then I switched over to the other spot and built up a puddle taller and taller. The gap between both got smaller and smaller til it was a solid bridge I could add a few more fillets on and smooth it out. Currently soaking off flux but from the bend test it seems pretty sturdy to me!
When the welding cart is all finished I’ll share pics ![]()
Before you go much further, figure this part out. it might not matter here but bridging the gap as you’ve done isn’t strong.