The pulse adjustment and programmable settings available on the EXT’s are well worth the added cost if you truly are going “all in” with tig welding your frames.
2 Likes
Thank you. I reached out to them to see if they’ll do just that. Fingers crossed that they have them in stock.
So my 200 DV arrives tomorrow. Their shipment came in the other day apparently. I inquired about the 210EXT, but it was also backordered but for longer. Regardless, I’m stoked to get the new machine and get to practicing…a lot!
1 Like
Indeed- my 200dv was great, but the lack of repeatability on the settings made them less practical for me. I wound up with a 255ext and it’s awesome. At the time, I thought the $6000 miller equivalent setup was insanely expensive- now it’s over $10k!
2 Likes
As a TIG beginner I’ve been very happy with my AHP 203. AHP is somehow related to Everlast (not sure if it same company or same owners of both companies). Primeweld looks good too.
AHP will sell the machines with a CK torch if you call. I wish I had done that.
I haven’t seen them mentioned much here but I really like my TIG button vs using the foot pedal for analog amperage control. I found it more intuitive coming from a fillet brazing background.
1 Like
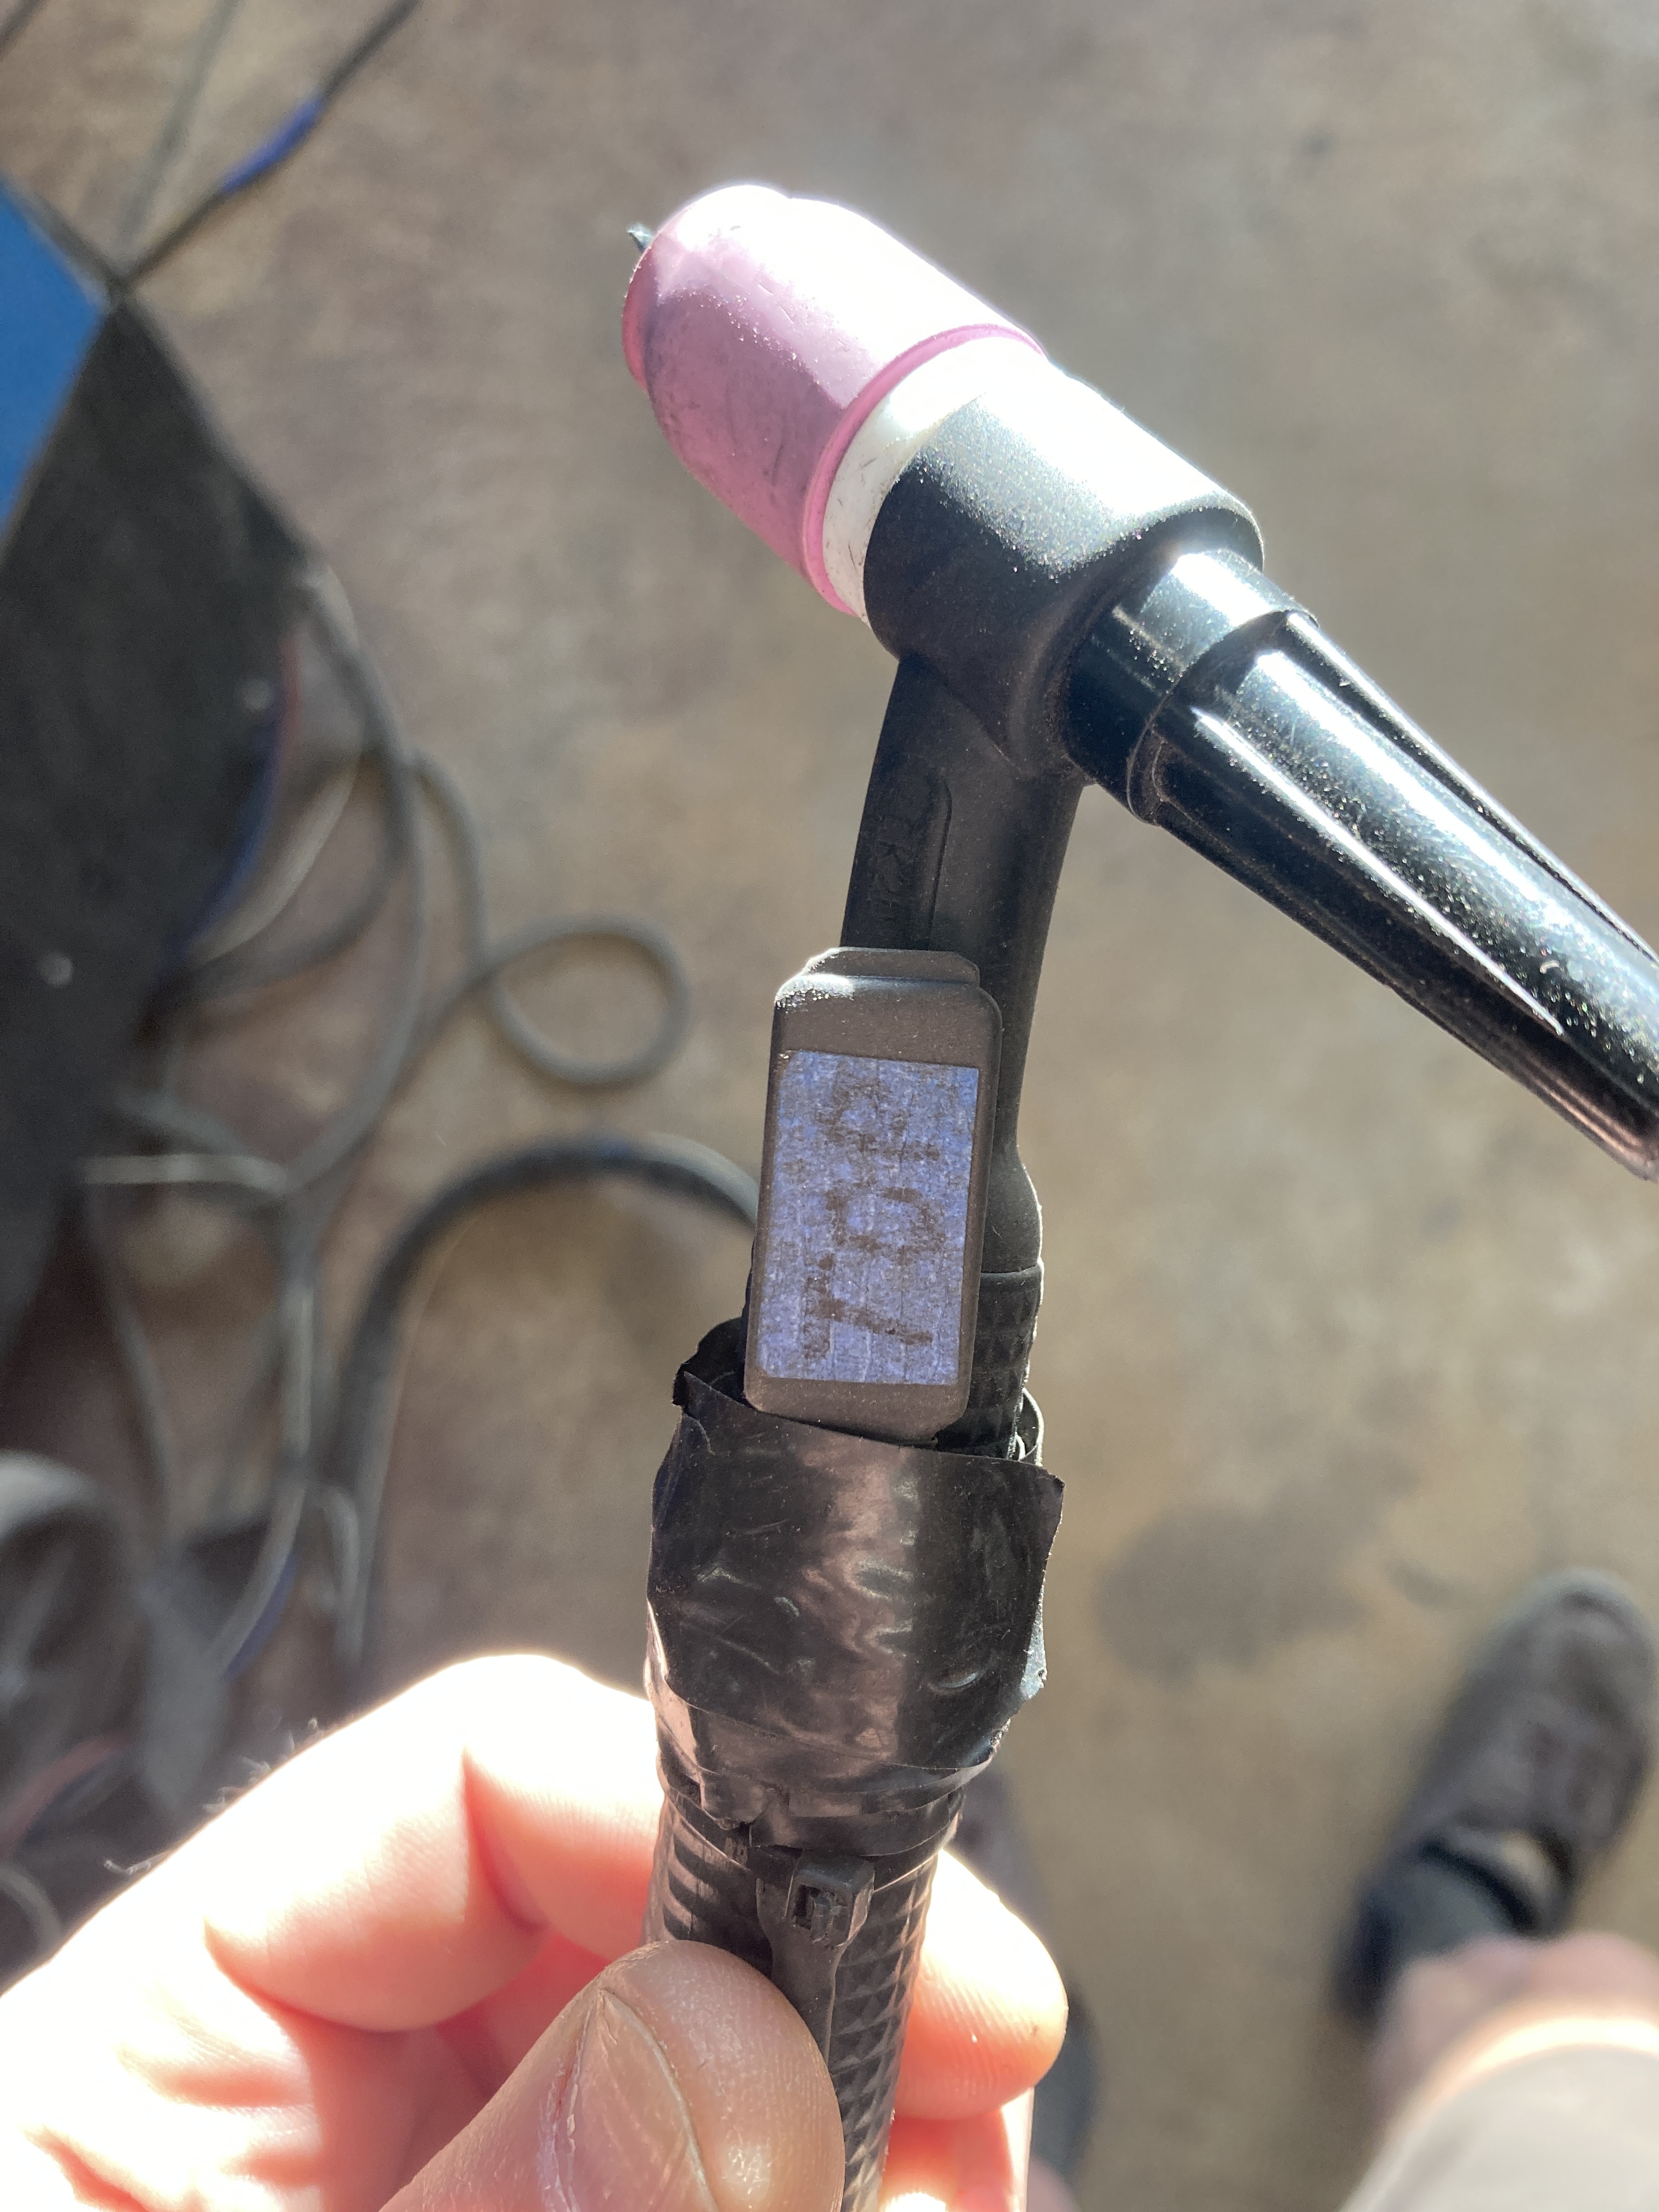
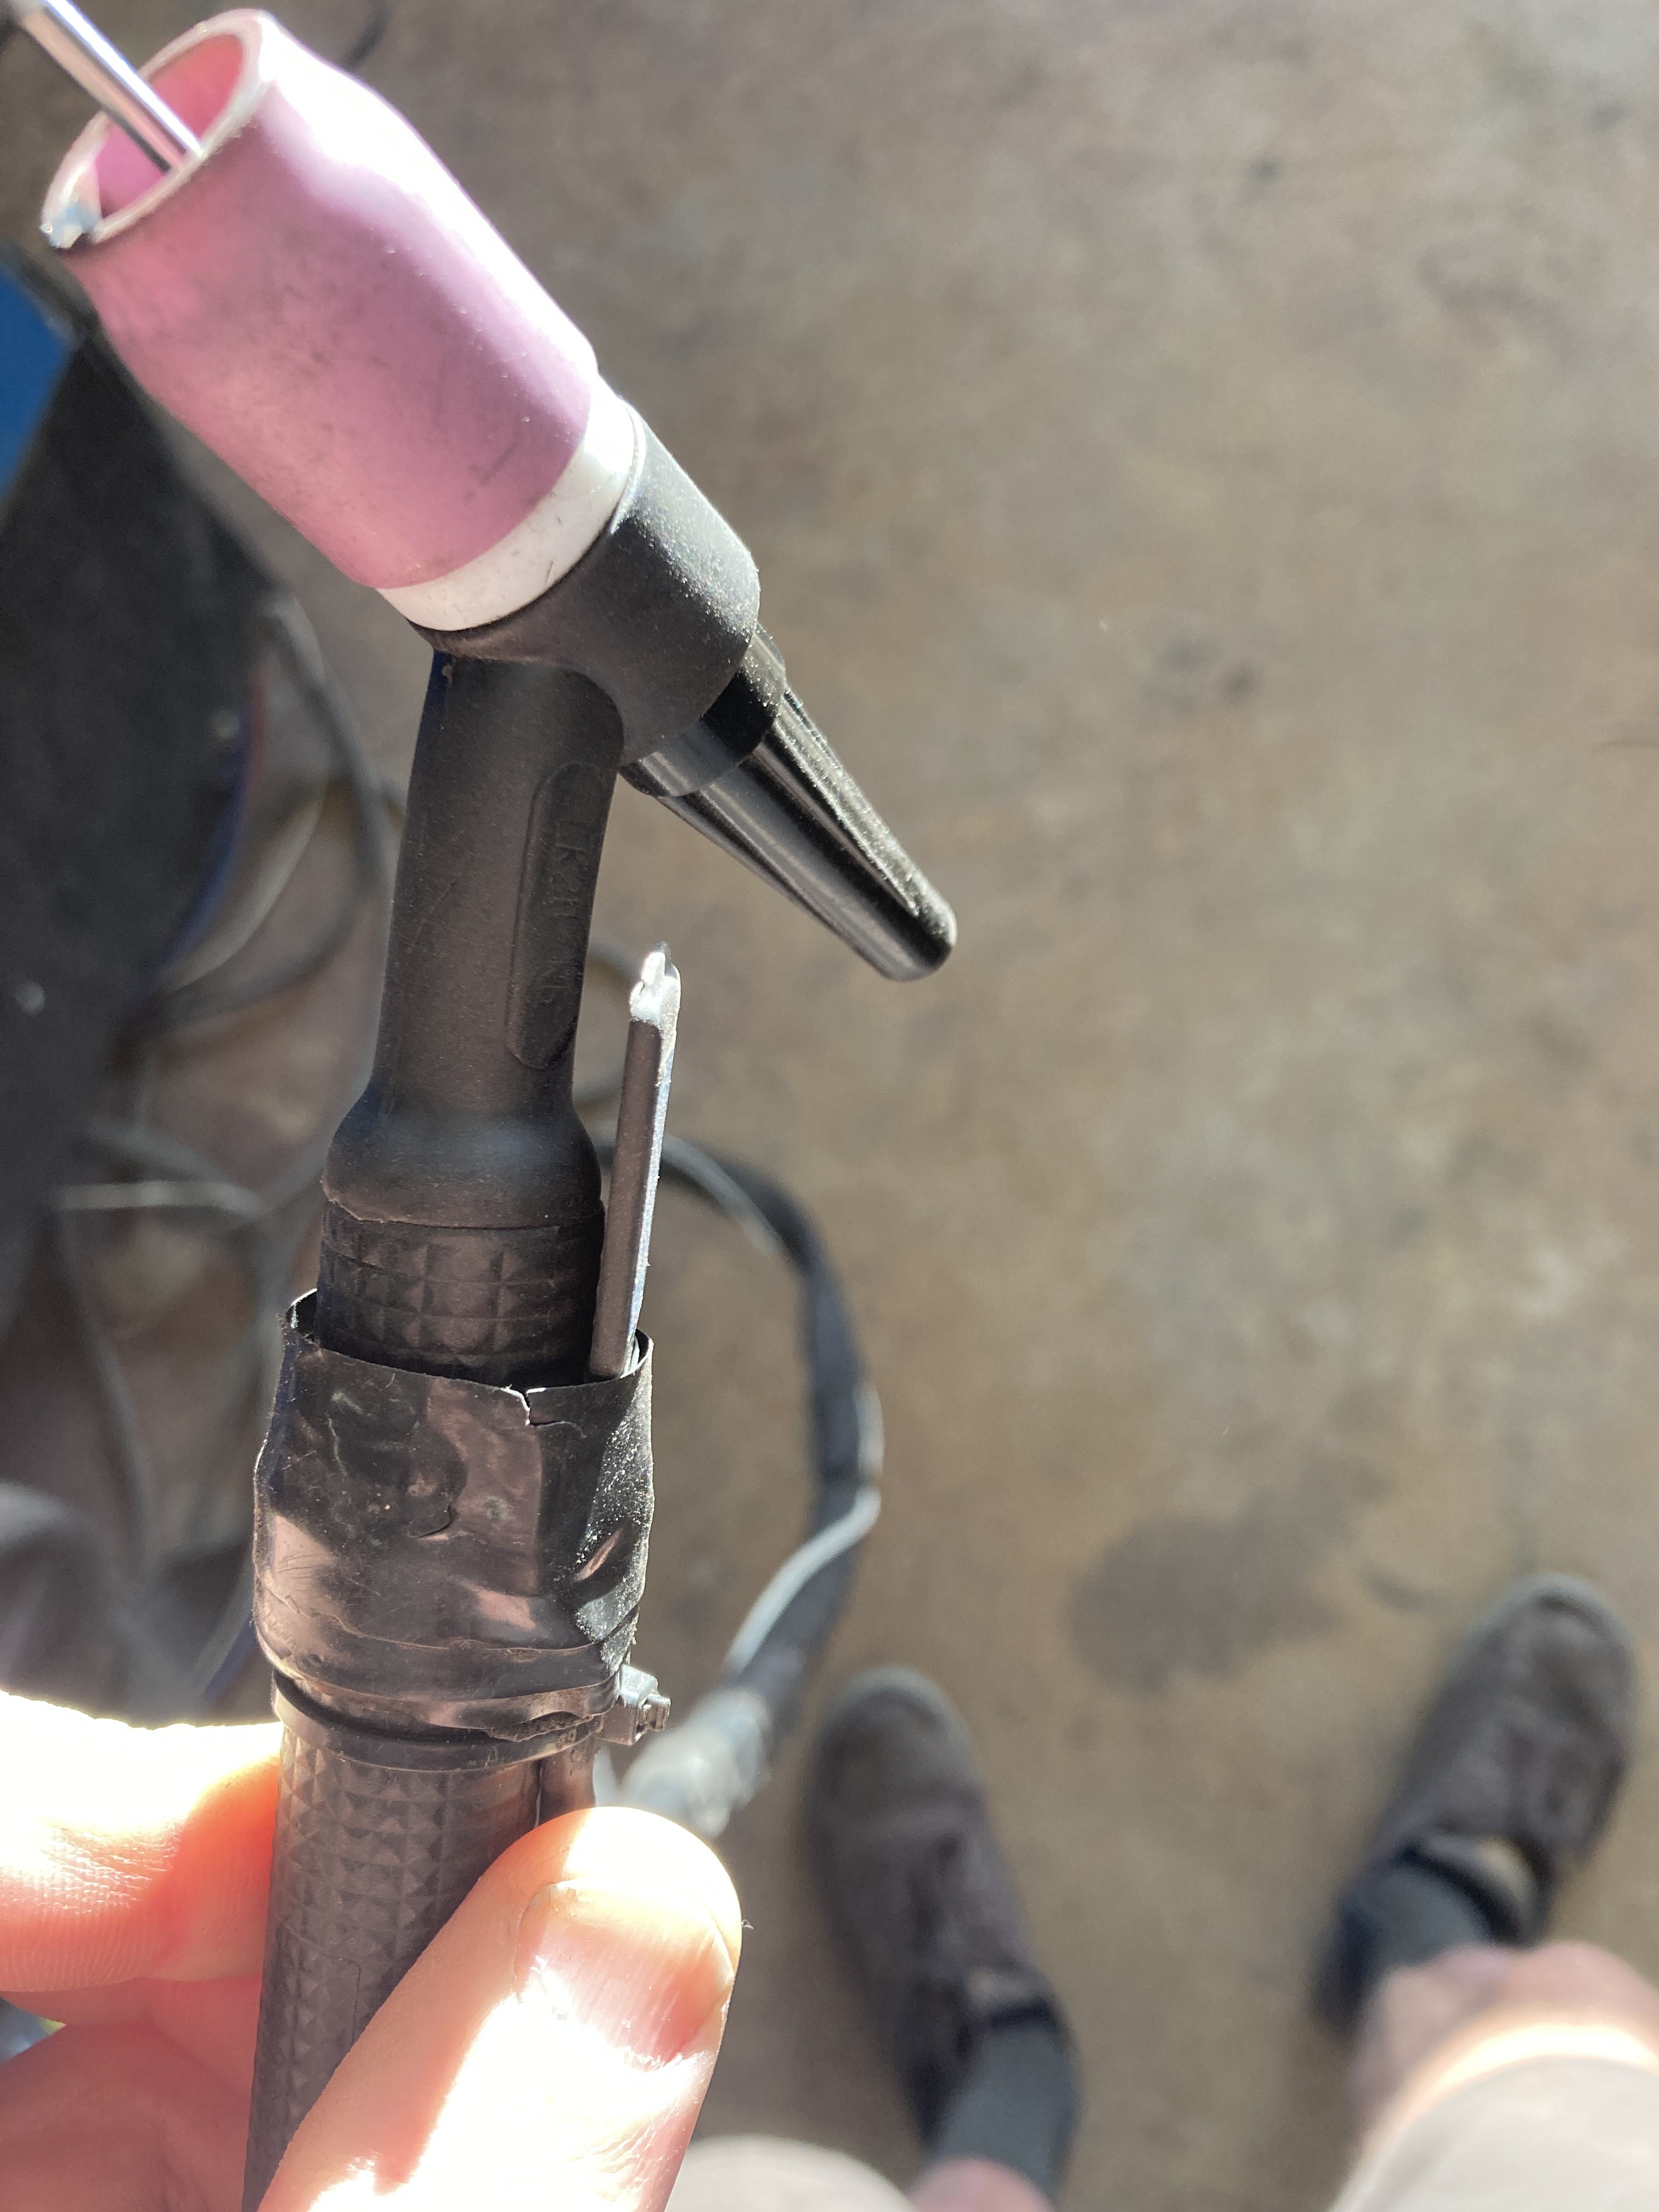
I was able to use my machine for a little bit on Friday before heading out of town for the weekend and surgery yesterday, but I’m really liking it. I haven’t yet tried all the options out, but hoping to get back to it by the end of the week. The one thing that I think I’ll have to change though it the torch. I think a small flex head might be advantageous. Thoughts?
1 Like
Assuming air cooled, a #9 is nice because it uses the smaller consumable size and it’s fairly easy to find good gas lenses, taper collets, etc. I think it’s only rated at 150a, but holds up well. Don’t forget to upgrade to 25ft length hose at the same time- it makes things easier in the shop IMO.
2 Likes
Are you using the adjustable tig button or just the on/off type? I’m interested to try the adjustable type, but they aren’t cheap!
I have one too, slightly older model (201XD). It’s gotten light use in hours, but some thicker stuff, like making fixtures and a stand for my milling machine. No frames but a few test joints in thin stuff.
The main reason I’m writing is to complain about the foot pedal, which failed after less than 4 hours of use, but due to me not using it much, it failed outside the warranty period, which was only 6 months (!) I finished the project I was working on with a finger button on the torch, which was also supplied with the welder package, and that was adequate but not near as good. It’s on or off (2T or 4T), so no ability to slightly decrease amps as the part gets hotter for example. (Others make sensitive TIG buttons with fine control, but this is not one of those)
Luckily SSC Controls makes a very good pedal to fit these welders. Made in the US.
I’ve heard mixed reviews on AHP support but (touch wood) I haven’t needed any yet. Luckily they’re cheap as. Even cheaper now then when I bought mine before the pandemic. Before the new tarriffs anyway… Not the cheapest thing out there, but possibly the best cheap one or cheapest halfway-decent one?
I’ll check into this. I have a #26 torch that has the tig button, but I haven’t used the button yet. BFS has a small torch that that looks good too.
1 Like
The one that I’m using is sold as “Tig Button” with a very simple website written in comic sans.
It’s an analog control, you press harder for more current. The button doesn’t move at all, it’s just a strain gauge under a solid plastic button. This seems to work well because nothing on the torch moves, you are just adjusting grip strength.
It’s pretty reasonably priced for a small production volume made in the US product. Anyone in/near Seattle is welcome to check mine out.
1 Like
Website: https://tigcontrol.com/
More informative website (his YouTube channel also has lots of videos): TIG Button - 6061 Finger Hand Amperage Control Order HERE
I bought it direct from TIG Control since they are the ones who make it.
1 Like
That looks interesting. The issue for me with something like that is that I rarely hold the torch in a position that would give me consistent access to work the button. I often wrap my hand around the cap and the also the cup/lens. Having to hold the torch with a pencil grip would be a non-starter.
Yeah after I had to finish a project with the ungood on/off button, I bought one of those. Then I didn’t do any welding since, so I haven’t even tried it. Maybe I shouldn’t admit that… there goes my weldor cred. Oh right, never had any.
I asked the guy, what’s the difference buying from you vs 6061, he said no difference. When 6061 gets an order, they just forward it to him for fulfilling, so I just bought from him.
FYI that TIG button got the ‘This Old Tony’ seal of approval. Plus I actually like comic sans.
For sitting at a table, I’ll always go for a pedal, but a button is great for odd-position welding
1 Like
I often wrap my hand too around the end of the torch too. When I do I reposition the button to the side of the torch and press it with my thumb. The button is just strapped in place with velcro so I can easily move it to where I want it.
I use one of those at work, pretty handy at times. Not sure id like it for welding a frame, but for the more dexterous among us it’s probably not an issue. Very easy to reposition its position depending on your torch grip
More pressure more amps, works just like a foot pedal
I had the original that was a button and now I am using the updated version that’s even more slim. Super easy to flash yourself 10/10
2 Likes
Good afternoon and happy Friday everyone,
I need help troubleshooting my titanium welds and have the questions below:
1. How do I get more filler metal into the puddle using the laywire technique?
I’m trying to figure out a process that works for me to weld titanium. When I use the laywire technique, I have trouble getting enough filler pushed into the puddle. I end up with a very flat weld on the ears or sides of a tube joint and I end up with undercut in the crotch or acute angle of a tube joint. I have tried bumping up the filler diameter from .045" to .060" and simply get a wider puddle with the same issues. If I go lower with amperage, I have a difficult time getting the puddle to wet all the way into the root when welding the crotch of the tube joint. Regardless of its size, the filler melts just before the puddle while I’m welding. Should I change my torch angle? Push the filler harder? Any tips would be appreciated. I wish I had a way to post a video of what the in process weld looks like.
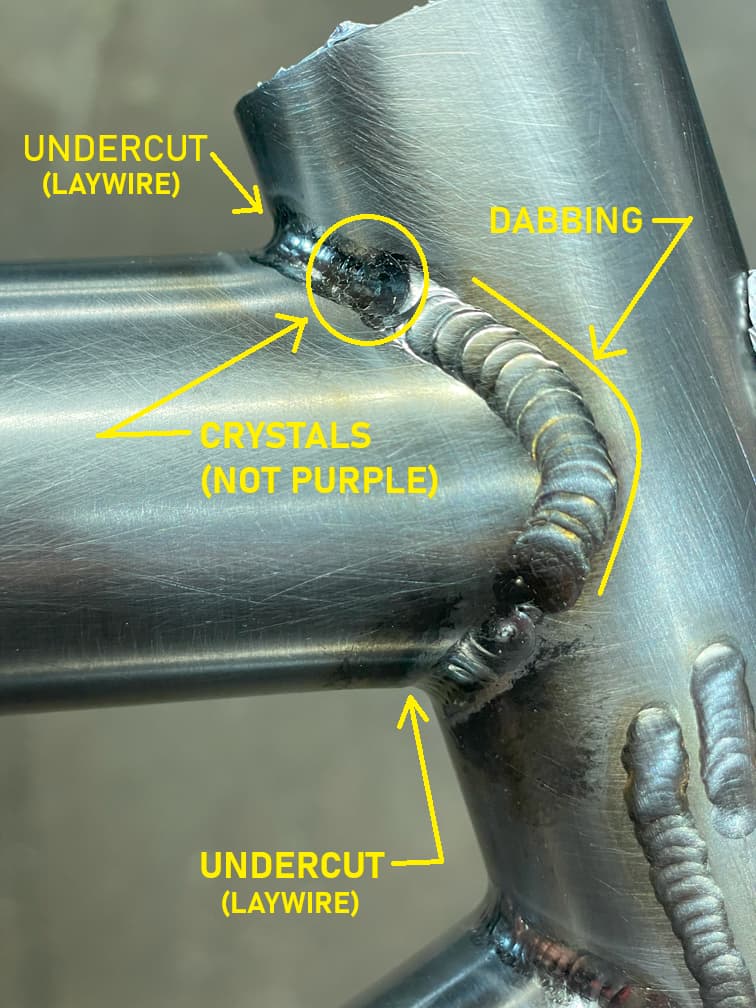
2. Any idea what is causing the purple crystal looking discoloration in my welds?
I was having really good luck with dabbing. I made many welds with no issue at all until I welded my last few practice joints that have this purple discoloration. Have any of you ever seen this before? Not sure If the filler metal is leaving the argon shield, I’m getting some kind of turbulence that’s pulling air in or what. I do notice that the purple becomes deeper in color as time passes following post flow. I have been mechanically cleaning the tubes with scotch-brite and chemically cleaning the tubes and filler with acetone. The challenge is I have used the same process with varying success so It’s hard to find a smoking gun. If I could figure out how to get more filler in the puddle using the laywire technique, it would eliminate the risk of the filler being taken out of the argon shield during welding. which I am guessing is the cause? The only evidence that contradicts this idea is, after welding, the end of the filler metal is still silver. There is no discoloration on the filler metal itself.
For both setups I am using I’m using 1/16" 2% lanthanated tungsten, a No.12 cup with a gas lens @ 25 CFH and back purge @ roughly 2.5 CFH. Pre flow is 1.5 sec and post flow is 10 sec.


Let me know if you have any ideas or if you have any more questions.
Thanks,
Buck
2 Likes
Purple color was likely caused by poor gas shielding. Either you lifted the torch too soon, or had a bad angle or too much stickout. I think you can remove the filler from shielding and put it back in puddle without causing discoloration (this does cause porosity though!!) so I don’t think that is to blame. Or your post flow isnt long enough. A piece like this with welds all over can get pretty hot and it can make it so the welds take much longer to cool down if the whole thing is hot.
The crystaly look is weird, titanium does have that fragmented look normally on the puddles but not sure whats causing that. You might be right about air getting mixed in or some turbulence. Maybe try bumping up your gas flow to 30 cfH
1 Like
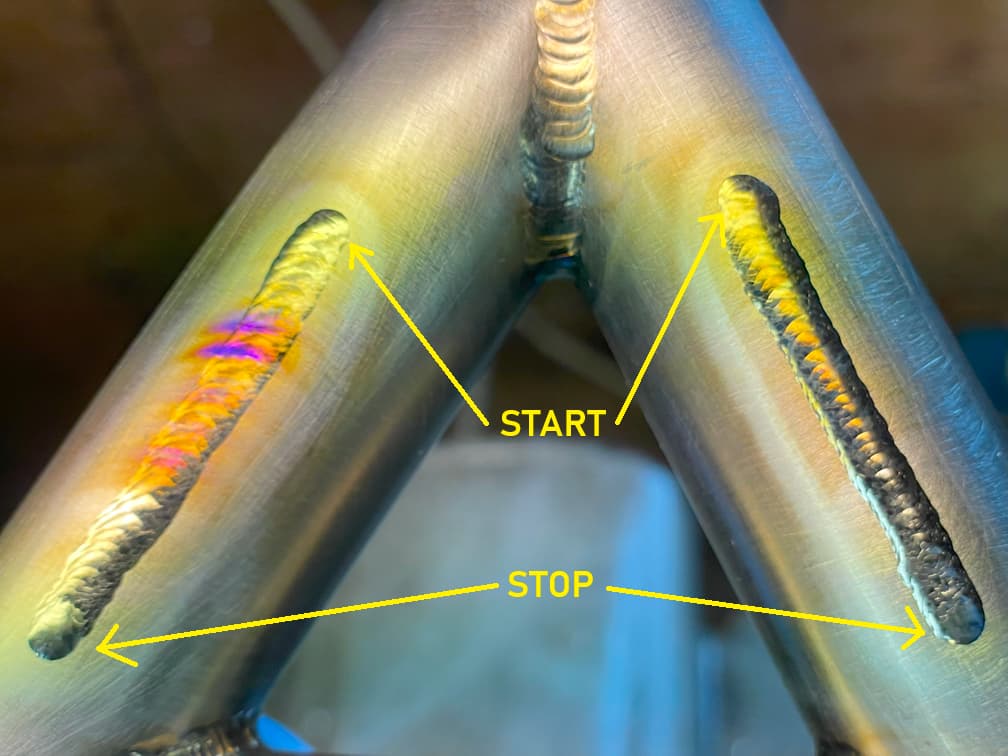
Here is a clue that is pointing towards travel speed and argon coverage. I welded these beads back to back using the laywire technique. I used Neuhaus’ pulse settings. with slightly different pre and post flow numbers.
1.5 pre flow
125A peak
16% on
15% backgronud
1.1 pulses/sec
12 sec post flow
#12 cup with gas lense
1/16" 2% lanthanated tungsten
.045 filler
The weld on the left had 25 CFH flow rate and the one on the right was 30 CFH.
Am I moving too fast? Does Ti just hold heat for that long? Would shortening my stick out help? All the fans in the shop are off. Weirdly if I look at the cobwebs above the wood stove and above my welding table they are moving indicating that there does seem to be a slight air current created from the convection off my wood stove. . . . . seems a little far fetched but… that’s where I’m at haha!
1 Like
@happywelder Thanks for your response!
Bumping CFH up to 30 did help! See my response below.
I think you are right with the multiple consecutive welds holding heat. Even after 12 sec post flow I can watch the weld continue to change color because, presumable its still above 400F or whatever temp Ti turns purple in air.
I guess that’s the difference between a complete frame and coupons is that you can move around and give each weld time to cool.
1 Like