The title says it all! I have built three frames and every time I am disappointed with weld quality.
For the next 30 days I am going to spend 20-30 minutes practicing welding or mitering tubes. I’m posting progress here to keep me accountable and on task!
I am currently welding pulsed at 120 amp 1.5 PPS and 22% pulse.
Day 2 progress- brought to you by humbling yourself…
I took the advice I did not want to hear. I turned off the pulse and started using a Metronome while making flat welds. I started without filler and moved into filler after I felt good moving steady.
This was a HUGE learning day! I learned so much about arc length and speed doing these simple welds. I am going to spend a few more days on these.
Spend the 20-30 minutes welding. You can waste a ton of time mitering tubes but there is no replacement for time spent actually welding. A good exercise is run beads across and around a tube with no filler. Work on keeping the puddle width and spacing consistent as heat builds.
Also, don’t be afraid to try different settings. I have 5 primary settings I use for steel and 5 I use for titanium, I will make small adjustments to those settings depending on a number of variables including how I am feeling that particular day. Some days it’s nice to slow things down a bit while other days I’ll throw back a bunch of coffee and just want to get at it.
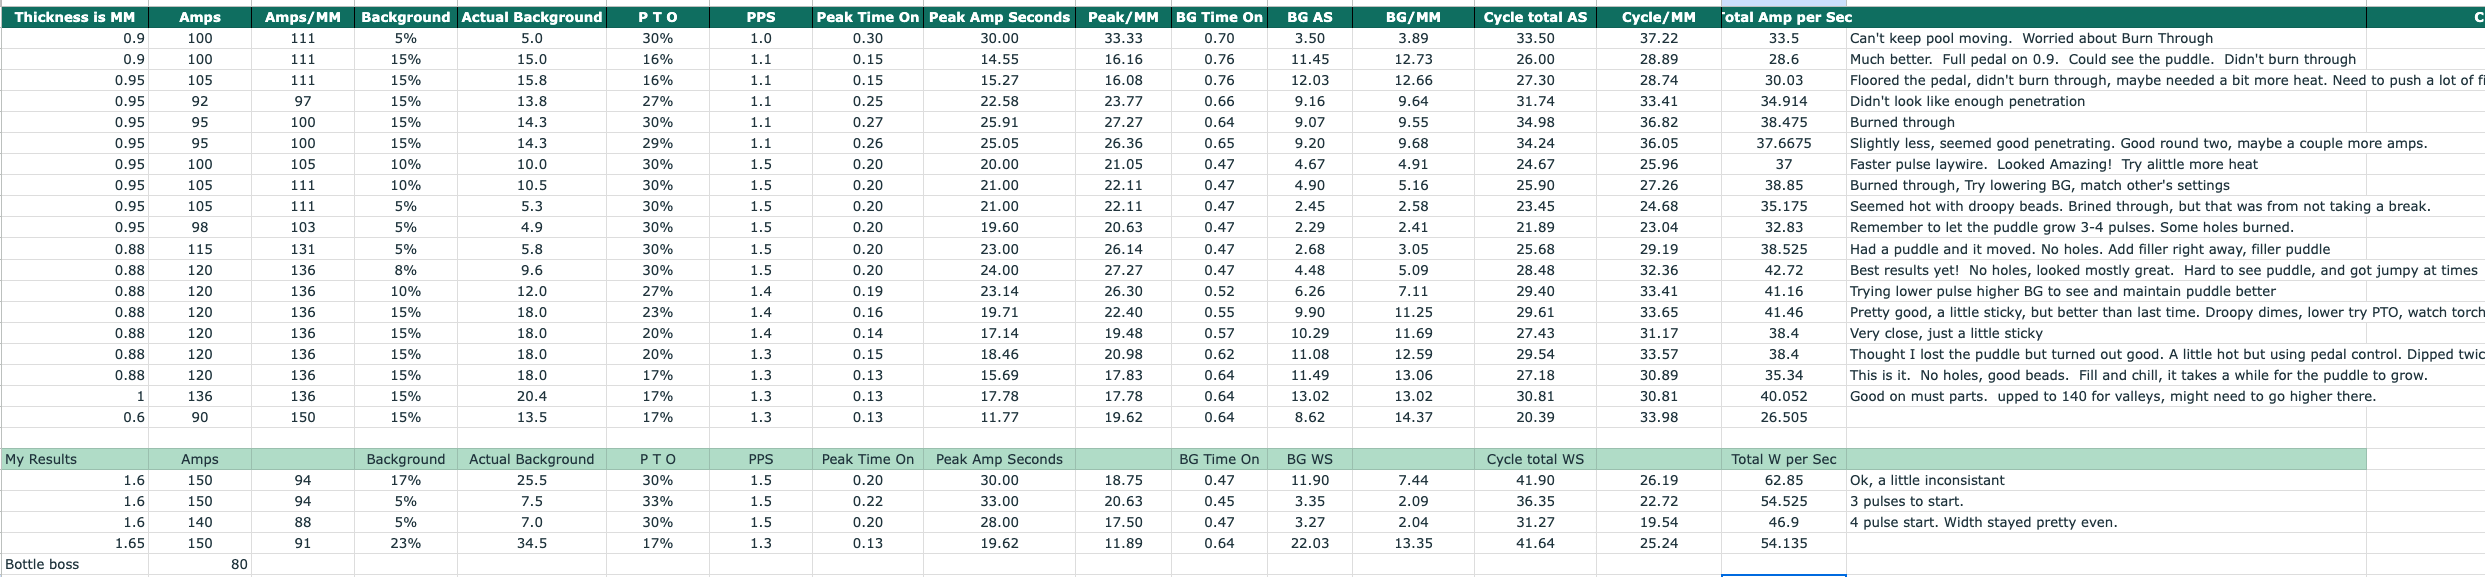
If you’re a data geek, I found the log I used when I was getting started with TIG and experimenting with settings. Not sure science backs up some of my formulas, but it was interesting to see how things like pulse rate can change the total heat put into the metal with other variables the same. I highly recommend logging your lessons in one form or another.
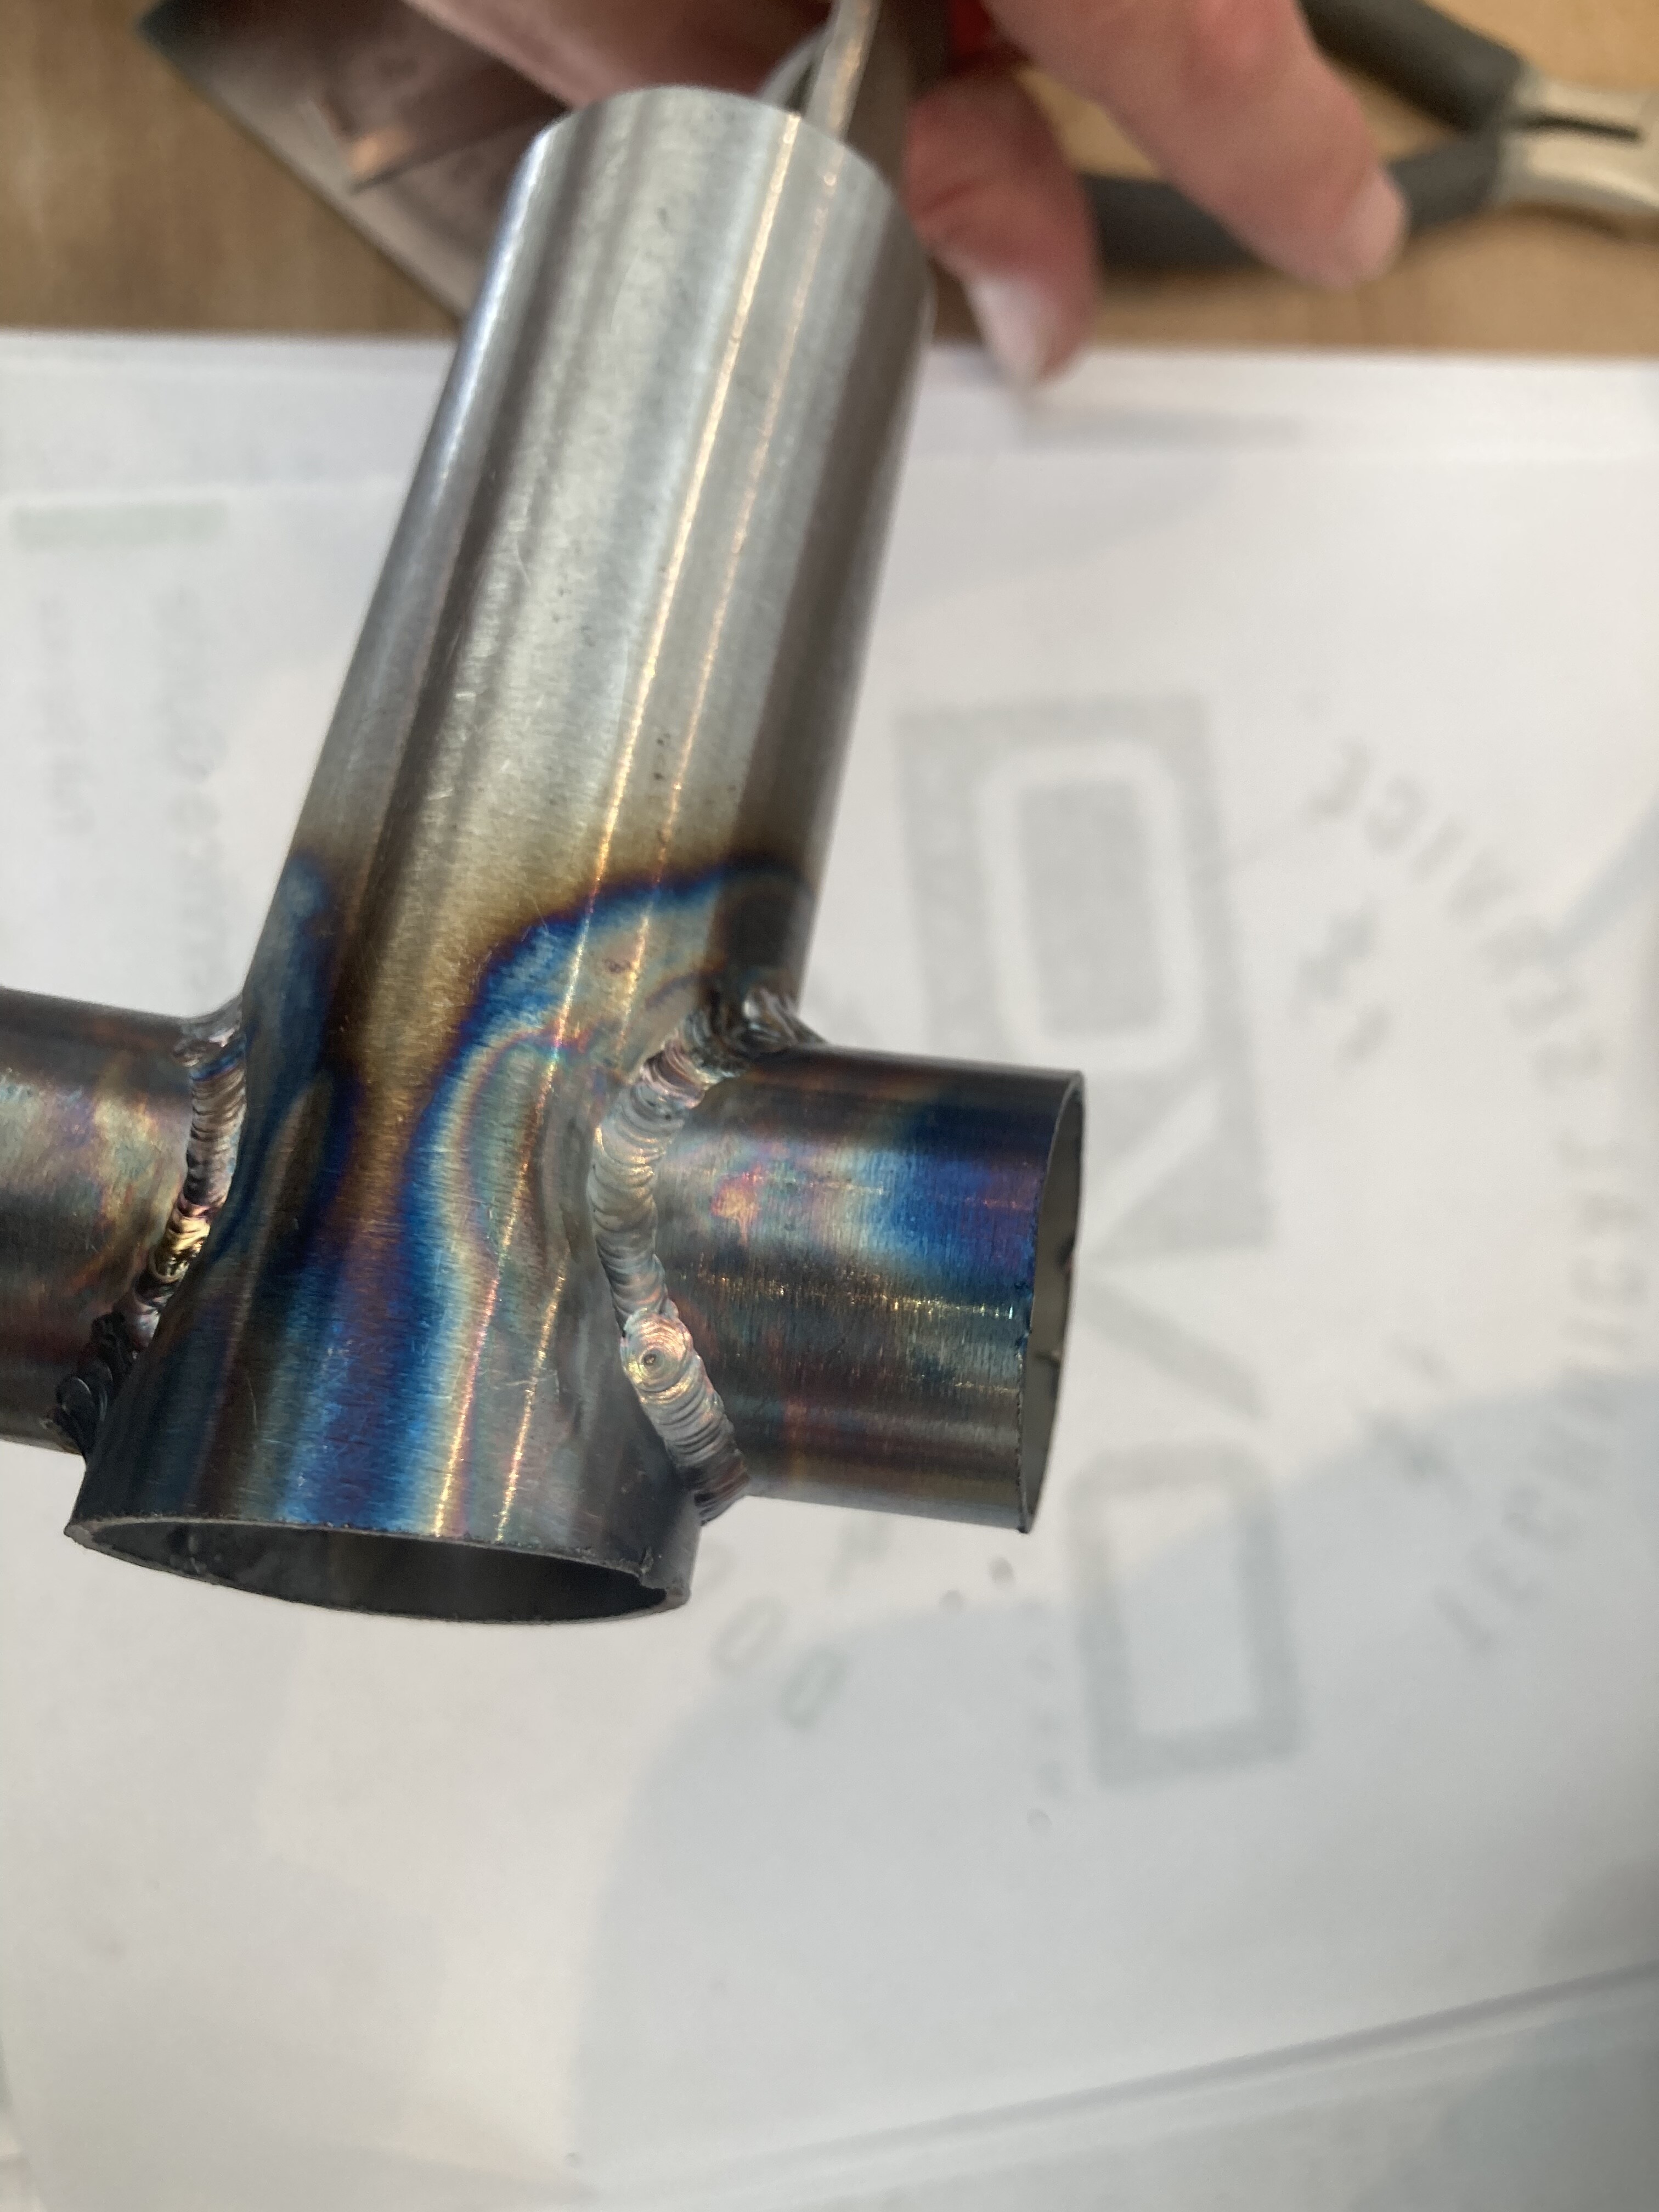
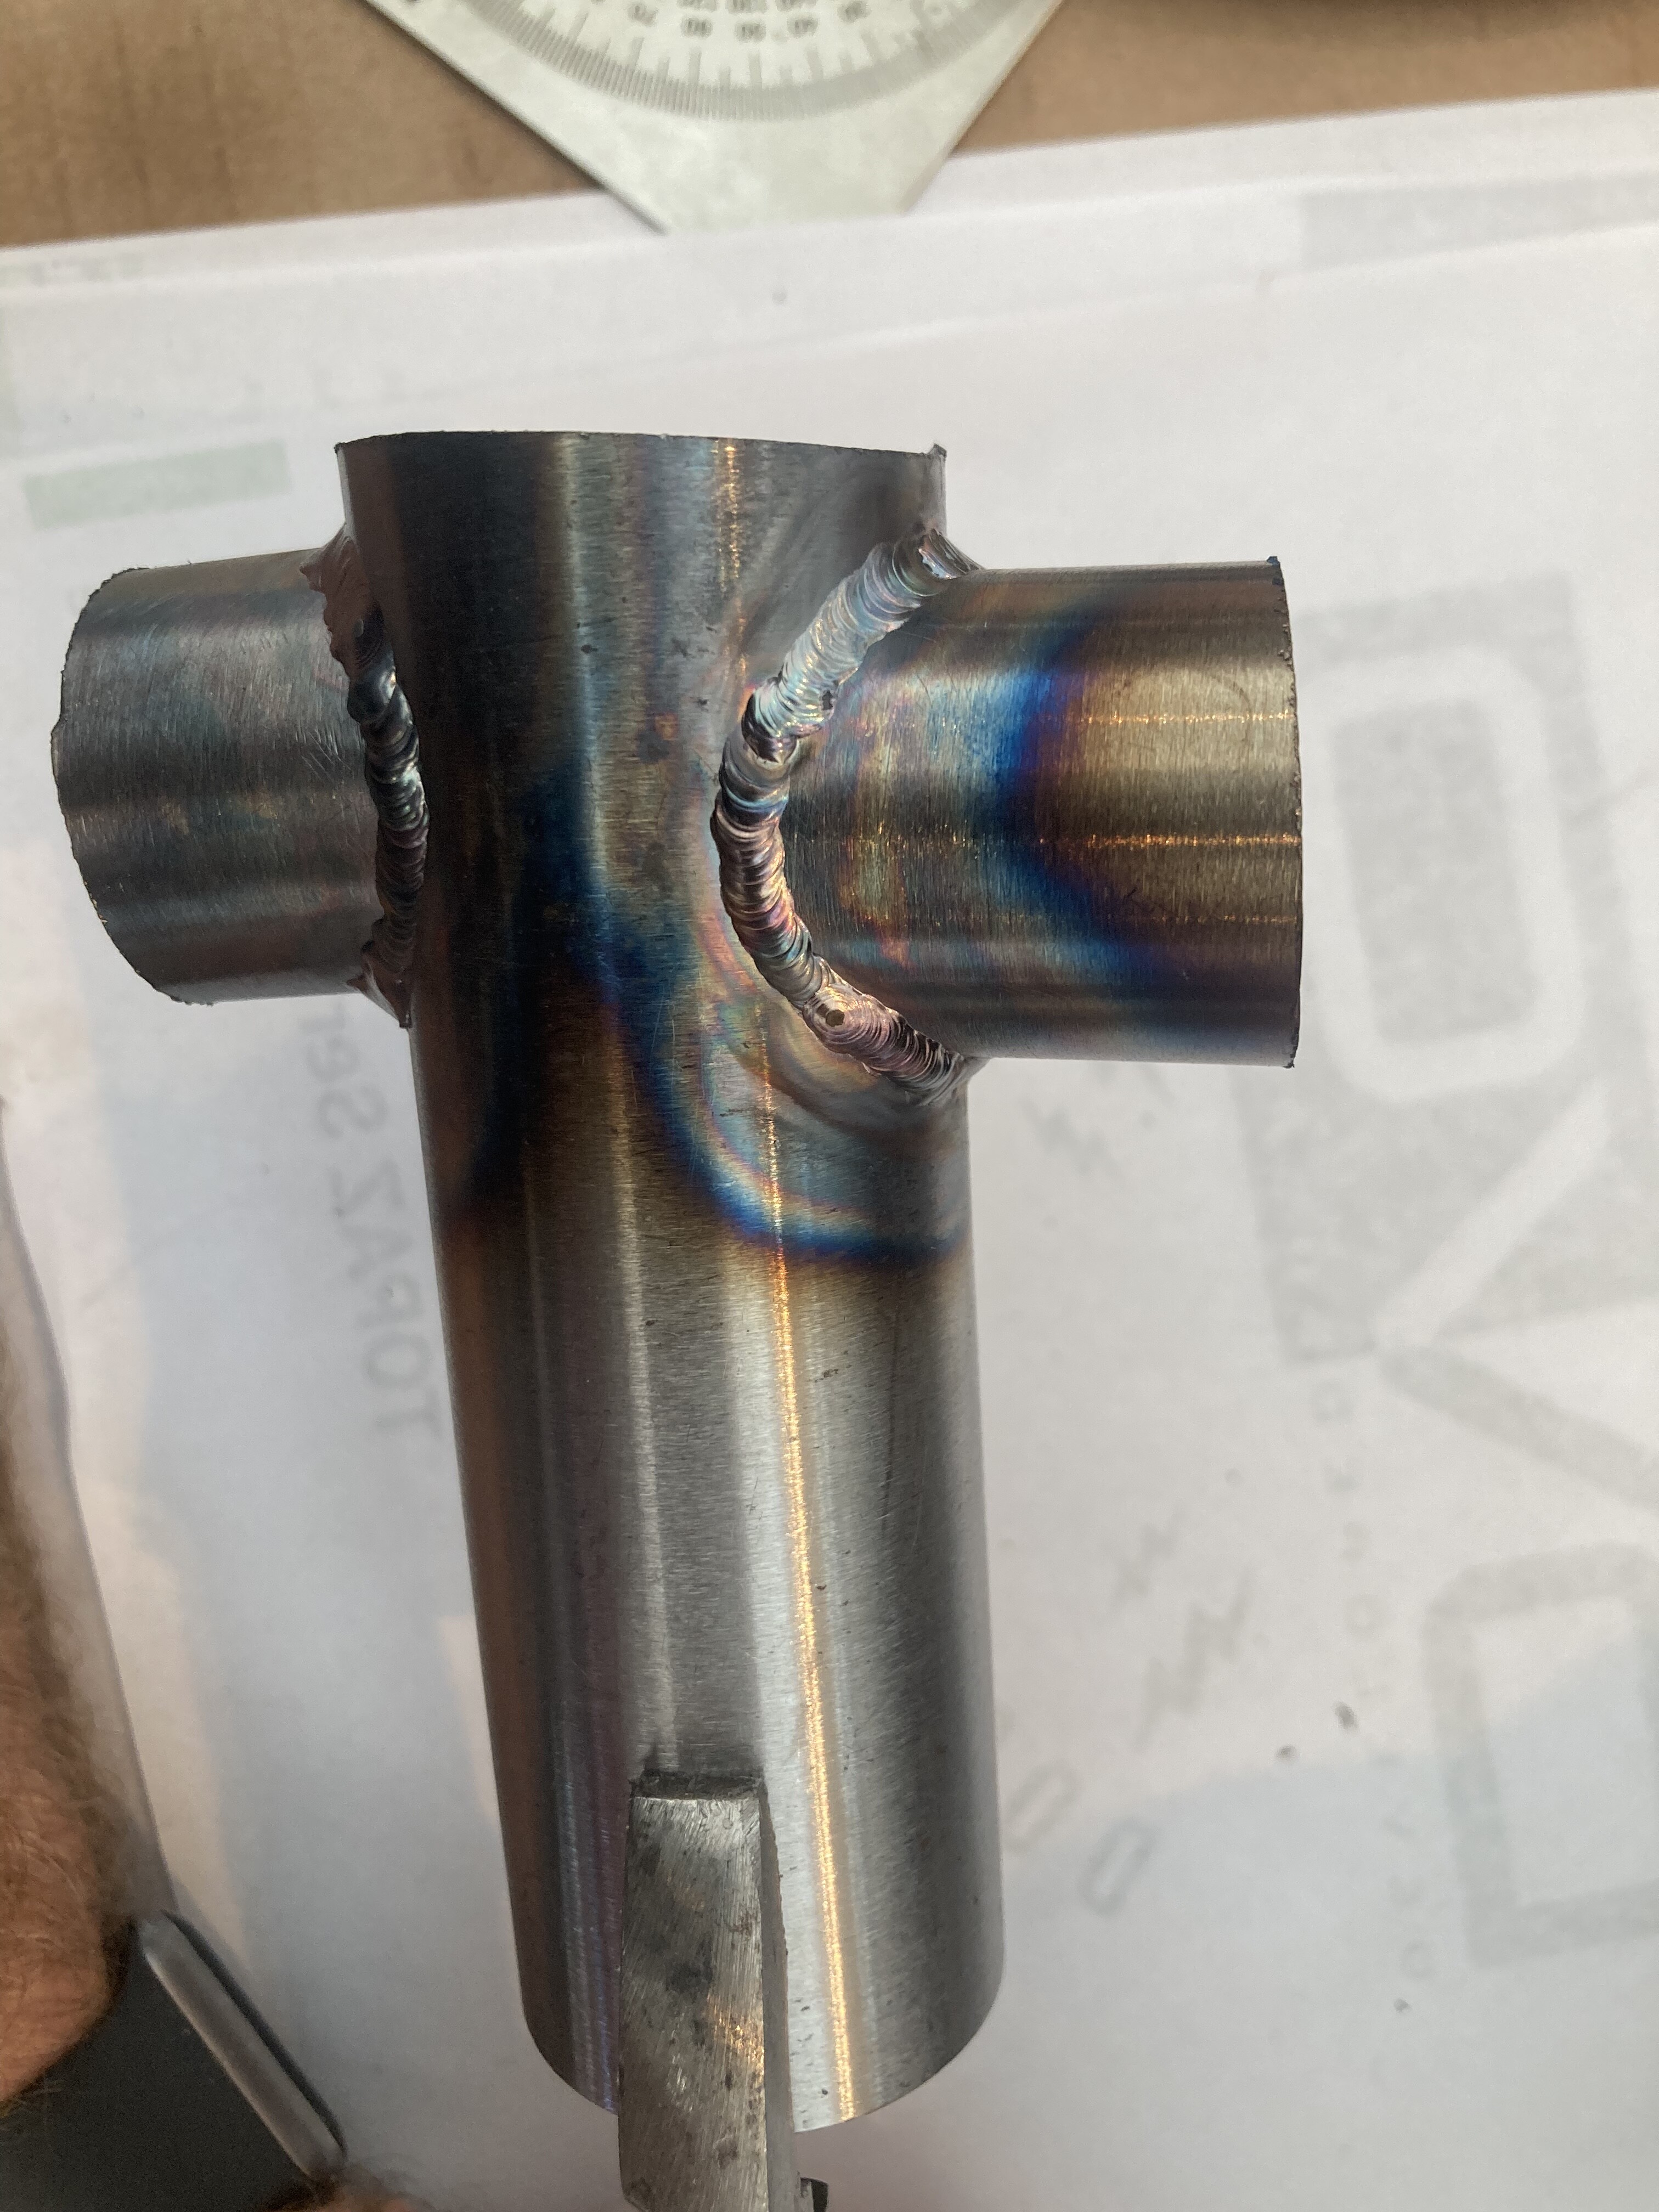
Similar to running beads on tubes, I gave myself lettering projects and tried writing “HOMAGE” with beads a bunch of times. I also practiced on joints using square tubes, mainly because I don’t have a mill and could prep a bunch of joints with 10 minutes of hacksaw time.
My suggestion: before you do 28 more days of pulsed work, do 28 days of non-pulse. Learning to read the puddle will really help your ability to weld with pulse.
That is amazing! Thanks for sharing, I’ll put it into practice and see what how it holds up.
My machine cannot adjust background when using a pedal. It is always 5. I just assumed that was because it varies based on pedal position. Do other machines do background adjustments when using pedal?
For reference it is a Yes Welder Pro TIG 250 AC/DC Pulse. Very happy with it but the instructions are poorly translated.
Background is usually a percentage, so it changes in tandem with the pedal. But there is also minimum amperage your machine needs to put out, which could be 5 amps… For example, if your background is set to 5%, and your machine is set to 80 amps (at full pedal), 80 x 5% = 4 amps. This is below the minimum 5 amps so the machine will still put out 5 amps. To extend on that, if your background is 5% and the minimum amperage is 5 amps, anytime you’re under 100 amps, whether from settings or the pedal, it will put out 5 amps. And at 120 amps your background will only be 6 amps. I think my machine has a 10 amp minimum.
Everything varies depending on the pedal, the calculations all use full throttle. And honestly the notes section is the most important part, all the calculations are just for fun. A tip from my learning experience: Don’t make changes to the machine settings and your technique at the same time. If you’re tweaking machine settings, try and keep torch angle and speed and filler rod technique consistent. If you want to experiment with different techniques, use the same machine settings while you work on that.
As i’m thinking about this i’m remembering what I actually learned. Pulses per second and pulse time on are intimately linked. For example, if you drop your PPS from 1.5 to 1, the duration of the pulse increase 50%. So by slowing the PPS down you end up putting a lot more heat out even though your other settings stayed the same. However, if you also adjust the PTO, you can arrive at the same pulse duration and only increase the background time.
Take a look at this screenshot. You can see that the “Peak Time On” is the same at 1.5pps and 22% PTO as it is with 1pps and 15% PTO.
I adjust based on a number of variables. Material thickness, type of material, type of joint, and even the weather to some extent.
They generally aren’t miles apart, but they do change the way the puddle behaves and flows. I use this to keep a similar look across the entire frame. When welding the 3D printed parts the settings deviate a bit more drastically.
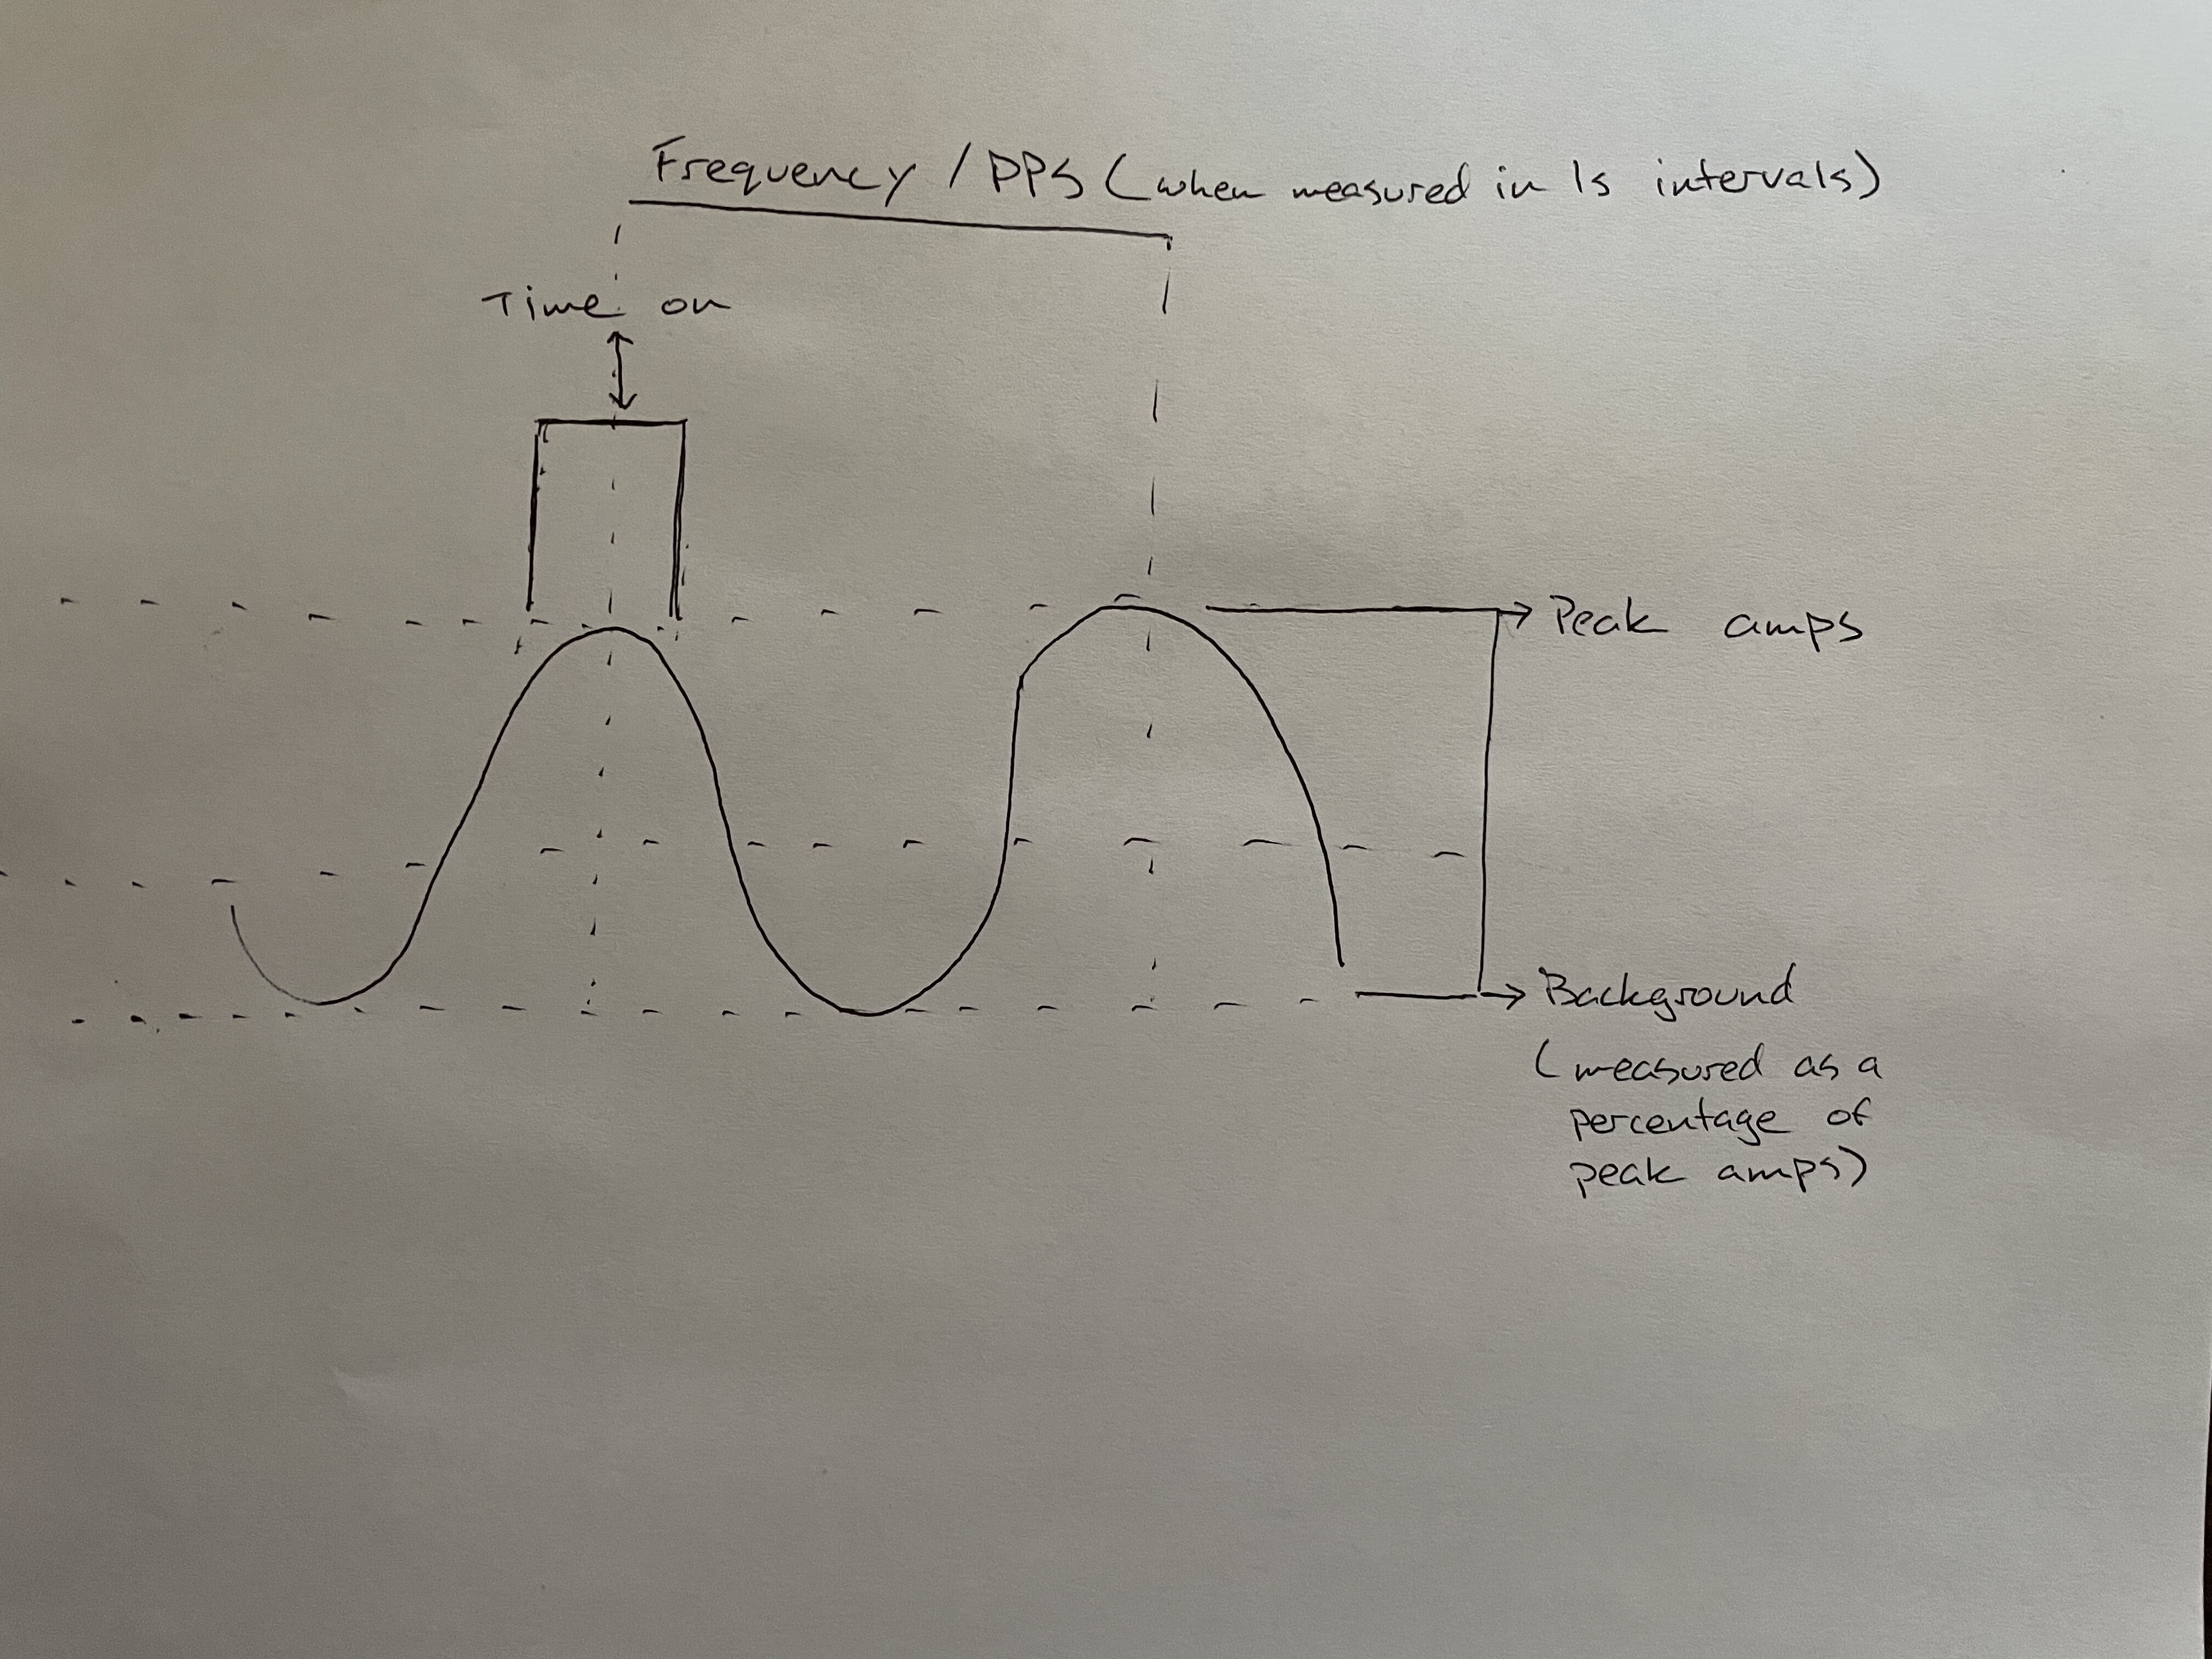
It’s important to understand what each pulse setting is referring to, what you can adjust and the impact your foot pedal will have. I’m sure you like a slow pulse because you feel less rushed. You can create the same sensation by increasing your peak time on and speeding up the pulse rate. This can be used to change heat input into a part.
Your welder’s inability to adjust background current is quite limiting. I never run less than 10% background and that is generally low compared to what I use most of the time. Increasing background current increases penetration at the root and helps you the filler continuously flowing into the puddle. This also helps reduce the instance of creating a keyhole because you have a little more warning, and your filler is already in position and in the puddle.
Definitely wouldn’t worry about filler at first, just get comfortable holding the torch and being able to read and control the puddle.
You are correct, the amount of time at peak amps changes as a percent of the total time on relative to frequency. This can and should be used to visually keep things in a space that the welder can tolerate while managing heat input into the part.
I apologize for my terrible drawing I am not an artist, but hopefully this helps.
Excellent idea! I need to do that same thing this winter. My welds on build #2 seem to be standing up to trail abuse so far but they really weren’t great.
Join us! I have built three frames and every time I have one in the jig I get too excited and lack focused practice. The best time to practice is when there are no distractions
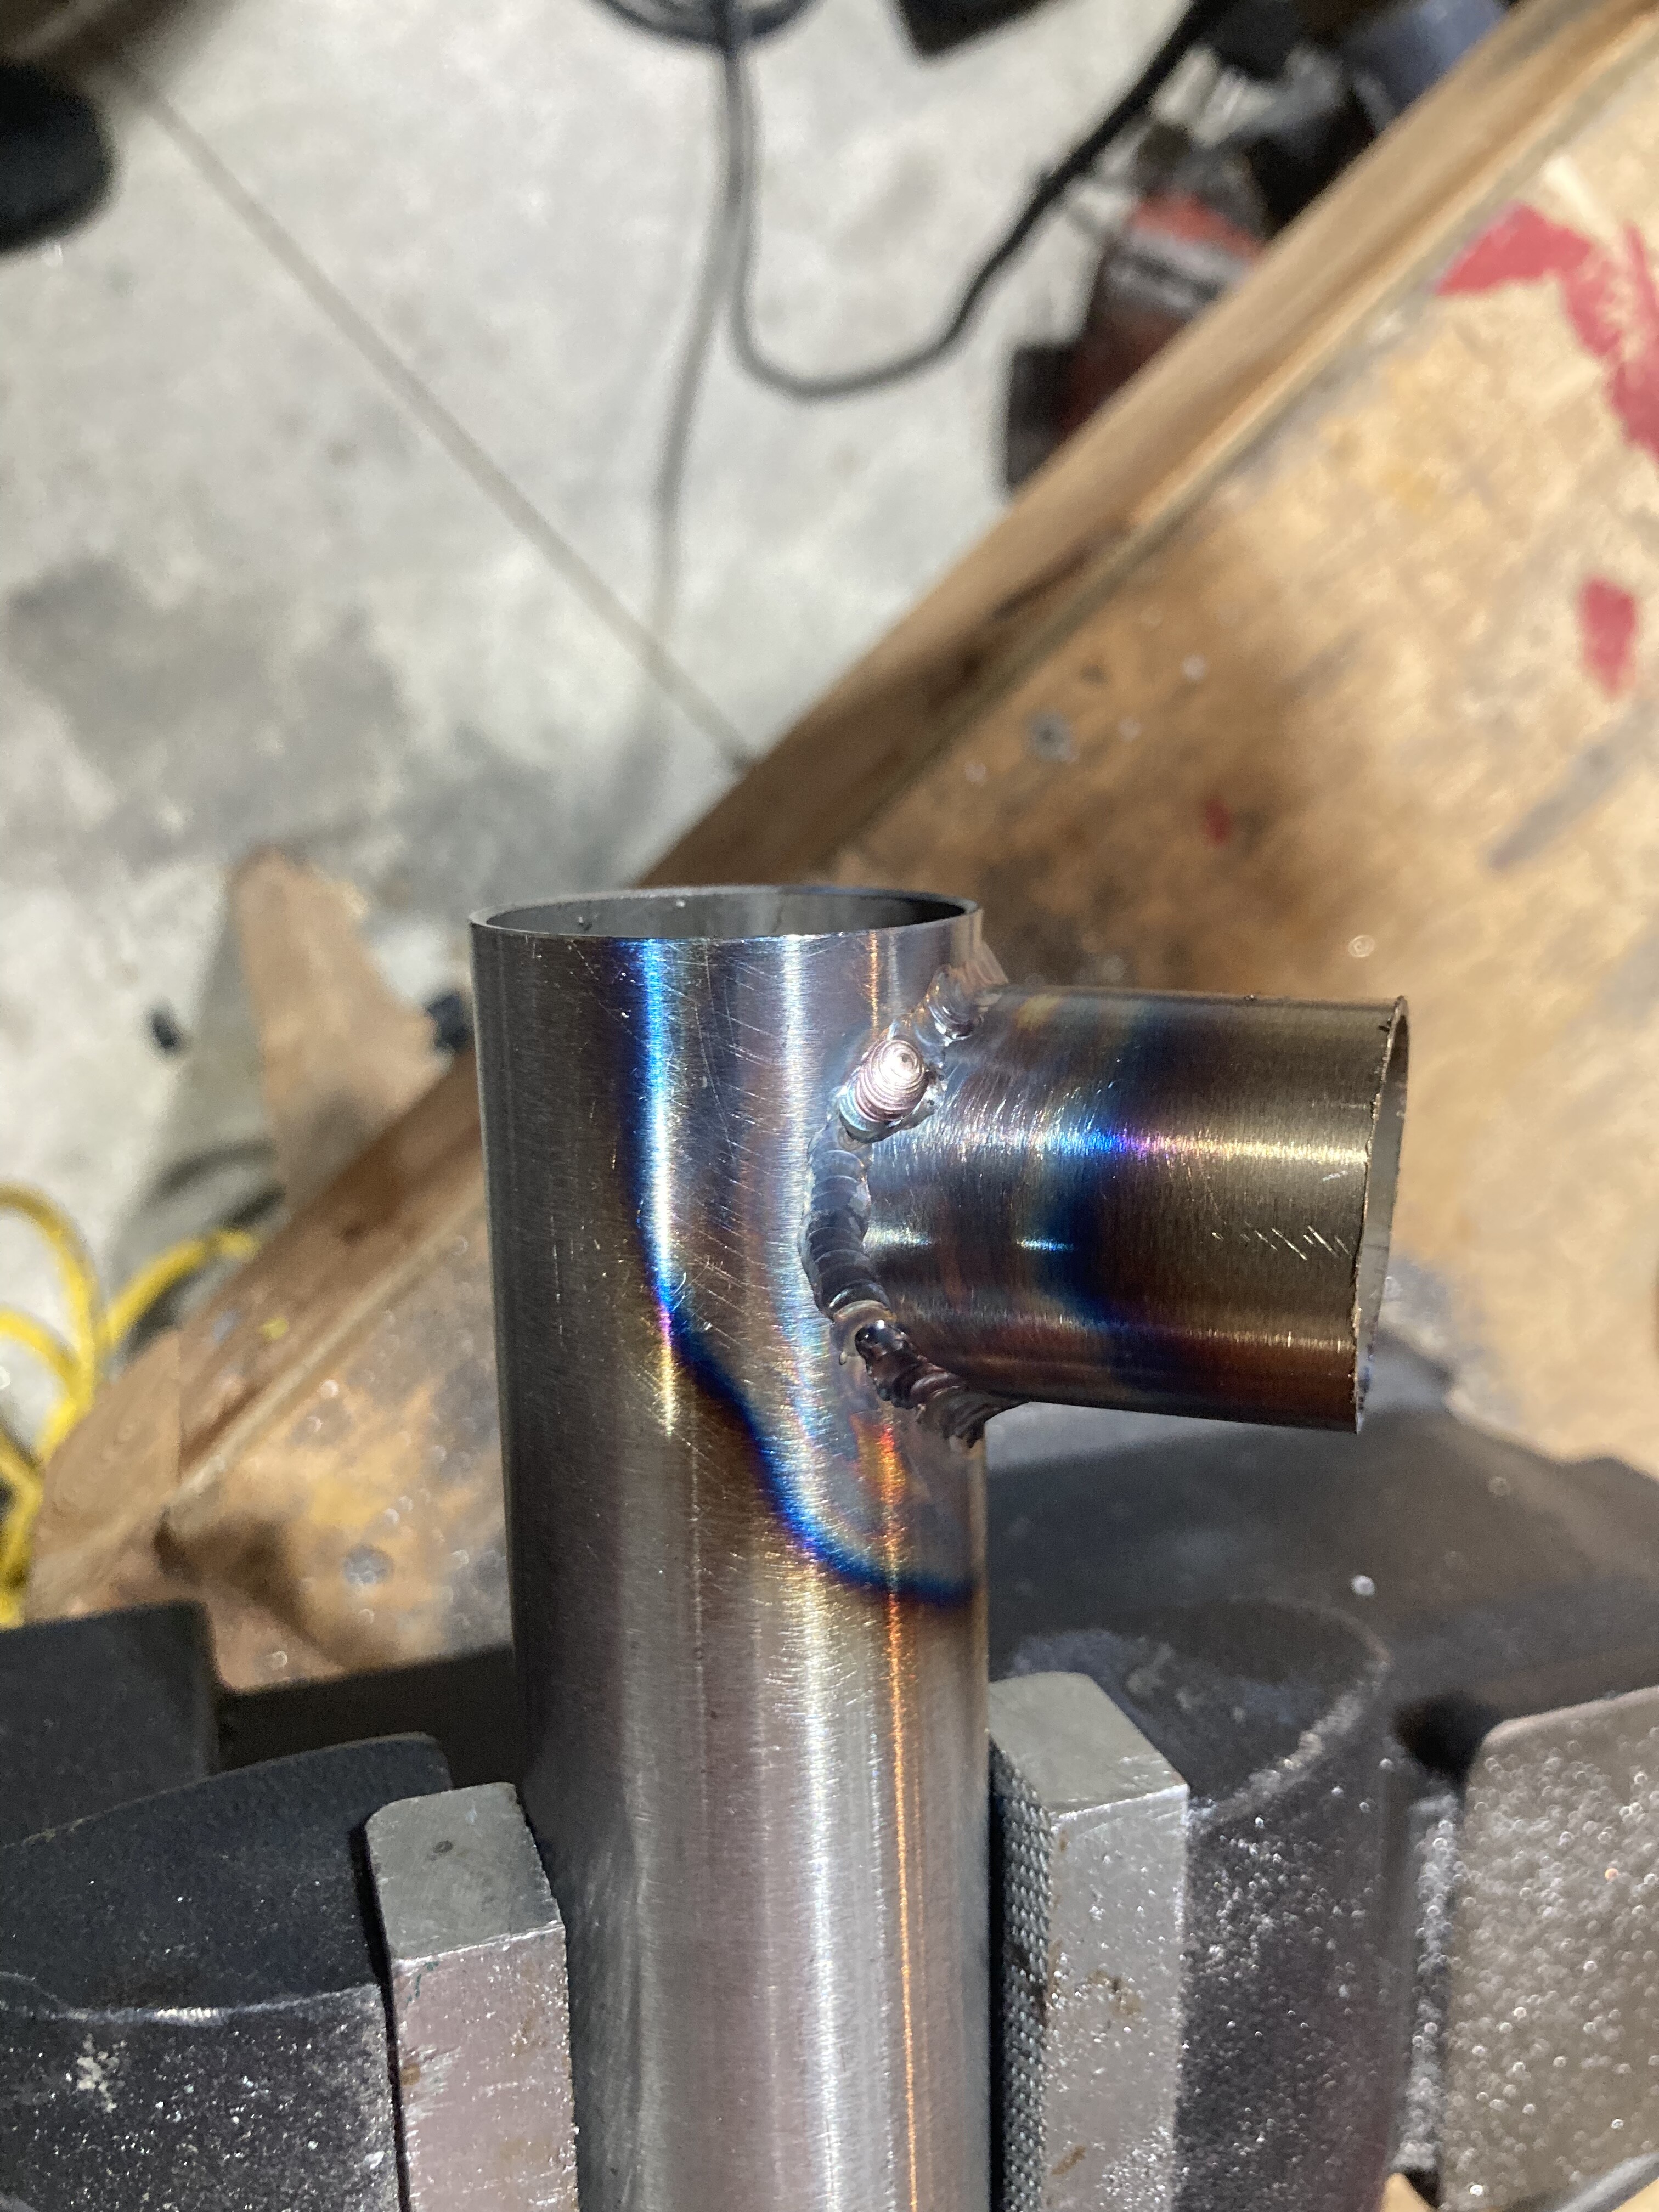
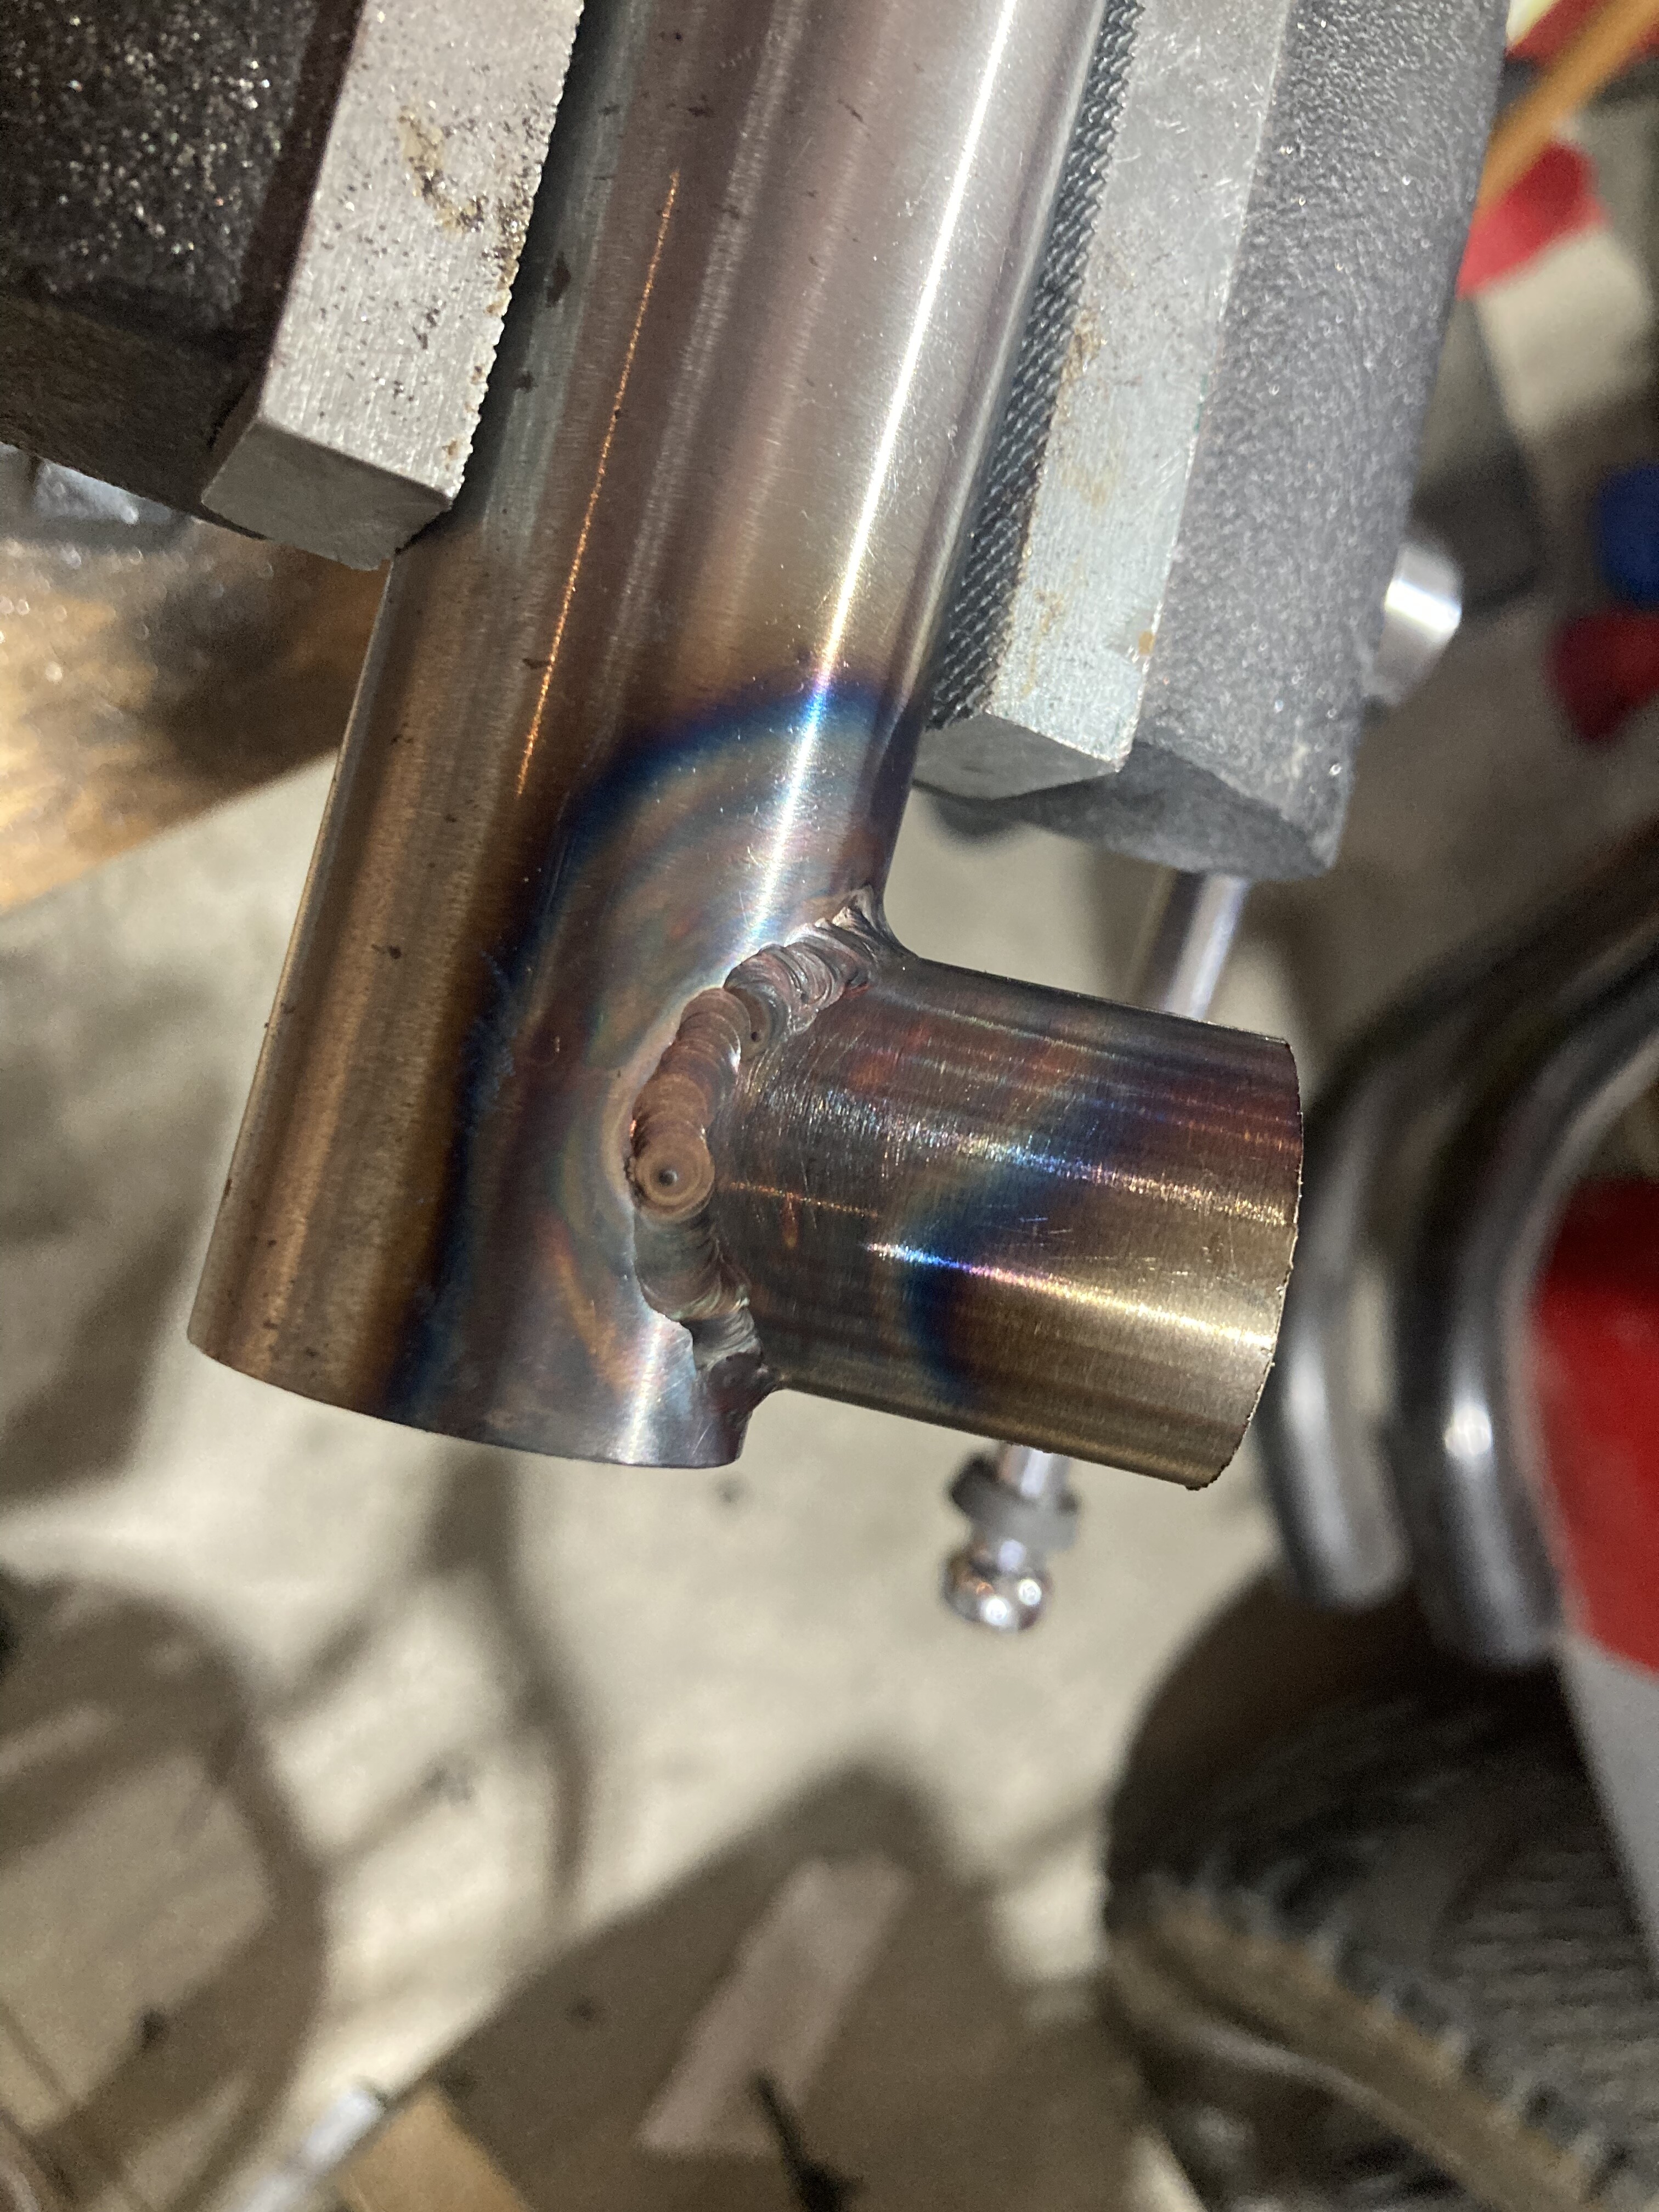
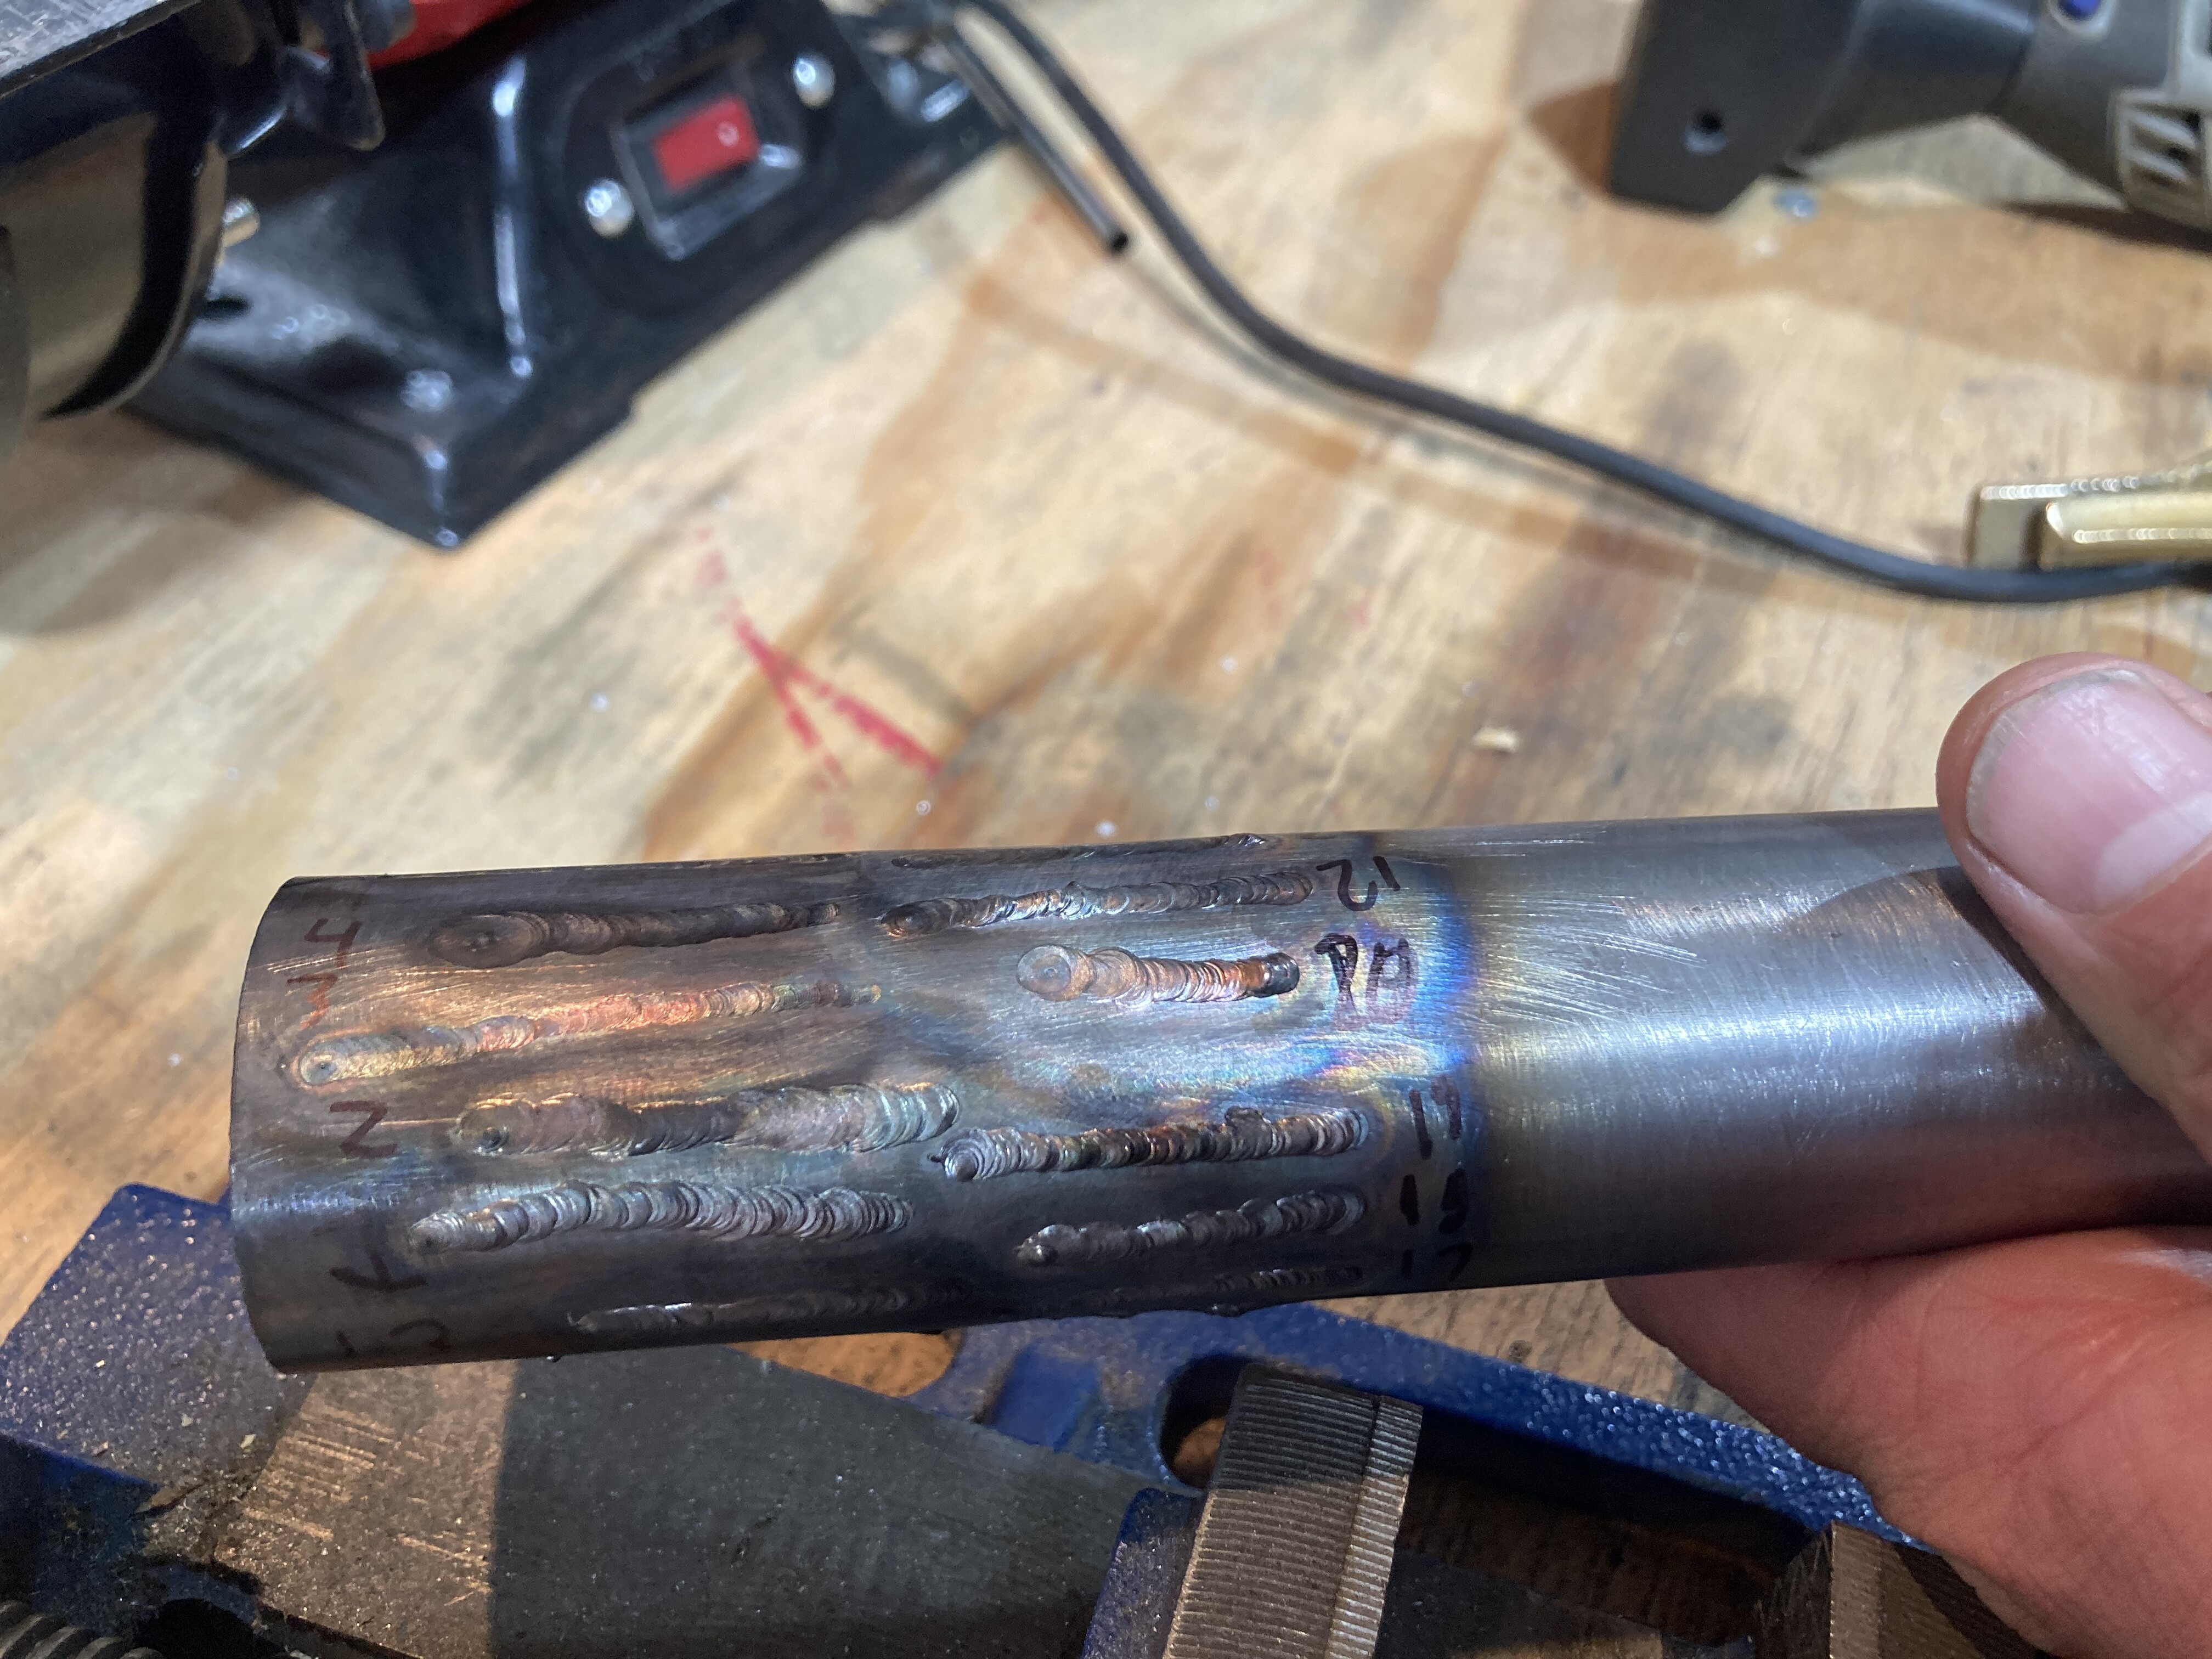
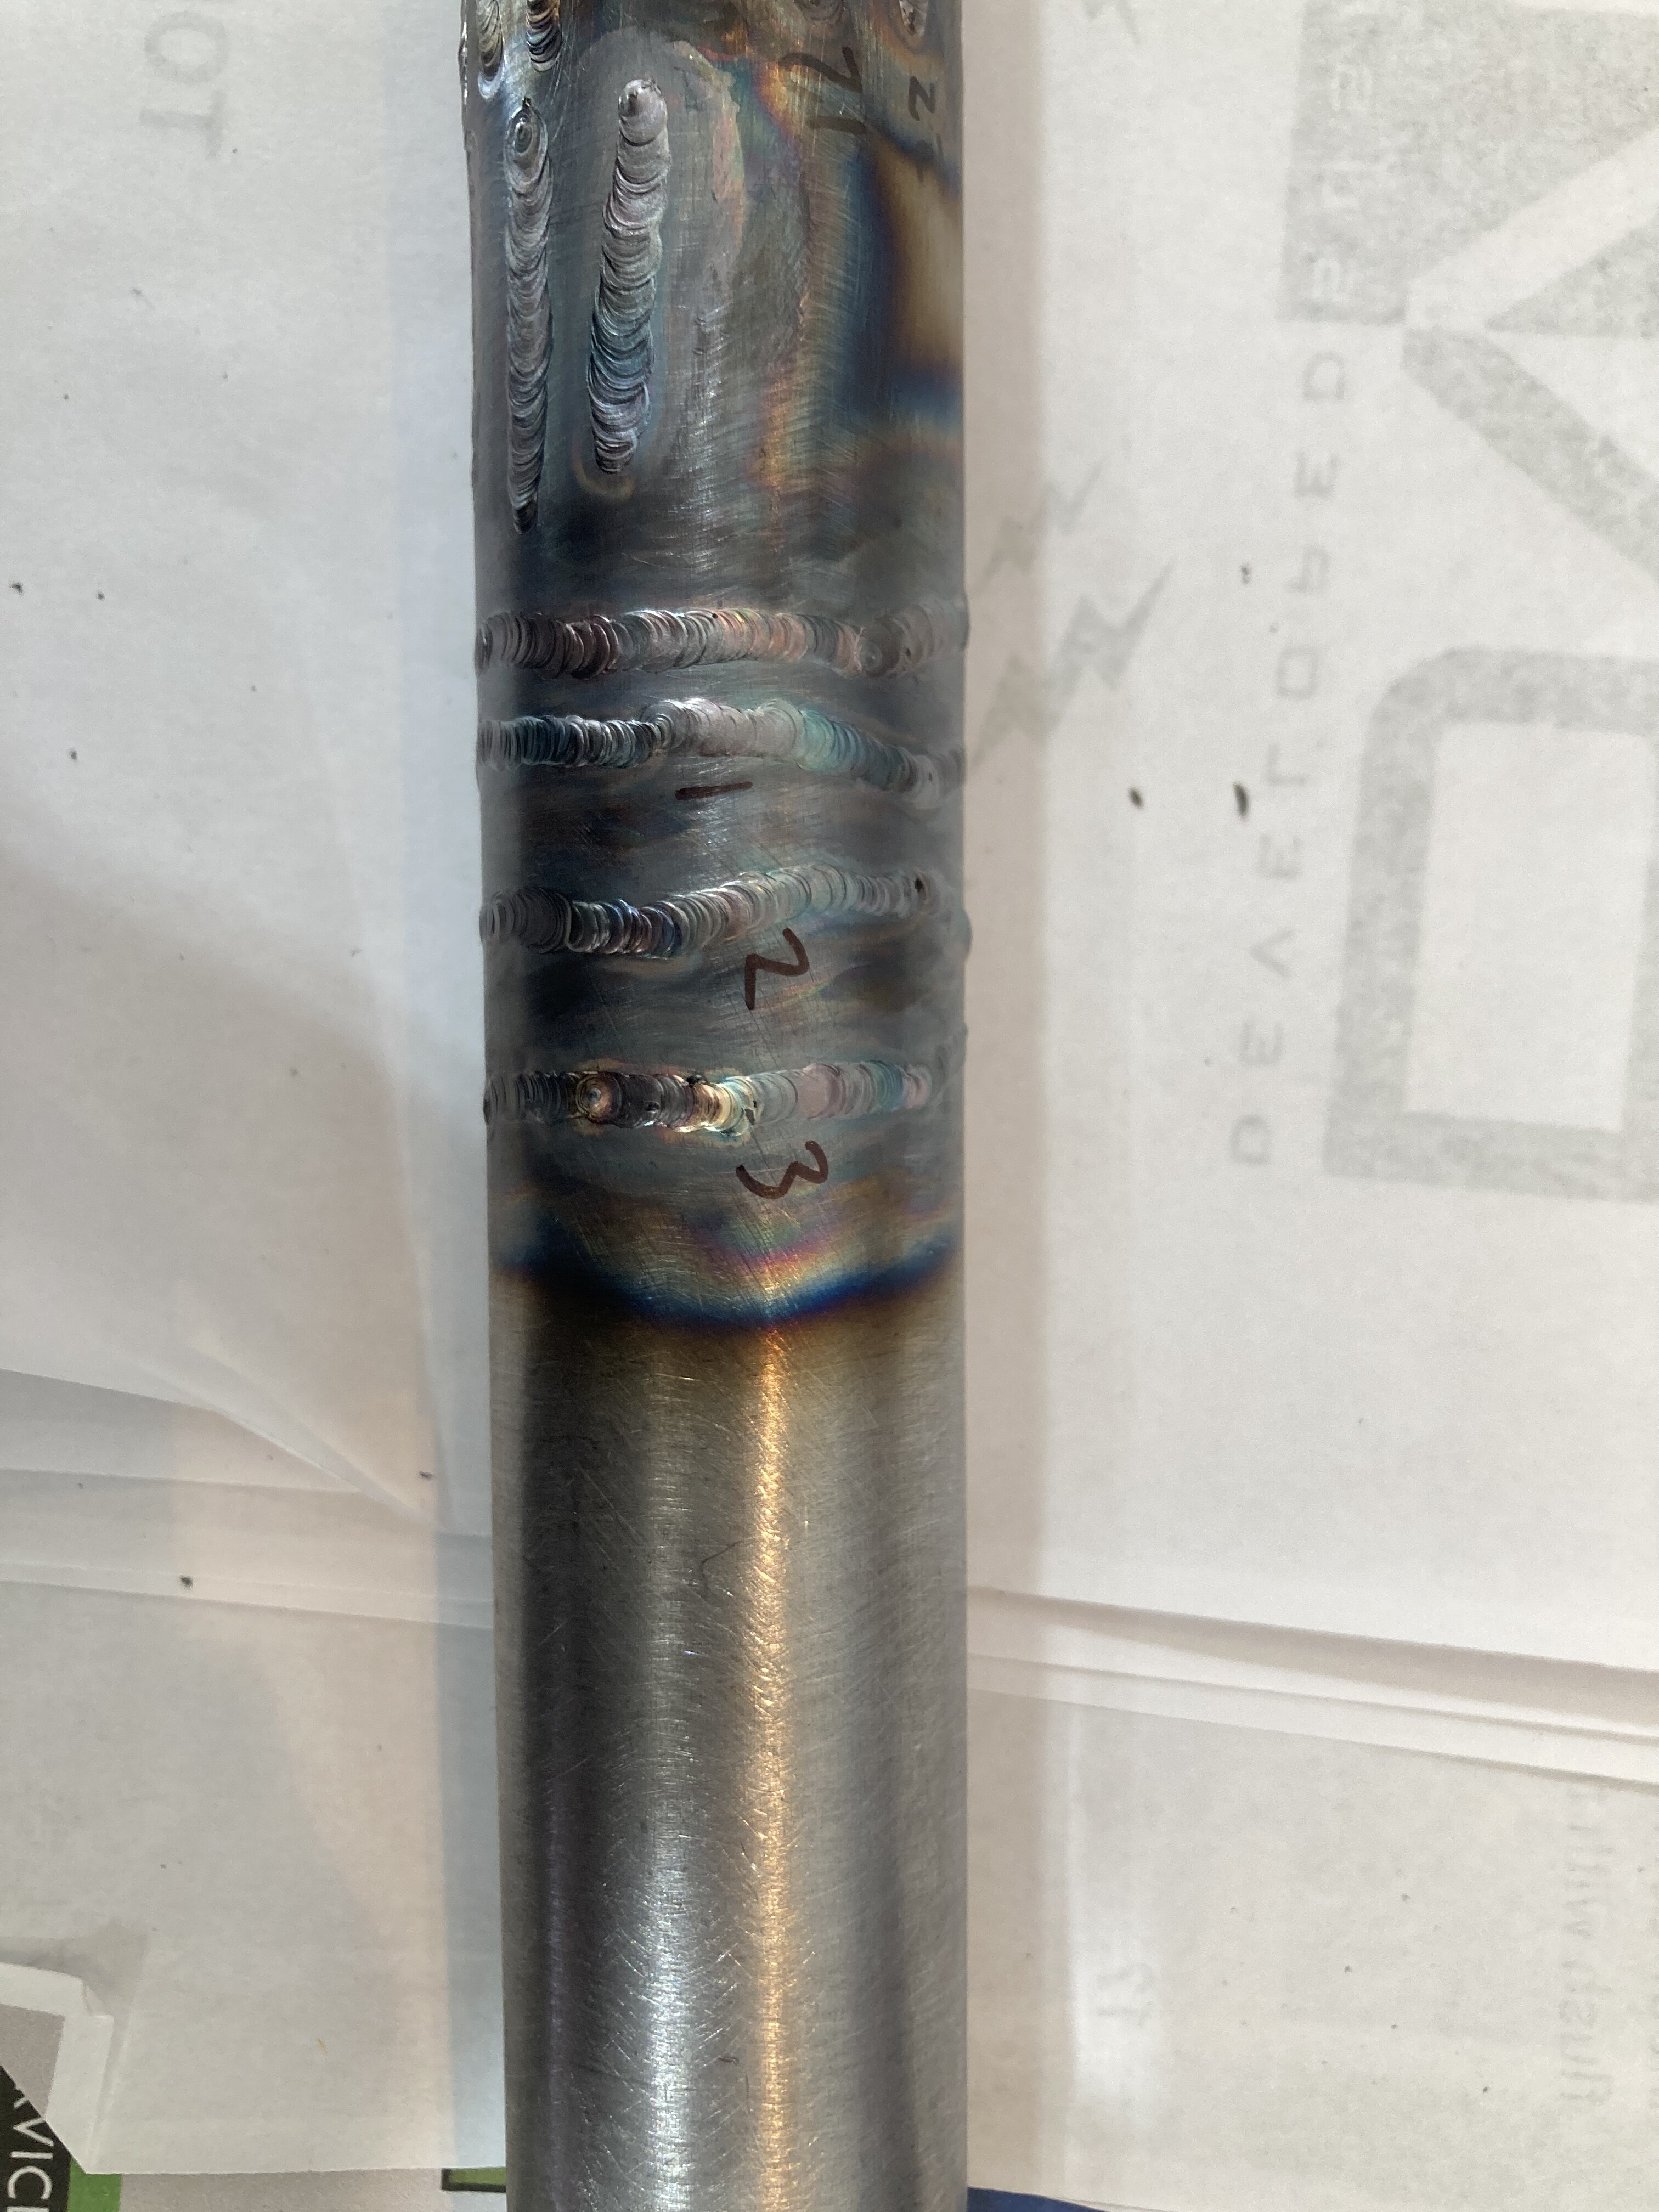
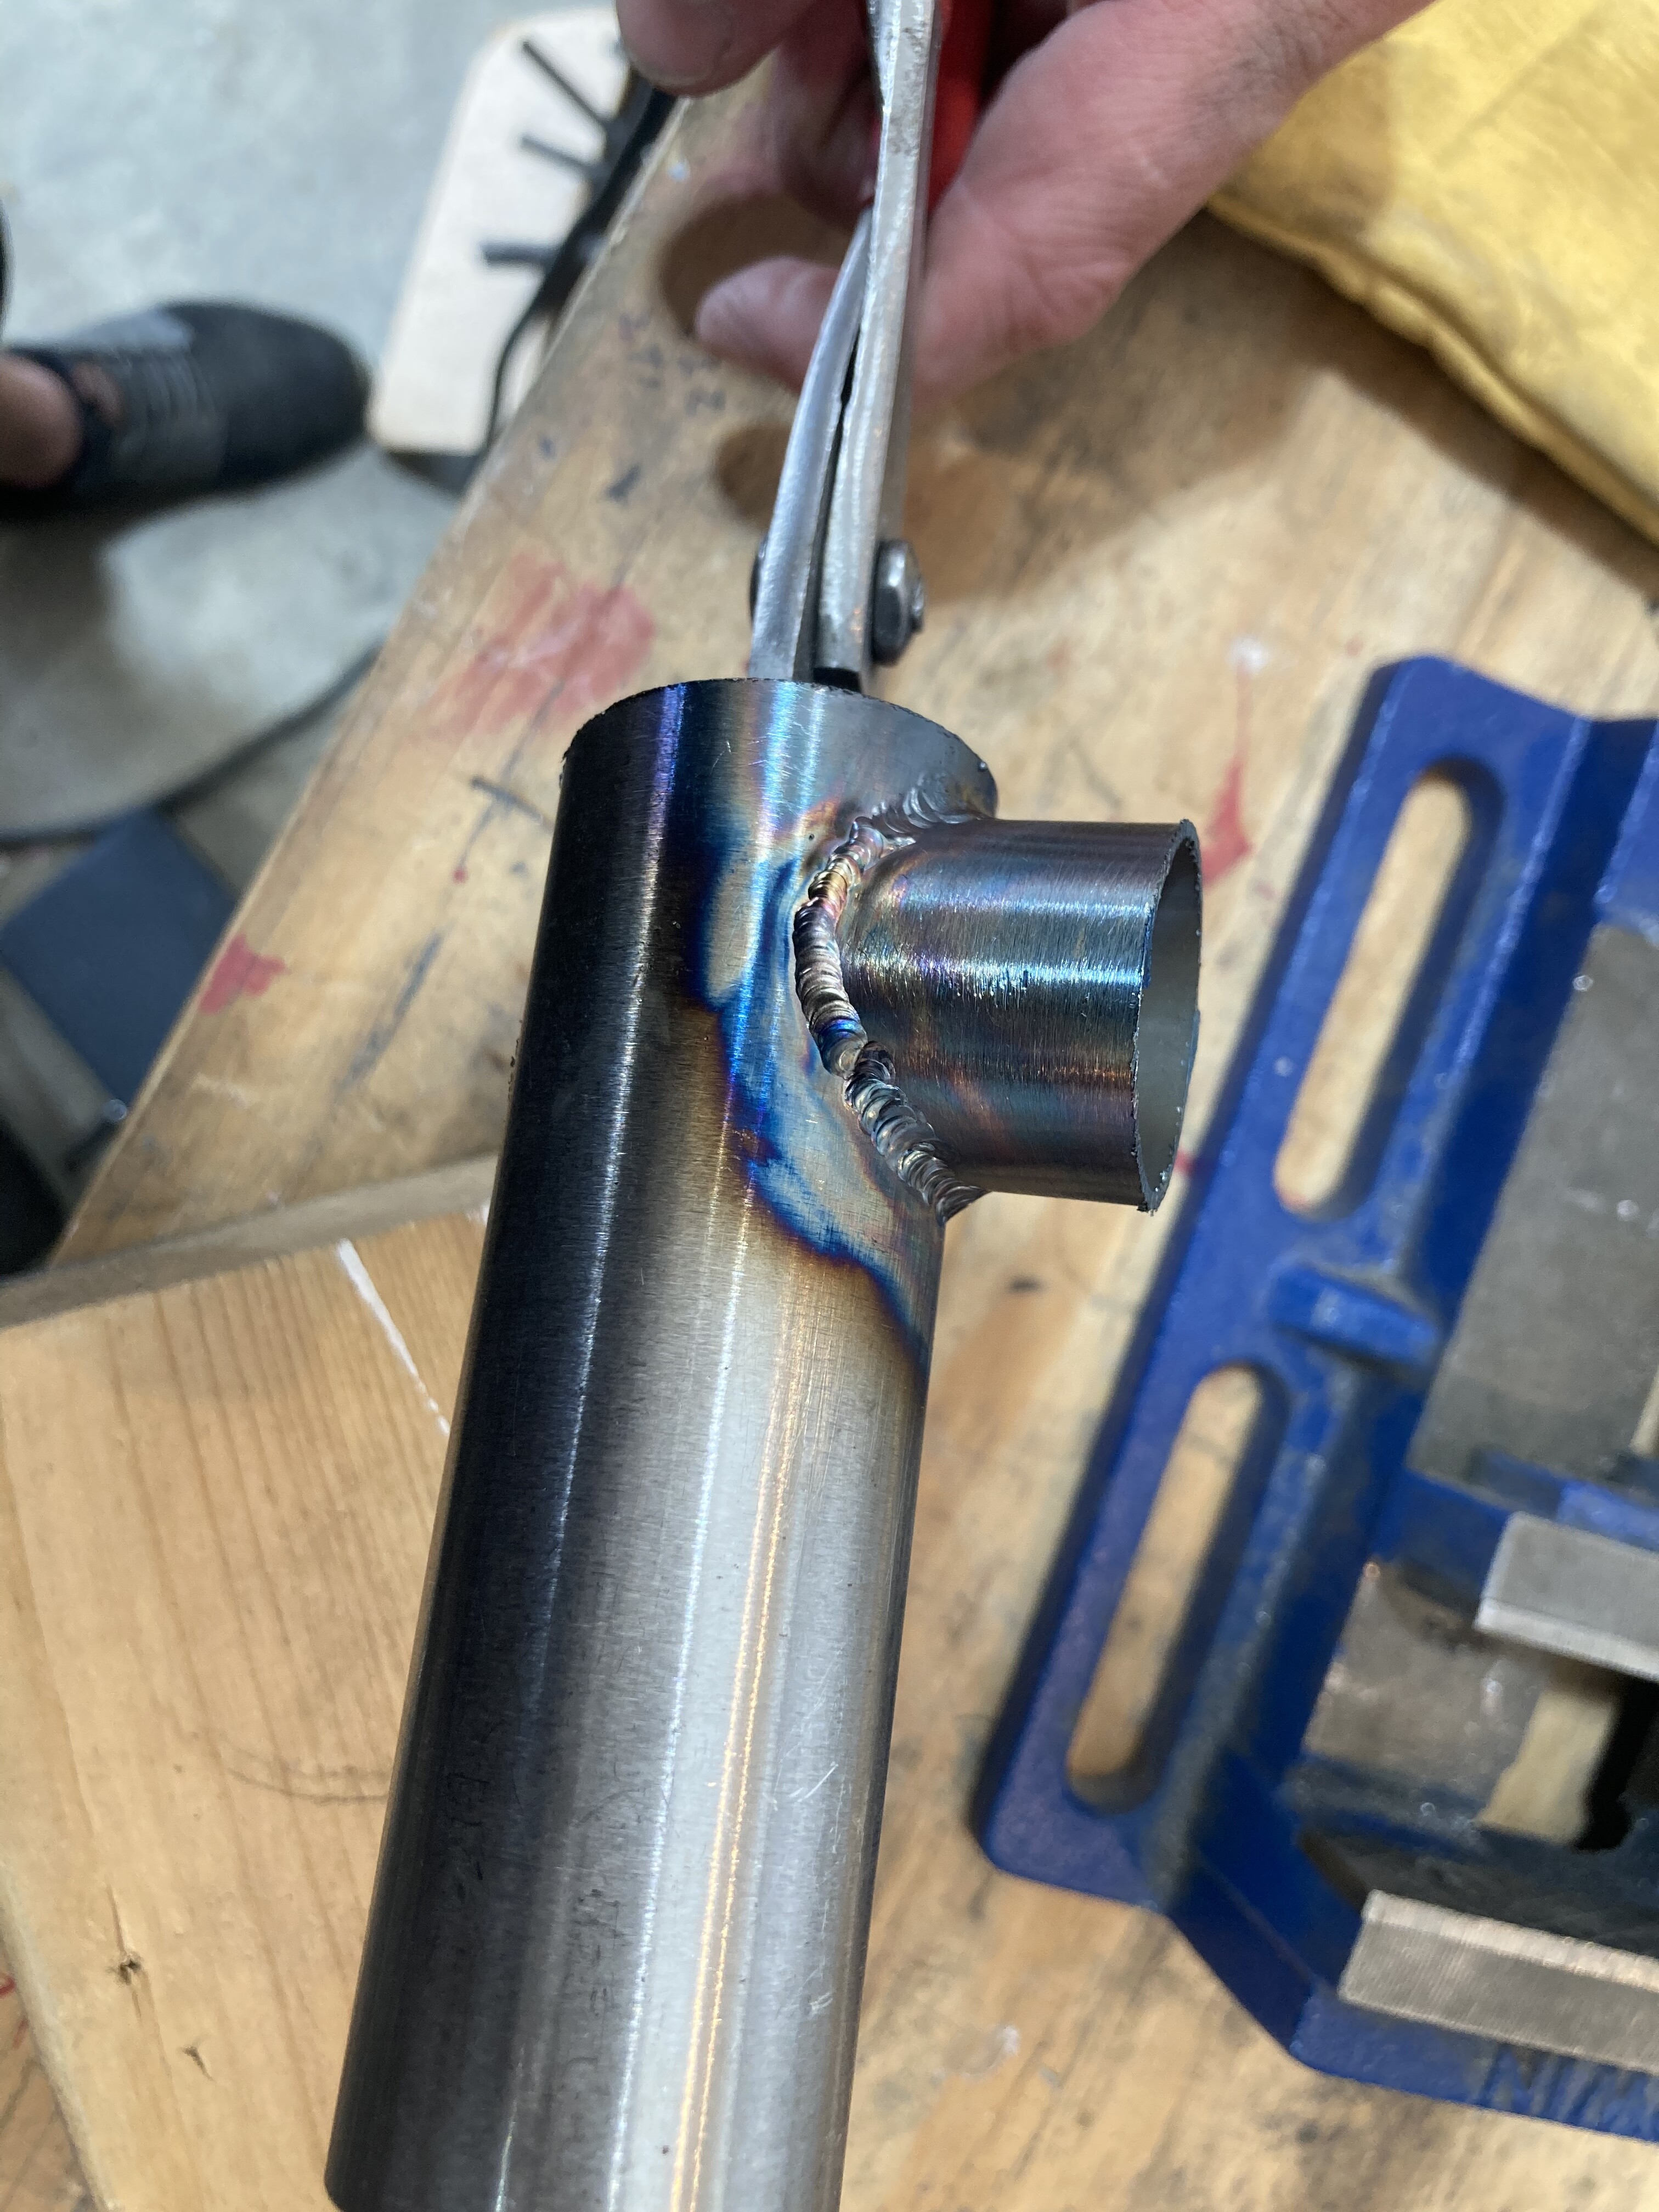
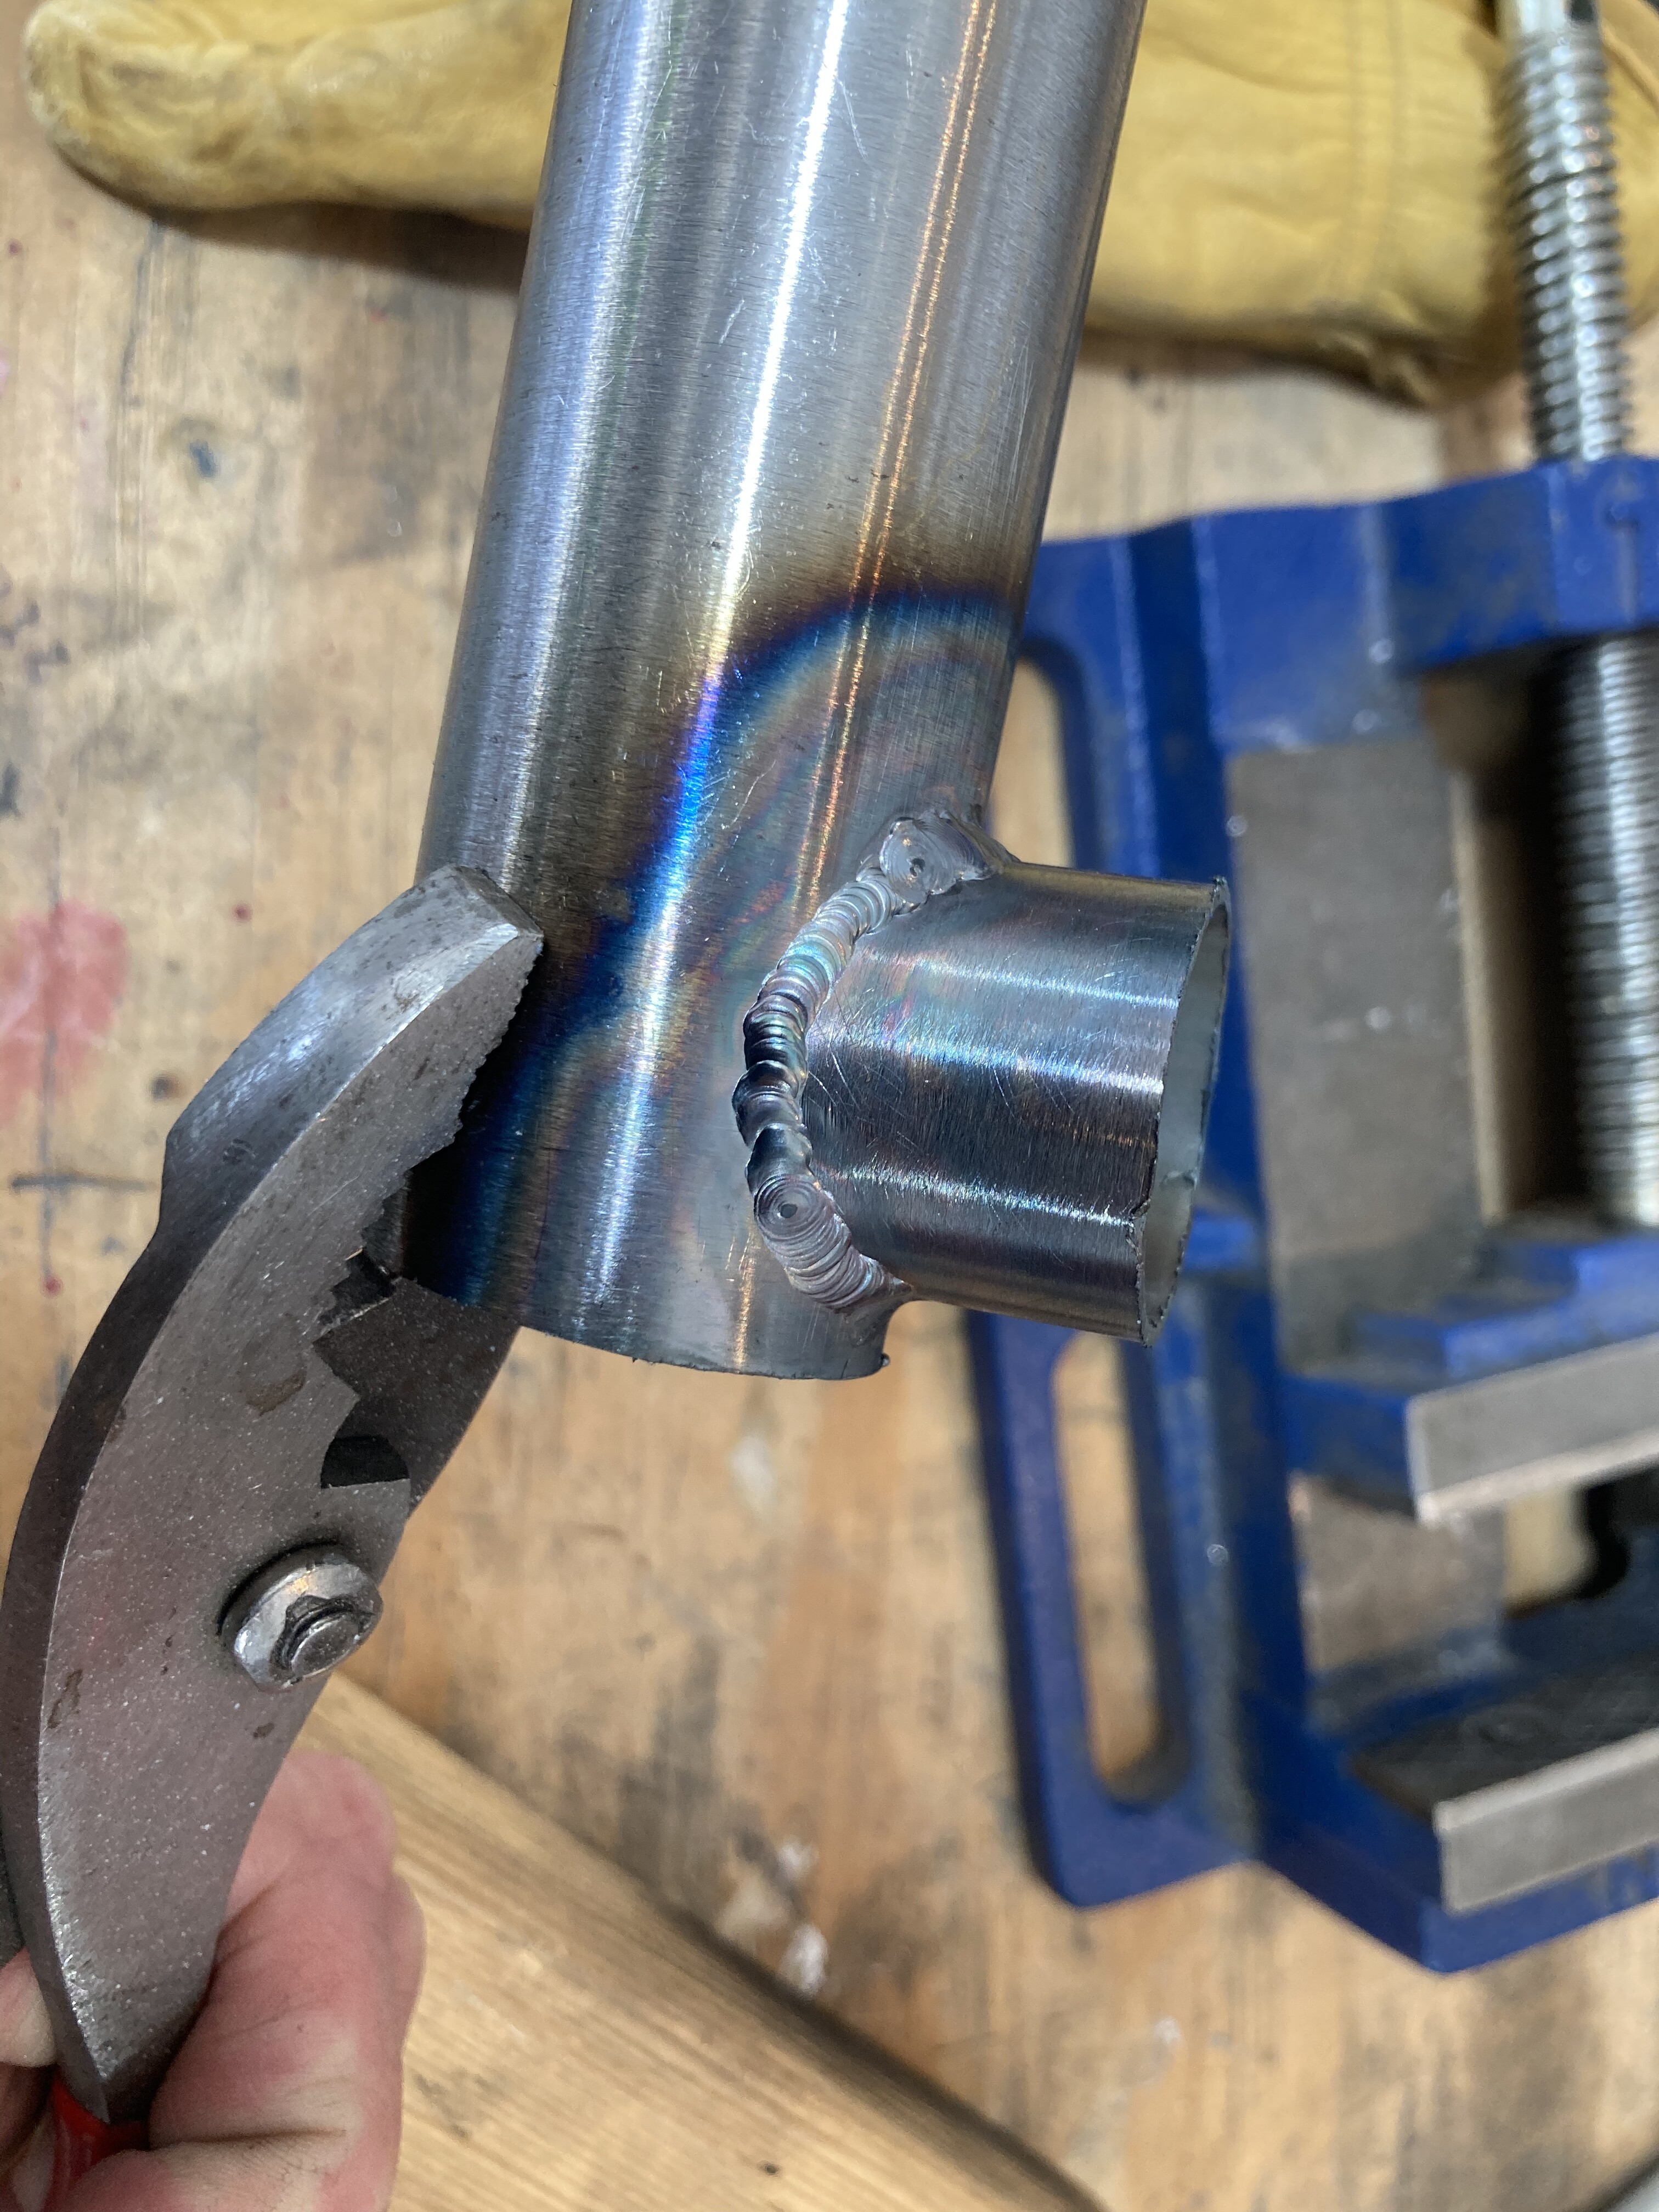
Day three is in the books. Yet another day of improvement even if it is more slight than yesterday. Still running no pulse with practice laps around a pipe finished with a joint for fun
I only move the pedal for temp control. For the T joints I am running 55 amps. I use nearly full pedal to get the pedal started but I only run about 1/2 pedal after it gets hot. Both tubes are 1.1 wall.
This is a big learning experience after turning off pulse. I did not know how much less power the weld takes after getting started. I think that is why I was so bad about keying out.
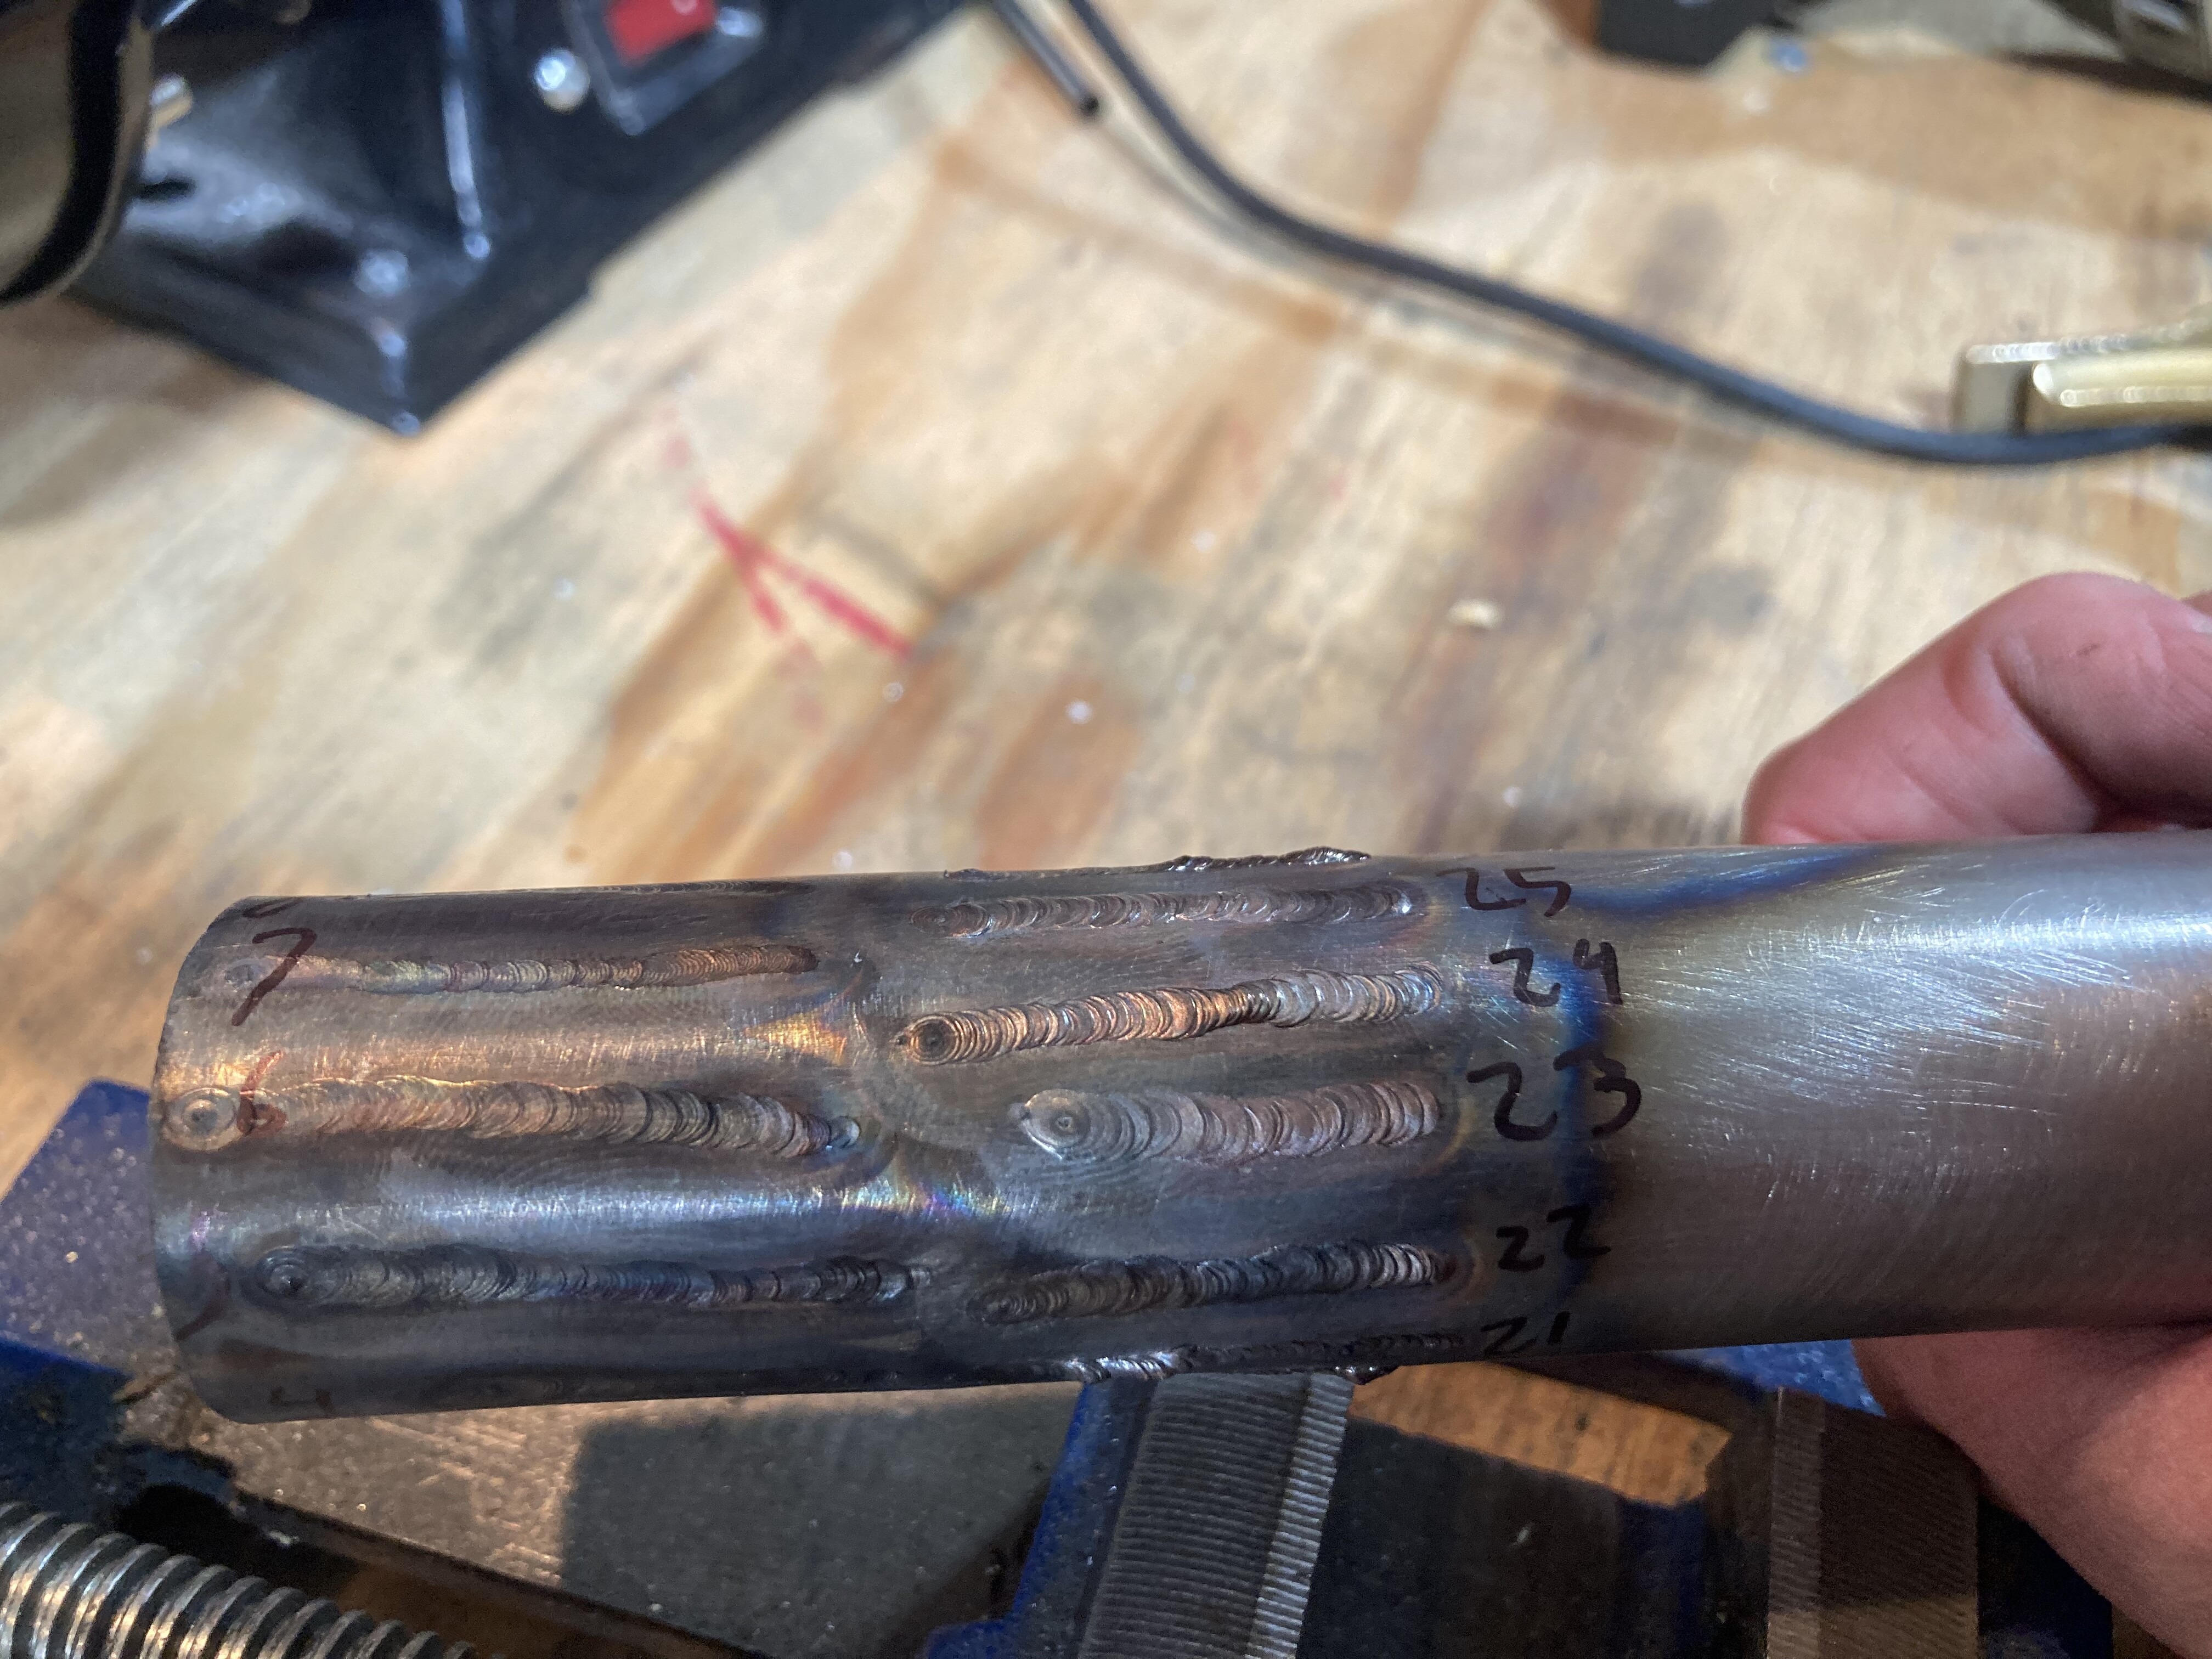
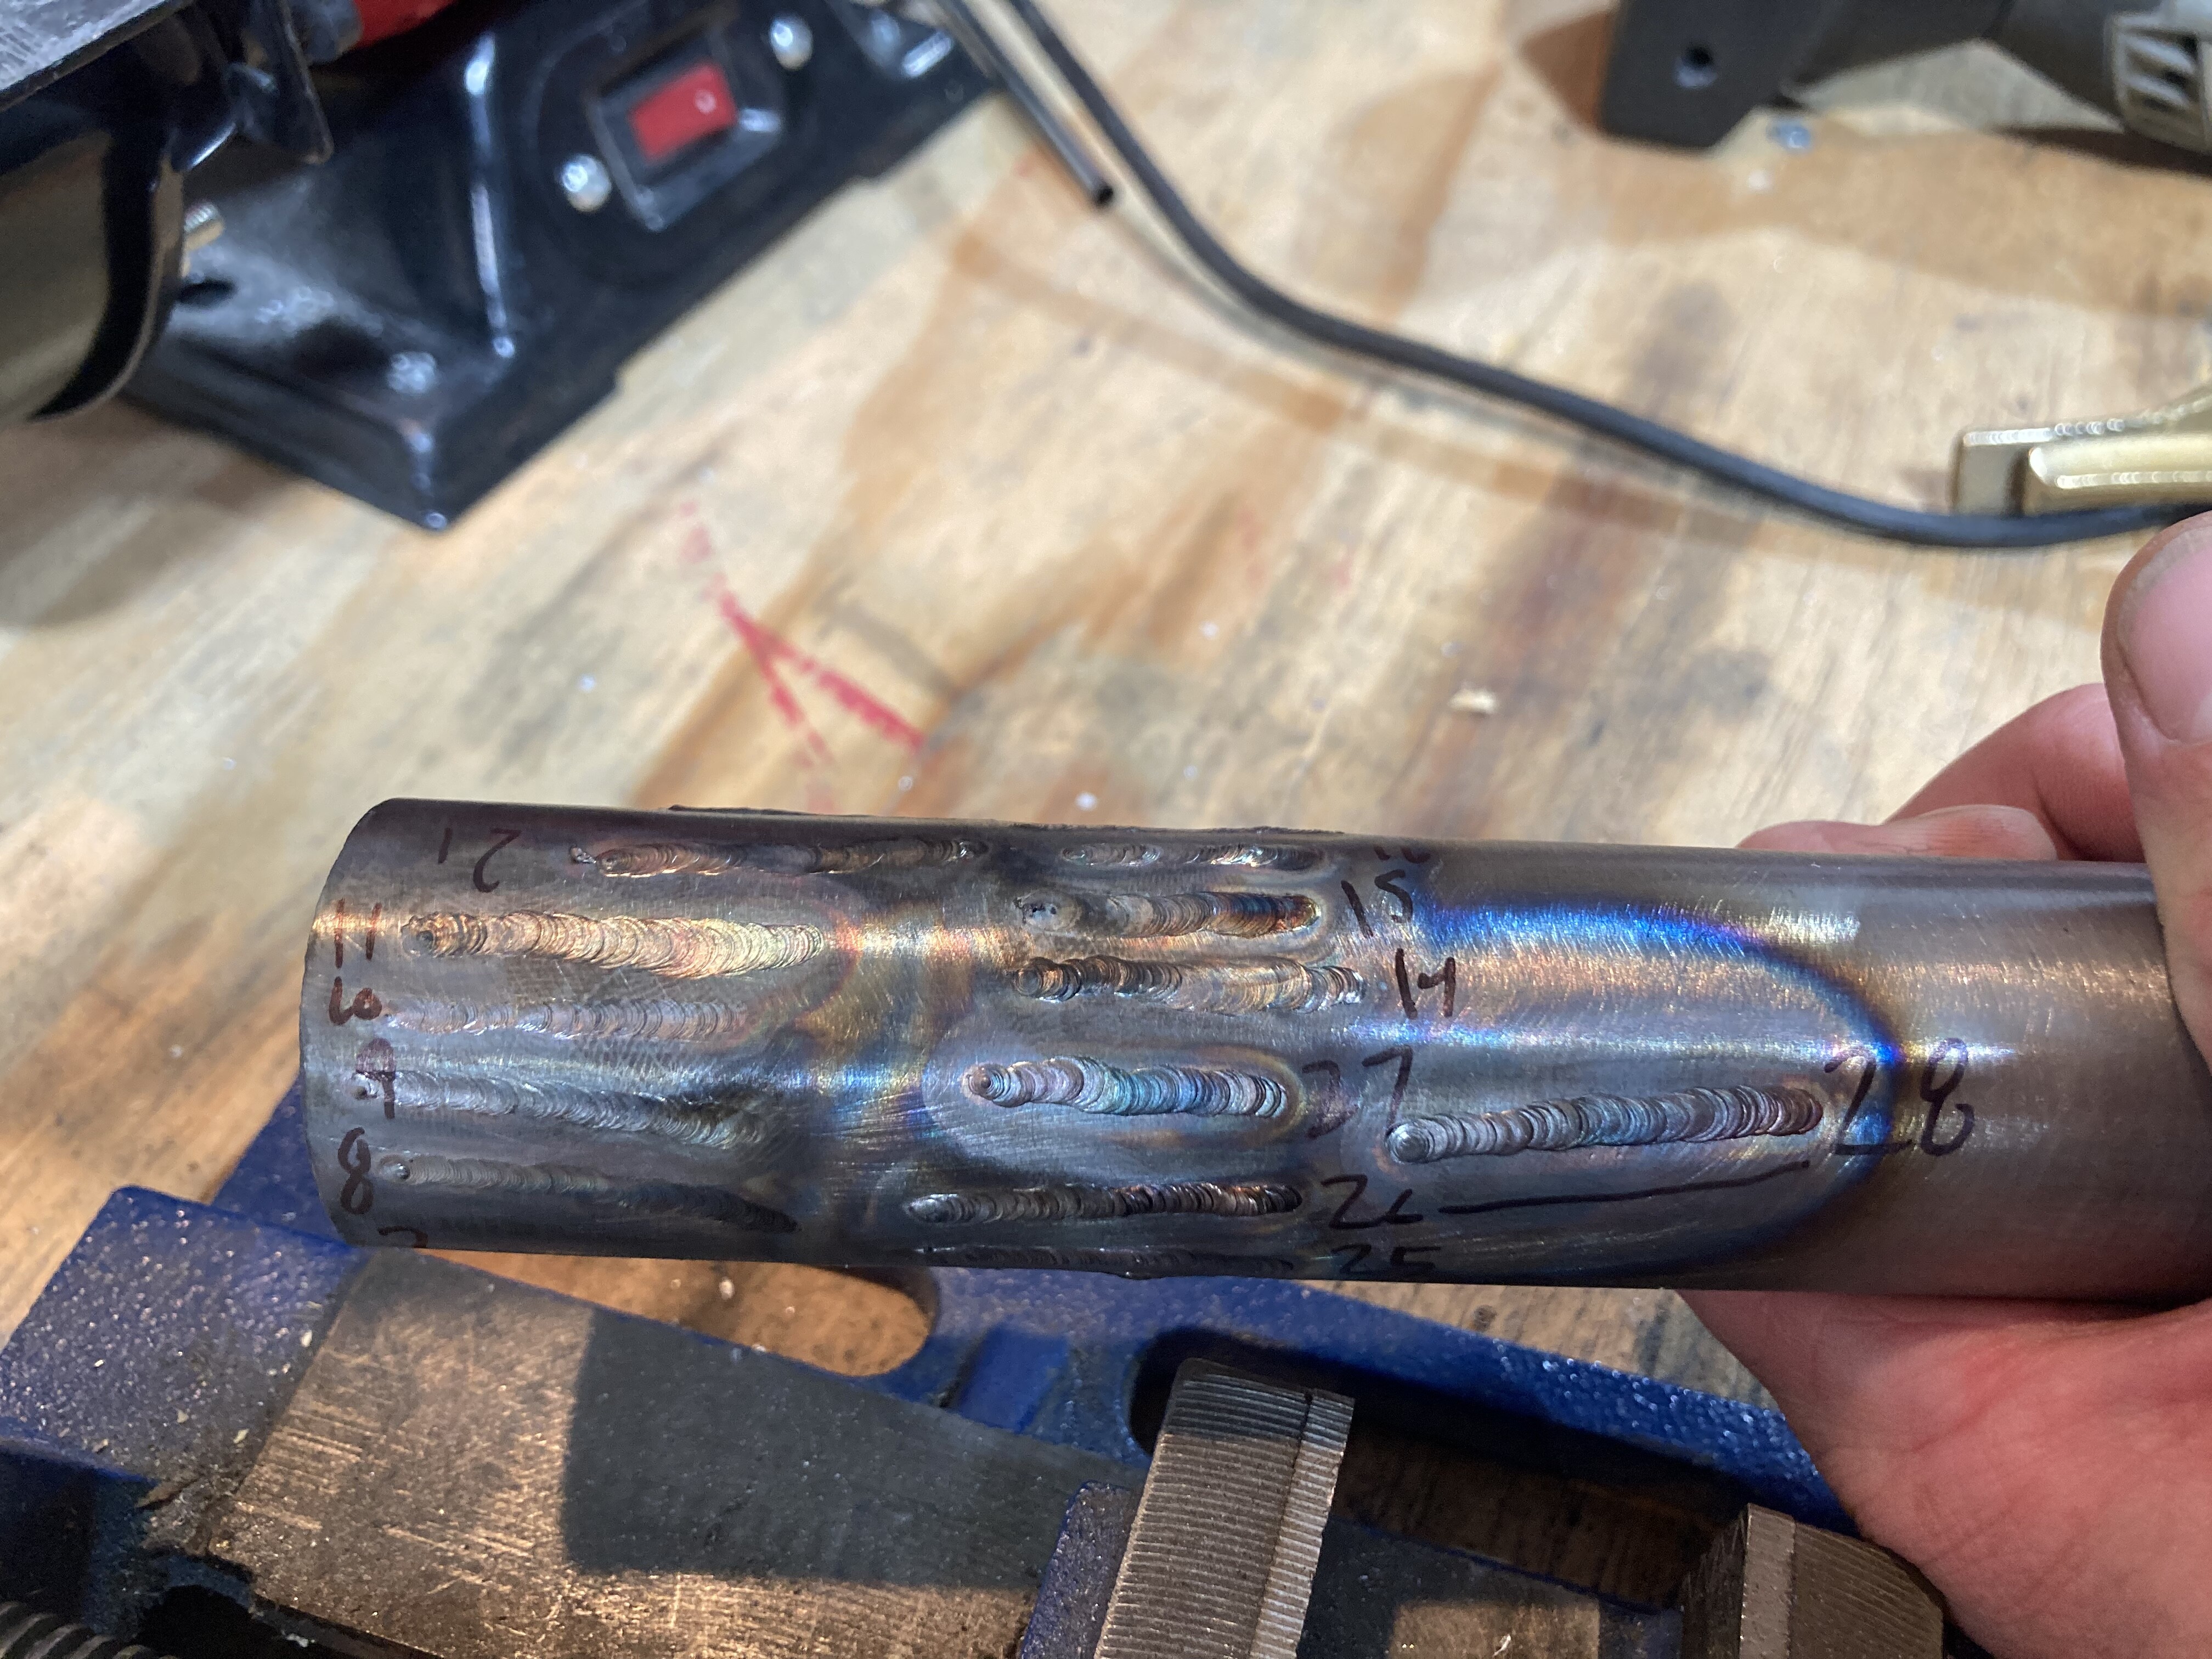
Day 4 was a rough one… hard ride in the morning zapped stability and focus. My flat welds were worse than day three but my joint was much better. I still have a hard time getting enough heat when starting but my torch angle is improving.