IMPORTANT:
This 3-minute video took over three months to collect clips and over 12 hours to edit. If you want to thank me, just subscribe to the channel, like the video, and learn something new.
If you are a professional framebuilder and you want to use these resources, consider joining the forum and contributing, if you have not already.
Thanks!
Daniel
Video:

Files:
F360 Assembly: Fusion
Dimple Die:
Updated 8/21/24: DIE - CNC Flatter v2.step (19.1 KB)
DIE - CNC v4.step (23.8 KB)
Flatter die gets better results for titanium
Laser Cut Plates:
Pivot DXF.dxf (3.1 KB)
slider plate.dxf (3.0 KB)
Bill of Materials:
| Item | Description | Price | Qty | Supplier | Link |
|---|---|---|---|---|---|
| T slot extrusion | ~400mm of 40 series (40mm extrusion) | $16.31 | 1 | 80/20 | https://8020.net/40-4040.html |
| T slot hardware | misc. 6mm hardware (estimate) | $20 | 1 | 80/20 | https://8020.net/fasteningmethods.html |
| Sheet Metal Brackets | laser cut brackets | $35 | 1 | Send cut Send | https://sendcutsend.com/ |
| Acetal Bar | 1.5 x 2 x 12 | $27.28 | 1 | Mcmaster | McMaster-Carr |
| 6mm Dowel Pins | 6mm x 70mm dowel pin (10 pack) | $14.53 | 1 | Mcmaster | McMaster-Carr |
| CNC dimple die | Optional. 4140 steel die. Includes Shipping | $125 | PCB WAY | https://www.pcbway.com/ |
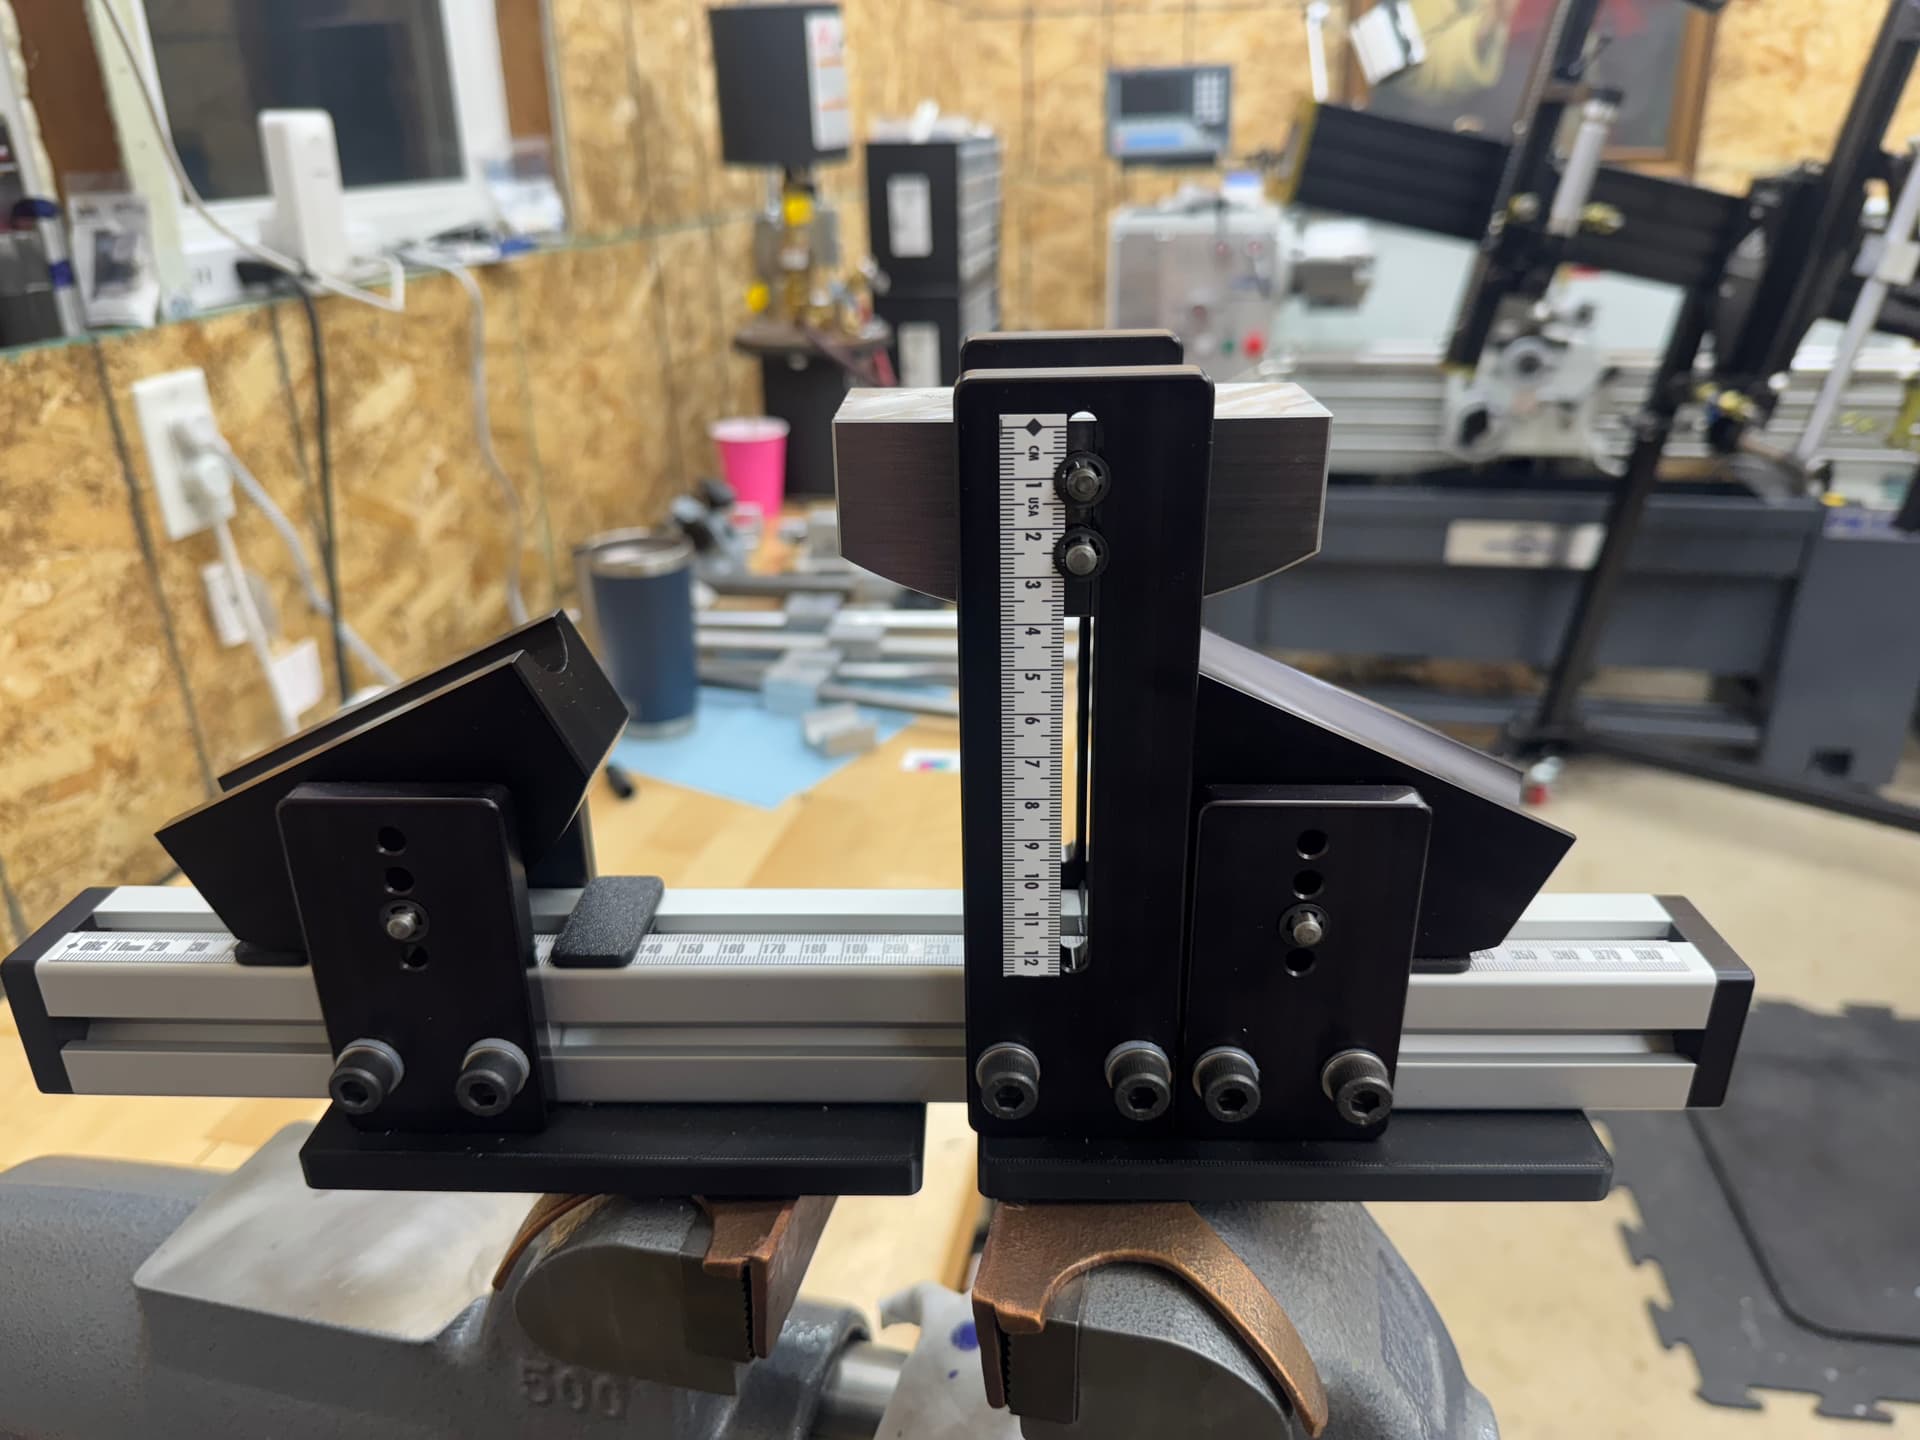
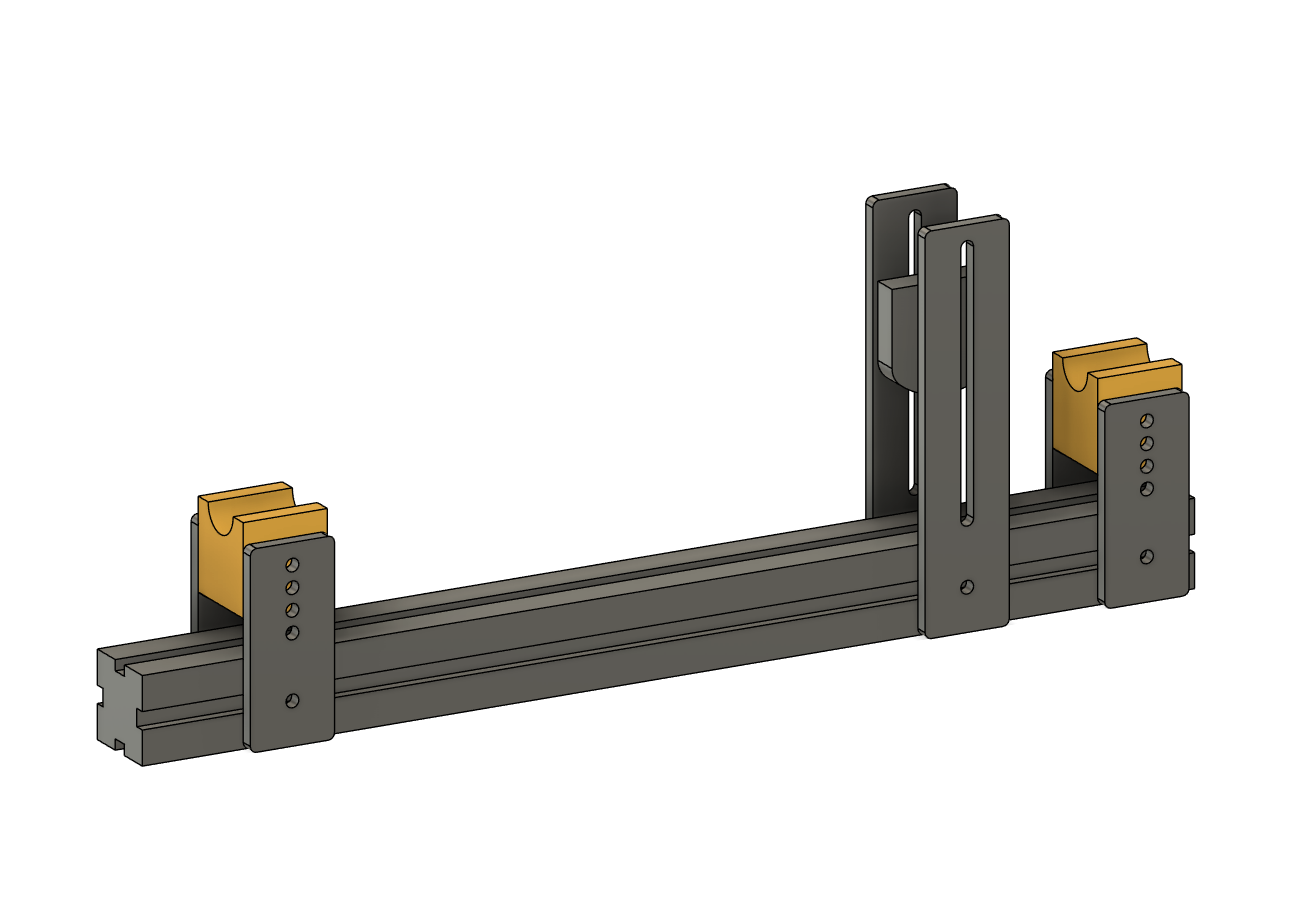
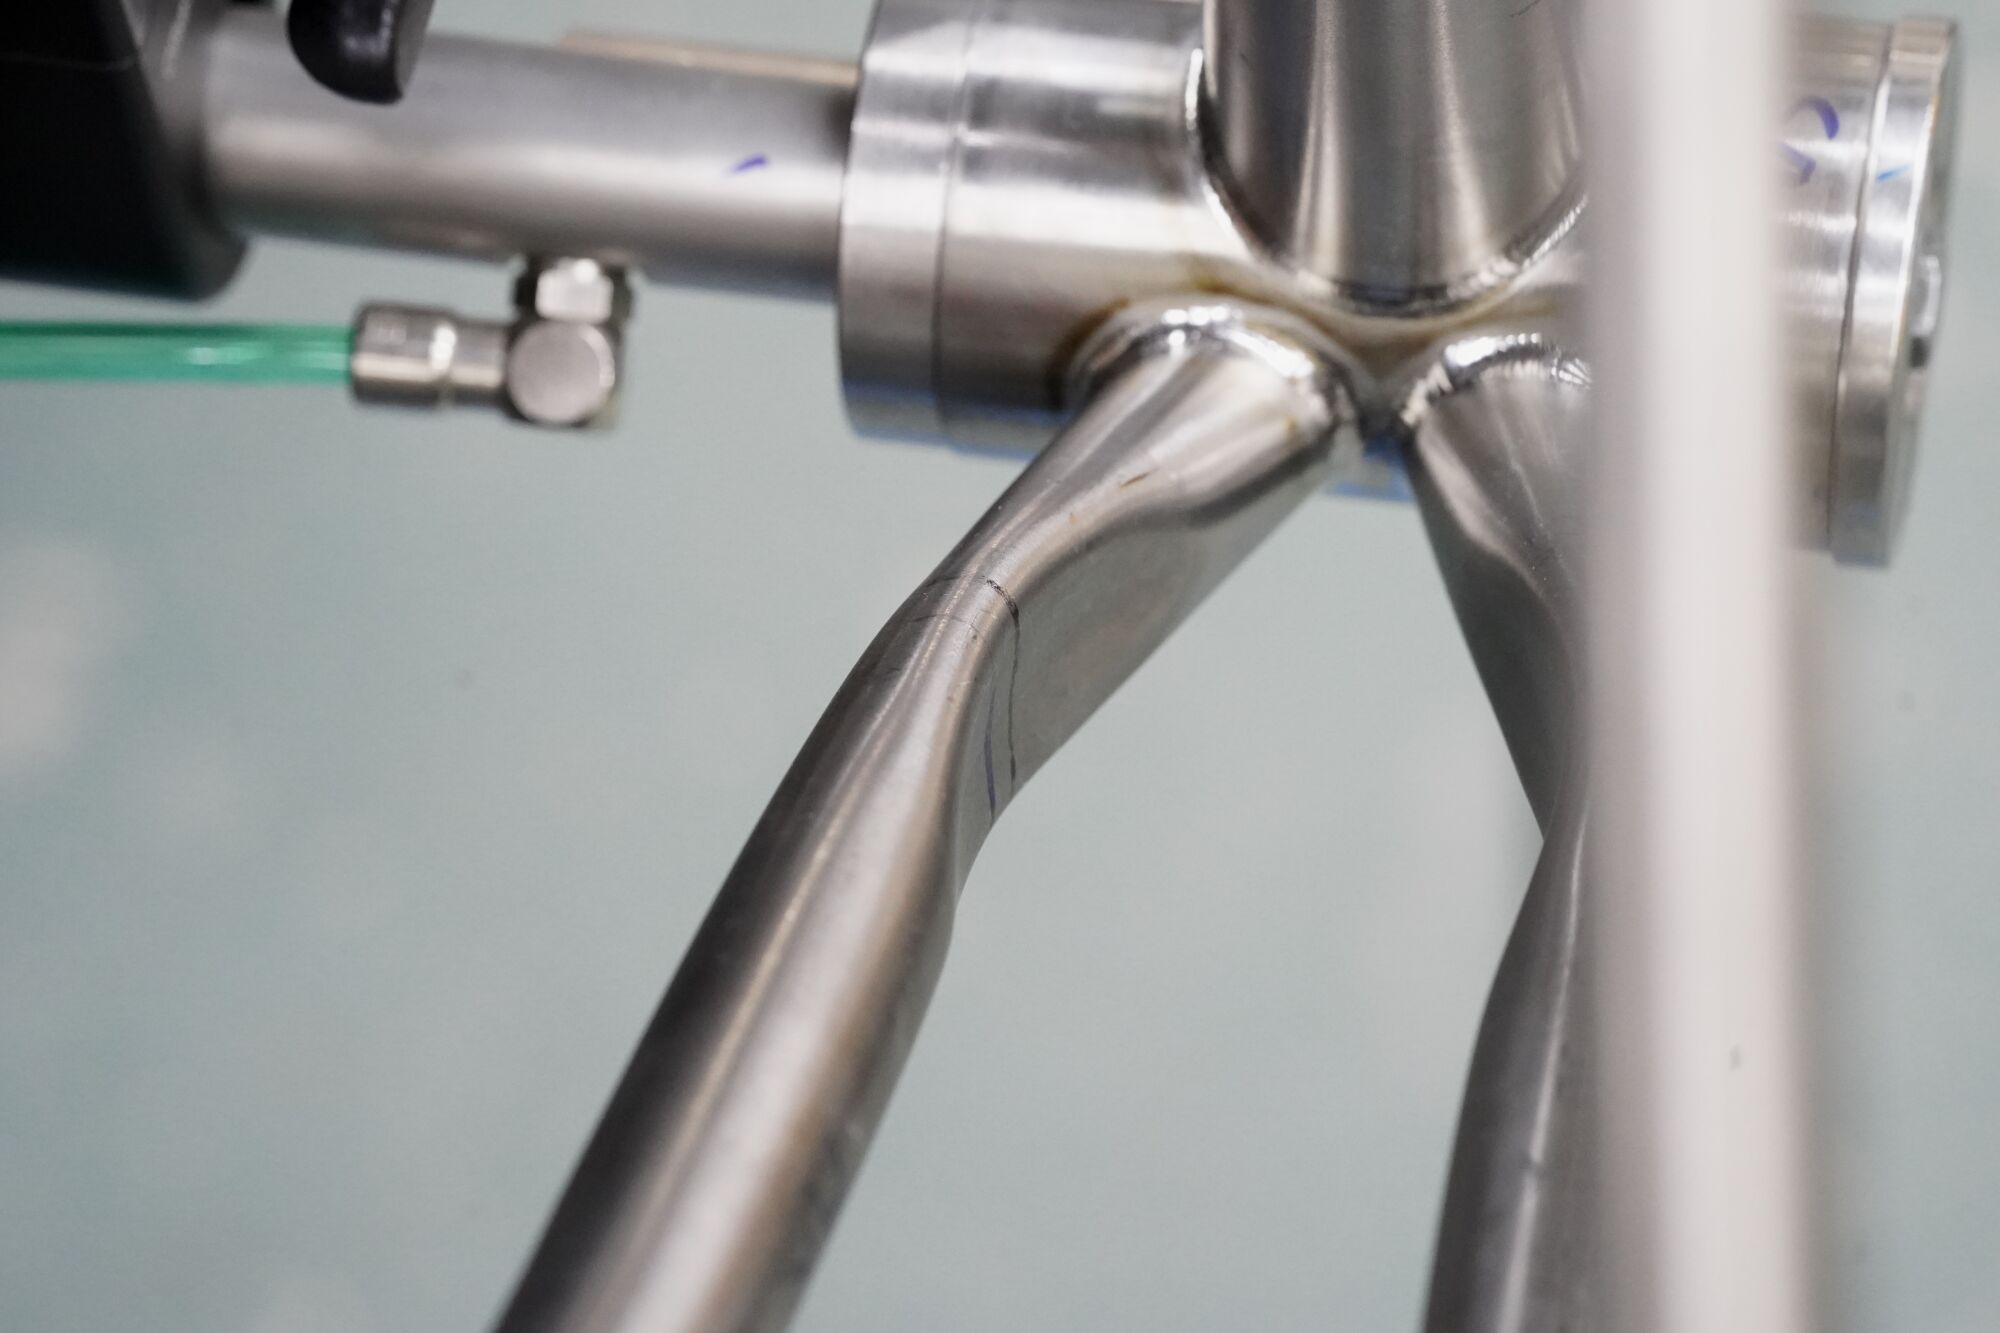
Design Features:
This fixture was based on a design that was kindly shown to me by ORA Engineering, one of the best titanium frame manufacturers:
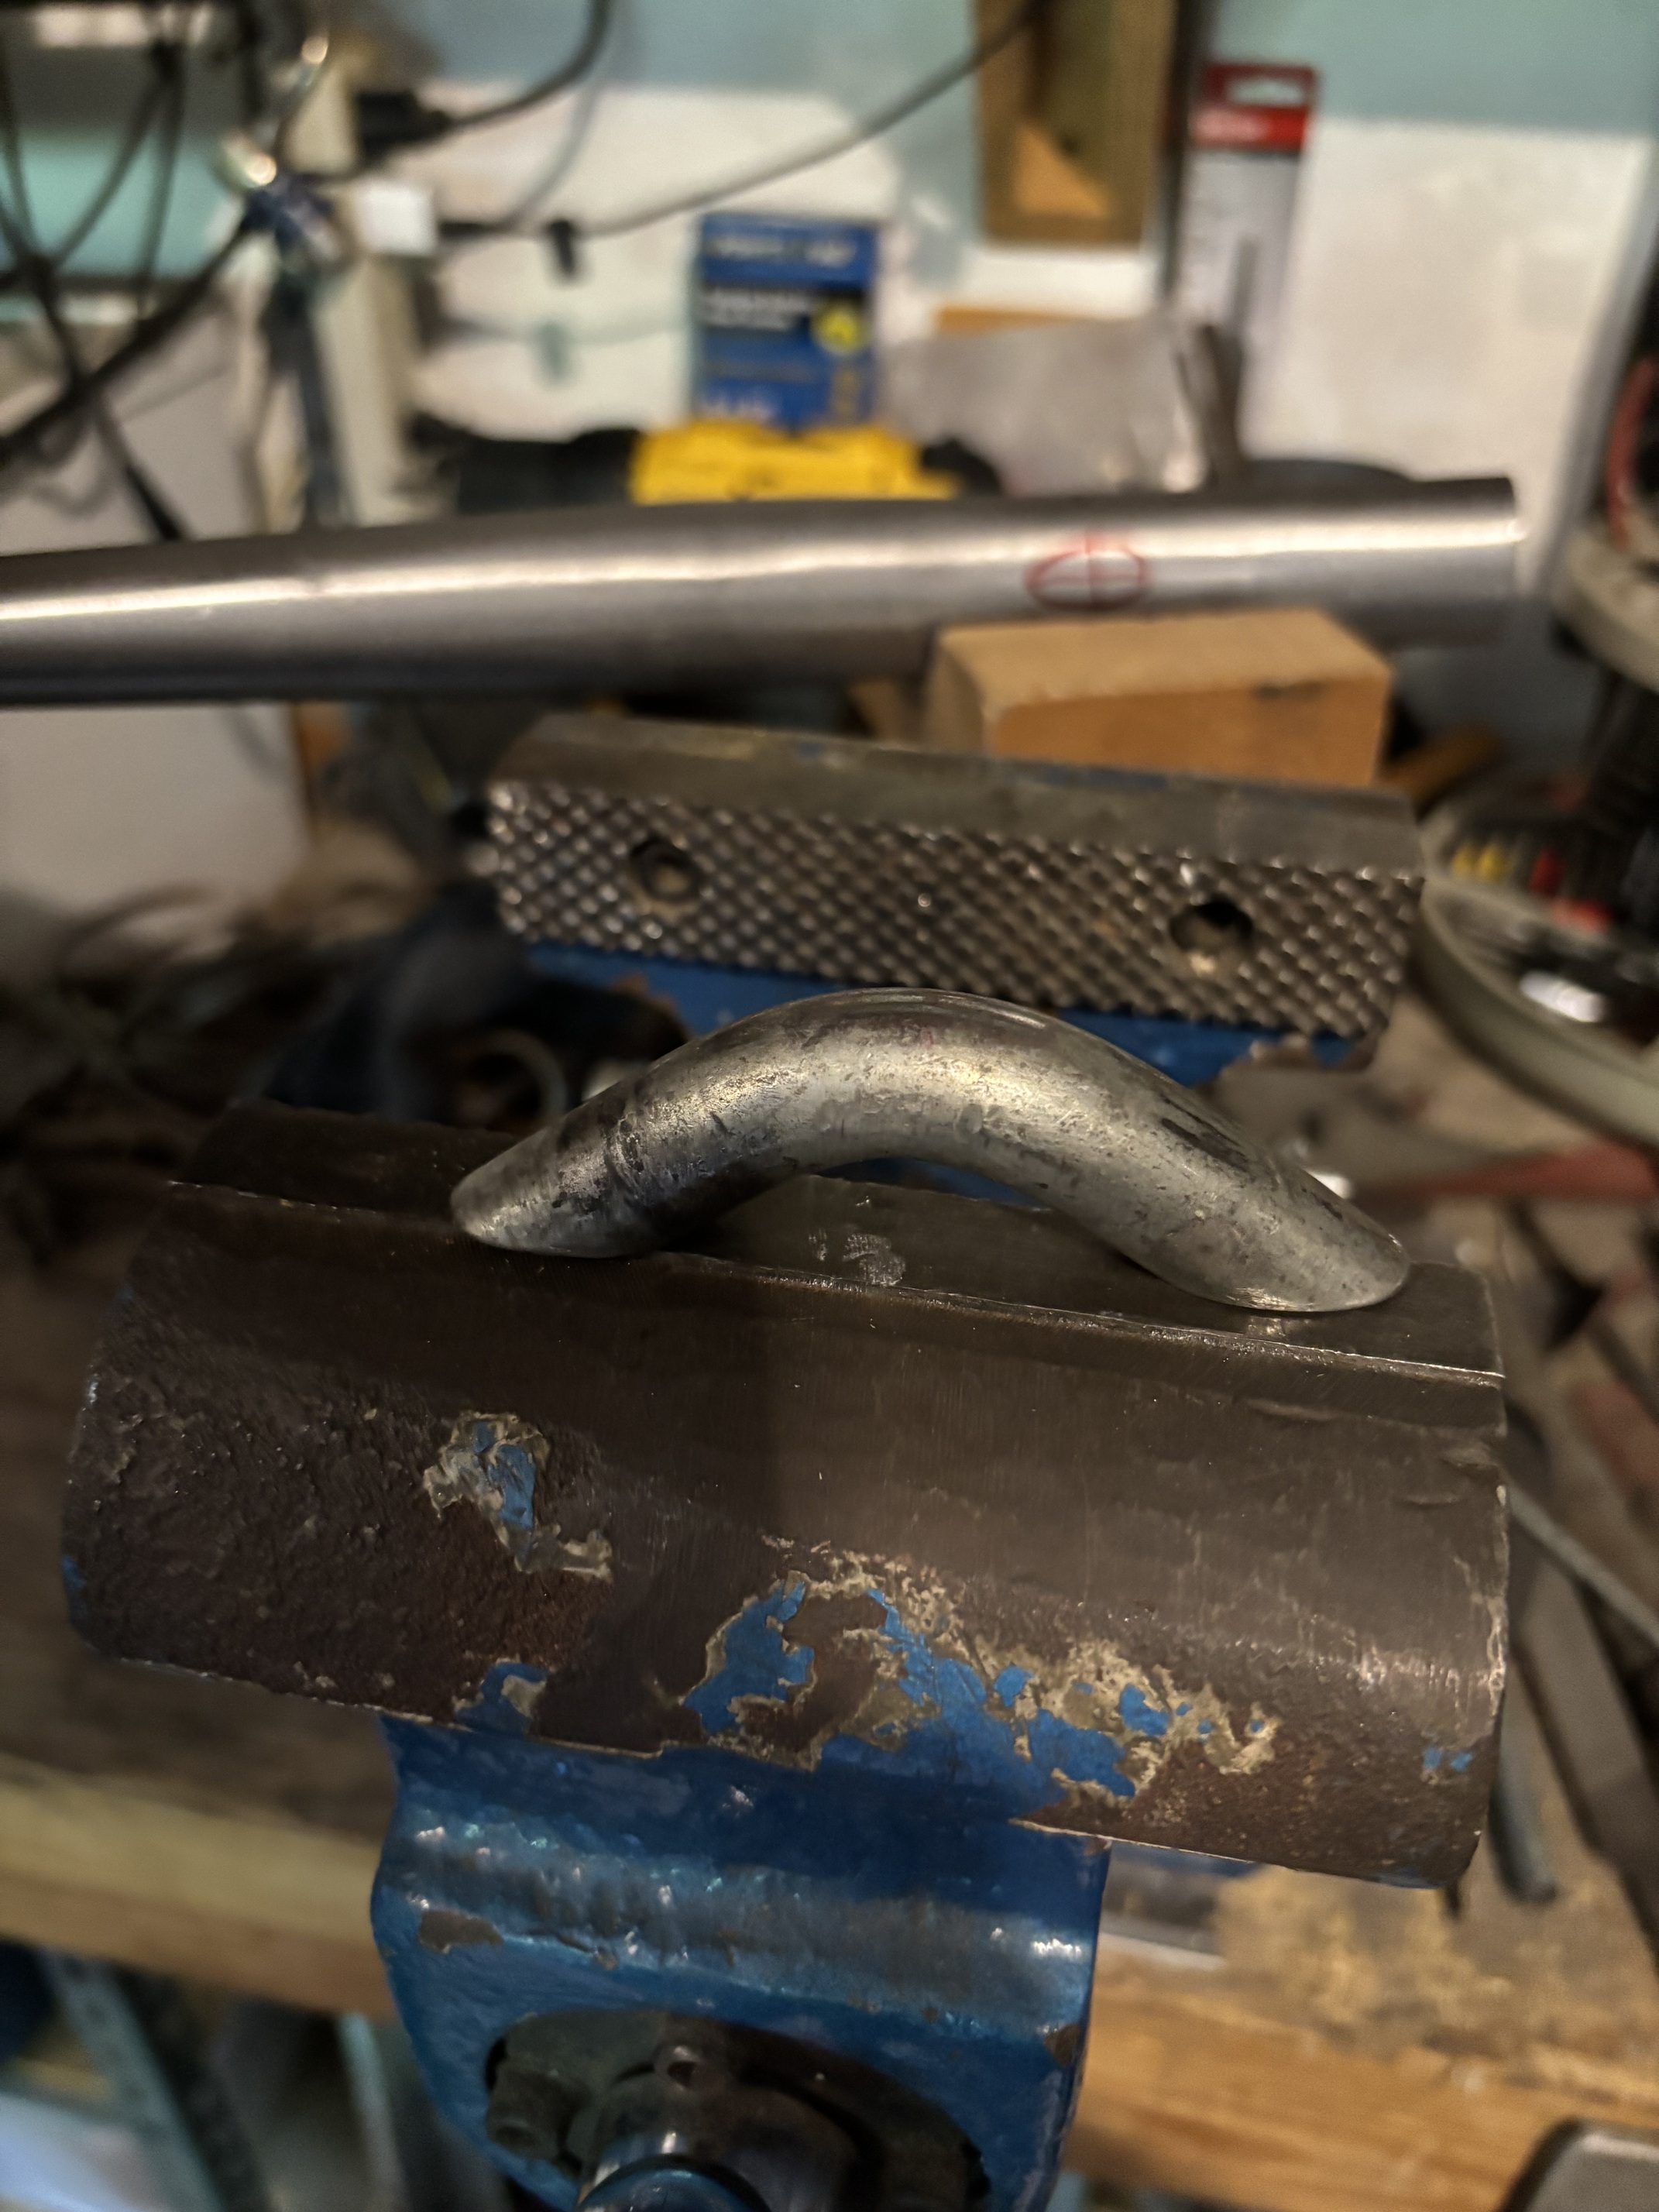
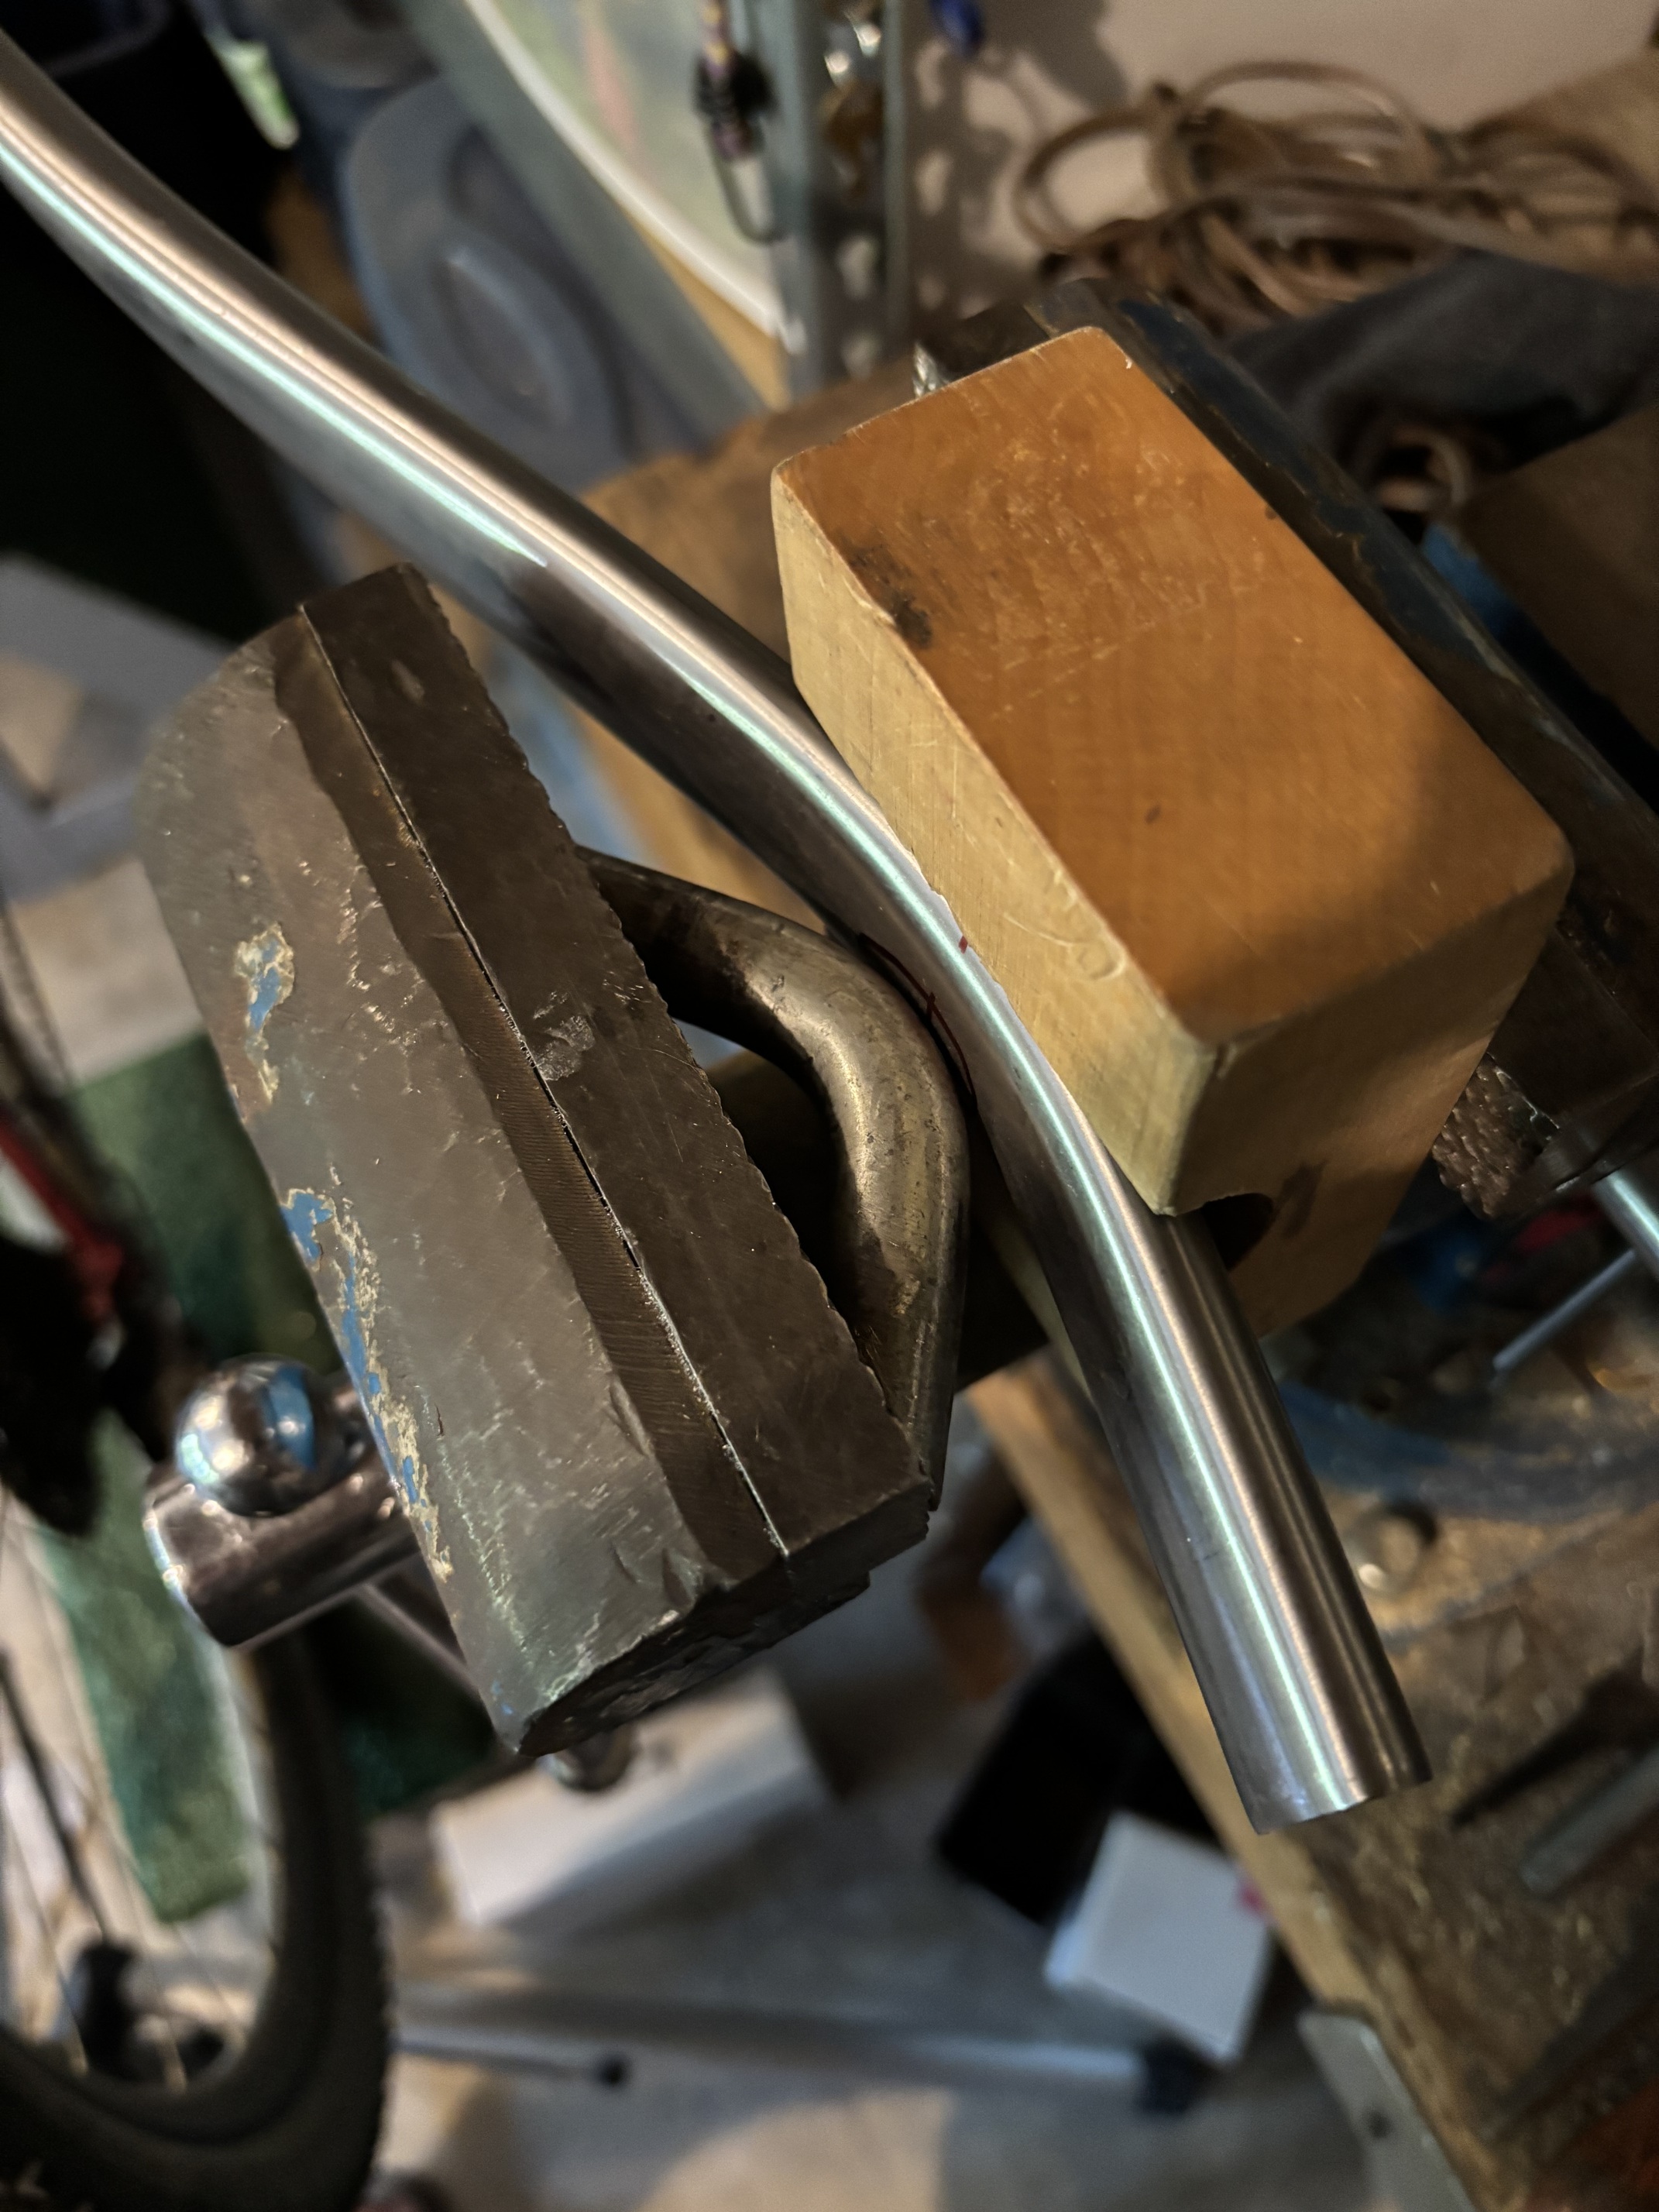
The key advantage of this fixture is that the supporting blocks can pivot. This allows two things:
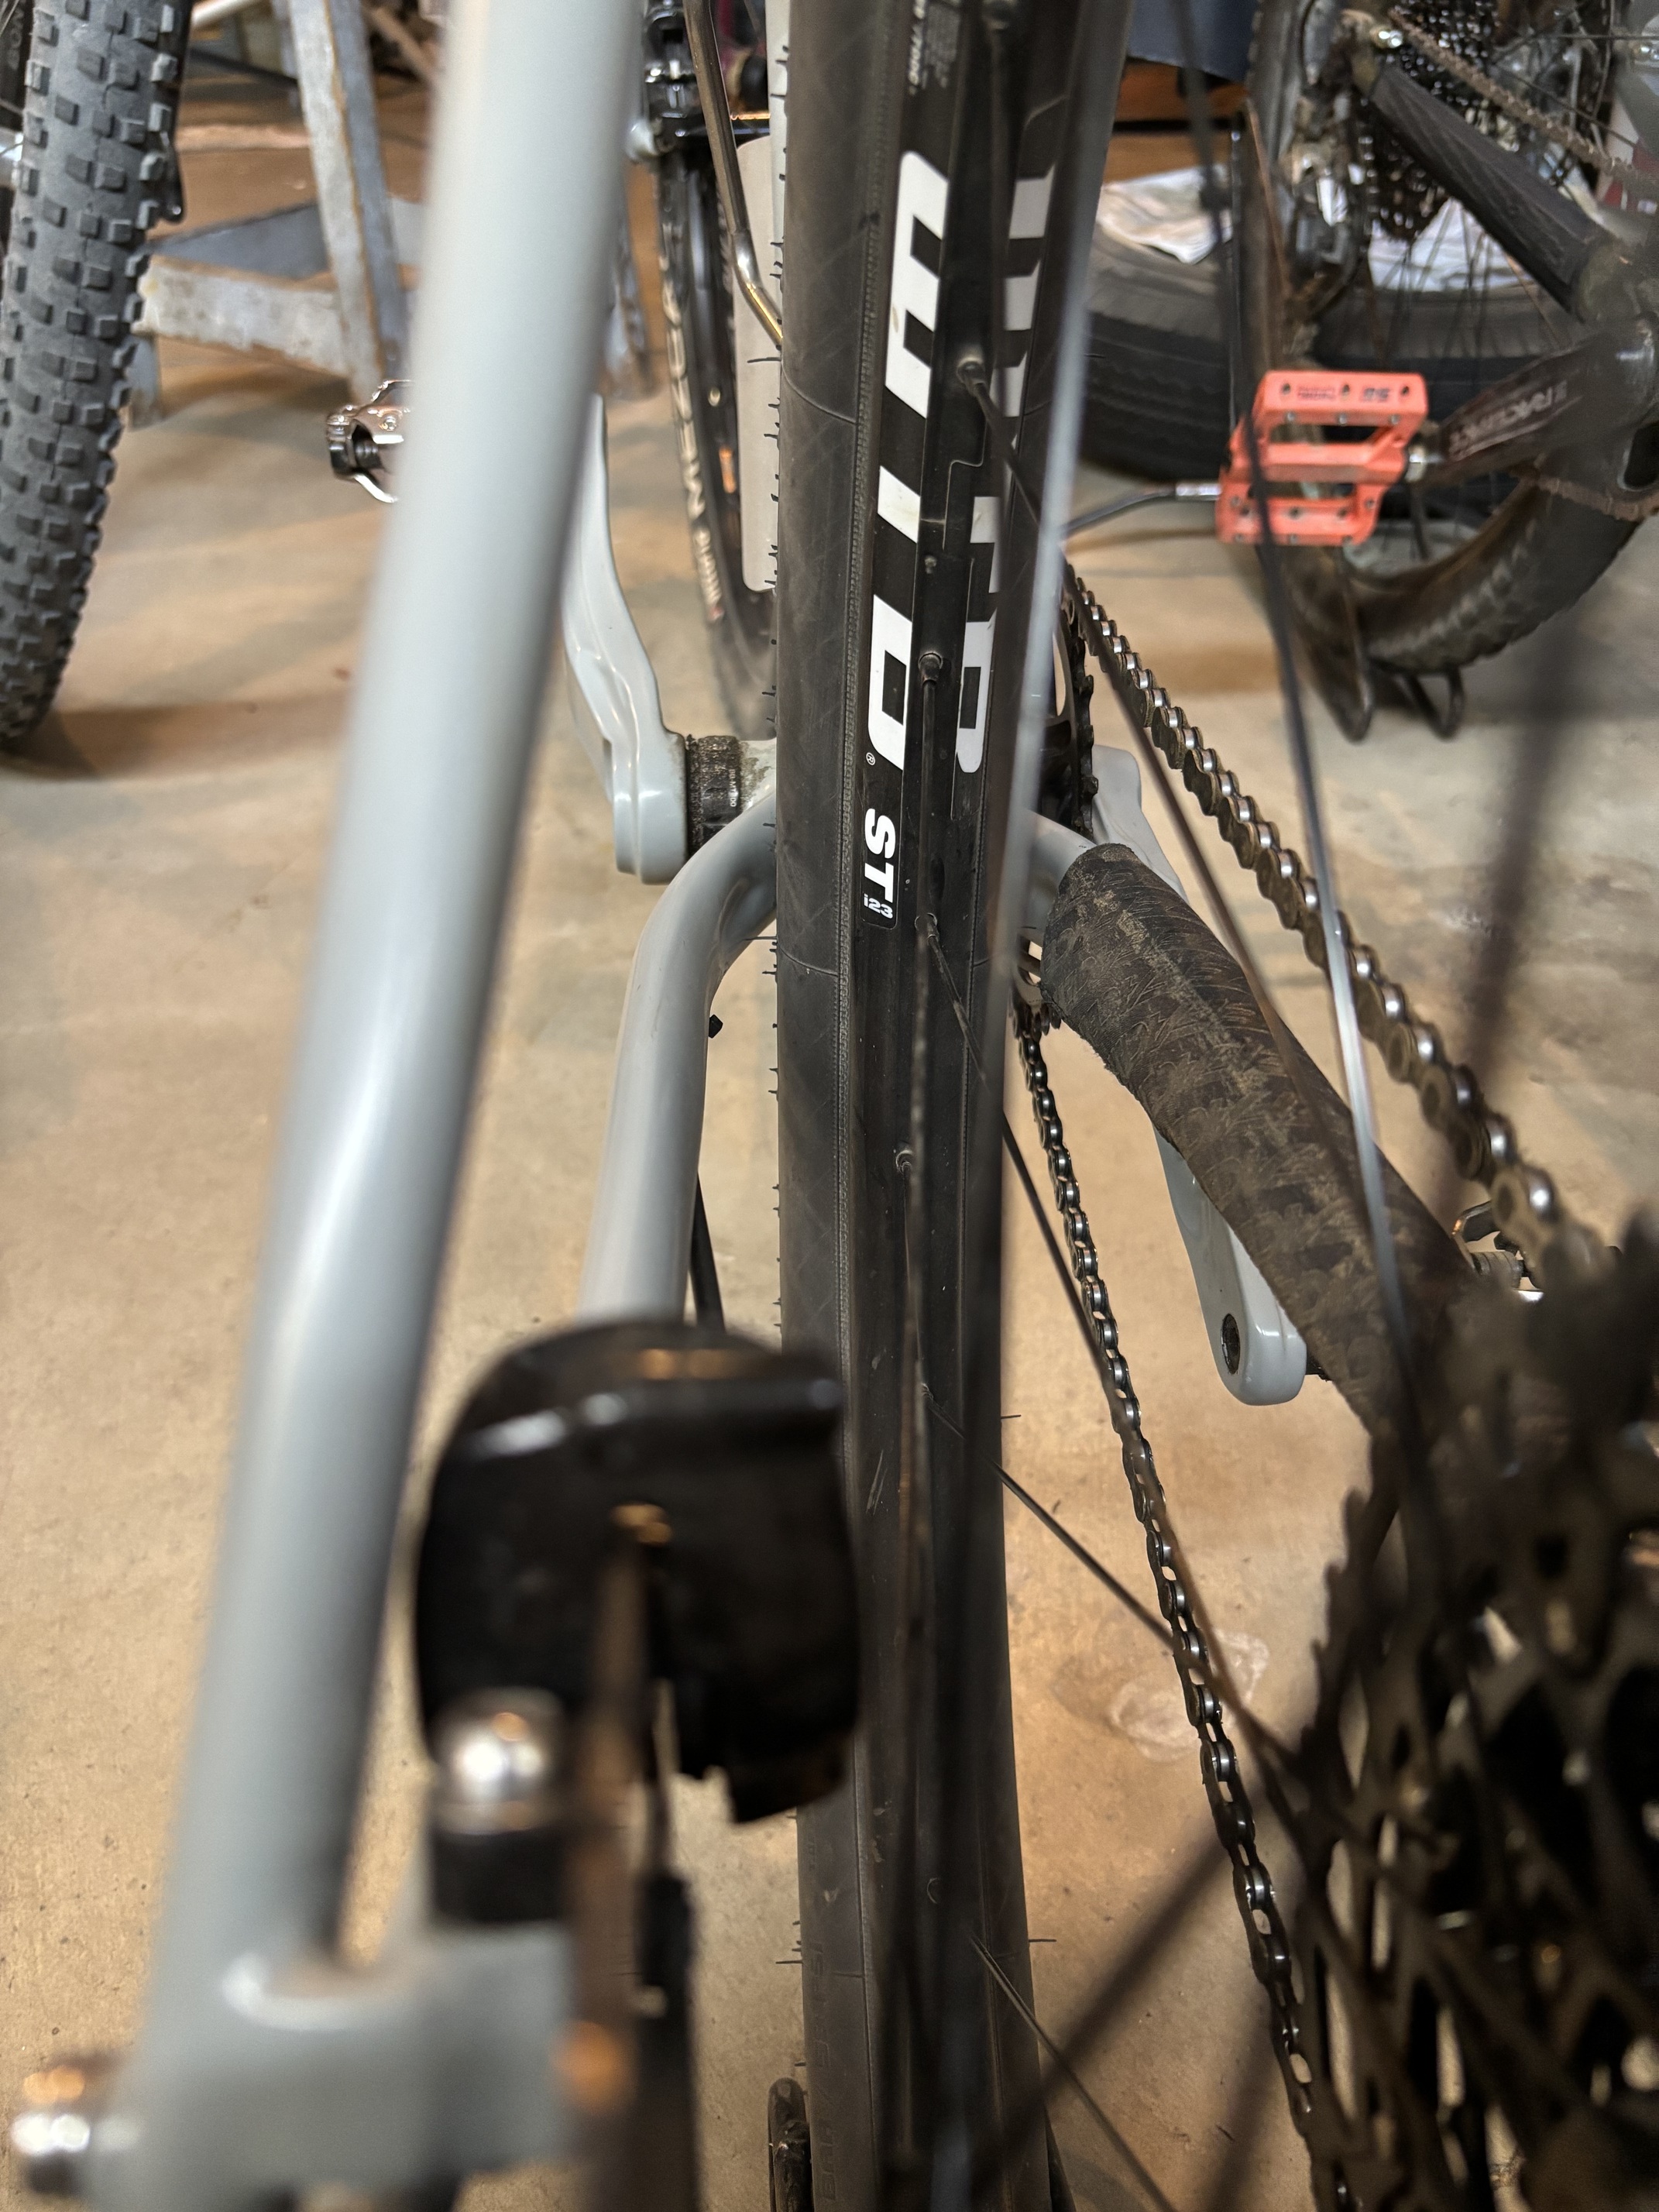
- prevents a flat spot or edge on the backside of the tube
- allows you to dimple bent chainstays
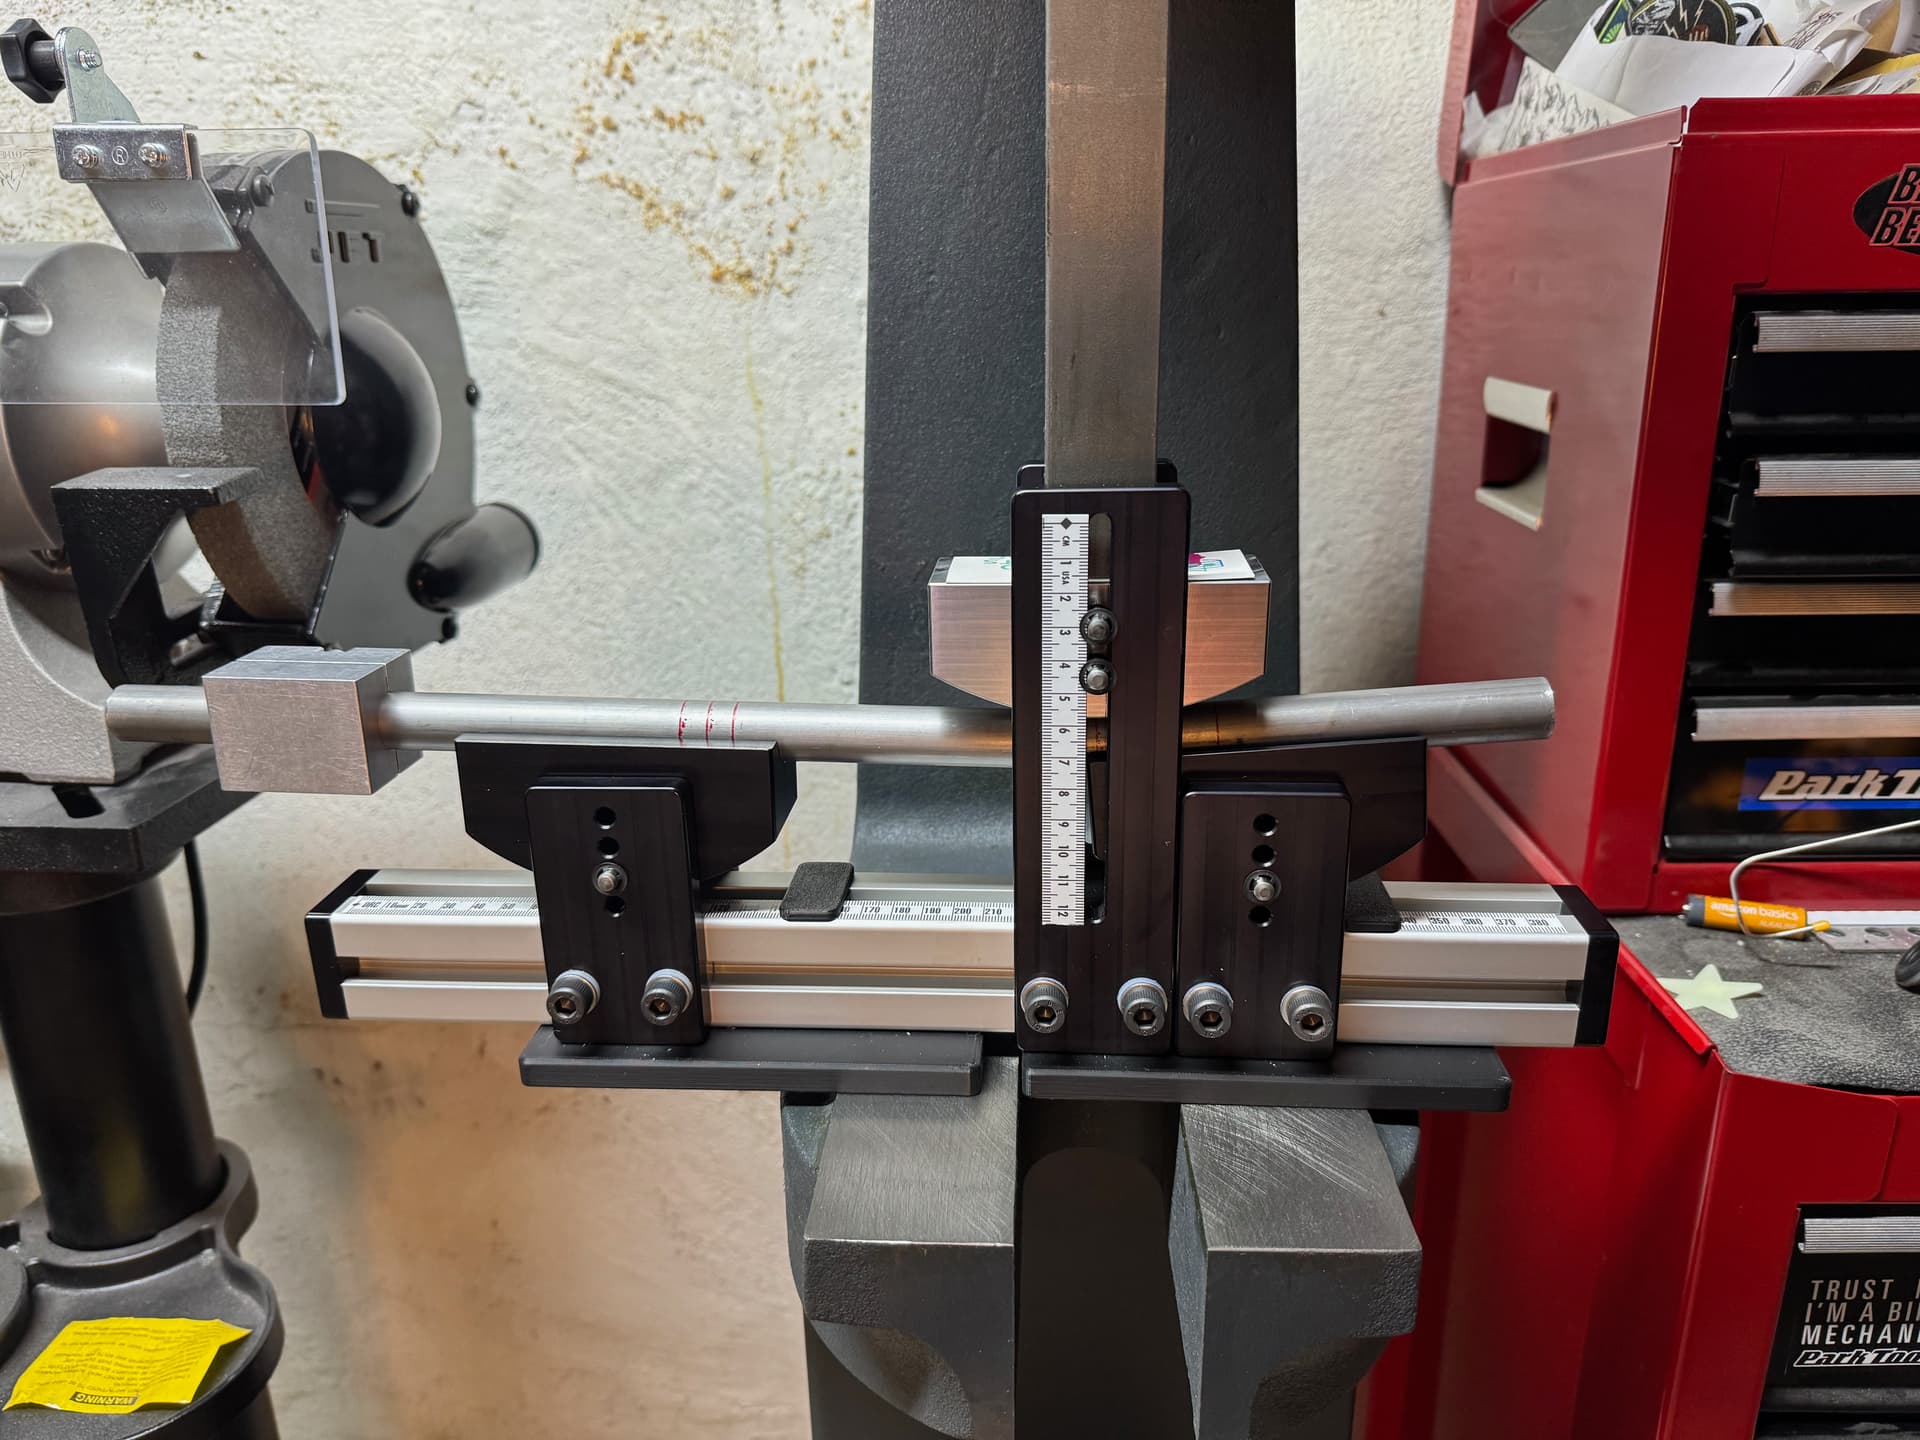
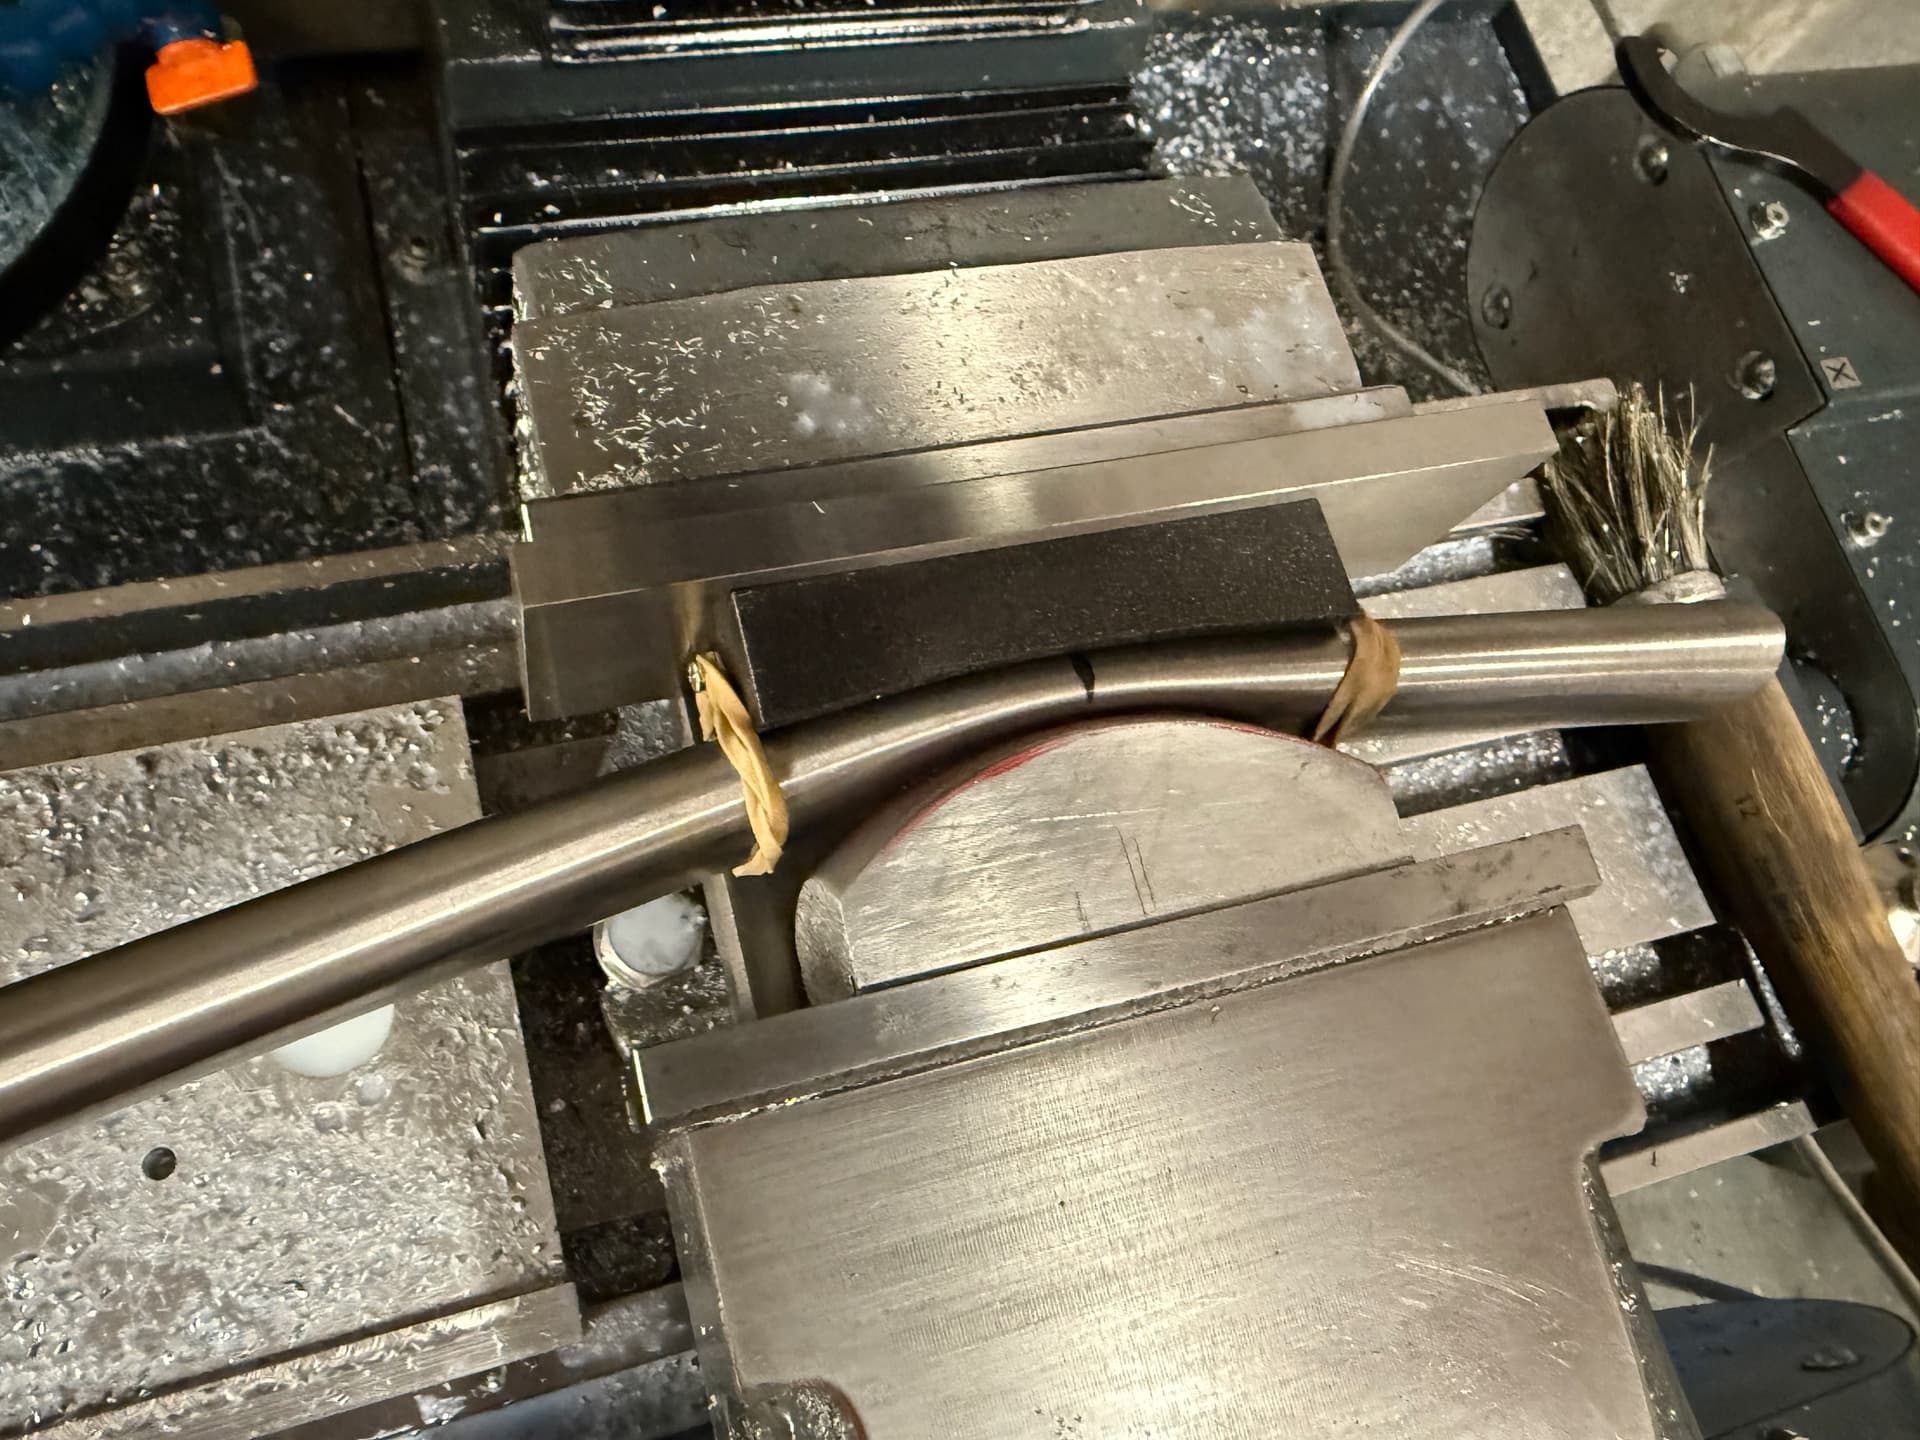
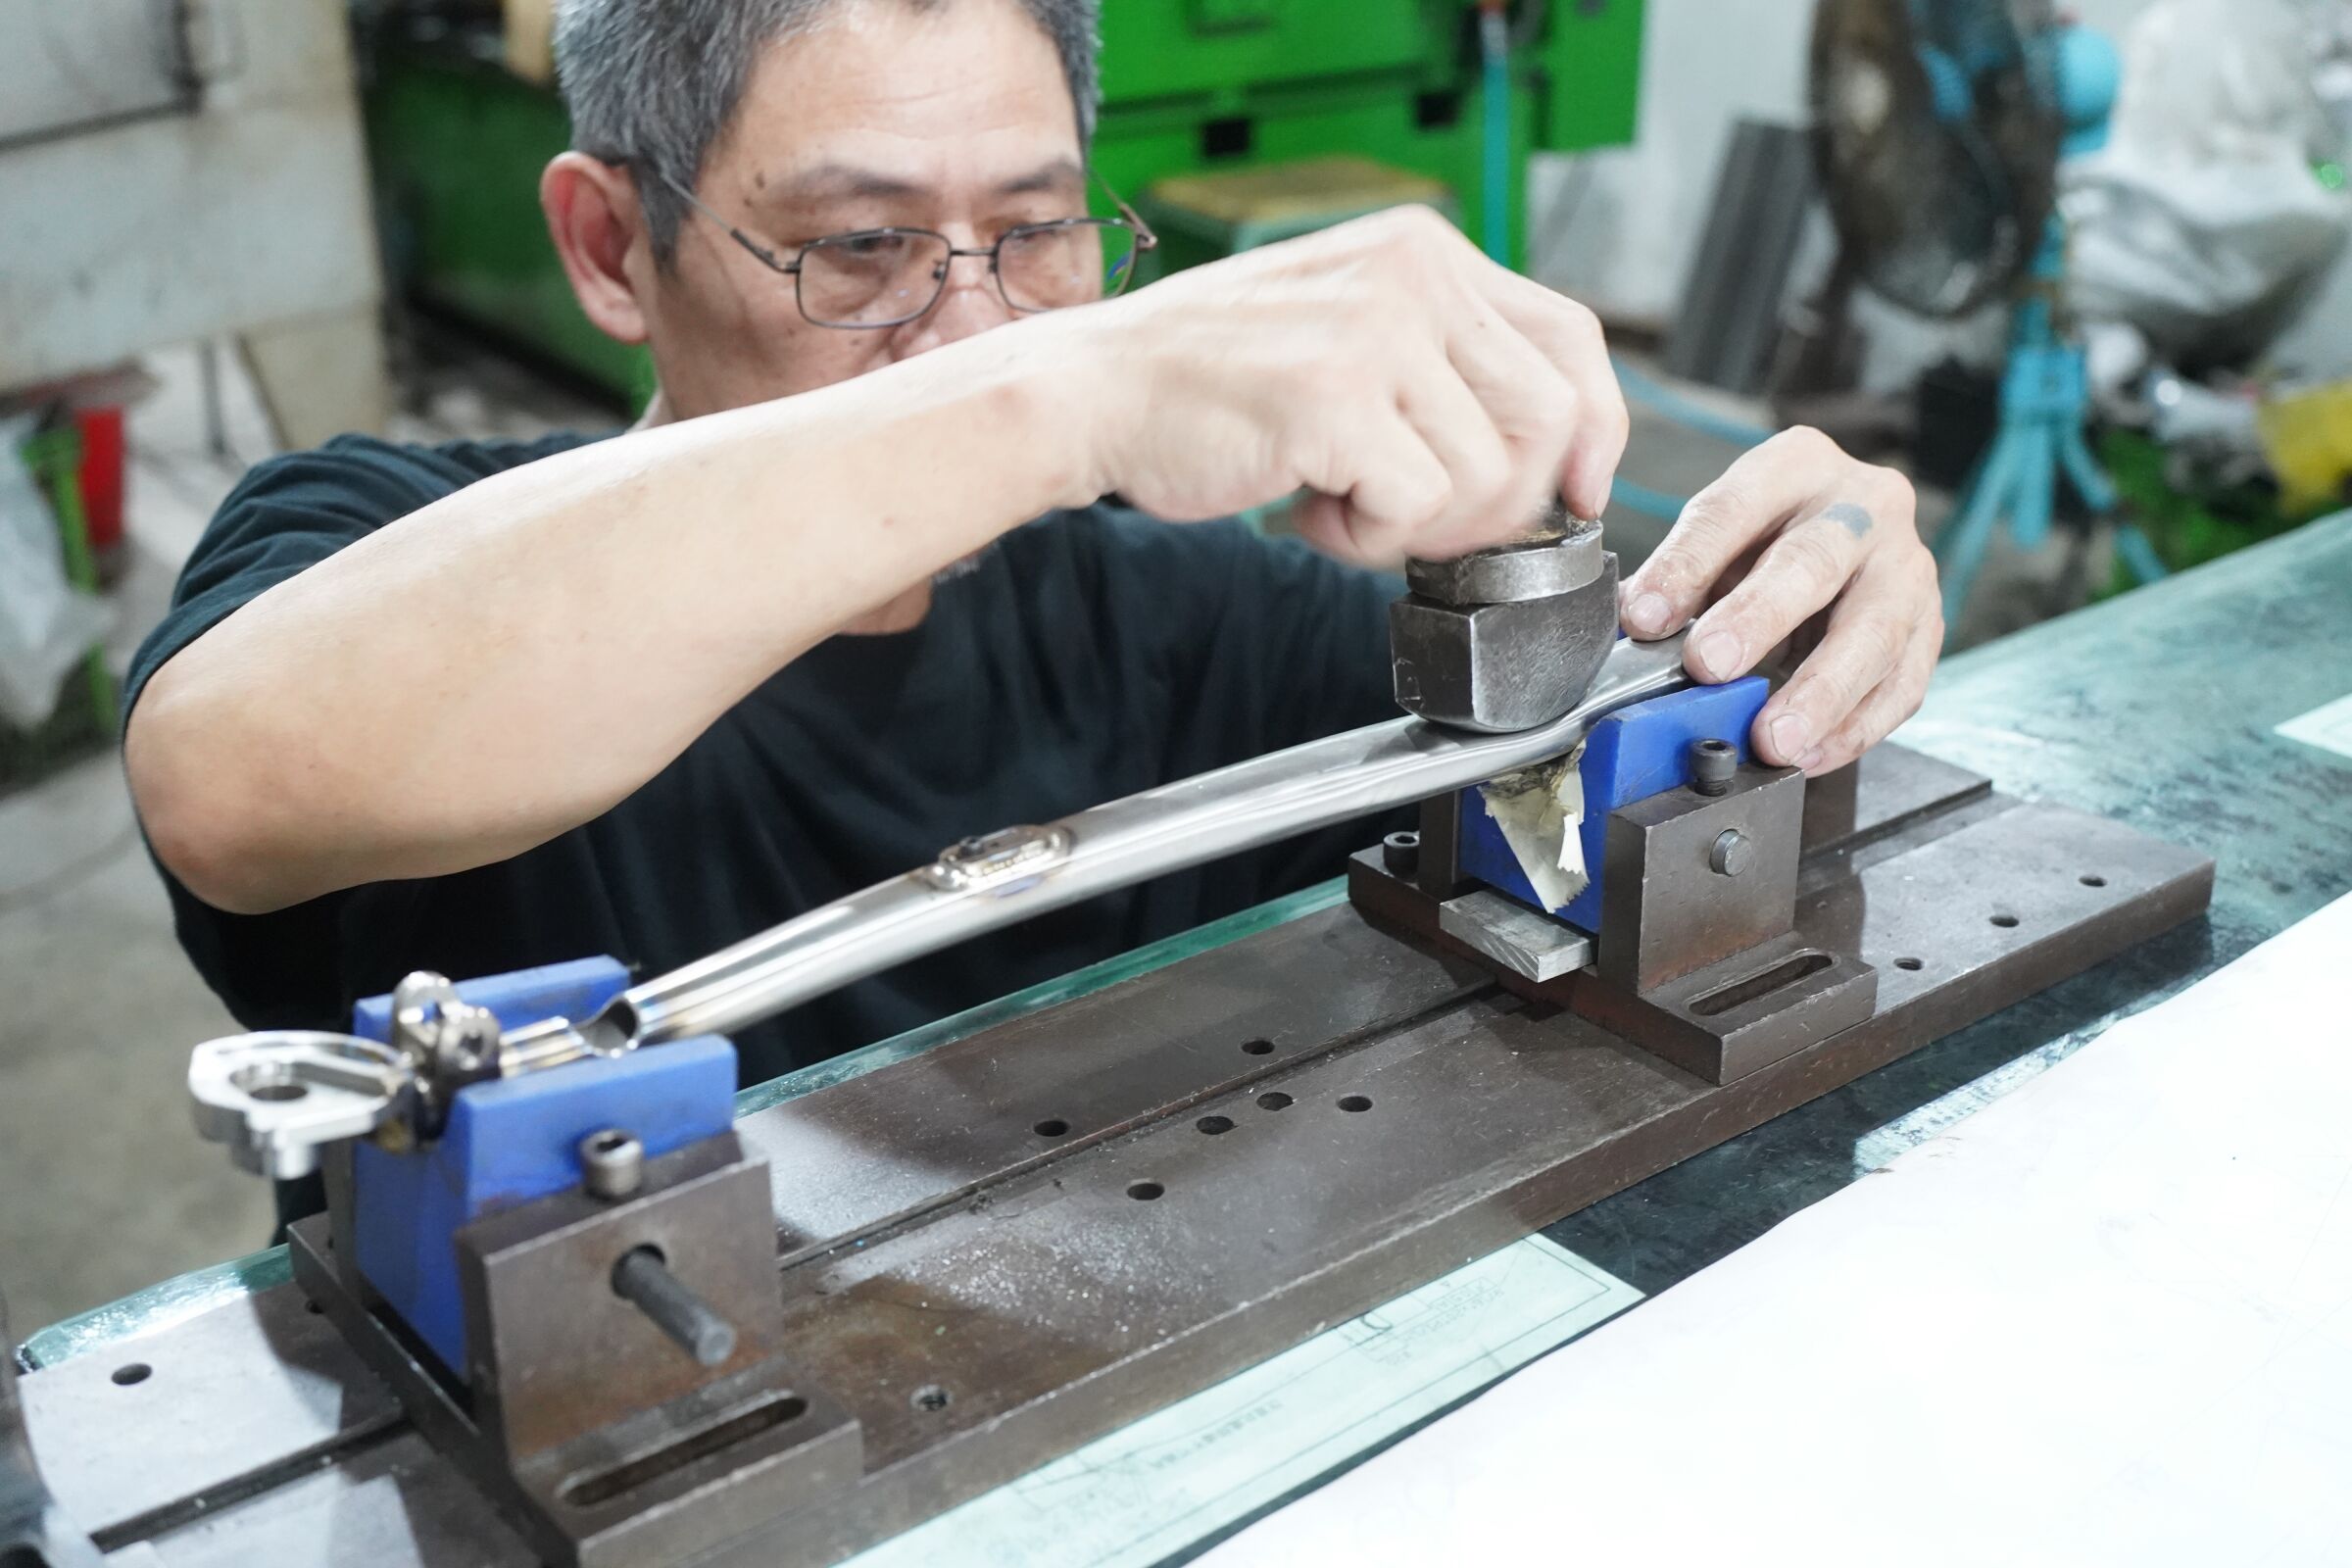
Press:
The force was generated with a hydraulic press:

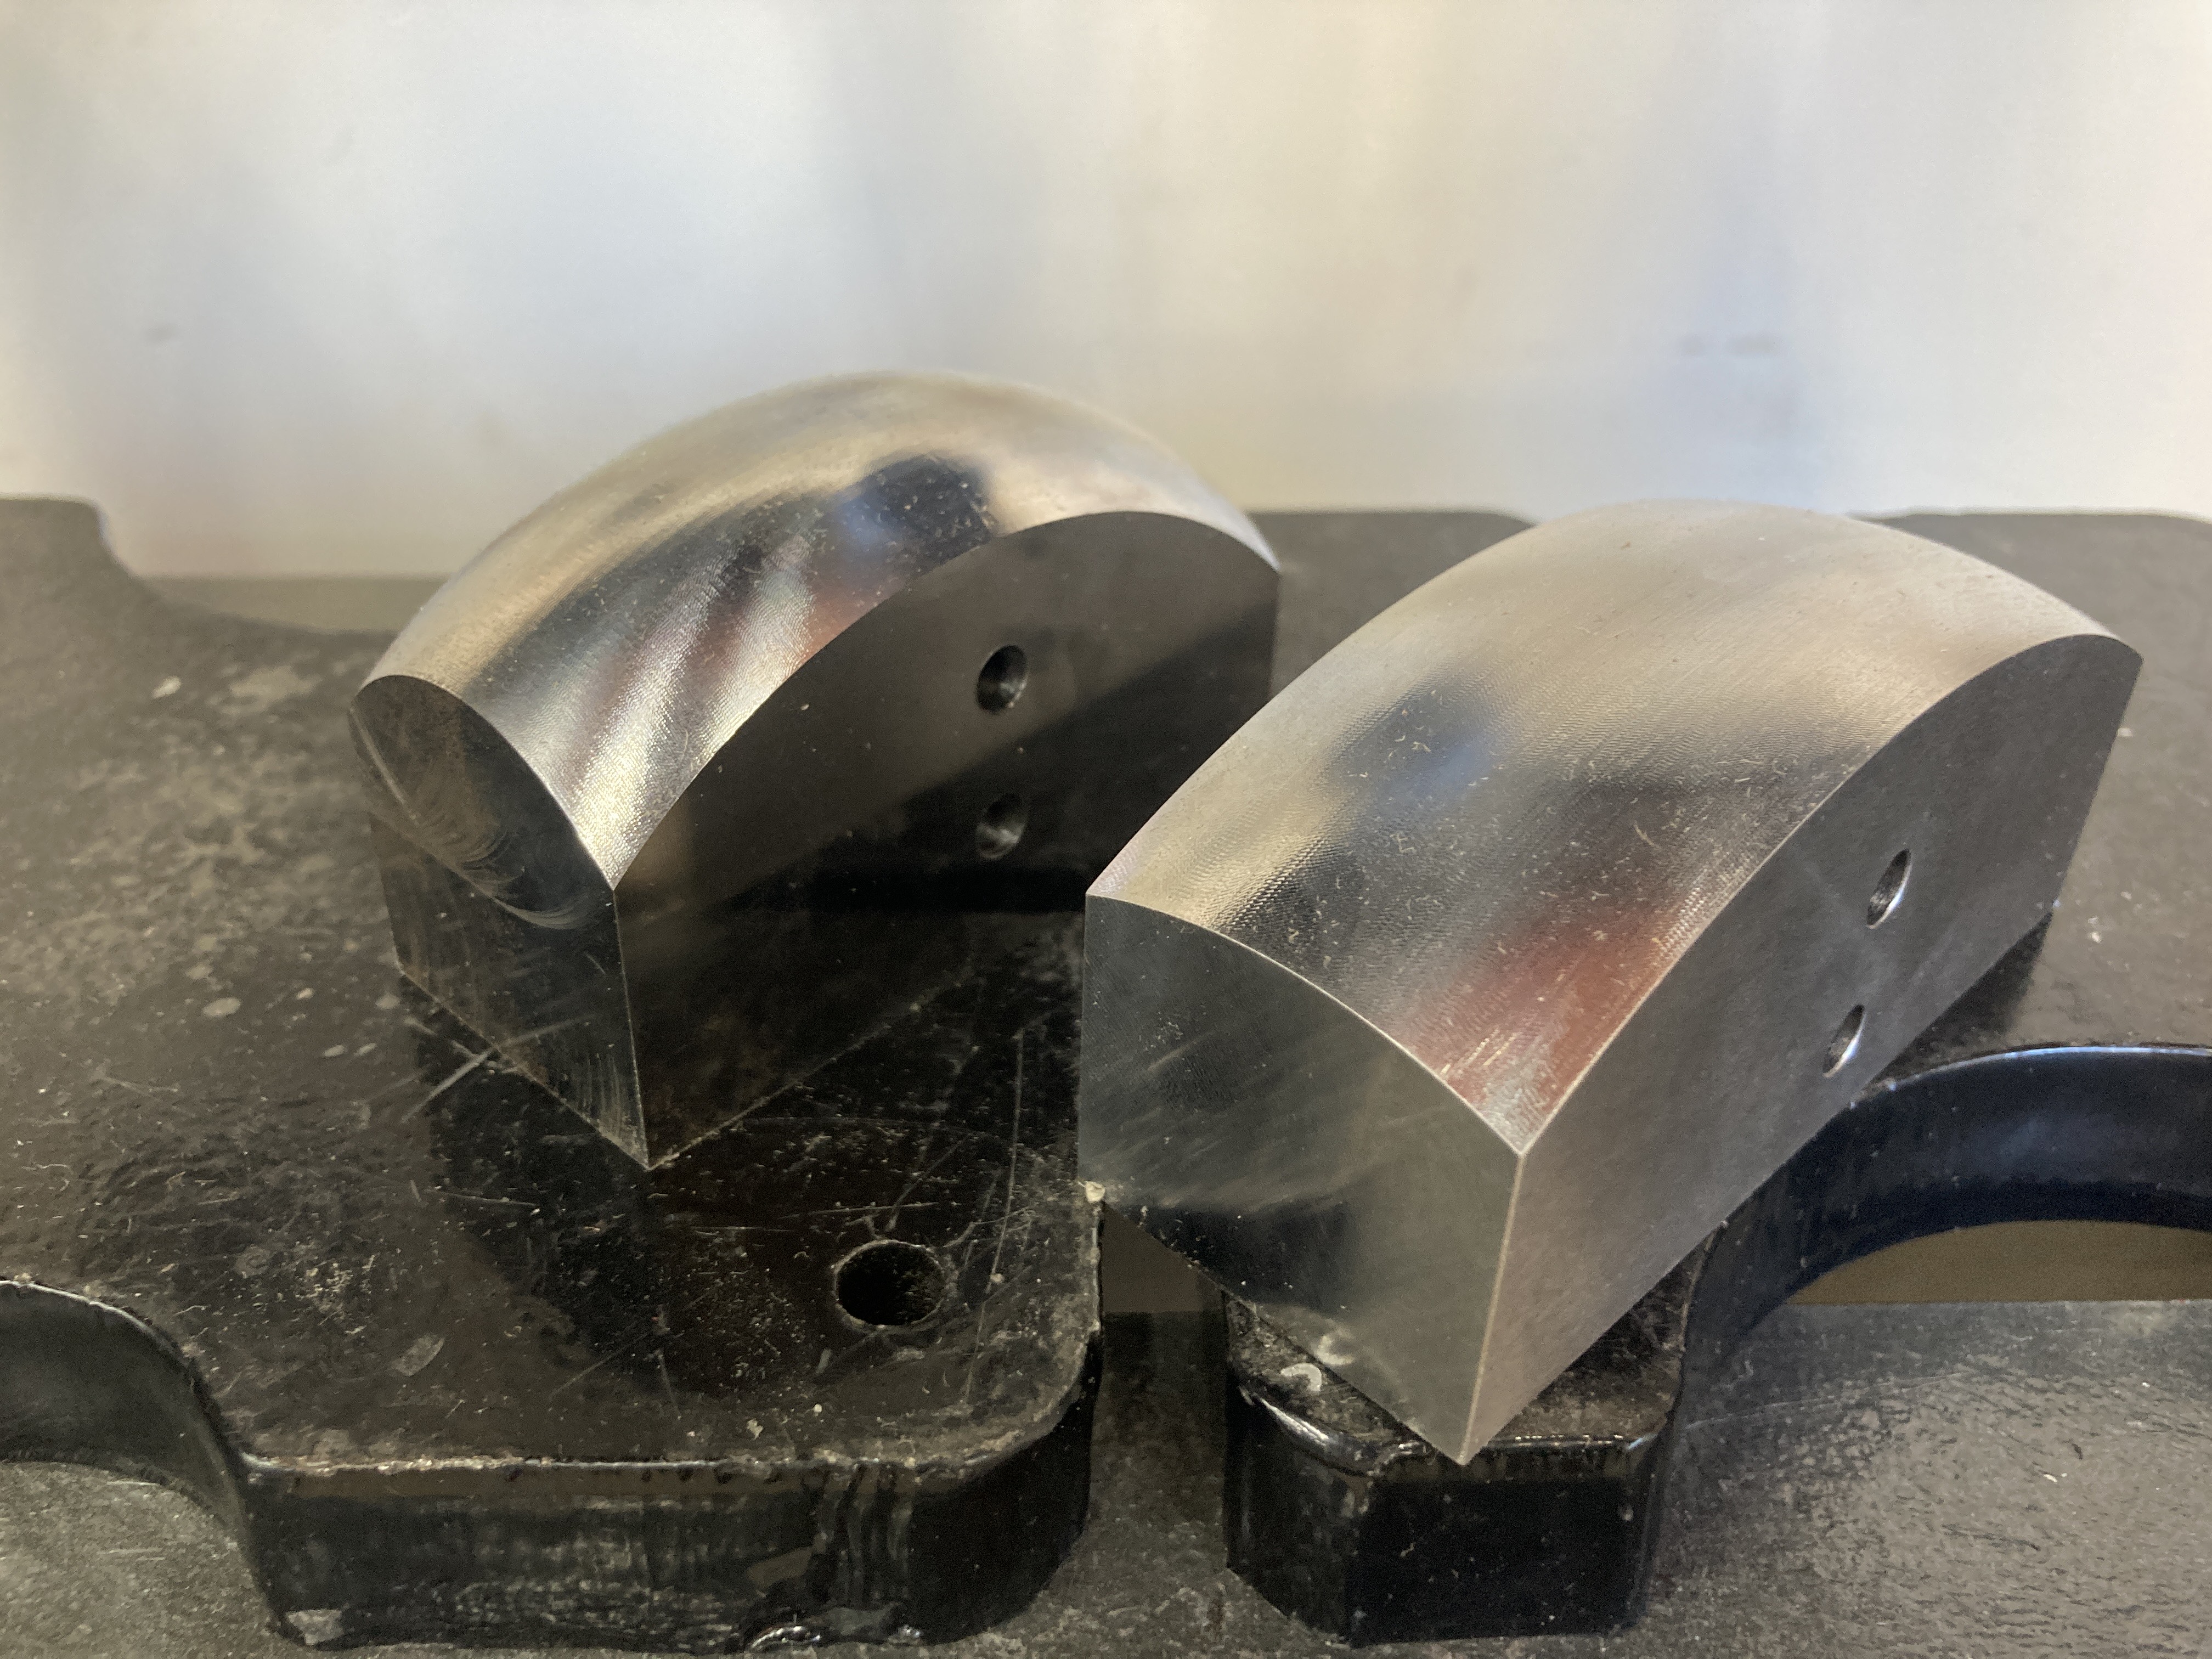
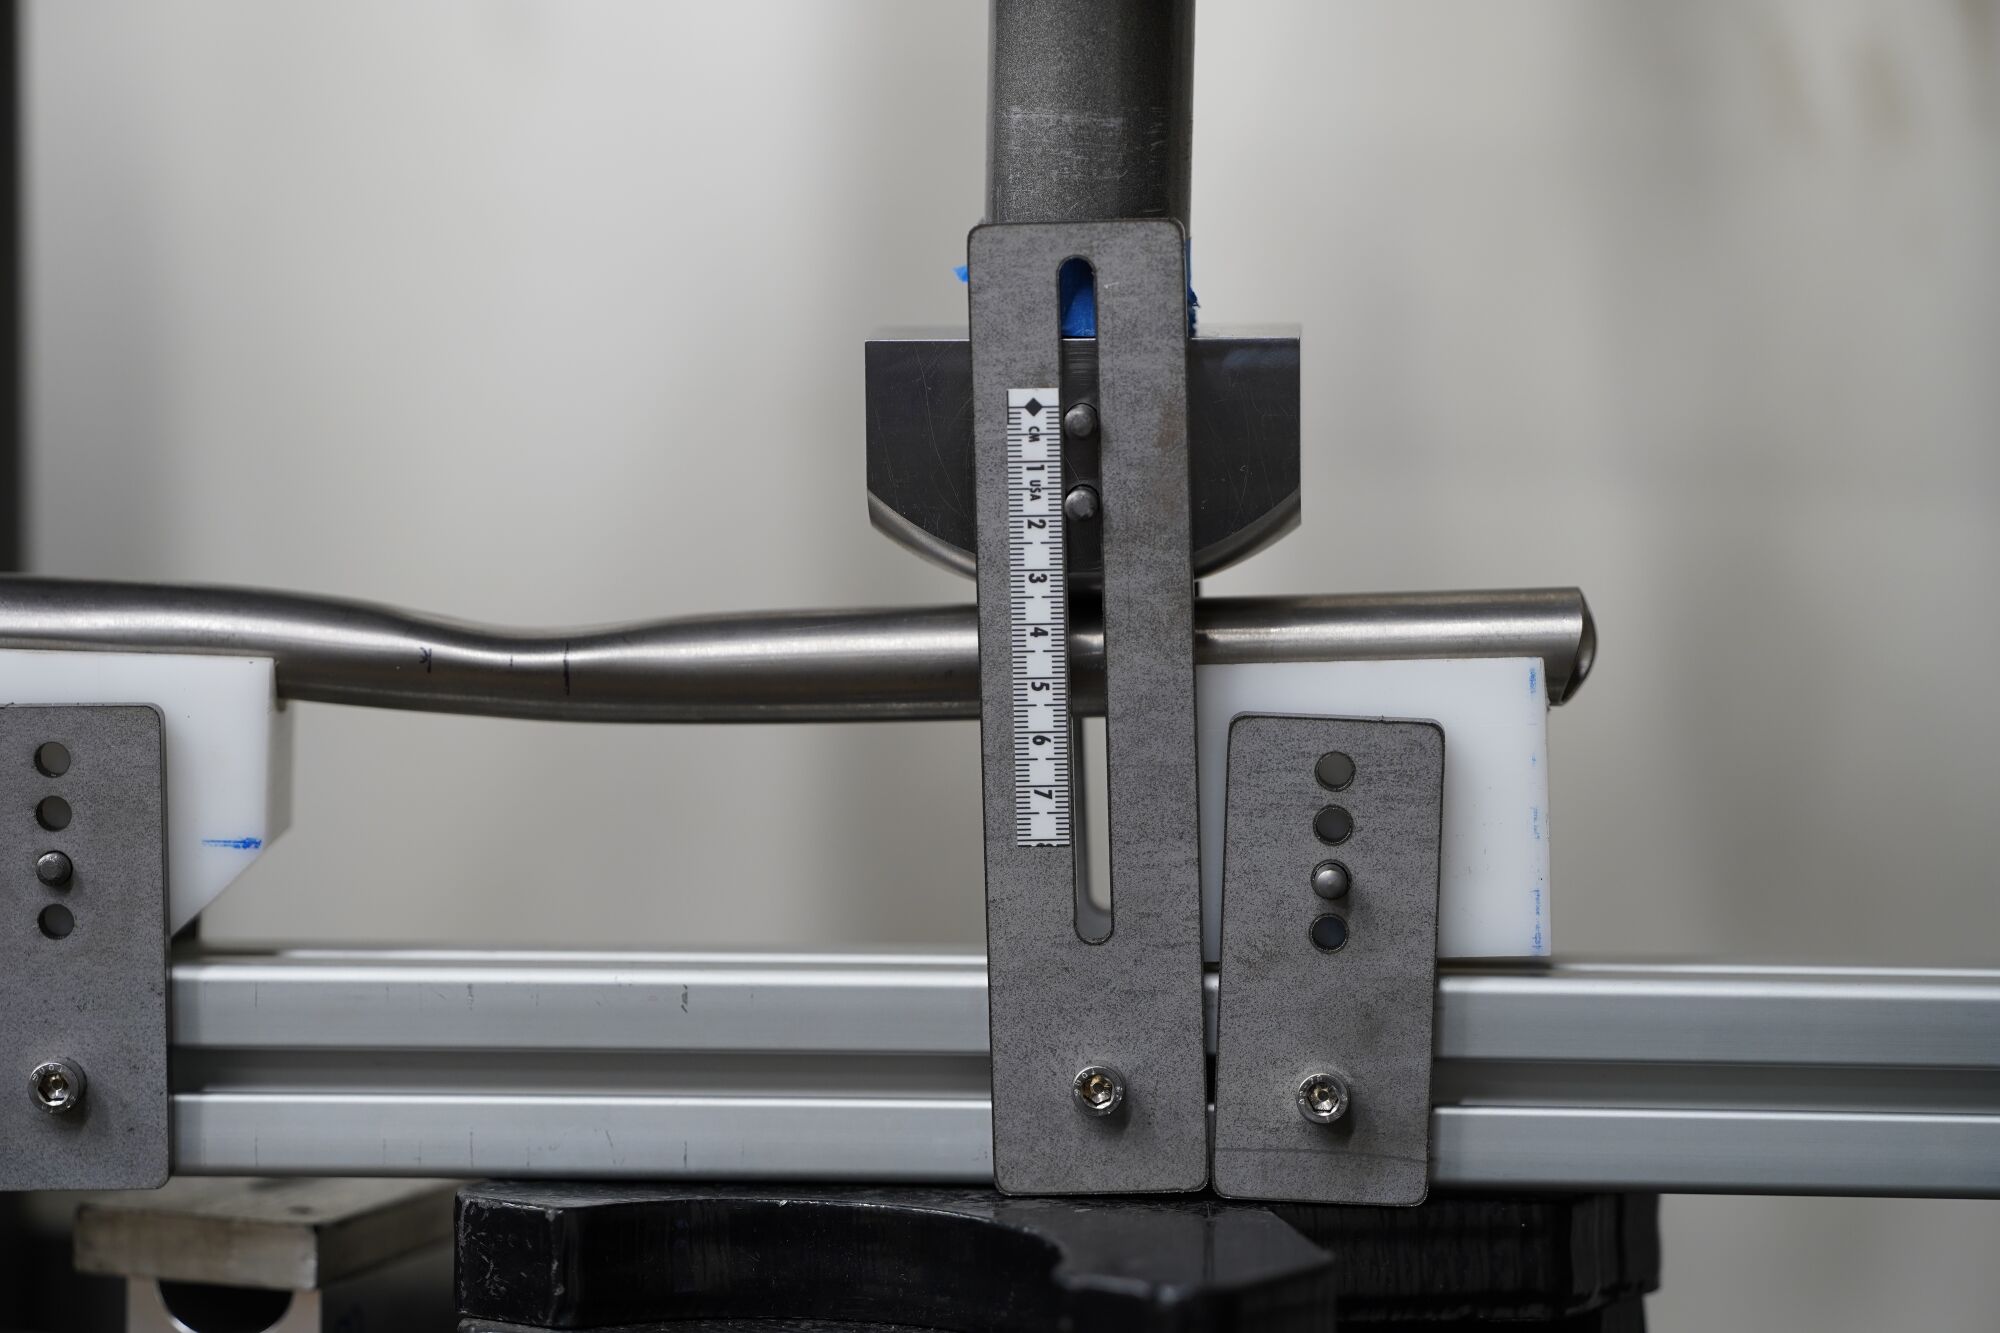
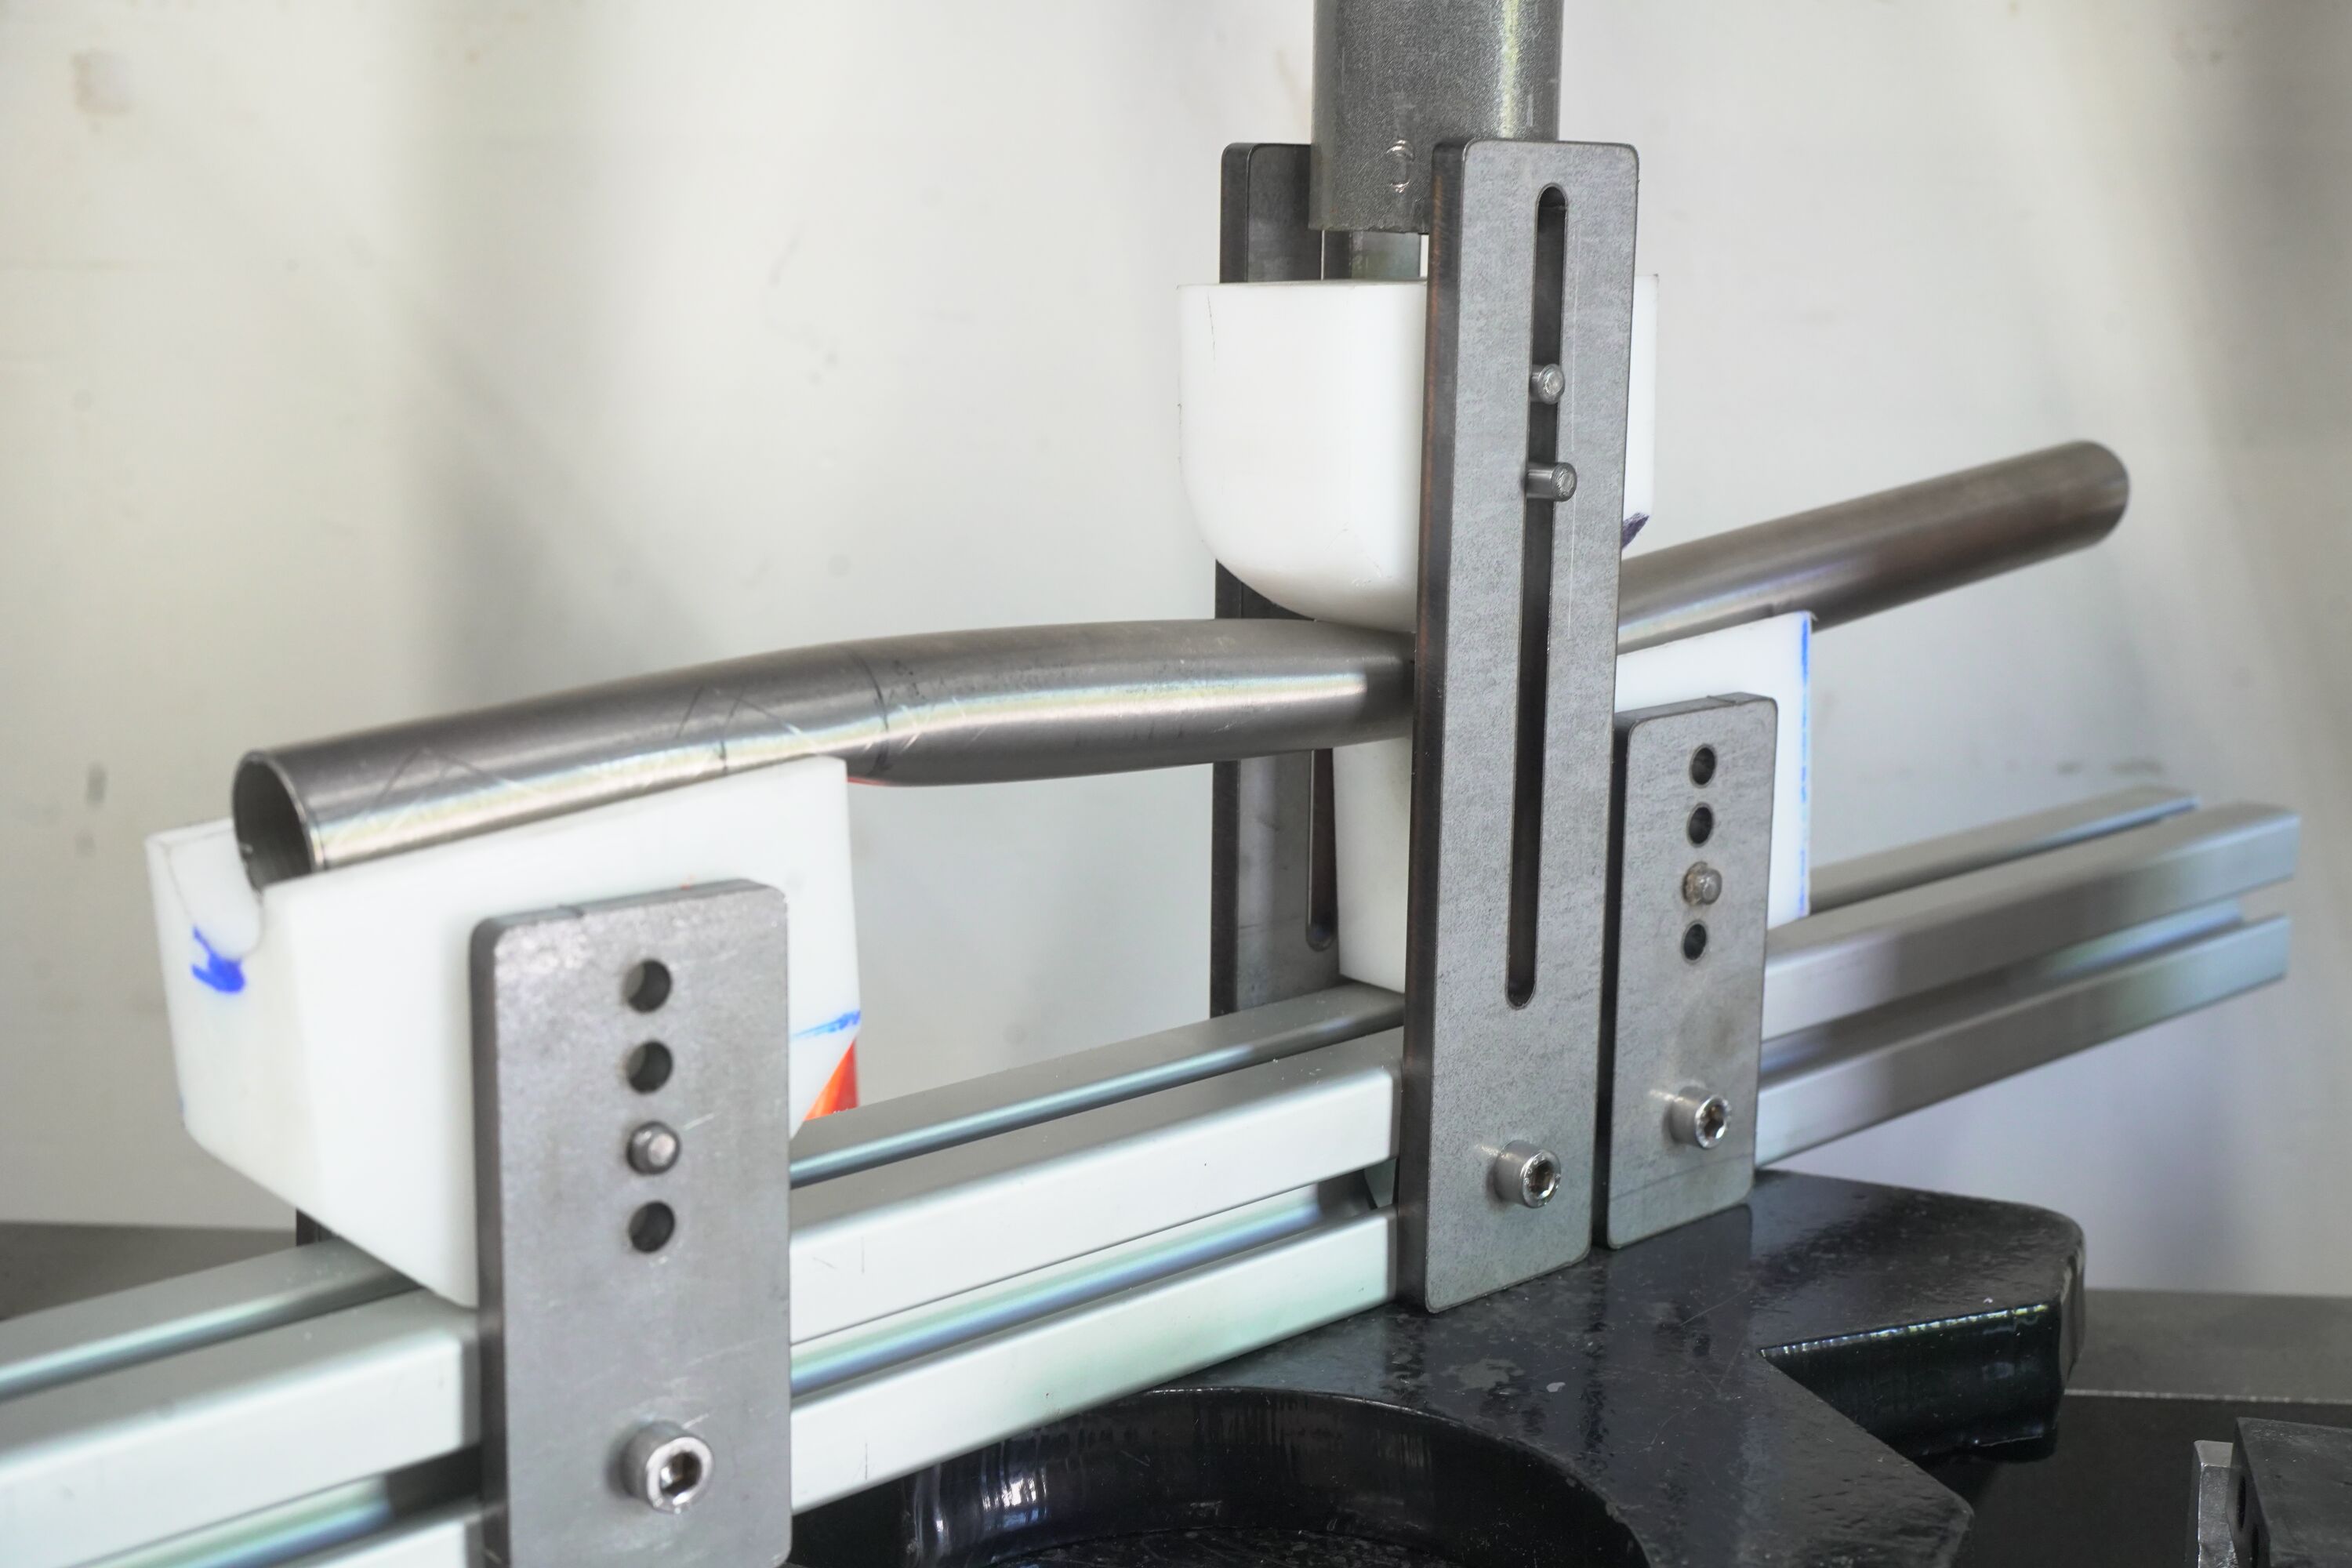
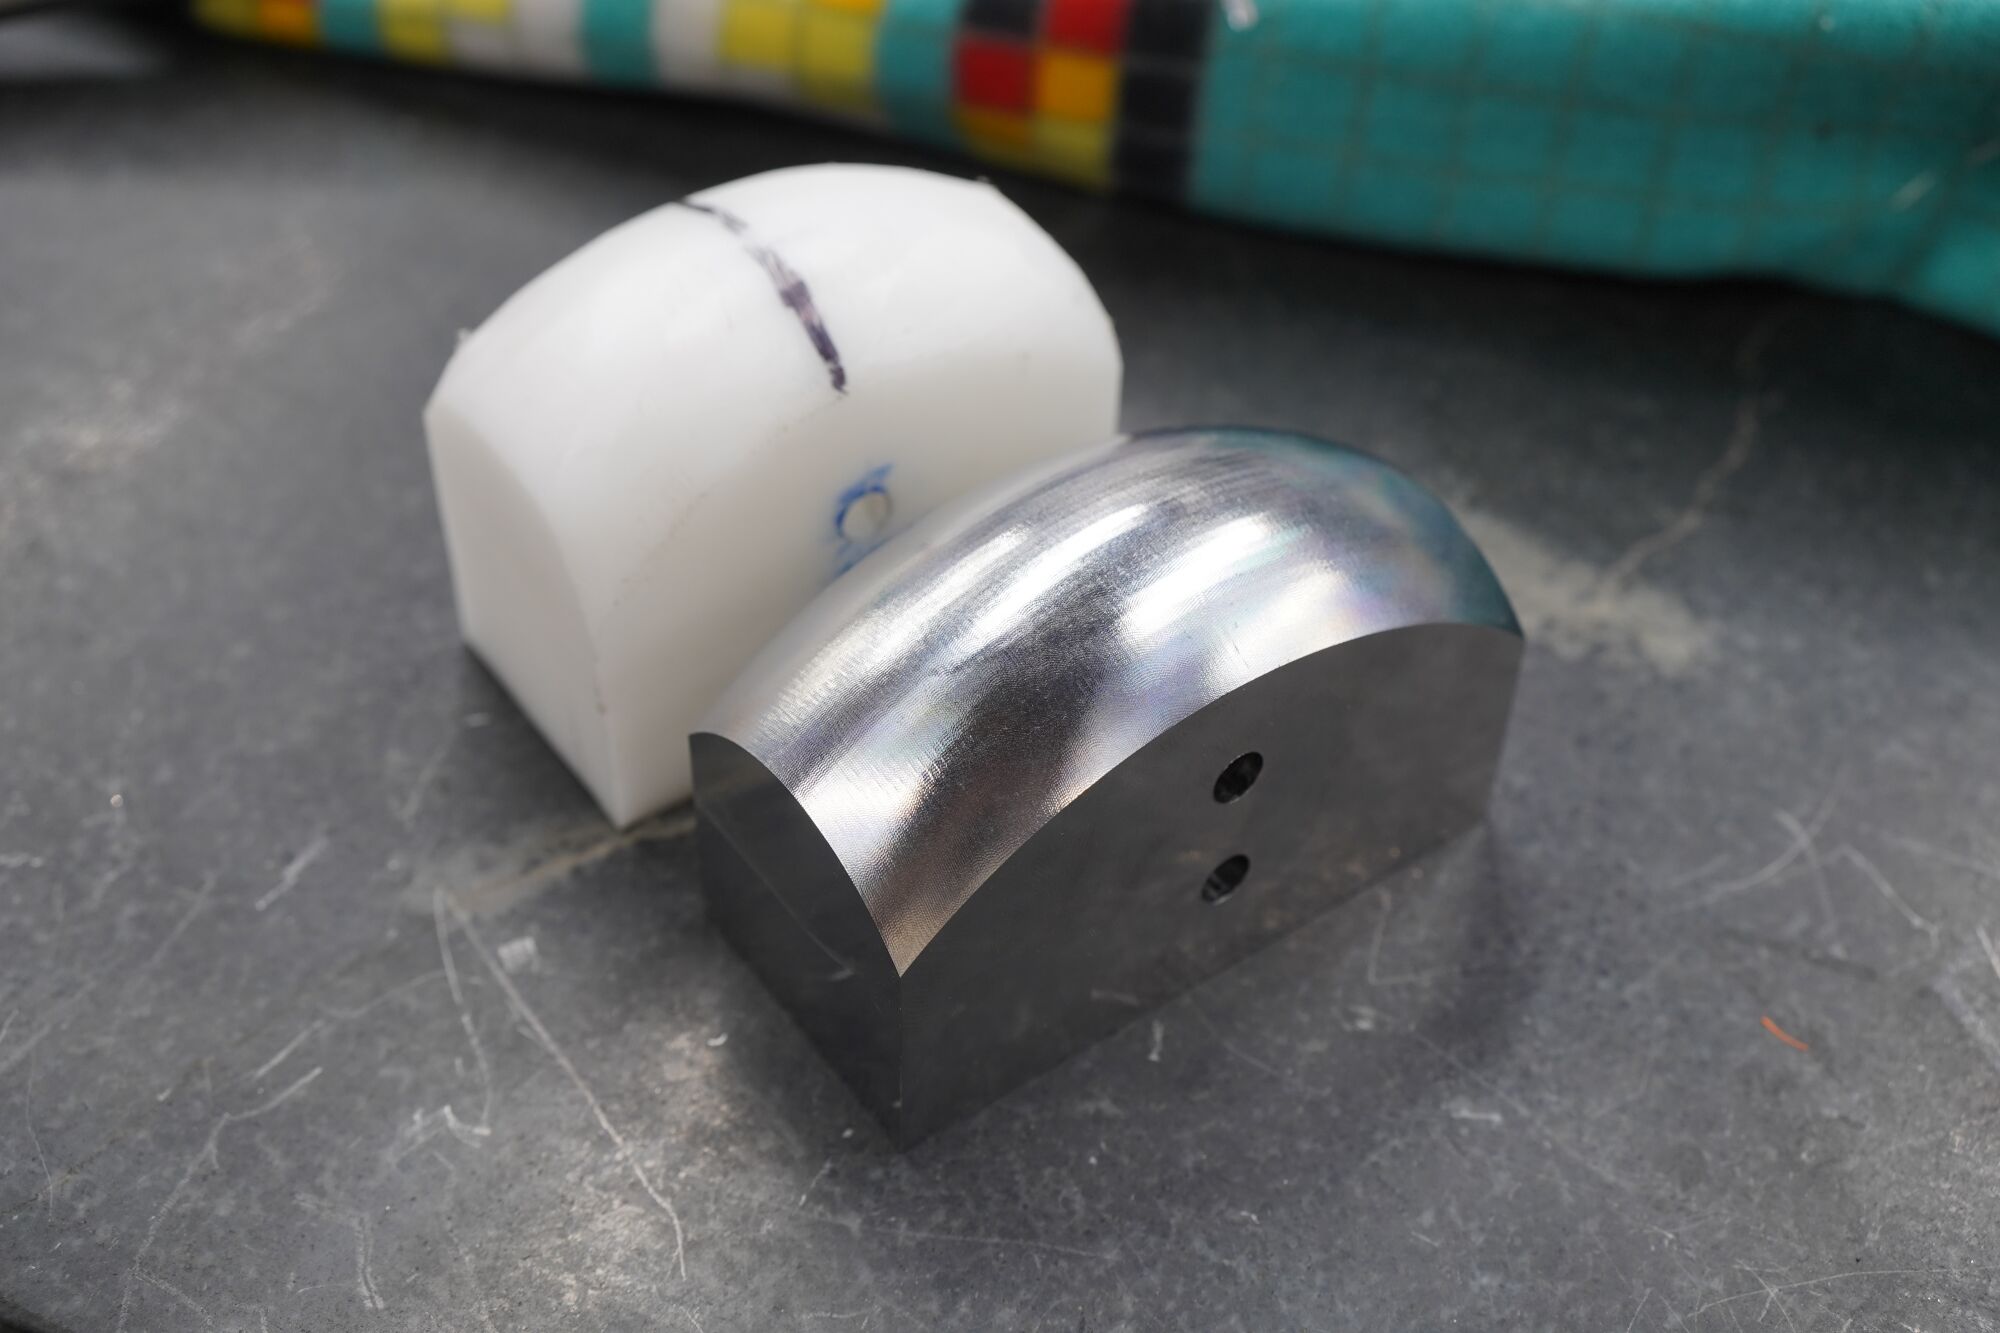
Support Blocks:
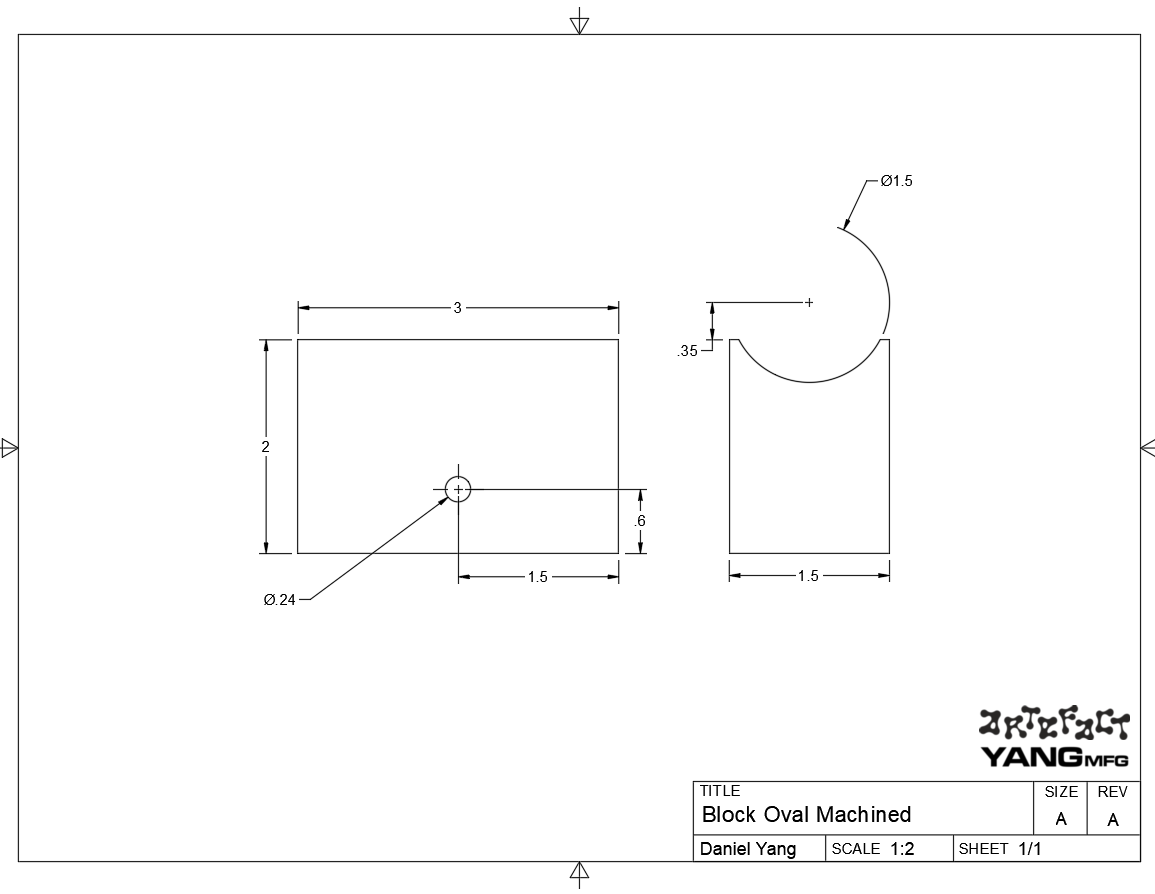
The support blocks were made from a 1.5x2x12in bar of Acetal. They were made using holesaw in a mill. The circular block is closest to the dropout (furthest from the die). On the final design, I cut off some of the corners to allow this block to pivot more.
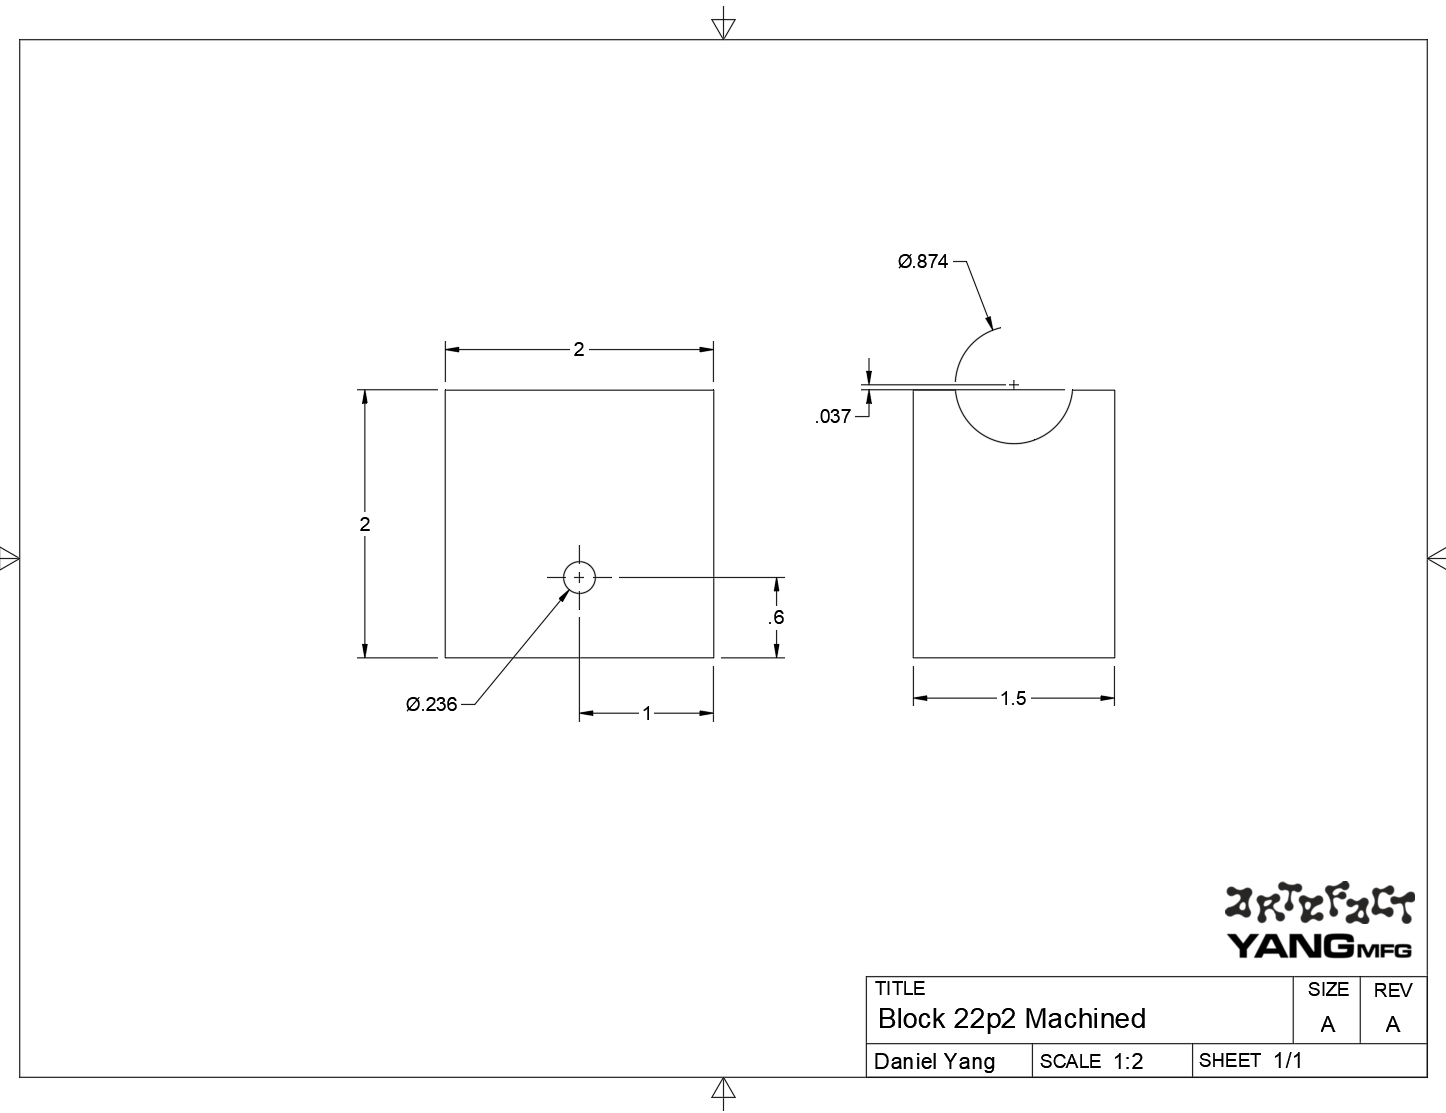
The “oval” block is closest to the dimple die:
laser cut brackets:
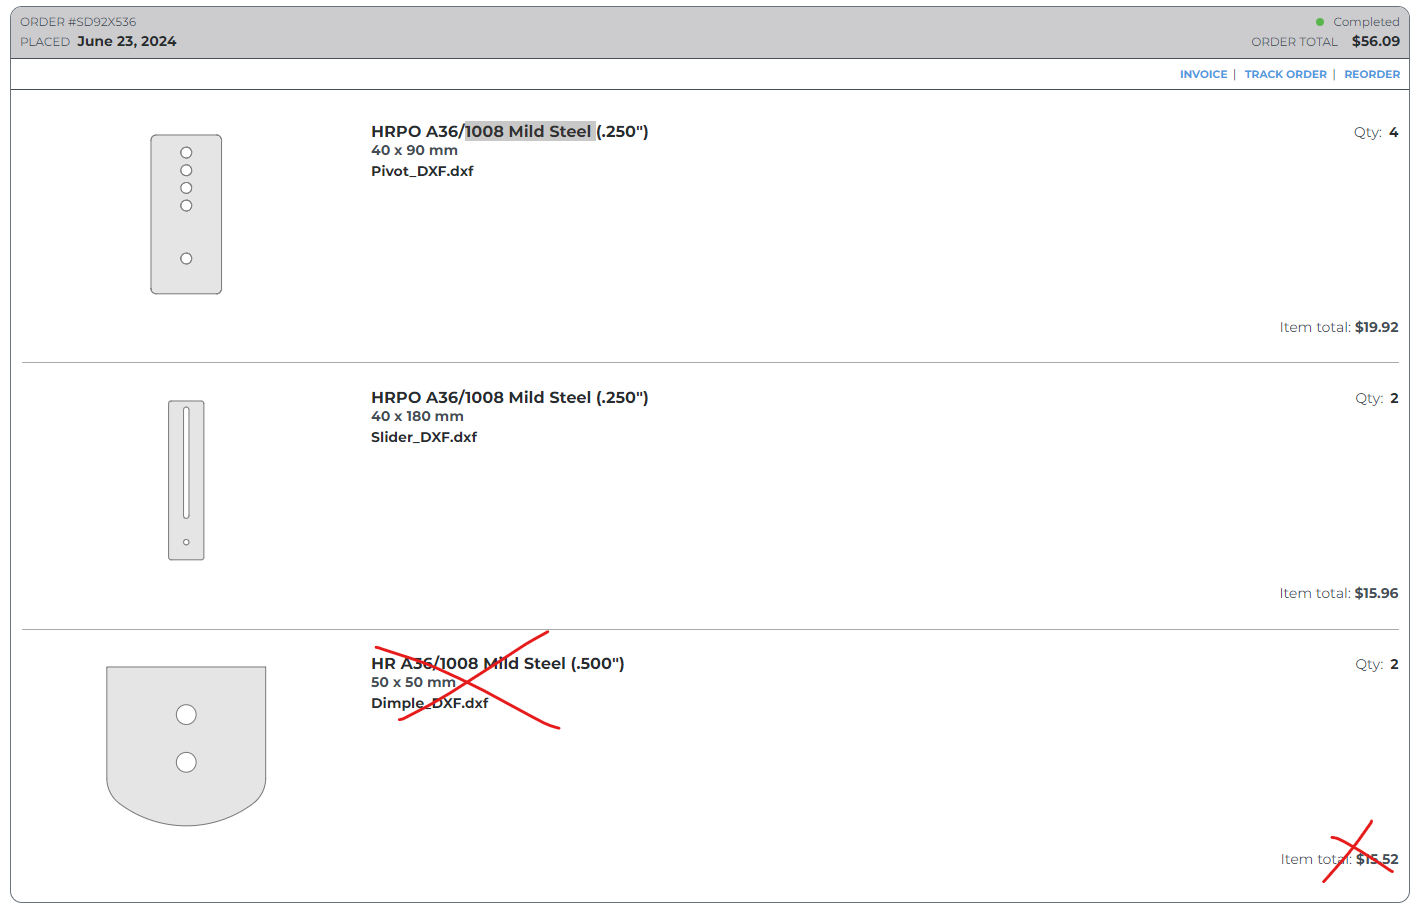
The brackets were laser cut from Send Cut Send from .25in 1008 Mild Steel
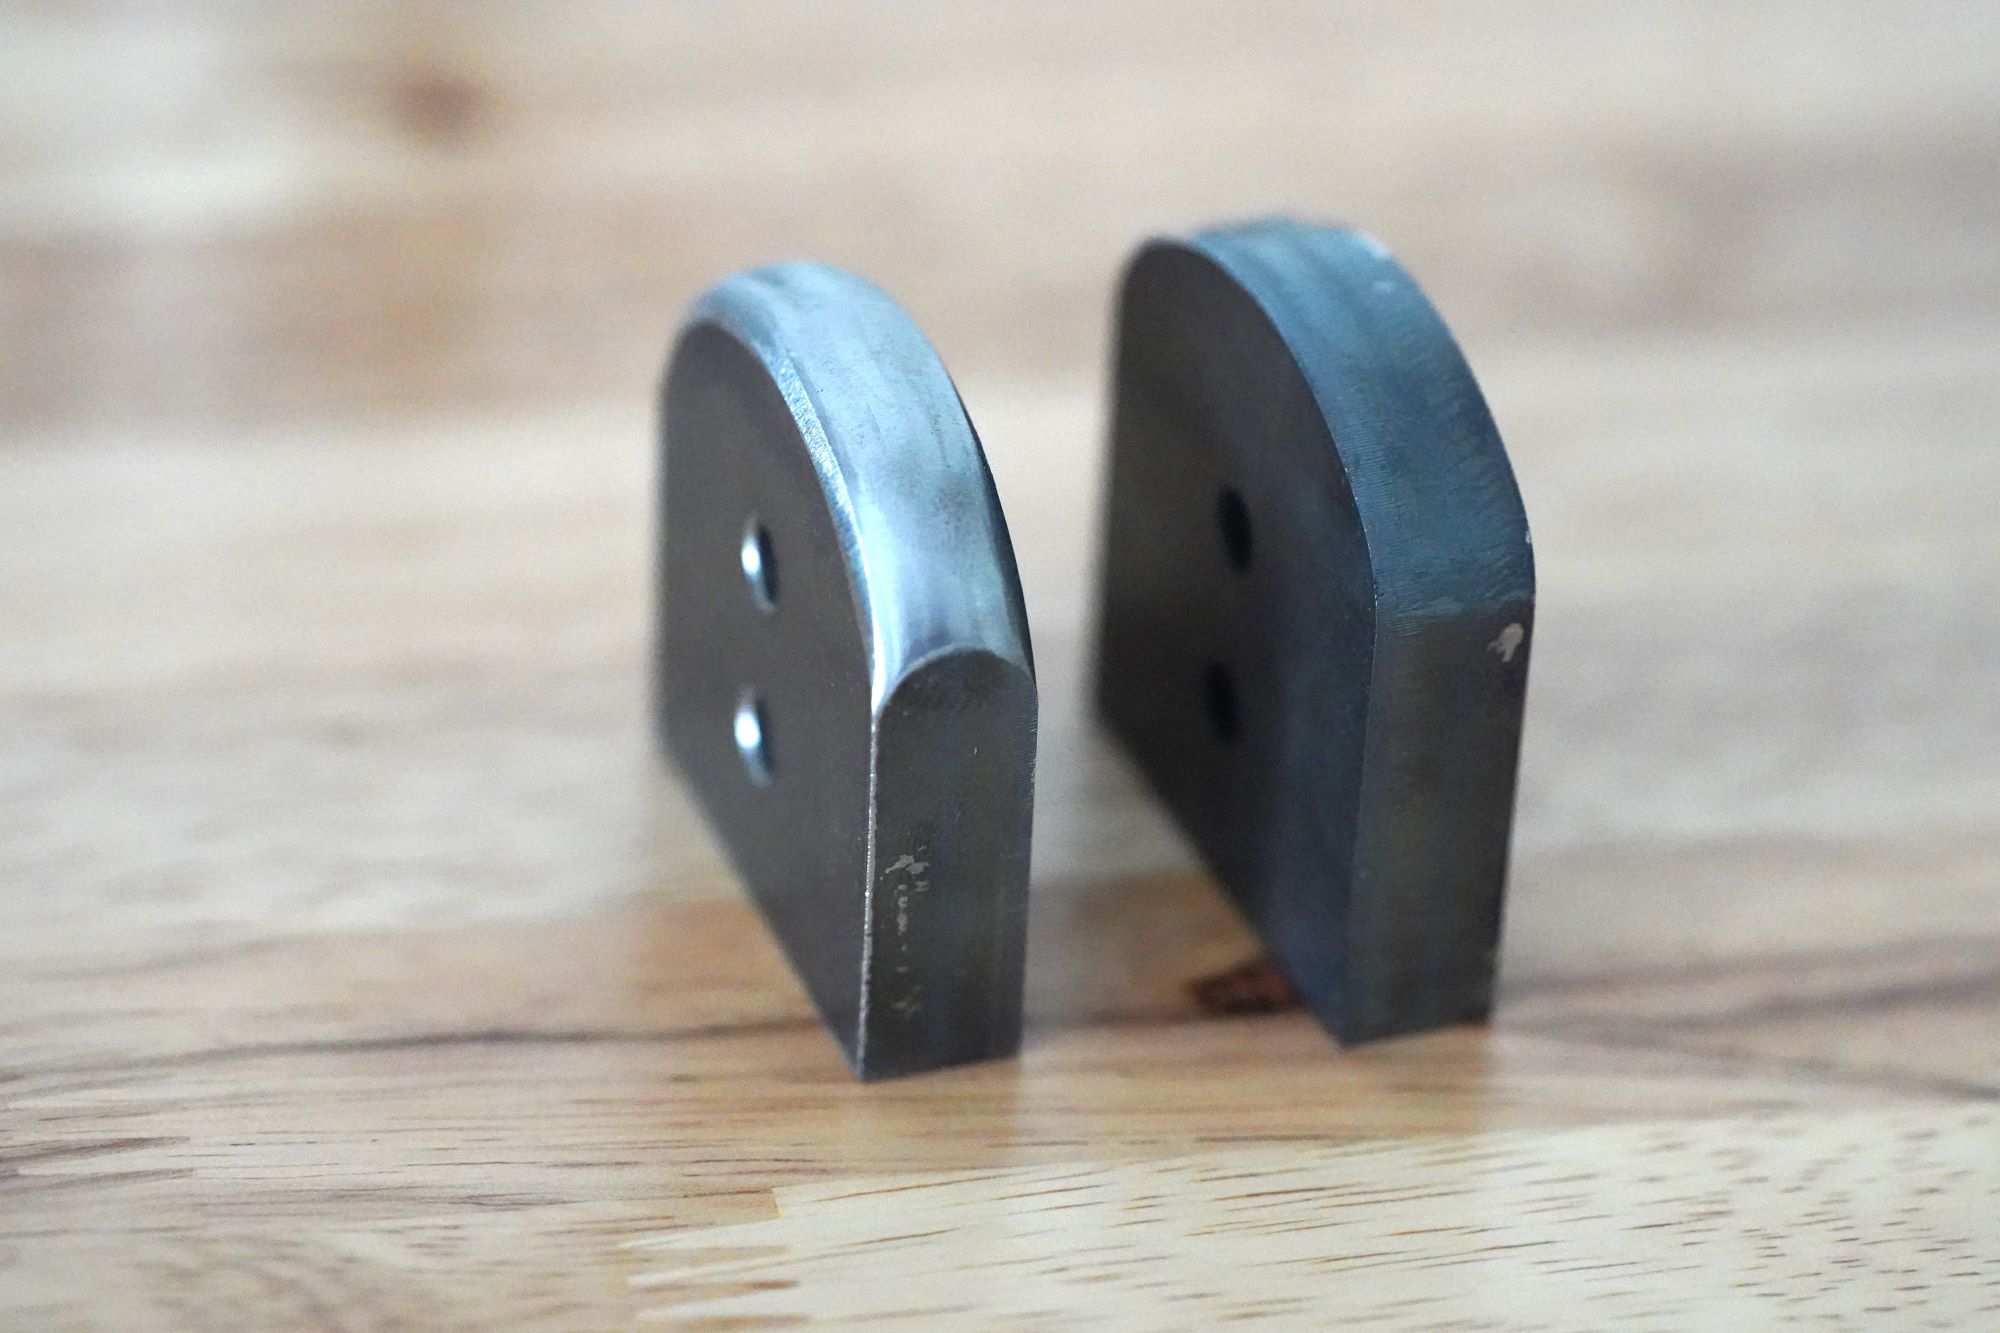
Dimple Die Discussion:
Here are the acetal and CNC dies:
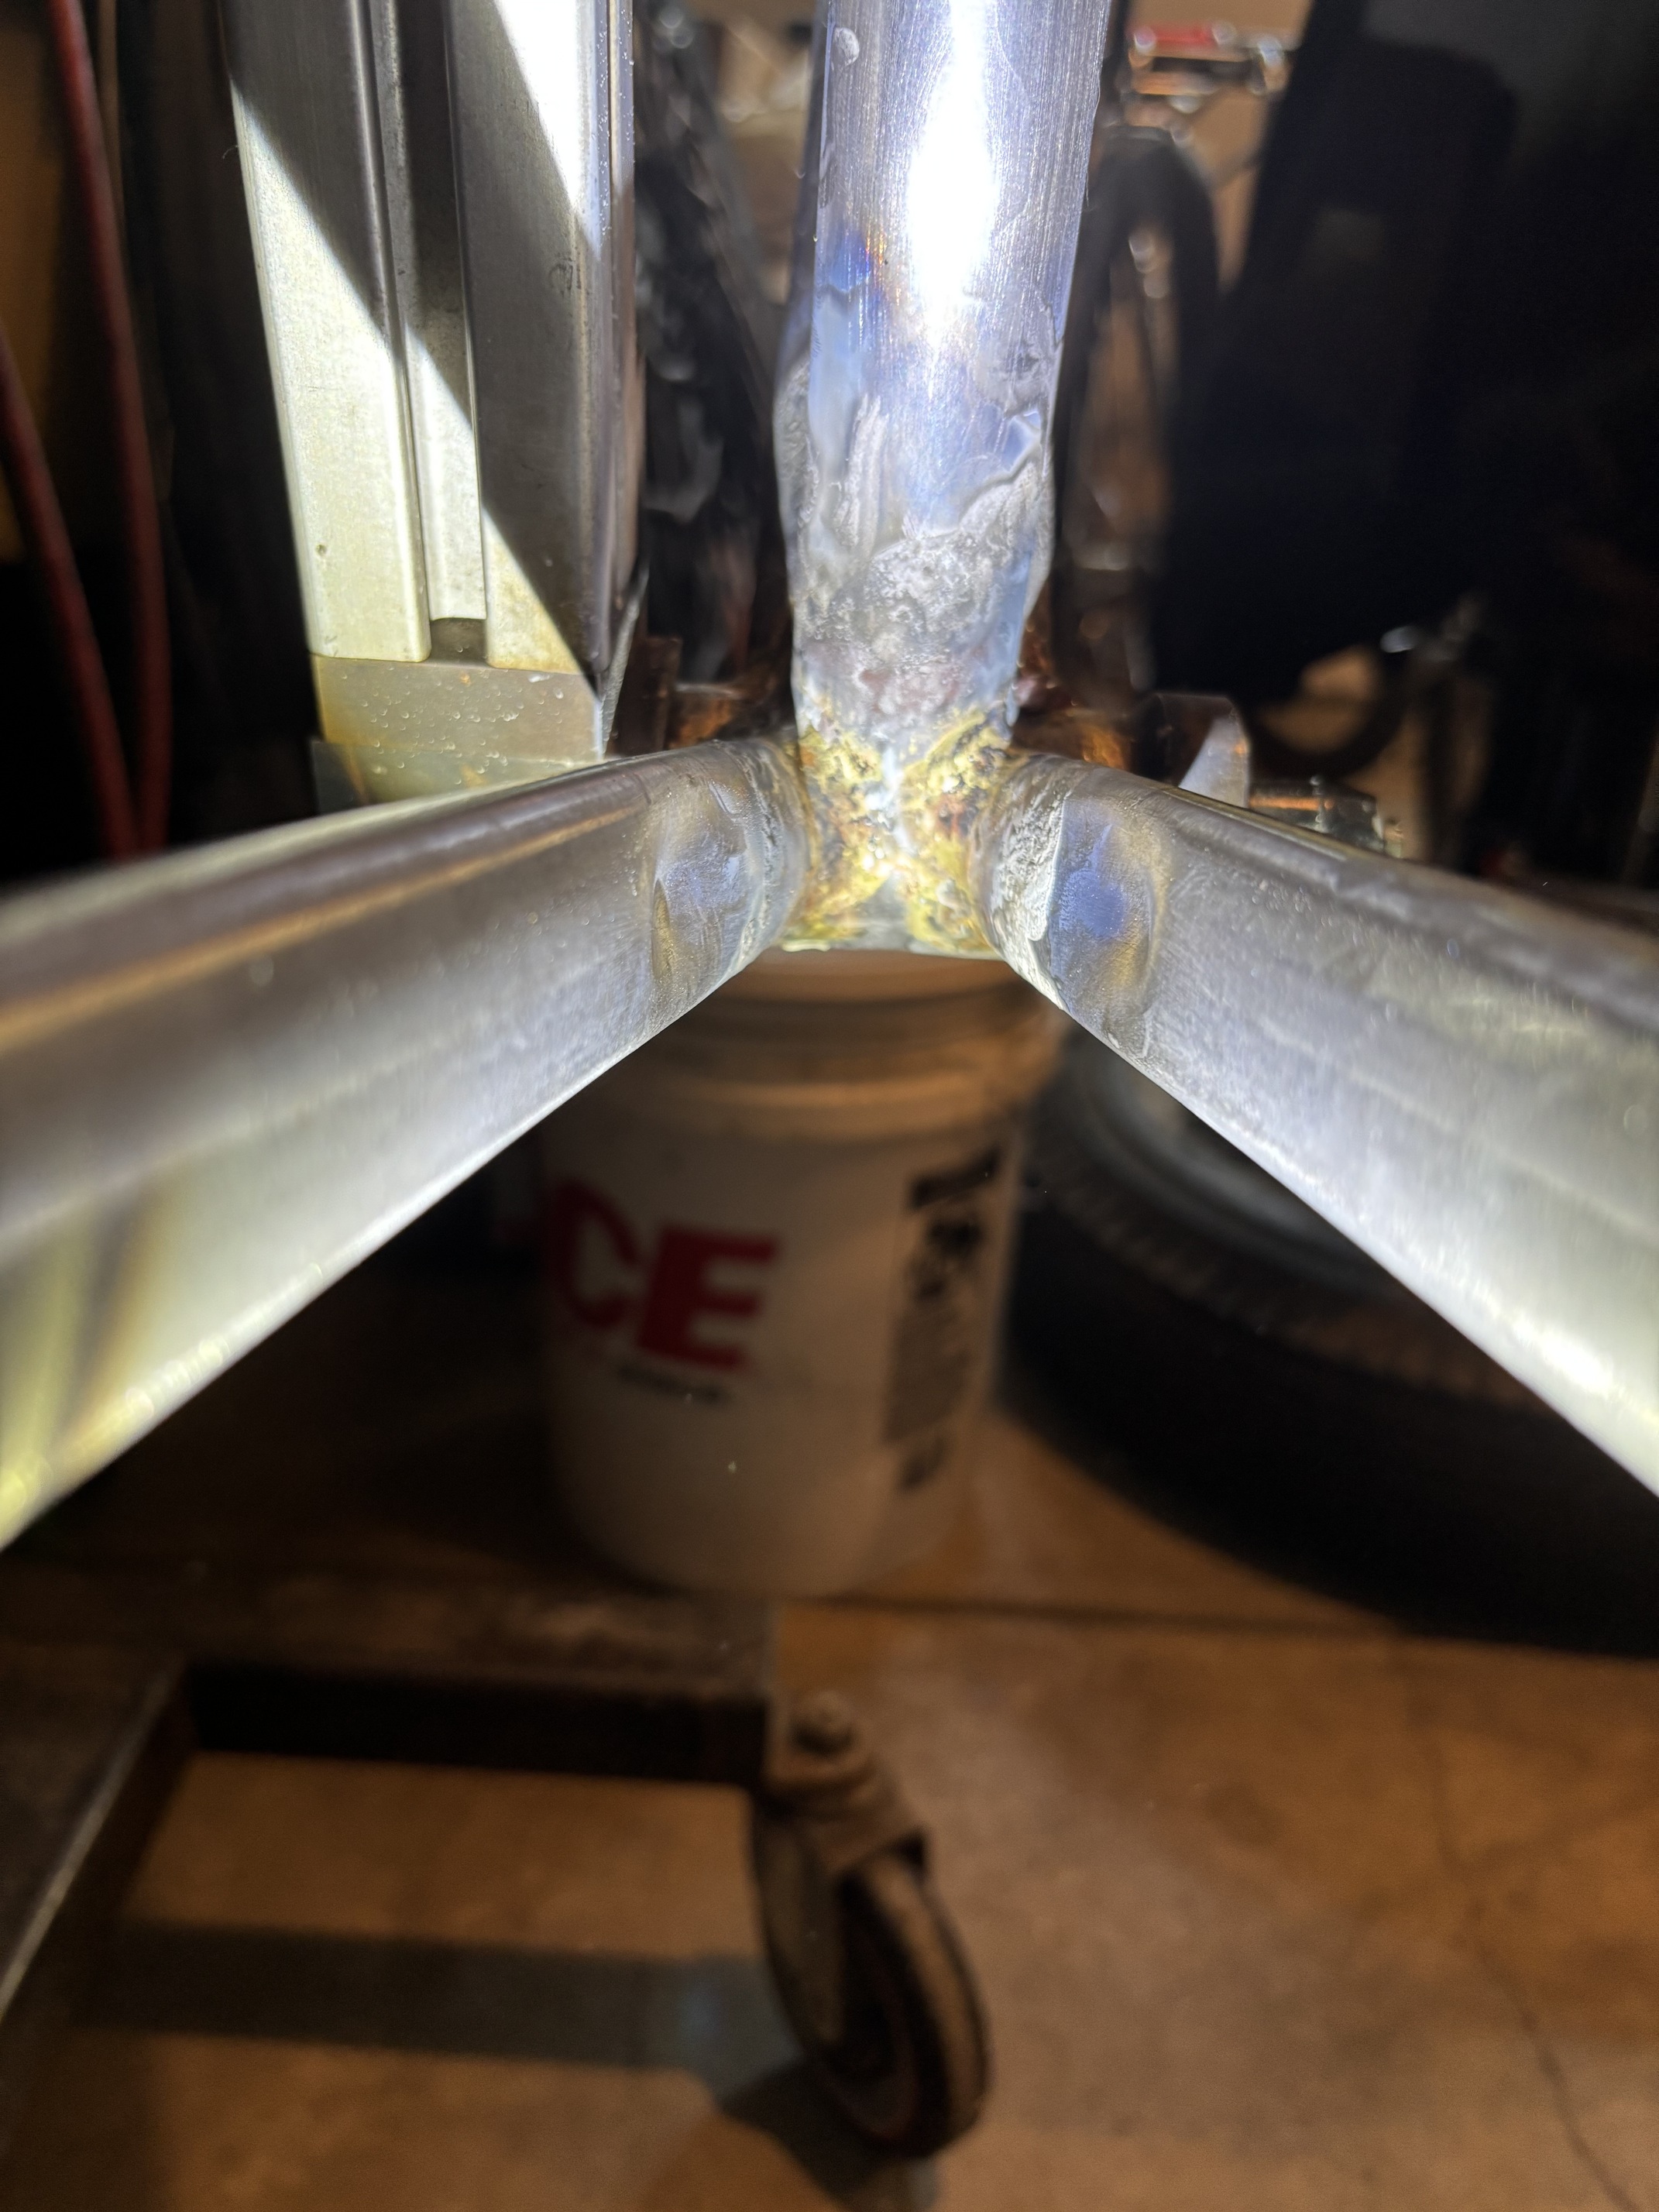
These narrow dies were smoothed over from laser cut .5in thick steel plate:
I still don’t know the optimal die shape. It probably varies with the material, tube size, tube shape, and whether the dimple is on a bend or a straight section of a tube.
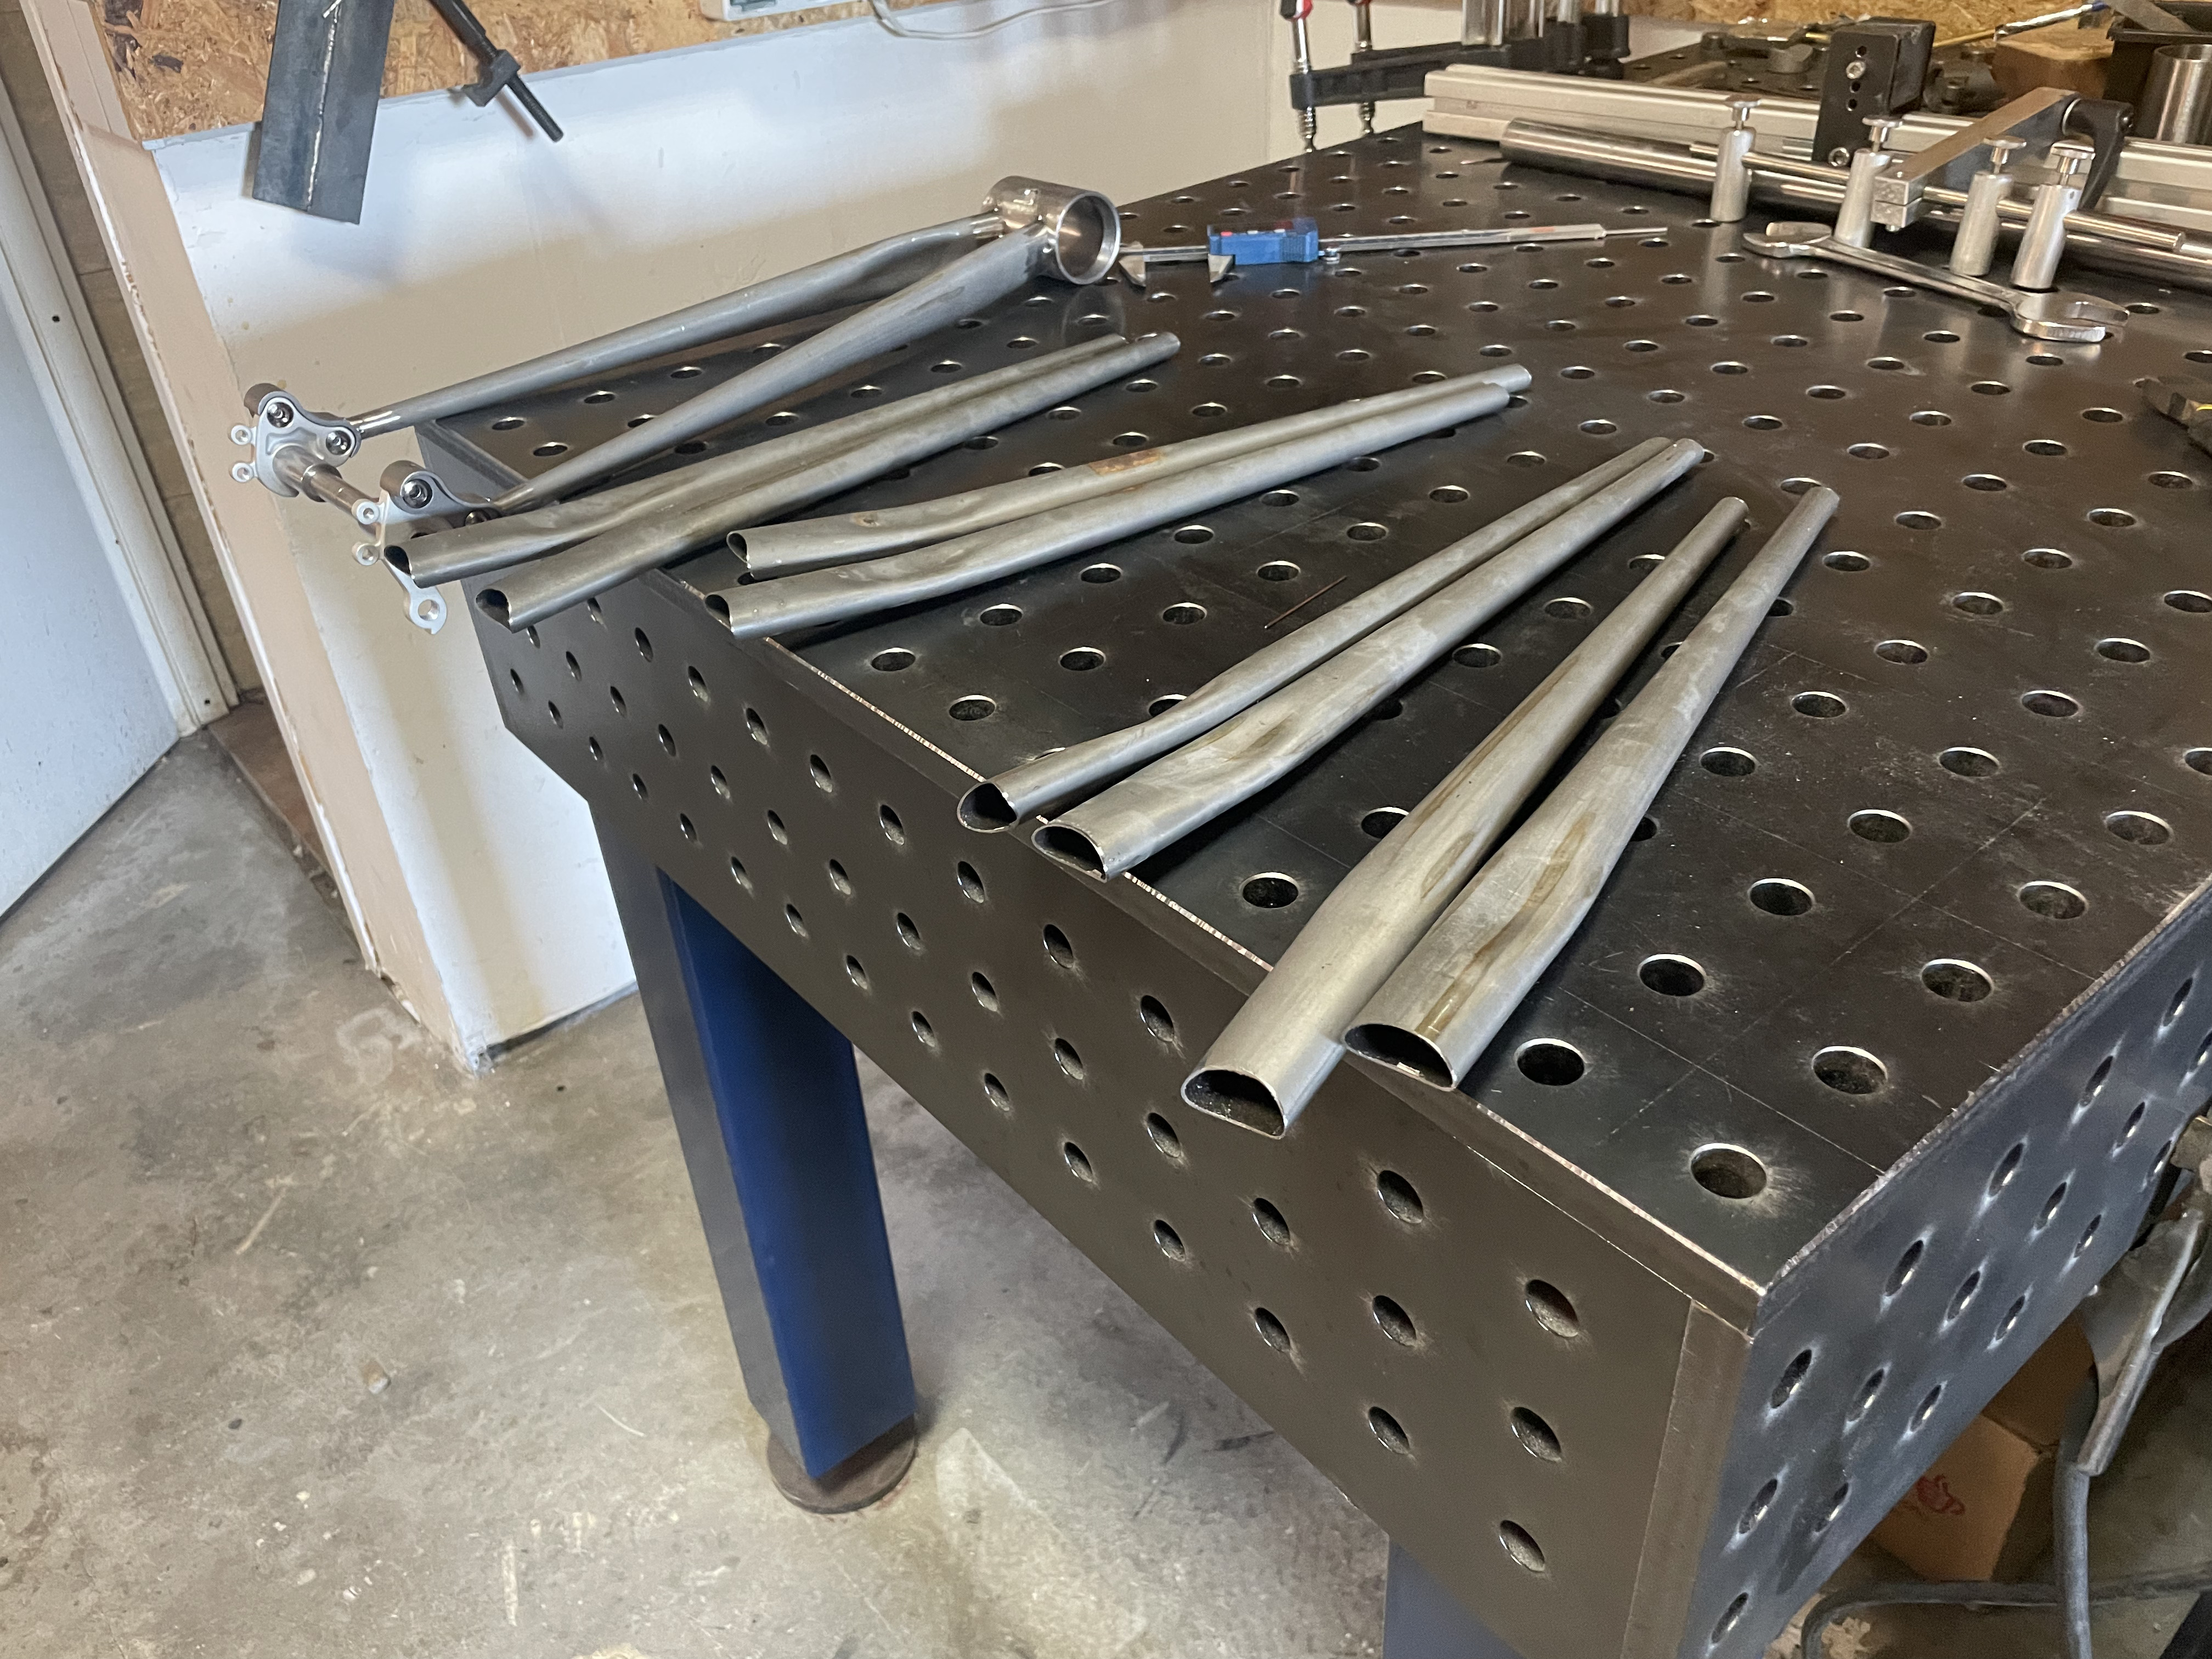
- Narrow dimples seemed to work well on oval steel chainstays
- Acetal seems to be a bit gentler on the tube, but does not produce as clean of a dimple
- Steel dimples are very “clean” but that might not be a good thing
A hand-shaped die from acetal worked pretty well. If you took the shaping seriously, I think it would be good enough. From the 1.5x2x12in bar, you can make the two support blocks and dimple die with material to spare.
Final Thoughts:
Even though the design is a rough draft, it ended up working surprisingly well. There are some quality-of-life improvements to be made:
- a maker for the measurement scale
- constraining the dowel pins
- re-designing the laser cut brackets
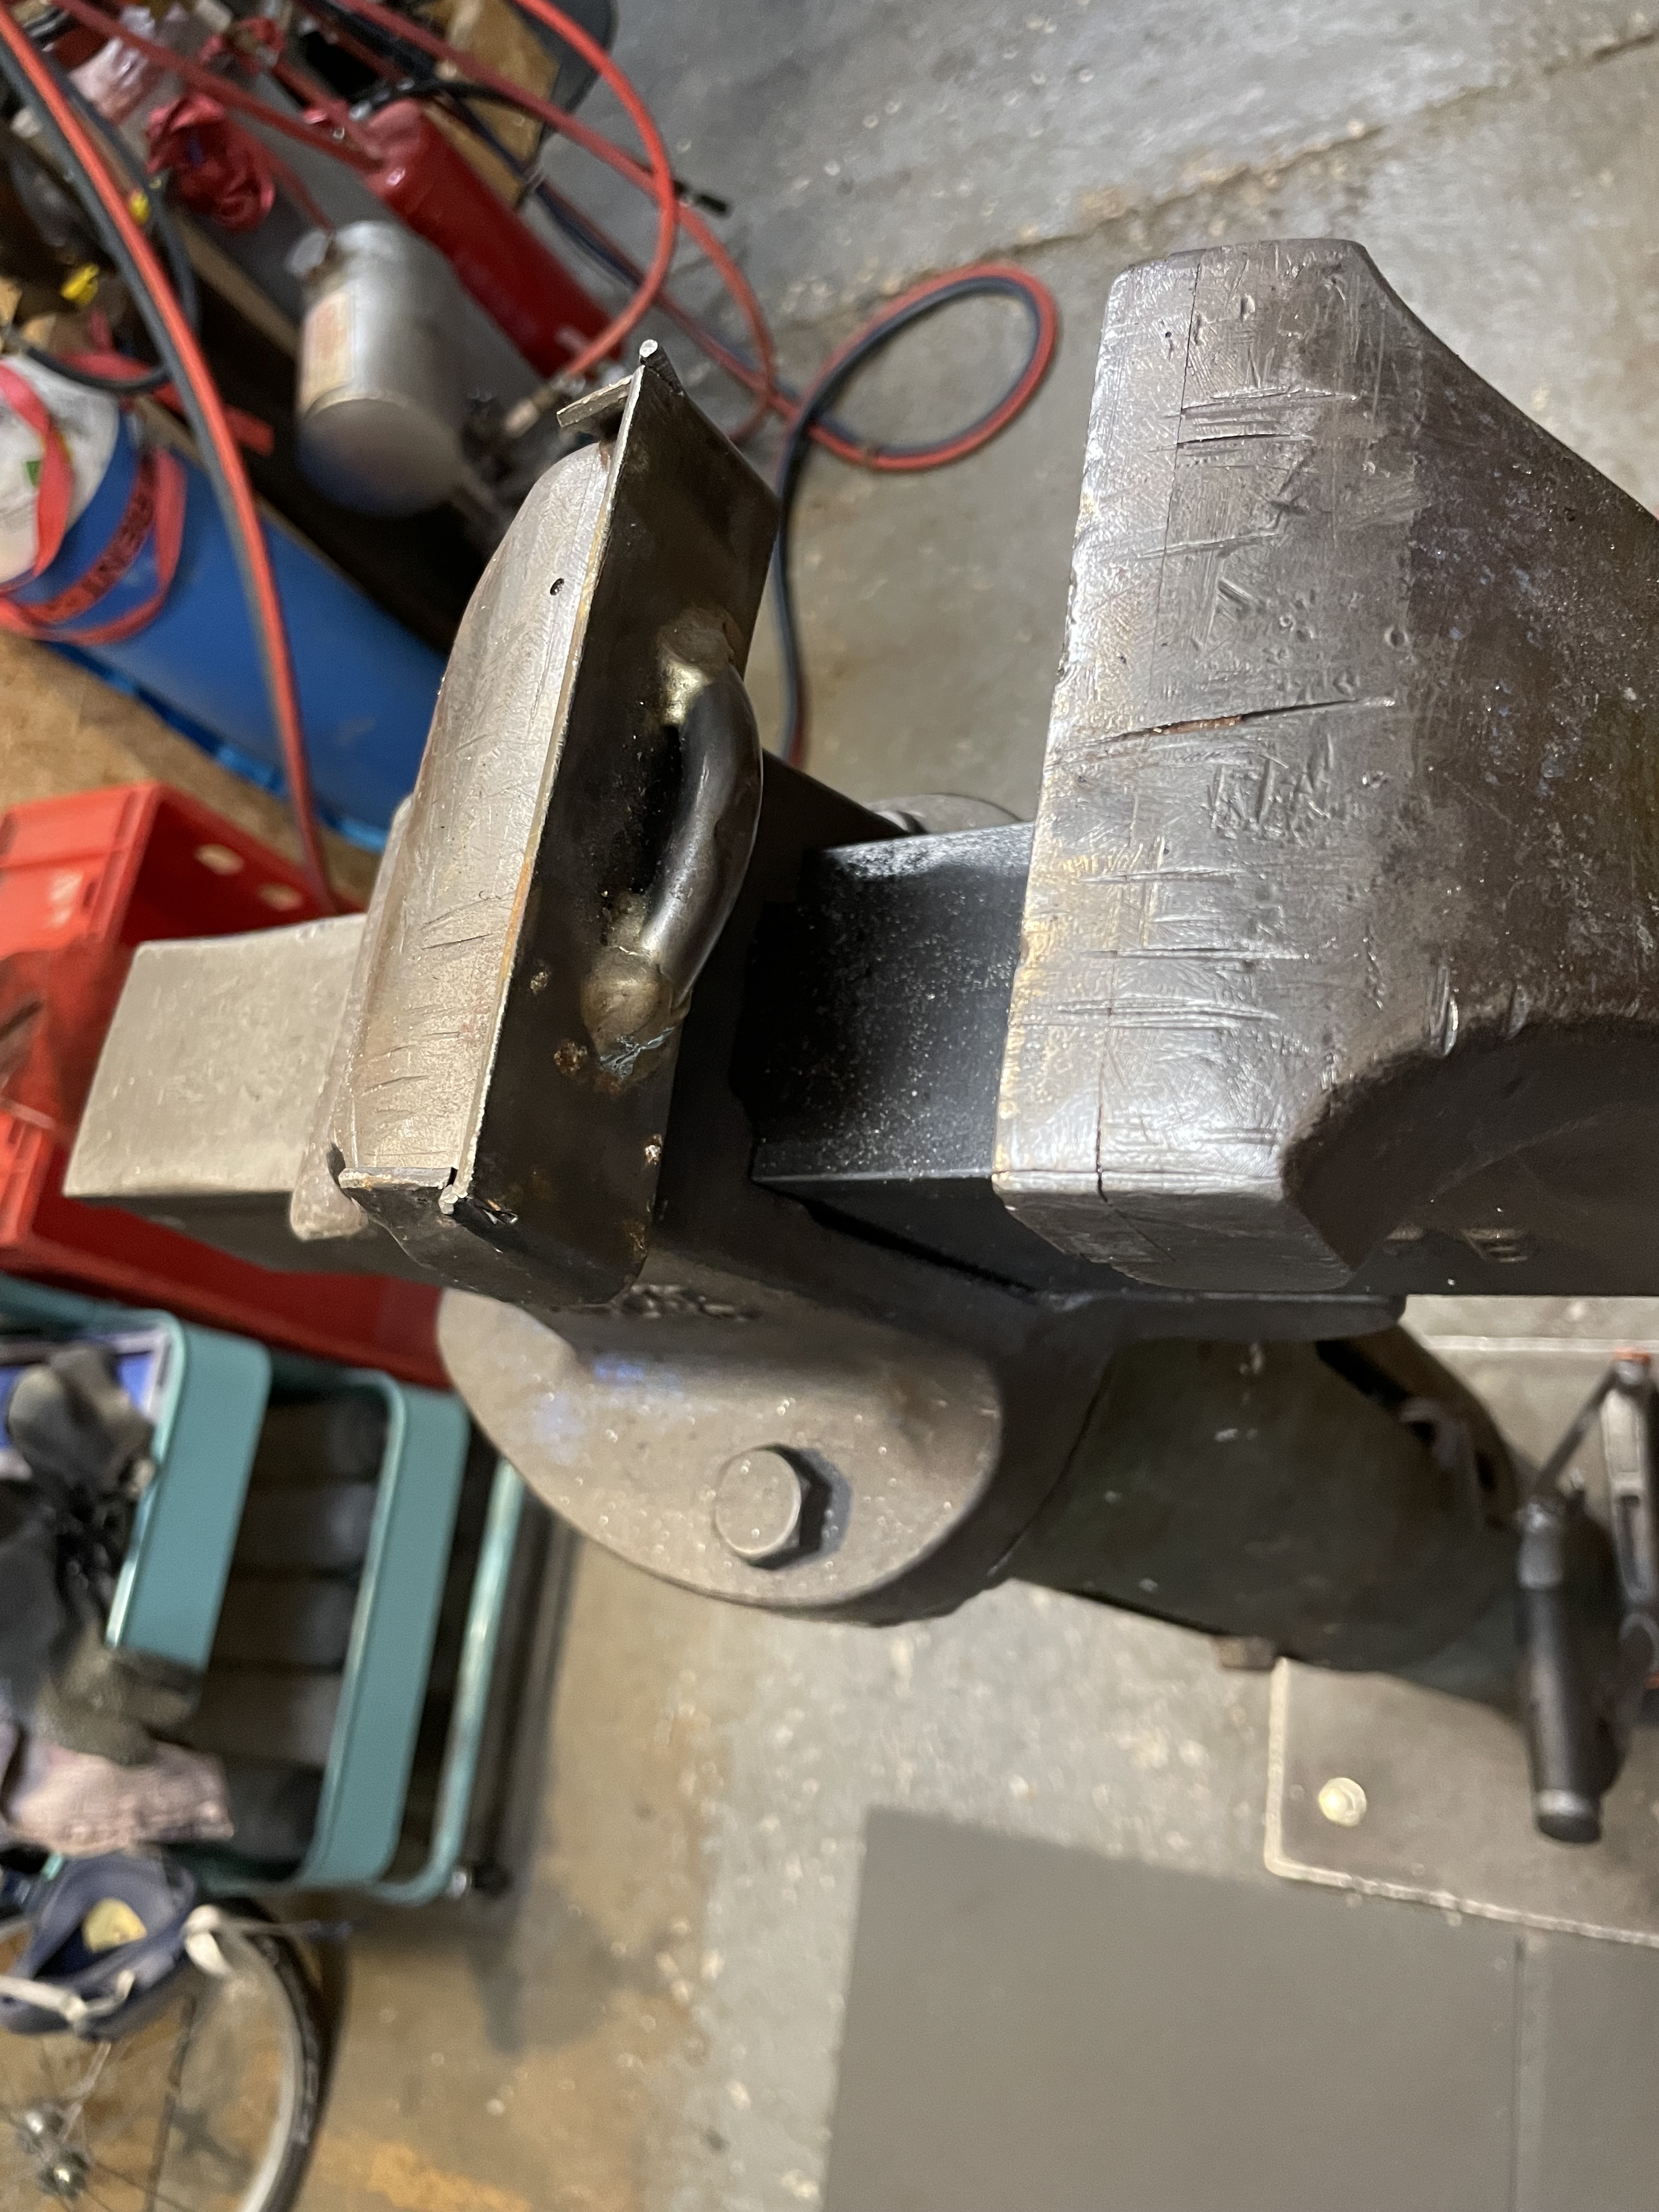
I also think this design could be modified to work in a vise, which more people have access to.
I still have a few more things I need to try, and I will update this post when I do. If you ended up making this chainstay dimpler, please share! I would love to see it.