I found I like the gold lens because (I think) it reflects a bit of light back into the area. But I’ve only compared gold lenses to an auto helmet and that’s not exactly apples to apples.
I feel like one of the videos missing from youtube is a comparison of welding lenses for TIG. There’s one or two for pipe welders but our requirements are way different than theirs.
Thanks for sharing, this is helpful, I’ve been working on getting my TIG welding to a point that I feel I can safely put a bike together. I’m feeling pretty good about my welds being functional at this point, I think I’m getting good penetration without undercut etc. They’re still a little hotter than I think they should be which leads me to my question here. I’ve been practicing with and without pulse. Without pulse I’m running about 33-35 amps on .035 wall tubing, with pulse (rule 33 settings) more like 45-50.
I see Neuhaus posted running 120 amps with a relatively short “on” time and some others with somewhat similar settings. With these settings is the full 120a being used or is that being controlled with a pedal?
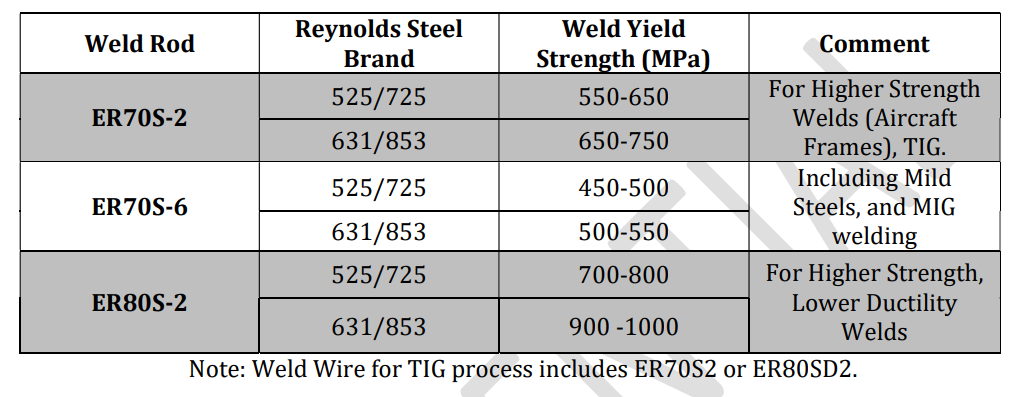
Slight side tangent, I was educating myself on tubing and came across the Renyolds documentation which has details about welding. I am not a welder, so you all need to decode it for me . I re-created it here so that it is searchable:
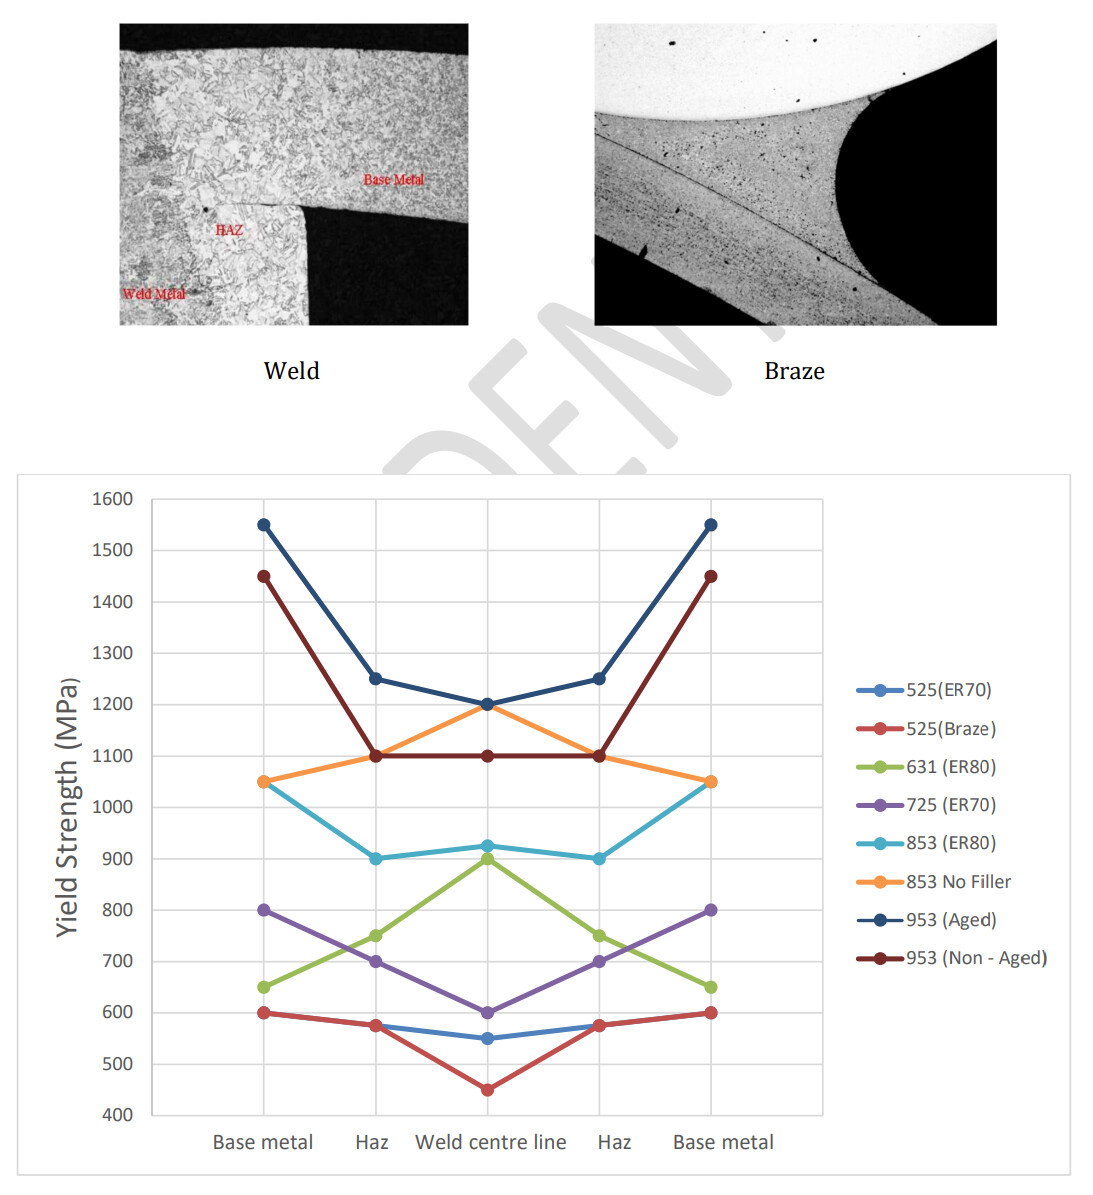
Estimated Tube Yield Strength in Welded/Brazed Joints
(Yield strength data is subject to validation but estimates are based on current knowledge and volume fraction data. In general, RTL expect a correlation between high strength in the edge of the HAZ and fatigue life). See page 9 for weld/braze guidelines.
Note that although the filler wire is less strong than the base metal, these wires are known to have good ductility after welding. Cr-Mo weld hardness typically average around 700-800 MPa, whilst 853/631 welds with the same wire can average over 1000 MPa due to the airhardening benefit. Welding Cr-mo to our air-hardening steels is also common practice in the cycle industry, using TIG welding settings similar to those used for Cr-Mo steel. Mild steel plate can also be welded to 525/631/853 but check the weld joint strength will meet your design specifications.
For Motorsport applications, mild steel or Cr-Mo fittings can be welded to 631/853 tubing
but care should be taken with thin walled fabrications.
I set my max amps around 135 but usually keep the pedal dialed back about 25% . . . it’s just more comfortable for my foot and I like having the “padding” if necessary.
The rest of my settings aren’t that far from Kris’ at 44 Bikes.
Once you get to the point where you feel pretty comfortable I’d encourage you to take a beat and do 100 joints that are all non-pulse and do them with a metronome (earbuds + metronome app) – start slow and then speed up. It sounds a little silly but I feel like it helped me a lot.
Is fusion welding 4130 acceptable? Just wondering since it doesn’t get the mild steel filler in the puddle if it would therefore be the same as if you used 4130 filler and have to do a heat treat technically.
I am putting a sleeve on a seat tube for where the main pivot is going to connect and I think I can probably make a nicer looking fusion weld than with filler.
For a seat collar, yes. Like with Ti it’s best to support it (overlay the seam) with at least one other tube placement, especially on a MTB.
I’ve done it both ways, when it was a bigger rider I’ve added filler. It is harder to get it to be as straight and nice looking as a fusion pass though.
If you look at some Ti builder feeds like Bingham’s you can see an automatic rotation fusion pass setup just for this weld like a mini slow rpm lathe. If you can get the tube turning while you weld it turns out way better, mr roboto style.
DISCLAIMER: Like most framebuilders I’m not certified in TIG welding or an engineer and have nothing to back up my claim other than I’ve done it that way and have seen others do it that way with no known failures at this seam so far (at least for my frames).
How long did it take you to become good enough at TIG that you would trust your bike for the long haul? Like 10+ years of hard riding. I’m a general maker but only a few hours of hood time. I’d hate to TIG up a frame and have it fail out in the wilderness.
I have access to TIG at my makerspace. Just have to pay for gas/min + consumables at this point. I’d rather braze as I like the look and it seems easier to me. But I’m on a budget and much easier access to TIG. I live in an apartment, so the only place I could legally and safely braze is 30min away at my parents even if I had a setup. Simple builds, low budget. I’d probably make 1-3 bikes then move on to the next hobby
[quote=“Angler, post:71, topic:132, full:true”]
How long did it take you to become good enough at TIG that you would trust your bike for the long haul? Like 10+ years of hard riding. [/quote]
Instruction and natural ability have a lot to do with success.
You pay “tuition” in one way or another. Either you pay someone to help you be successful or you pay for your mistakes to get to the point of being successful.
All that said, I probably had a dozen hours of bench time before I made my first frame. That frame was immediately cut up for more practice.
My 2nd frame is still being ridden hard 5-6 years later.
My first frame is still getting used and abused, prior to that I had only made a money tin out of sheet metal and a few practice joints on the tig. I probably had a bit of a head start in that I had done a little bit of gas welding and a whole lot of mig welding. I think it probably doesn’t help at all with the hand control and muscle memory aspect but it helps you understand how you want the puddle to move/look.
My first bike also has oversized tubing, my theory was that since I couldn’t guarantee my welding was going to be great I would get a larger diameter tube and therefore there would be more weld area to share the load.
Be it brazing or TIG, practice is key, having one on one instruction can speed up the process (less guessing what you’re doing wrong). Brazing is a more forgiving process and can ultimately be cleaned up into beautiful joints. TIG welding happens a lot faster, meaning heat can get away from you (blowing holes in tubes, less likely with brazing).
If you want a frame you made more than learning a skill, I encourage you to pursue brazing. But you might pick up a tig torch and be a natural. Try out both processes on a test joint, that will give you a fairly quick realization what is more attainable. Youtube has wonderful videos of both processes, look up paul brodie for brazing and weldingtipsandtricks (jody has great arc shots!) for the tig.
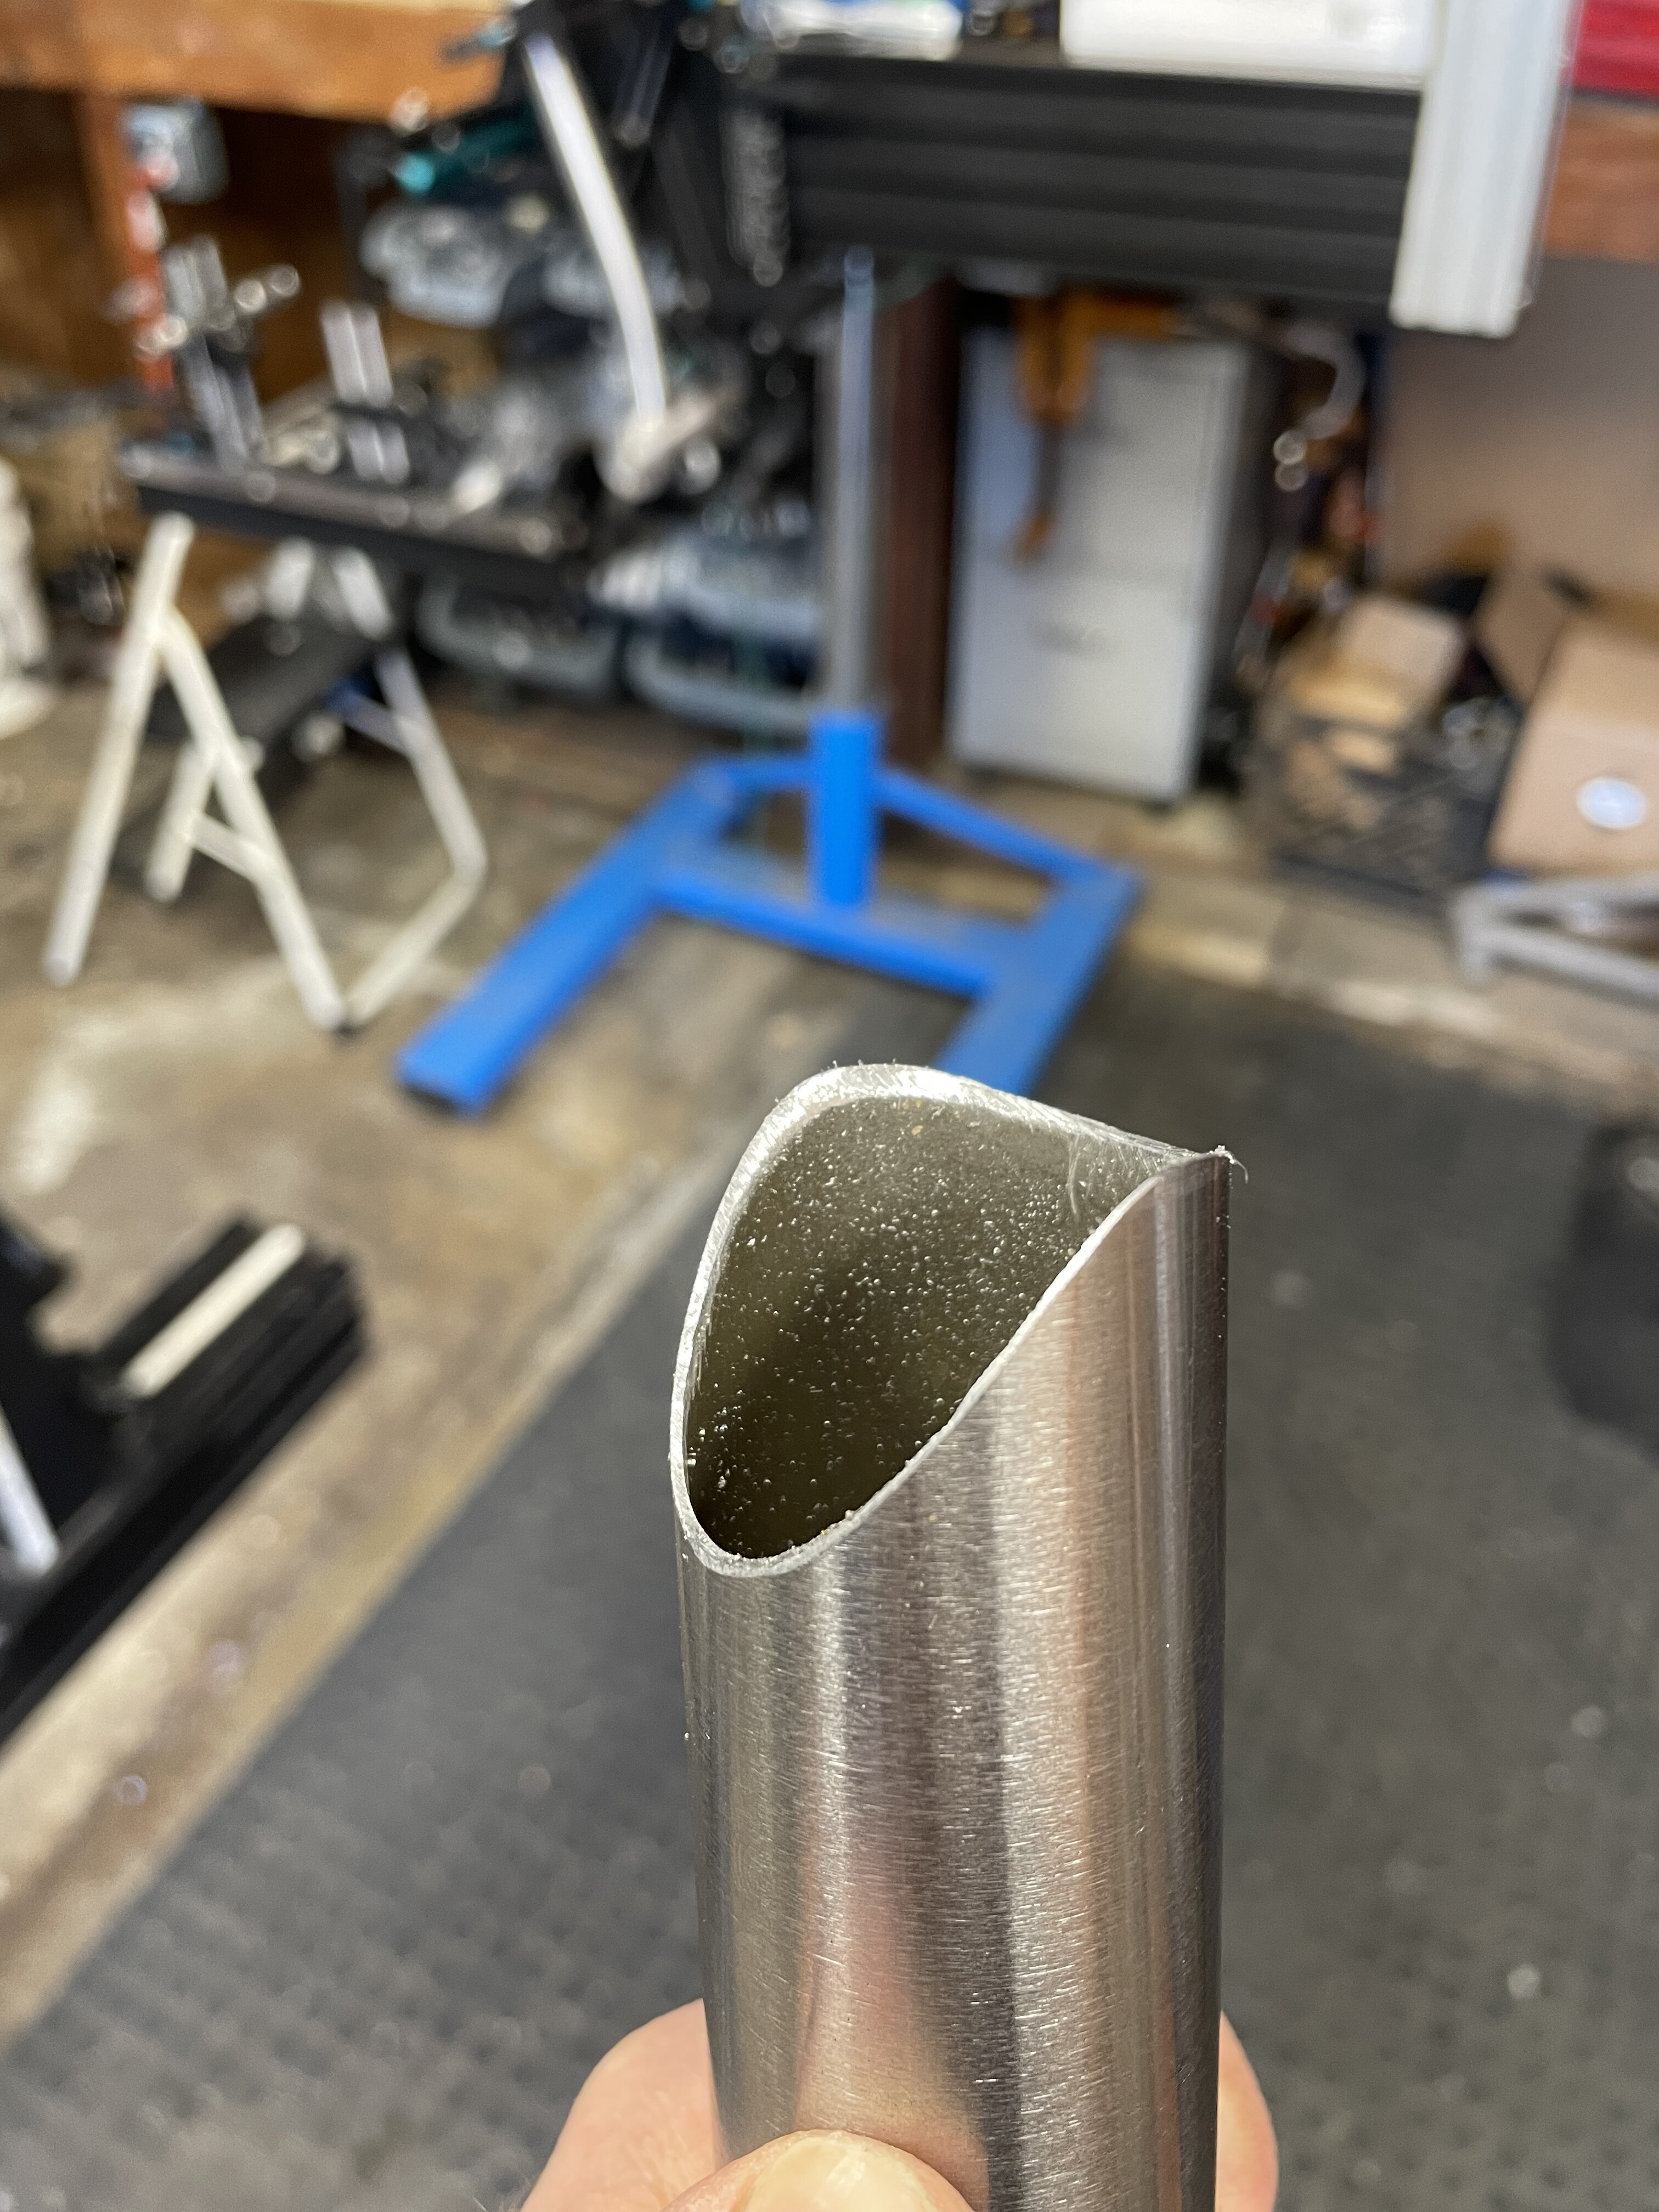
A few strategies that seem to have helped so far are filing down the “points” or ears of the miters so the material is thicker there, letting off the amperage and or using smaller filler, and pausing to really let the joint cool down before welding the “lap” section. Still not the best at it
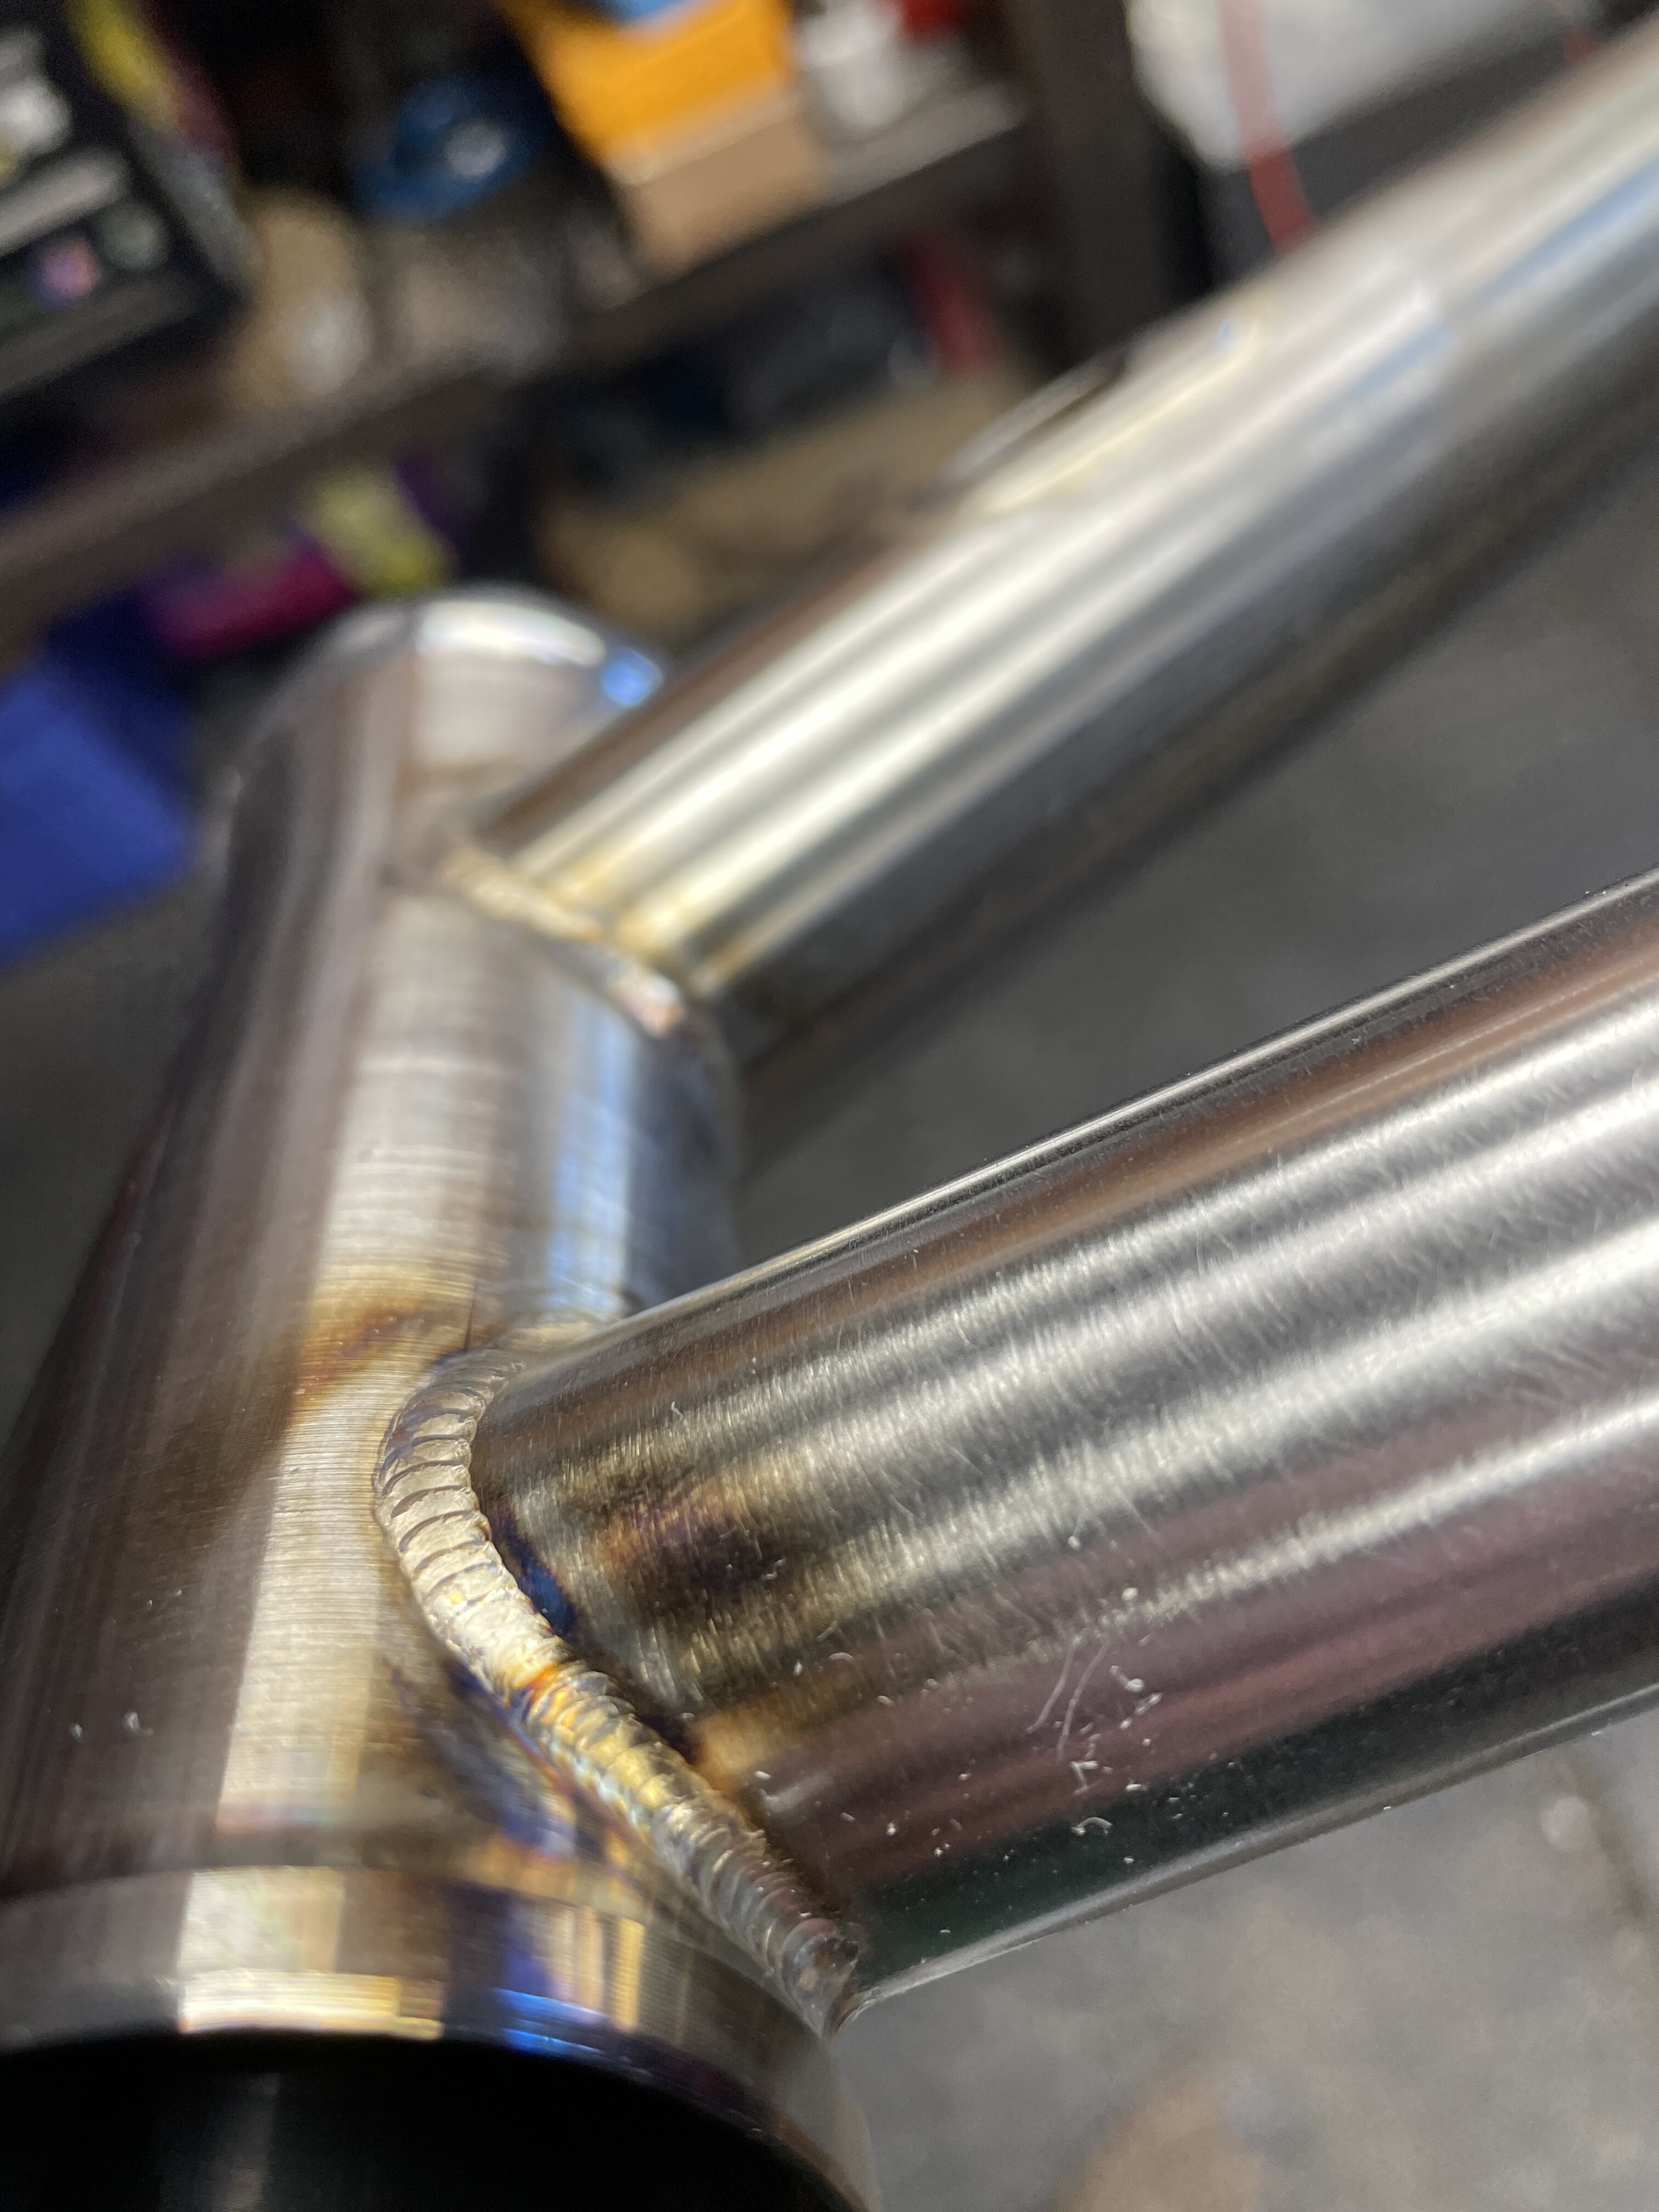
Torch angle is critical, make sure you position yourself so your tungsten is pointing straight into the joint, if it starts to peel away you can just pull the arc back onto the ticker non mitered material. As @RxDesigns mentioned, file the ears so that you’re welding to thicker material.
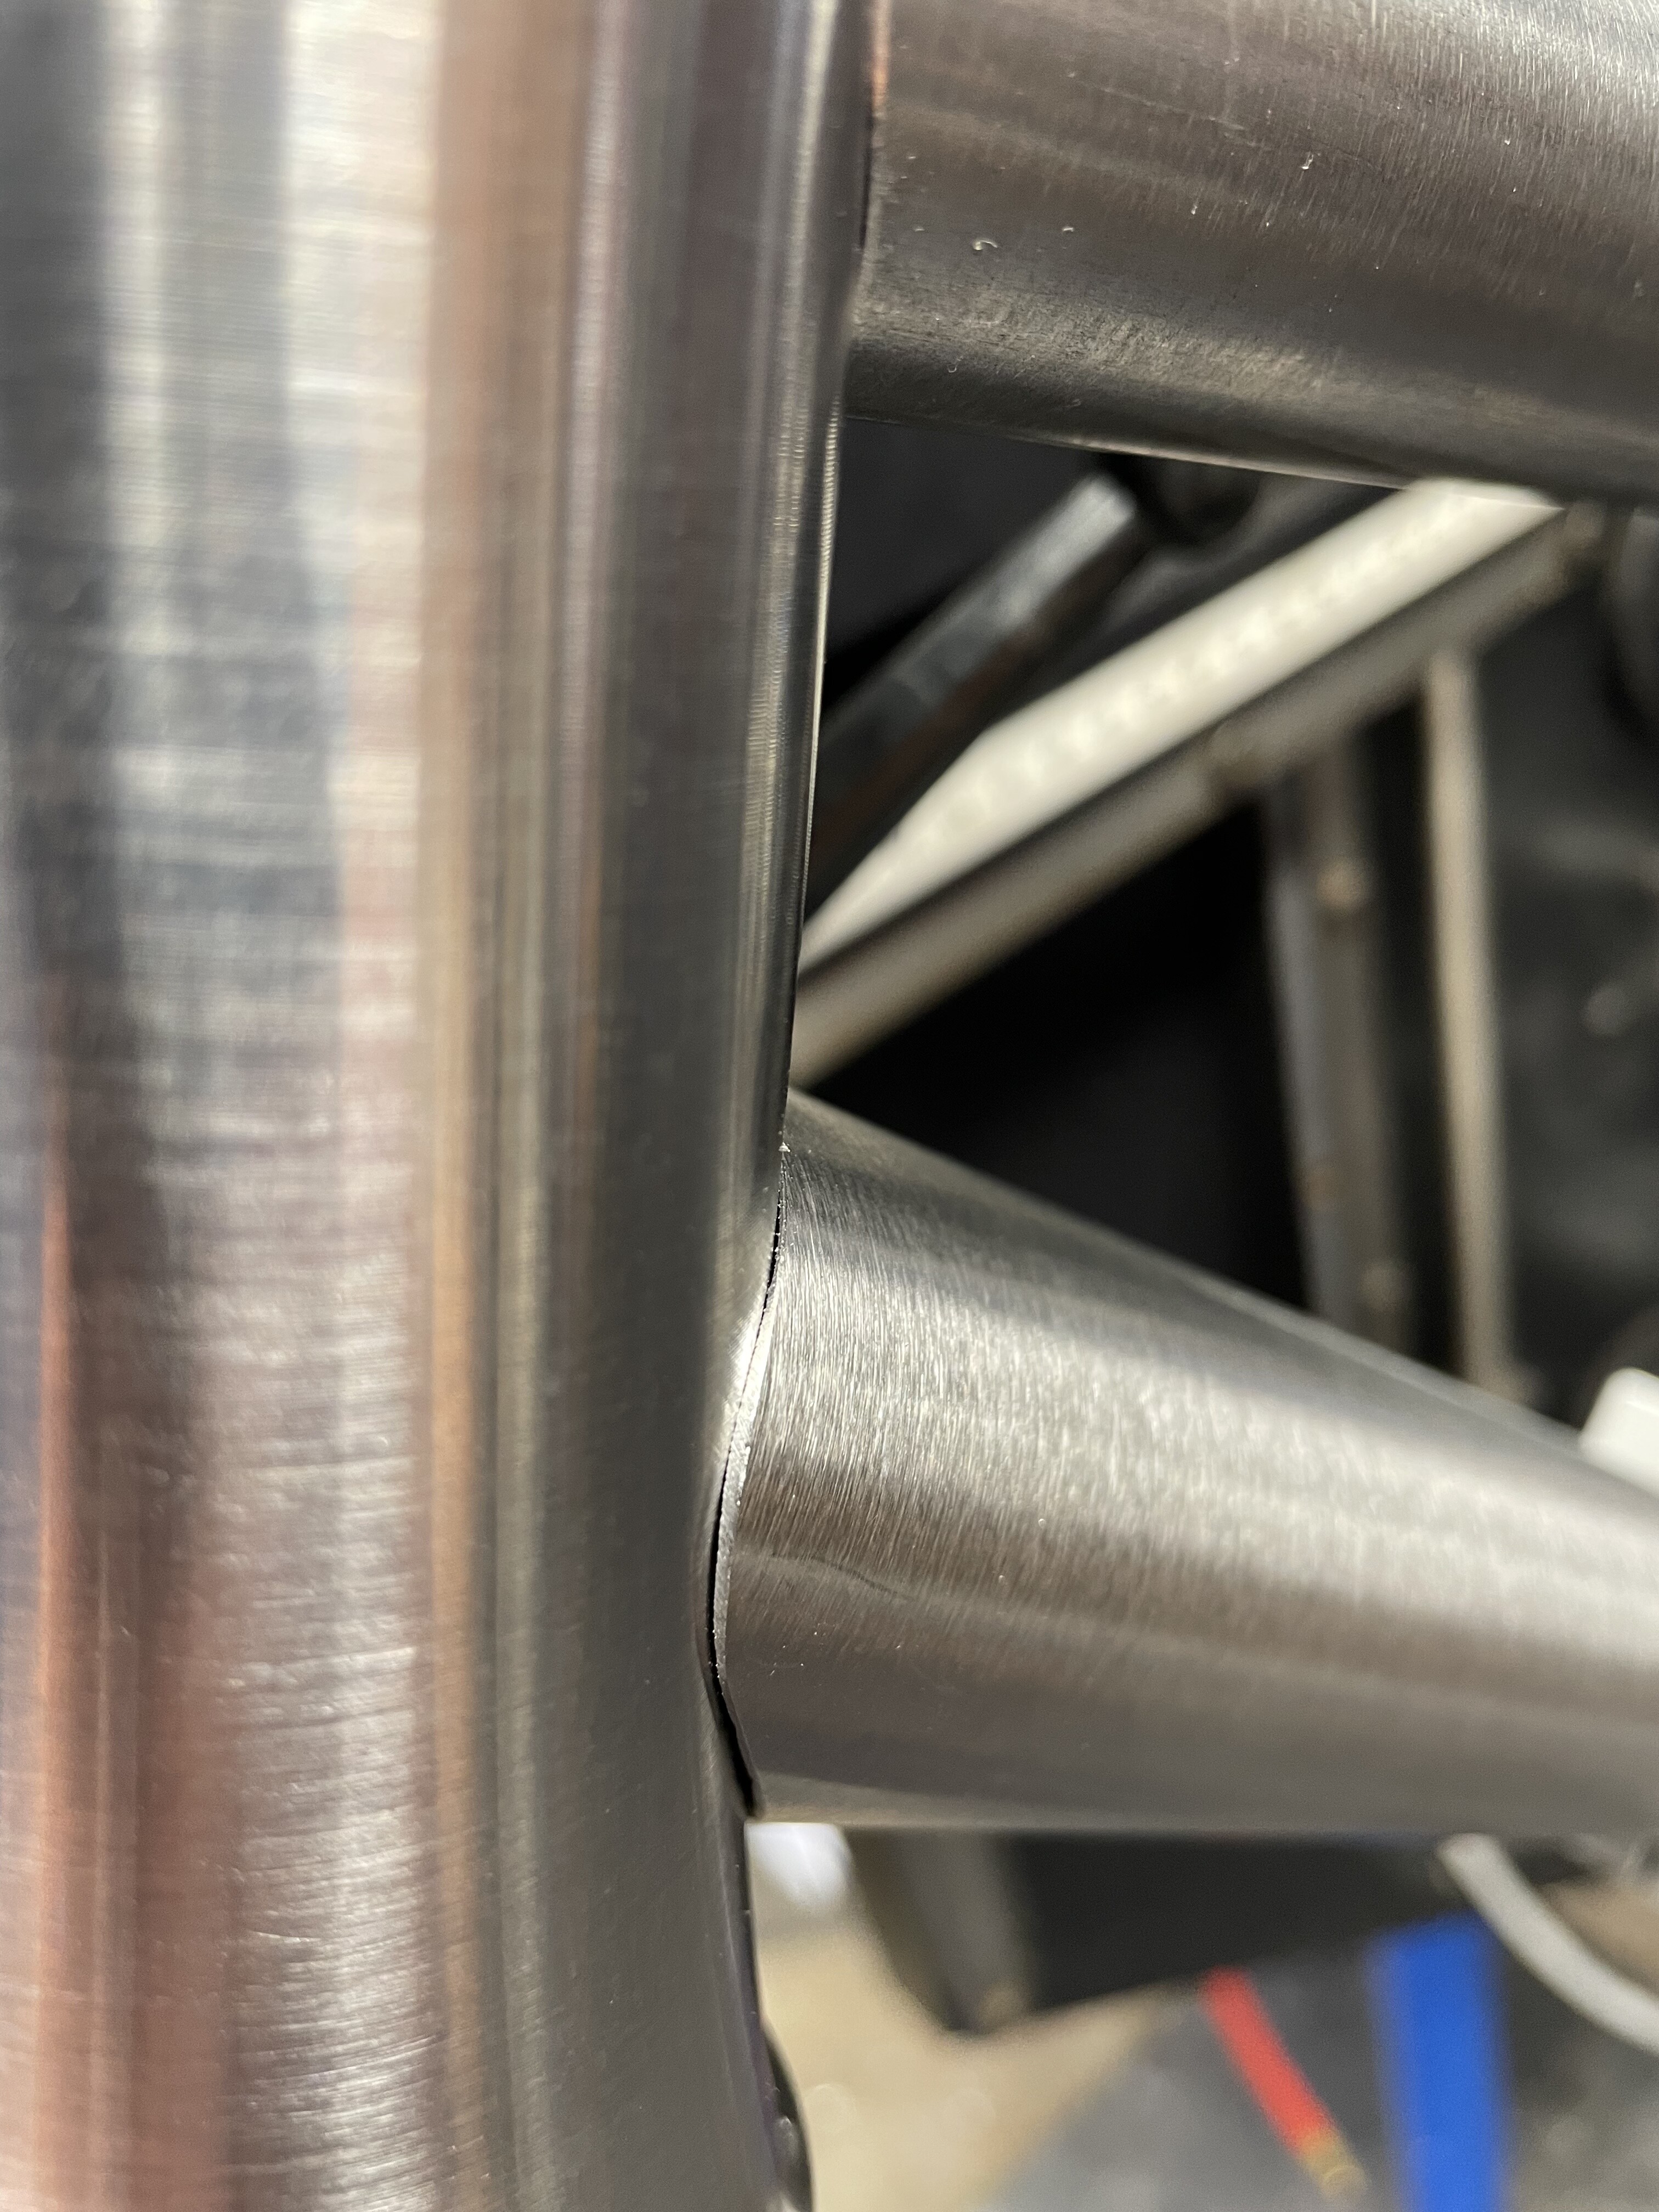
In both pictures below you can see where I stopped to reposition before wrapping around the ears
@Neuhaus_Metalworks finally found the way to fight the craters. It turned out, that it actually it was not my lack of skills, but a faulty cheap pedal. The thing is: there is a potentiometer that changes amps and a tiny switch that toggles welder on and off inside. And they were not correctly calibrated - the switch clicked when the pedal was already pressed - with potentiometer on like 35amps. So I never managed to taper down, as the arc was shut down with relatively high amps. Moved the switch so it turns on/off in sync with potentiometer, all crater problems gone.